SharePoint 2013 Customize Display Template for Content By Search Web Part (CSWP) Part-2
In my previous post I explained different components on Display Templates. In this post I will explain how to create a custom Display Template (control and Item display templates) and use JQuery Slider plugin to create image slideshow effect using Content By Search Web Part (CSWP) and Display Template.
Download JQuery Plugin
First step is to decide what effect you need for your search results, then you can look for available JQuery Plugins. I found https://plugins.jquery.com is helpful to find available JQuery Plugins. For my requirement I wanted to create a smooth slideshow effect, so I have decided to use SliderJS JQuery Plugin, that I have downloaded from https://github.com/nathansearles/Slides/archive/SlidesJS-3.zip
Once Plugin is downloaded extract Slides-SlidesJS-3 folder, go to Examples folder and choose the one which you like to implement. I chose to create Standard Slide Show effect. View example here https://www.slidesjs.com/exa mples/standard/. Every JQuery Plugin incudes few CSS and JS files and also every plugin will have an example that will show how to use plugin with some sample data.
How SliderJS JQuery Plugin works
Once JQuery Plugin SlidesJS-3.zip is downloaded and extracted, navigate to Examples-->Standard folder. Folder structure looks like following:

Open index.html in preferred editor and explore the code. Top part of the page under <head> section has few .css file references.
These.css files are used to style the Plugin, so we need to make sure .css files are available in our SharePoint site.
span class="sc1" style="color: #0000ff; text-transform: none; text-indent: 0px; letter-spacing: normal; font-family: 'Courier New'; font-size: 10pt; font-style: normal; font-variant: normal; font-weight: normal; word-spacing: 0px; white-space: pre; -webkit-text-stroke-width: 0px;"><body> <!-- SlidesJS Required: Start Slides --> <!-- The container is used to define the width of the slideshow --> <divclass="container"> <divid="slides"> <imgsrc="img/example-slide-1.jpg"alt="Photo by: Missy S Link: https://www.flickr.com/photos/listenmissy/5087404401/"> <imgsrc="img/example-slide-2.jpg"alt="Photo by: Daniel Parks Link: https://www.flickr.com/photos/parksdh/5227623068/"> <imgsrc="img/example-slide-3.jpg"alt="Photo by: Mike Ranweiler Link: https://www.flickr.com/photos/27874907@N04/4833059991/"> <imgsrc="img/example-slide-4.jpg"alt="Photo by: Stuart SeegerLink: https://www.flickr.com/photos/stuseeger/97577796/"> <ahref="#"class="slidesjs-previous slidesjs-navigation"><iclass="icon-chevron-left icon-large"></i></a> <ahref="#"class="slidesjs-next slidesjs-navigation"><iclass="icon-chevron-right icon-large"></i></a> </div> </div> <!-- End SlidesJS Required: Start Slides --> <!-- SlidesJS Required: Link to jQuery --> <scriptsrc="https://code.jquery.com/jquery-1.9.1.min.js"></script> <!-- End SlidesJS Required --> <!-- SlidesJS Required: Link to jquery.slides.js --> <scriptsrc="js/jquery.slides.min.js"></script> <!-- End SlidesJS Required --> <!-- SlidesJS Required: Initialize SlidesJS with a jQuery doc ready --> <script> $(function(){ $('#slides').slidesjs({ width:940, height:528, navigation:false }); }); </script> <!-- End SlidesJS Required --></body>
|
Under <body> there are few important elements.
- DIV with class "container" is used to define the width of the slideshow.
- DIV with id "slides" is main div and used with function .slidejs () which is responsible for generating slideshow. This DIV contains navigation icons and four images that will display.
- First <script> element is including Jquery-1.9.1 library which will be used for id selector functionality. So we need to have access to JQuery 1.9.1 from SharePoint site.
- Second <script> element is including jquery.slides.min.js and this is the actual plugin JS.
- Next, when document is ready a function is called that will bind DIV with id "slides" to.slidejs fucntion which will generate the slide show.
Now, that we have explored how SliderJS JQuery plugin works on a simple HTML page, next steps are to configure plugin to work with SharePoint Display Templates.
Upload and Setup for JQuery Plugin
Firstly we create a site collection which will host CSWP. I have created a publishing site collection https://demo.contoso.com/sites/Jquery-displaytemplate-demo.
Now let's upload JQuery plugin files to SharePoint so that we can access them from Display Template. I have created a folder "slider" under style library and created a similar structure as show in the previous step.
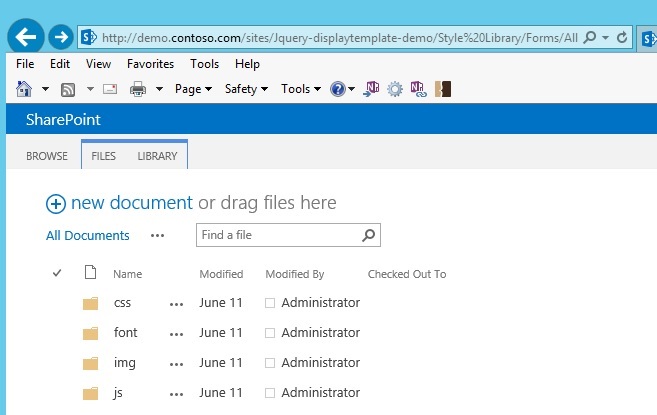
- Copy all .css, .js files from local plugin folder to corresponding folder in SharePoint. For images foder just copy pagination.png (we will be using images for slide show from our site content). I have also downloaded jquery-1.9.1 minified from https://jquery.com/download/ and uploaded to JS folder on Site Collection.
- Now that plugin files are uploaded let's upload images that you want to be displayed in slideshow to images library under Site Collection. Also provide some title and description to each image.
- Next step is to crawl content, in our case we want content on images library to be crawled. If there is any incremental or continuous crawl schedule ,wait for it to be completed or simply run an incremental crawl on content source.
Configure CSWP to display search result
Now it's time to configure Content By Search web part!
- First step is to go to Settings-->Site Content and open Pages Library. Now create a page with "Blank Web Part Page" layout. Edit the newly created page and add a Content Search web part from Content Rollup category.
- Go to Web Part Settings and under "Select a Query" choose Picture (System) and under "Restrict by app" choose "Specify a URL" and provide URL for Images Library. If crawl has finished you should see images metadata under search result preview.

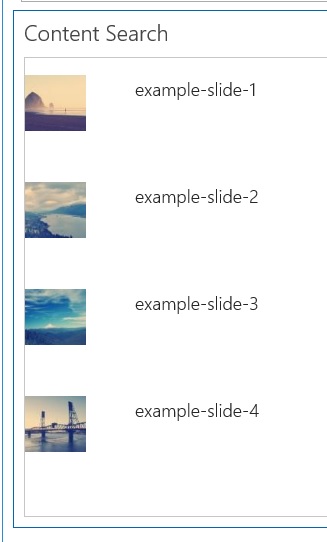
- At this point our CSWP will be rendering with Default Display Template and will look like the following screenshot:
Customize Display Template to use JQuery Plugin
First we will customize Control Template. To do that in a SharePoint 2013 Publishing Site, follow Map a network drive to the SharePoint 2013 Master Page Gallery. Once your drive is mapped, navigate to Display Templates --> Content Web Parts, copy Control_List.html and rename it. In my example I have renamed it to Control_Jslider.html.
Open Control_Jslider.html in editor and paste the following code. In this code I have removed all JavaScript that is not needed.
| <htmlxmlns:mso="urn:schemas-microsoft-com:office:office"xmlns:msdt="uuid:C2F41010-65B3-11d1-A29F-00AA00C14882"> <head><title>Jslider</title><!--[if gte mso 9]><xml><mso:CustomDocumentProperties><mso:TemplateHidden msdt:dt="string">0</mso:TemplateHidden><mso:MasterPageDescription msdt:dt="string">This is the default Control Display Template that will list the items. It does not allow the user to page through items.</mso:MasterPageDescription><mso:ContentTypeId msdt:dt="string">0x0101002039C03B61C64EC4A04F5361F385106601</mso:ContentTypeId><mso:TargetControlType msdt:dt="string">;#Content Web Parts;#</mso:TargetControlType><mso:HtmlDesignAssociated msdt:dt="string">1</mso:HtmlDesignAssociated><mso:HtmlDesignConversionSucceeded msdt:dt="string">True</mso:HtmlDesignConversionSucceeded><mso:HtmlDesignStatusAndPreview msdt:dt="string">https://demo.contoso.com/sites/Jquery-displaytemplate-demo/_catalogs/masterpage/Display Templates/Content Web Parts/Control_JSlider.html, Conversion successful.</mso:HtmlDesignStatusAndPreview></mso:CustomDocumentProperties></xml><![endif]--></head><body> <!-- Warning: Do not try to add HTML to this section. Only the contents of the first <div> inside the <body> tag will be used while executing Display Template code. Any HTML that you add to this section will NOT become part of your Display Template. --> <script> $includeLanguageScript(this.url,"~sitecollection/_catalogs/masterpage/Display Templates/Language Files/{Locale}/CustomStrings.js"); $includeScript(this.url,"~sitecollection/style library/slider/js/jquery-1.9.1.min.js"); $includeScript(this.url,"~sitecollection/style library/slider/js/jquery.slides.min.js"); $includeCSS(this.url,"~sitecollection/style library/Slider/css/example.css"); <!--$includeCSS(this.url, "~sitecollection/style library/Slider/css/font-awesome.min.css");--> $includeCSS(this.url,"~sitecollection/style library/Slider/css/charm.css"); </script> <!-- Use the div below to author your Display Template. Here are some things to keep in mind: * Surround any JavaScript logic as shown below using a "pound underscore" (#_ ... _#) token inside a comment. * Use the values assigned to your variables using an "underscore pound equals" (_#= ... =#_) token. --><divid="Control_List"><!--#_ if (!$isNull(ctx.ClientControl) && !$isNull(ctx.ClientControl.shouldRenderControl) && !ctx.ClientControl.shouldRenderControl()){ return "";}ctx.ListDataJSONGroupsKey = "ResultTables";var siteURL = SP.PageContextInfo.get_siteServerRelativeUrl();_#--><divclass="container"> <divclass="slides"> _#= ctx.RenderGroups(ctx) =#_ <ahref="#"class="slidesjs-previous slidesjs-navigation"><iclass="icon-chevron-left icon-large"></i></a> <ahref="#"class="slidesjs-next slidesjs-navigation"><iclass="icon-chevron-right icon-large"></i></a> </div></div> <!--#_ AddPostRenderCallback(ctx, function(){ $.getScript(siteURL + "/style library/Slider/js/jquery.slides.min.js", function(){ $('.slides').slidesjs({ width: 940, height: 528, navigation: true }); }) }); _#--> </div></body></html> |
Few things to note here are <script> section where I have included all .js and .css files, I have included reference to .js file and .css that we have uploaded under Style Library. Next, I have added two DIVs here with class "container" and class "slider". These DIVs will wrap results coming from Item Template. Also, I have added a function AddPostRenderCallback(ctx,function) which will be executed once Display Templates are all completely loaded. This function binds .slidejs method of slider plugin to the DIV "slides". Instead of AddPostRenderCallback() I could have also used ctx.OnPostRender(), they both will execute once the Display Template is fully loaded.
Also in some caes to make sure .js files are loaded before we call the function, we can use following JQuery getScript function as in the following example:
$.getScript(SP.PageContextInfo.get_siteServerRelativeUrl() + "Style Library/jquery.sliders.min.js", function() { });
Customize Item Control Template
For Item Control template copy Item_TwoLines.html and rename it to Items_PictureJSlider.html and paste the following code:
| <htmlxmlns:mso="urn:schemas-microsoft-com:office:office"xmlns:msdt="uuid:C2F41010-65B3-11d1-A29F-00AA00C14882"> <head><title>Picture JSlider</title><!--[if gte mso 9]><xml><mso:CustomDocumentProperties><mso:TemplateHidden msdt:dt="string">0</mso:TemplateHidden><mso:ManagedPropertyMapping msdt:dt="string">'Picture URL'{Picture URL}:'PublishingImage;PictureURL;PictureThumbnailURL','Link URL'{Link URL}:'Path','Line 1'{Line 1}:'Title','Line 2'{Line 2}:'Description','Line 3'{Line 3}:'','SecondaryFileExtension','ContentTypeId', 'FileExtension'{FileExtension}:'FileExtension'</mso:ManagedPropertyMapping><mso:MasterPageDescription msdt:dt="string">This Item Display Template will show a 100x100 picture of the item on the left. The title and the default item description will display to the right of the picture with an additional line that is available for a custom managed property.</mso:MasterPageDescription><mso:ContentTypeId msdt:dt="string">0x0101002039C03B61C64EC4A04F5361F385106603</mso:ContentTypeId><mso:TargetControlType msdt:dt="string">;#Content Web Parts;#</mso:TargetControlType><mso:HtmlDesignAssociated msdt:dt="string">1</mso:HtmlDesignAssociated><mso:HtmlDesignConversionSucceeded msdt:dt="string">True</mso:HtmlDesignConversionSucceeded><mso:HtmlDesignStatusAndPreview msdt:dt="string">https://demo.contoso.com/sites/Jquery-displaytemplate-demo/_catalogs/masterpage/Display Templates/Content Web Parts/Item_PictureJslider.html, Conversion successful.</mso:HtmlDesignStatusAndPreview></mso:CustomDocumentProperties></xml><![endif]--></head><body> <!-- Warning: Do not try to add HTML to this section. Only the contents of the first <div> inside the <body> tag will be used while executing Display Template code. Any HTML that you add to this section will NOT become part of your Display Template. --> <script> $includeLanguageScript(this.url,"~sitecollection/_catalogs/masterpage/Display Templates/Language Files/{Locale}/CustomStrings.js"); </script> <!-- Use the div below to author your Display Template. Here are some things to keep in mind: * Surround any JavaScript logic as shown below using a "pound underscore" (#_ ... _#) token inside a comment. * Use the values assigned to your variables using an "underscore pound equals" (_#= ... =#_) token. --> <divid="Item_PictureJSlider"><!--#_var encodedId = $htmlEncode(ctx.ClientControl.get_nextUniqueId() + "_picture3Lines_");var linkURL = $getItemValue(ctx, "Link URL");linkURL.overrideValueRenderer($urlHtmlEncode);var line1 = $getItemValue(ctx, "Line 1");var pictureURL = $getItemValue(ctx, "Picture URL");var containerId = encodedId + "container";var dataDisplayTemplateTitle = "ItemPicture3Lines"; _#--> <divclass="cbs-sliderContrainer"id="_#= containerId =#_"data-displaytemplate="_#= $htmlEncode(dataDisplayTemplateTitle) =#_"> <ahref="_#= linkURL =#_"title="_#= $htmlEncode(line1) =#_"target="_blank"> <imgsrc="_#= pictureURL =#_"width="570"height="270"> </a> </div> </div></body></html> |
Item Control template is where each search result item is binding with HTML elements. Under the header mso:ManagedPropertyMapping, Managed properties are mapped with Display Template properties. These properties can be accessed using
var linkURL = $getItemValue(ctx, "Link URL"); To get more details on $getItemValue() check my previous post
Set CSWP to use Custom Display Templates
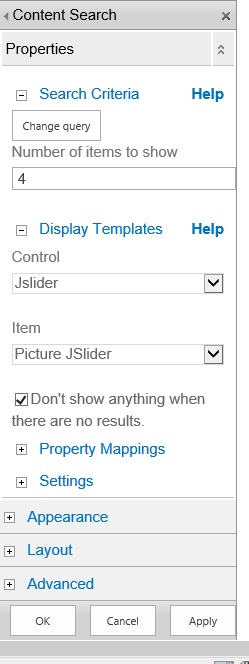
Now we have customized Control Template and Item Template but not yet configured CSWP to use these new templates. This is the easiest one, just edit CSWP and select Custom and Item templates!
Publish the page and now you can see beautiful picture slider using JQuery Plugin rendering on your page!!!
 |
--> |
|

This post focused on using JQuery within Display Template to customize output of CSWP. Different JavaScript libraries including JQuery are Power Tools for modern web designing. Display Templates open a whole new world of customizing search results using these latest technologies!
Happy Templating!!
SharePoint 2013 Customize Display Template for Content By Search Web Part (CSWP) Part-1