Intune: Deploying ADMX-Backed policies using Microsoft Intune
Howdy folks !!!
Today's blog is about how to deploy ADMX-Backed policies using Microsoft Intune.
What is ADMX-Backed Policy?
ADMX-Backed policy is nothing but a Group Policy setting in a form of Windows 10 CSP which can be deployed to devices via MDM channel. (Intune)
Starting in Windows 10 version 1703, Mobile Device Management (MDM) policy configuration support expanded to allow access of select Group Policy administrative templates (ADMX-backed policies) for Windows PCs via the Policy configuration service provider (CSP). Configuring ADMX-backed policies in Policy CSP is different from the typical way you configure a traditional MDM policy.
Summary of steps to enable a policy:
- Find the policy from the list ADMX-backed policies.
- Find the Group Policy related information from the MDM policy description.
- Use the Group Policy Editor to determine whether there are parameters necessary to enable the policy.
- Locate the Policy Definition file (C:\windows\PolicyDefinitions) and open with any XML Editor.
- Create OMA-URI and its value for the policy.
- Create a Device Configuration Policy in Intune and Assign to the user.
Each ADMX policy has various elements.
Text Element
MultiText Element
List Element
No Elements
Enum Element
Decimal Element
Boolean Element
In our example we are going see a ADMX policy which has List element.
Step 1:
We have chosen the below ADMX-Backed policy.
ActiveXControls/ApprovedInstallationSites
ADMX Info:
- GP English name: Approved Installation Sites for ActiveX Controls
- GP name: ApprovedActiveXInstallSites
- GP path: Windows Components/ActiveX Installer Service
- GP ADMX file name: ActiveXInstallService.admx
Step 2:
Understood the policy description as below.
This policy setting determines which ActiveX installation sites standard users in your organization can use to install ActiveX controls on their computers. When this setting is enabled, the administrator can create a list of approved ActiveX Install sites specified by host URL.
If you enable this setting, the administrator can create a list of approved ActiveX Install sites specified by host URL.
If you disable or do not configure this policy setting, ActiveX controls prompt the user for administrative credentials before installation.
Note: Wild card characters cannot be used when specifying the host URLs.
Step 3:
We need to determine the parameters required for this policy. We can use the Local Group Policy Editor on the Windows 10 Device.
- Open Run-> GPEDIT.MSC
- Use GP path identified from Step 1 and navigate to Windows Components/ActiveX Installer Service
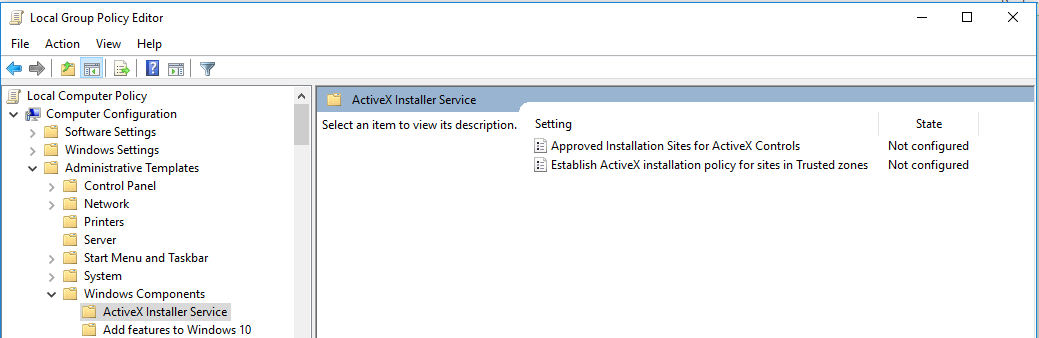
3. Open the GP found in Step 1 as GP English Name for this policy.
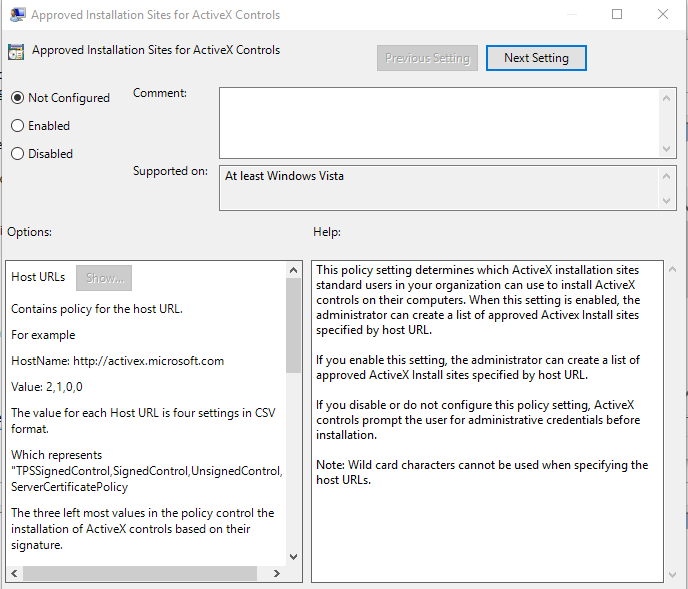
This policy requires two parameters when enabled.
Host URL and Value
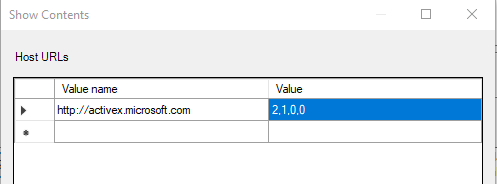
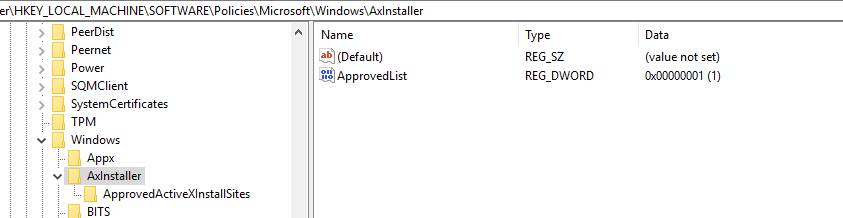
Once applied, it creates a Reg Key as below.
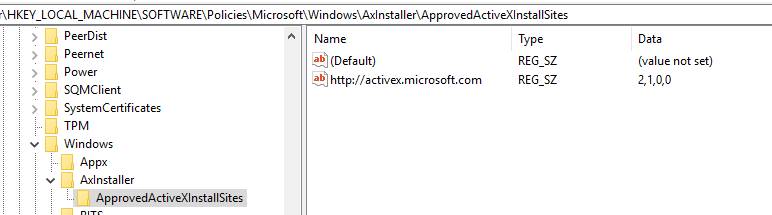
Step 4:
Identify the ADMX file name from Step 1 and locate the file under C:\windows\PolicyDefinitions
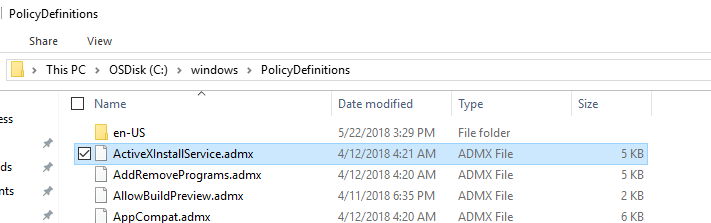
Copy the file to other location (Like C:\temp) and open the copied file using XML editor.
The XML file has a <policies> <policies/> tag has all policies associated with that ADMX file.
Our policy name is ApprovedActiveXInstallSites as mentioned in Step 1 GP Name.

Step 5:
From the above Policy, we should build the OMA-URI and its value.
Important parameters to make a note are Class and elements
- Class defines whether it is Device policy or User policy.
- Elements defines how the value should be formatted.
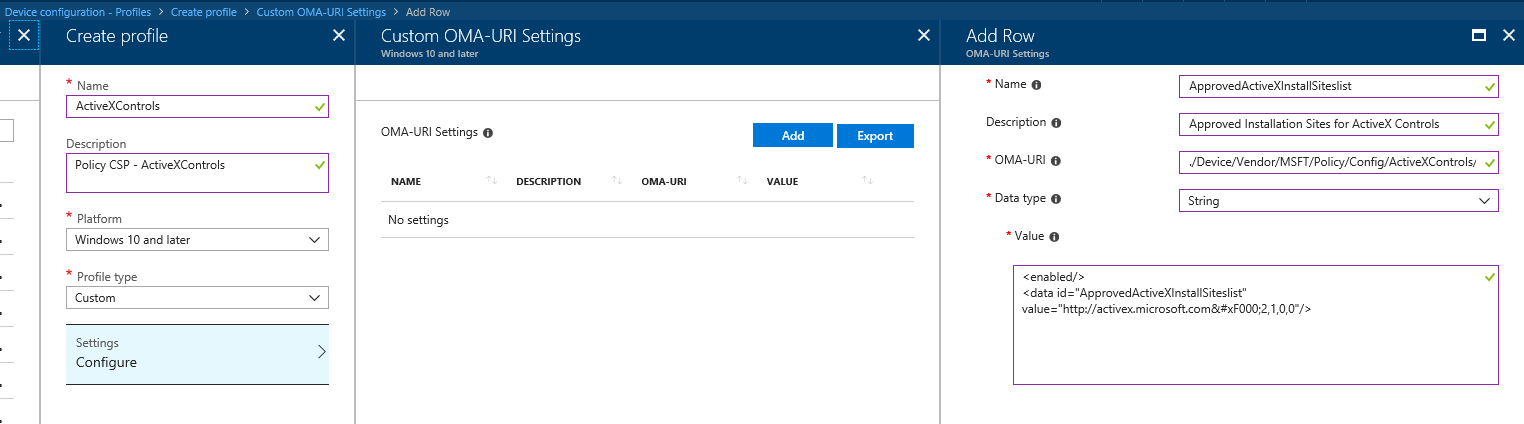
In our example, we see Class = Machine and the OMA-URI for this policy is
./Device/Vendor/MSFT/Policy/Config/ActiveXControls/ApprovedInstallationSites
[Note: This is case sensitive and make sure the name exactly matches what we have in Policy CSP identified in Step 1]
Now we need to create the value for the policy. For Intune, we should use String as Data Type as mentioned in article and Intune doesn't require encoding and no SyncML required.
Our policy has enabled or disabled and a list element and should contain multiple values.
When a policy setting has multiple values, we need to use below as separator.

Having said that our policy value will be below. 
Step 6:
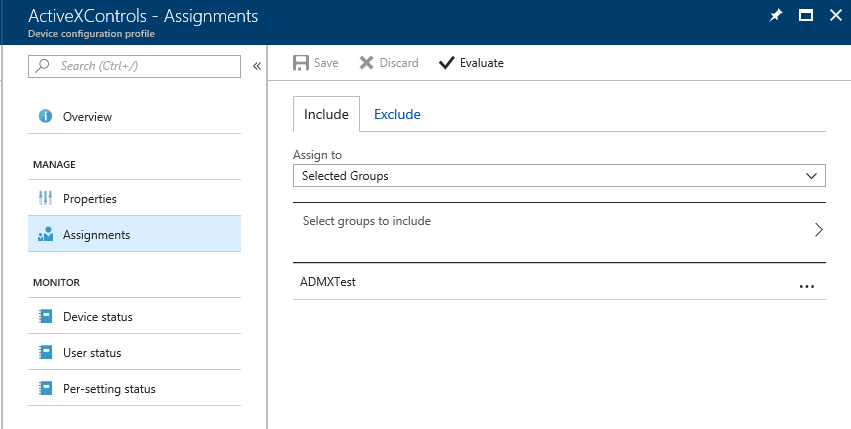
Now we need to create a Device Configuration Policy in Intune and assign to a user.
Assign the profile to a group.
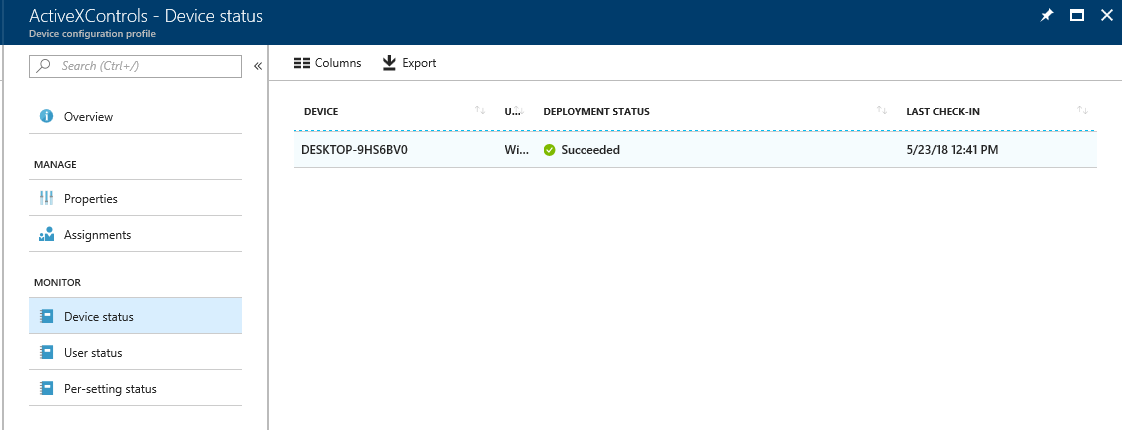
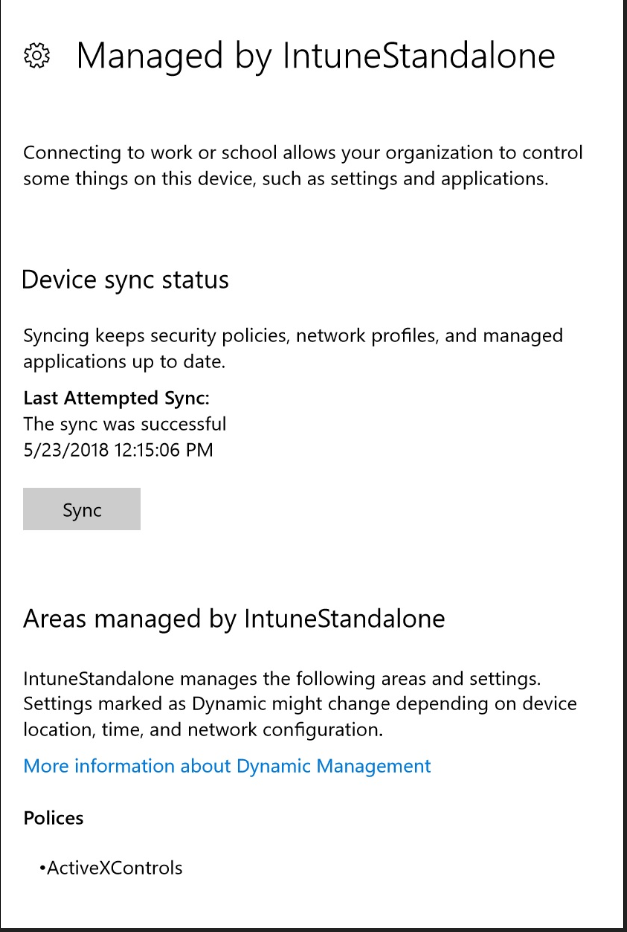
Monitor the status
On Portal
On Device
Senthilkumar Pandurangan
Support Escalation Engineer | Microsoft Intune
Disclaimer: This posting is provided "AS IS" with no warranties and confers no rights