ConfigMgr2012 SP2 / R2 SP1 : Build and Capture Windows 10 with Built-In Apps removed from Reference Image
ConfigMgr 2012 SP2 / R2 SP1 Officially supports Windows 10 Deployment when it is installed with ADK 10.
For upgrading the existing clients to Windows 10, it supports "In-Place upgrade" with the task sequence which can be imported from the blog post from Aaron Czechowski, Senior Program Manager, Enterprise Client and Mobility.
Today we are going to Build and Capture a Windows 10 Image using the ConfigMgr 2012 R2 SP1 Task Sequence with Build-In Apps removed from Reference Image.
Windows 10 comes with some built-in apps, like Mail, Calendar, OneNote (Touch), 3D Builder, etc. Sometimes, Enterprises doesn't want to have these apps deployed to all users as part of the Imaging.
We can remove the Built-In apps from Windows 10 while capturing the reference Image. These apps are provisioned with the Operating System Image and will be installed for each user when they login.
Even if we remove the apps from a reference machine by right click and uninstall them, it is uninstalled only for that User Profile. So when a next user logs-in it will be installed for that user.
How to avoid this? Here is the procedure.
1. Download the attached RemoveApps.txt.
2. Edit the file using Notepad and modify the first line with the apps which you don’t want to keep in your Image.

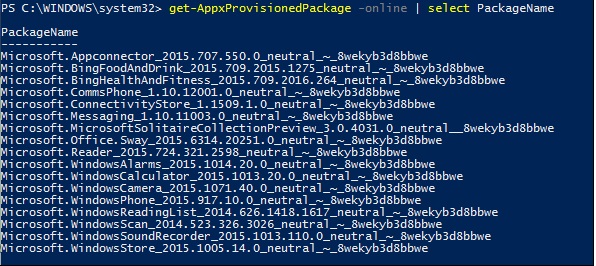
3. You can get the names for each Application by running the below PowerShell script on a Windows 10 Device. (Requires Elevated permissions)
Get-AppxProvisionedPackage -online | select PackageName
NOTE: All Apps doesn't support removal. So make sure you are removing an App which can be installed back from Windows Store.
4. Once modified the file Save it as "RemoveApps.ps1"
5. Create a Package named "RemoveApps" which contains the above modified PowerShell script as Source. This doesn't require any program.
6. Create a Simple ConfigMgr Task Sequence to Build and Capture Windows 10 Image.
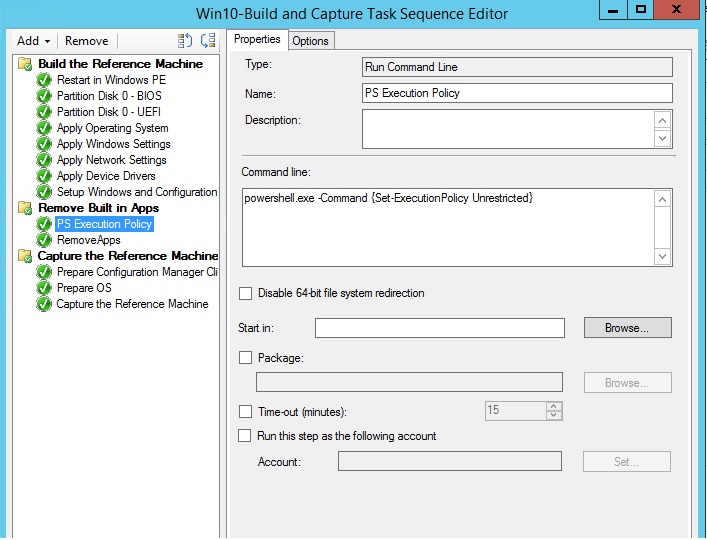
7. Modify the Task Sequence and add a group named like "Remove Built-In Apps" after "Setup Windows and ConfigMgr" step in the Task Sequence.
8. In the Group add "Run Command Line step" to set the PowerShell Execution policy and name like "PS Execution Policy".
powershell.exe -Command {Set-ExecutionPolicy Unrestricted}
9. Next to that add another step to "Run PowerShell Script" and name it like "RemoveApps"
10. Configure the options as below.

11. Deploy the Task Sequence to a client which you are going to use for Build and Capture Windows 10.
12. Use the captured Image for imaging new clients.
Senthilkumar Pandurangan
Support Escalation Engineer | Microsoft System Center Configuration Manager
Disclaimer: This posting is provided "AS IS" with no warranties and confers no rights