Configuring SharePoint Apps or Add-ins with SSL encryption
If you are trying to configure SharePoint Add-ins or Apps on a farm that has multiple web applications using SSL encryption. It can be a bit of challenge to understand how to configure the App domain to work with SSL. Now that we can use Server Name Indication (SNI) since IIS 8.0. We can have multiple SSL certificates bound to one port in IIS for each IIS site. No need to have multiple IP addresses on the web front end servers anymore. Below I go through each configuration step briefly to help you understand how to set a SharePoint farm to use Add-in or Apps.
Certificates You will need one SSL wildcard certificate for your app domain web application and one standard SSL certificate for each of your web applications that will be using SSL encryption.
Step 1 – App Domain wildcard SSL endpoint certificate.
You will need to have a SSL wildcard certificate generated for your App Domain. I'm using *.contosoapps.com for the friendly name in this example. 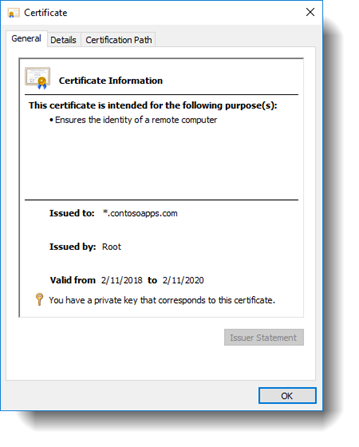
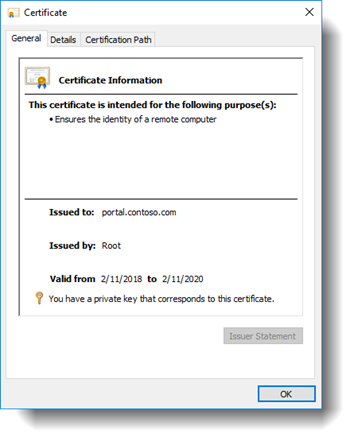
Step 2- All Other Web Applications using SSL certificates.
You will also need to have a Web applications SSL certificates generated with their friendly name for all your Web applications that will be using SSL encryption. I'm using portal.contoso.com in this example.
DNS
You will need a forward lookup zone in DNS for the App Domain with a wildcard Host record.
Step 1 – Create a forward lookup zone in your DNS for your App domain. I'm using ContosoApps.com in my example.
Step 2 – Create a Host (A) record in the forward lookup zone with a wildcard pointing to your SharePoint web application's VIP or server's IP address depending on how you have web application configured. In this example, I'm pointing the wildcard Host record to my SharePoint server's IP address since I'm not using a VIP. 
SharePoint
Continue with the steps below to configure the SharePoint portion for Apps and Add-ins.
Step 1 - App Management and Subscription Service applications
We need to make sure we have a App Management and Subscription service application running in the farm. If not, create them using the PowerShell scripts listed below:
App Management service application – To create a App Management service application with PowerShell, use the script below.
$AppPool = Get-SPServiceApplicationPool "SharePoint Web Services Default"
$App = New-SPAppManagementServiceApplication -ApplicationPool $AppPool -Name "App Management" -DatabaseName AppManagement_DB
$proxy = New-SPAppManagementServiceApplicationProxy -ServiceApplication $App -Name "App Management Proxy"

Subscription Settings service application – To create the Subscription service, you must use a PowerShell script to create it. Use the script below.
$AppPool = Get-SPServiceApplicationPool "SharePoint Web Services Default"
$Sub = New-SPSubscriptionSettingsServiceApplication -ApplicationPool $AppPool -Name "Subscription Settings" -DatabaseName SettingsService_DB
$proxy = New-SPSubscriptionSettingsServiceApplicationProxy -ServiceApplication $Sub

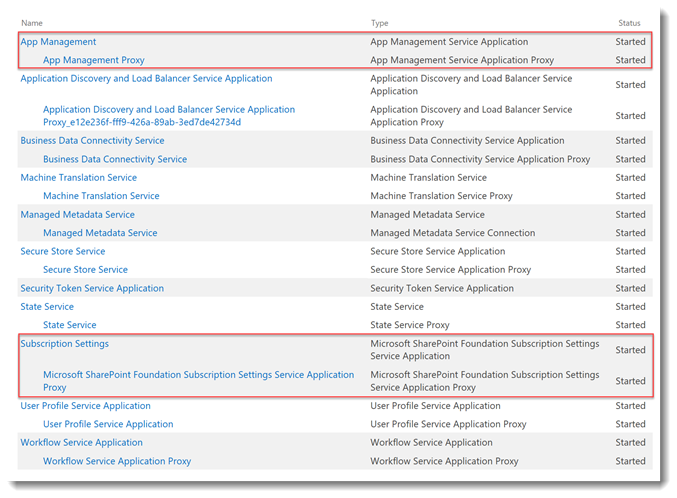
Step 2 - App Management and the Subscription Settings services
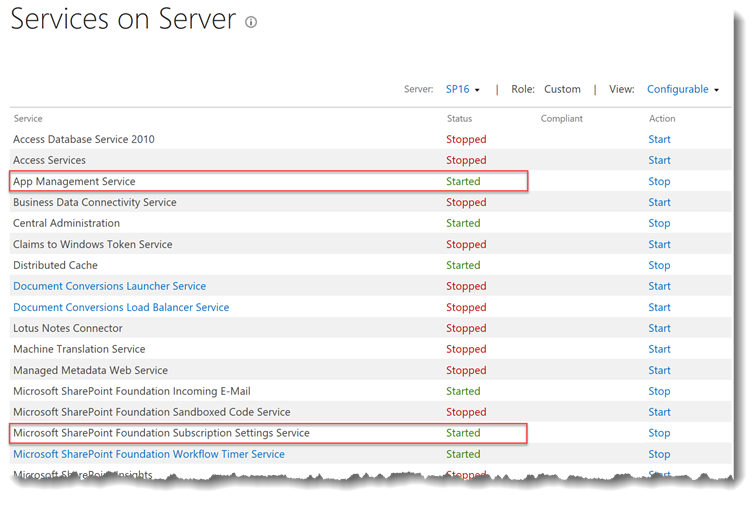
Make sure the App Management and the Subscription Settings services are running at least on one of the servers in the farm by checking in Central Administration\System Settings\Manage Services on server. Start them both if they are not started.
Step 3 - Configure App URLs
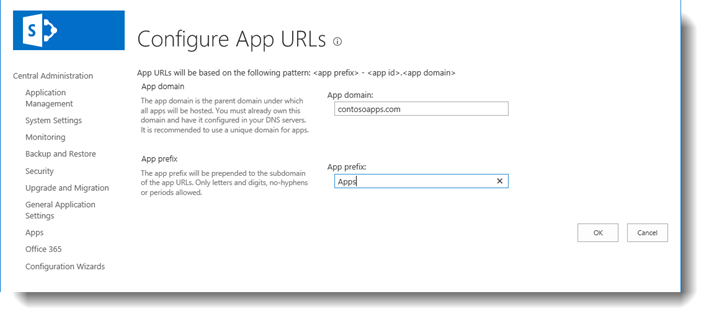
Now we need toset your App domain and the App prefix for your URLs. Navigate to Central Administration\Apps\Configure App URLs to configure these settings.
App domain – Enter the name of your app domain, usually it's your domain+apps. See the example below.
App prefix – This will be the app prefix added to the applications URL
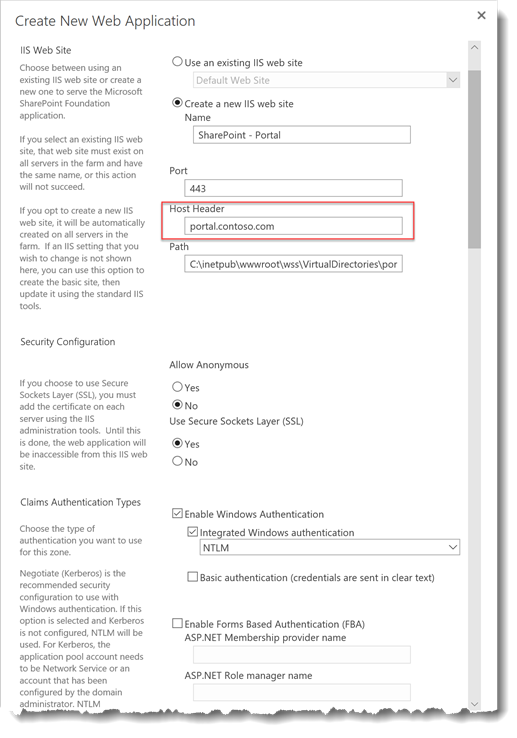
Step 4 - App Domain Web application
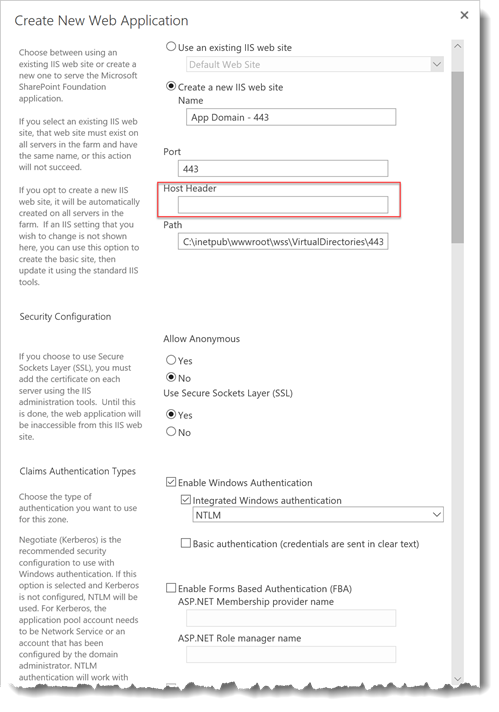
We need to create a web application for the App Domain that does not have a Host Header configured and will only be accessed by the Apps. We will bind the App Domain's SSL wildcard certificate to the IIS site once we create it.
Name – Give your App domain web application a name
Port – Use port 443 for SSL
Host Header – Leave the Host Header blank, we need to be able to access this site with any name.
Use Secure Sockets Layer (SSL) - Yes
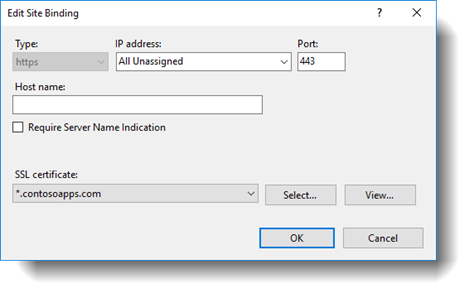
Step 5 - App domain wildcard SSL certificate
Bind the App domain's wildcard SSL certificate to your new app domain web application using IIS manager on your web server. You will need to repeat this on all your SharePoint web front end servers in the farm.
Note – Please make sure you have no Host name configured and bind your certificate to your site.
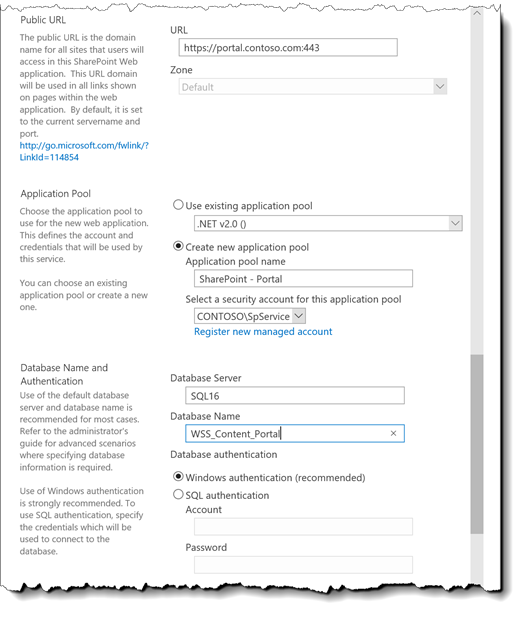
Step 6 - SharePoint Web applications
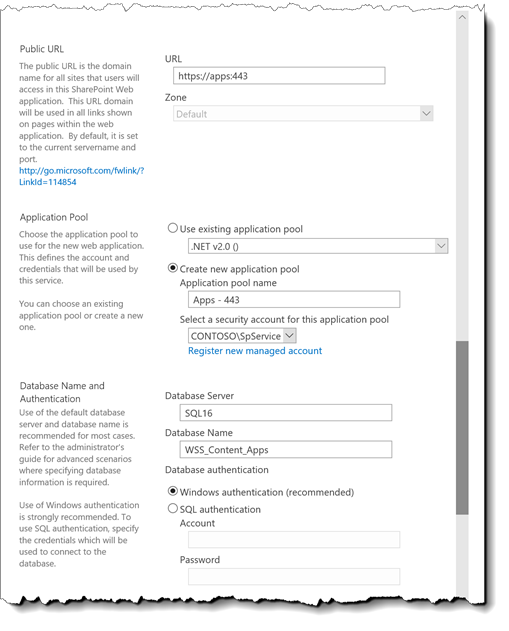
Now that you have the farm configured for SharePoint Add-ins and Apps. You can create a SSL web application or extend an existing web application to use SSL and Host Headers like my example below.
Name – Enter a name for you web application
Port – 443
Host Header – Enter a Host Header for you site, should match the friendly name of the SSL certificate.
Use Secure Sockets Layer (SSL) - Yes
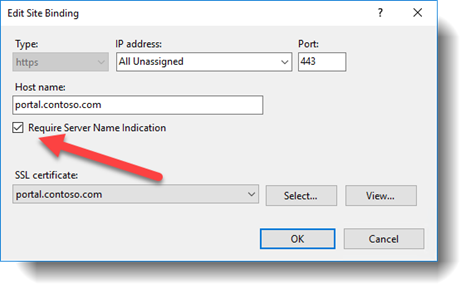
Step 6 – Bind the Web applications SSL certificate to its IIS site.
Make sure the Host name is correct and check the box for "Require Server Name Indication". Next bind the correct SSL certificate to the site that matches the Host name.
SAML Authentication configuration notes (Don't do if you are not using SAML Authentication)
If the SharePoint web applications is configured to use SAML authentication. You will need to perform these extra steps below to allow your SharePoint Apps and Add-ins to be authenticated correctly.
Step 1 - UseWReplyParameter
You will need to enable UseWReplyParameter in the SharePoint SAML configuration on your SharePoint farm by using the following PowerShell script.
Note – Update the name of your Trusted Identity provider before running the script below.
$ap = Get-SPTrustedIdentityTokenIssuer "ADFS"
$ap.UseWReplyParameter = $true
$ap.Update()
Step 2 - Identity Provider extra configuration
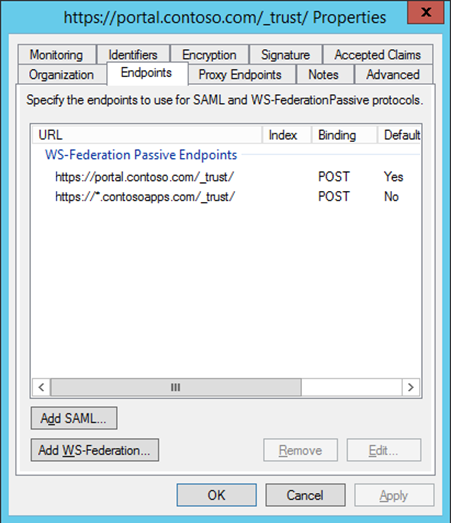
Your web application's relying party will need to have an extra Passive Endpoints for you Apps URLs. In my example below, I'm using ADFS as my claim provider and added the endpoint https://*.contosoapps.com/_trust/ to my URL list of endpoints. Depending on your claim provider, it might be called something else. This will allow SAML authentication to work with your SharePoint apps and add-ins.
ADFS Relying party example: https://*.contosoapps.com/_trust/