Installing Windows Home Server in Virtual Server
It turns out that Window Home Server installs into (and works fine on) Virtual Server 2005 R2 SP1. (Virtual Server is free, and available from the previous link). I did run into a couple of gotchas while installing, so thought that I would provide you a walkthrough with screenshots and workarounds.
FOR THE RECORD: The following is my own experience with the installation. I don't know whether or not Windows Home Server will be supported in a virtual environment upon release, or even if it will be available in Retail.
The first thing you need to do is request to join the Beta program, which you can do here: https://connect.microsoft.com/windowshomeserver. I don't know if you will get in or not, but the team has done an incredible job of enrolling several thousand applicants to date. If you are willing to provide feedback to the development team, have two or more PCs, a broadband connection and router, and a spare PC or Server that can be dedicated to running Windows Home Server (the required specifications are VERY minimal), then you are their target demographic and should be able to get in.
Once you have downloaded Windows Home Server, you can install into Virtual Server from the ISO directly, or you can burn it to a DVD and install from physical media. I will skip the steps for those tasks, although if there is a huge demand, I'll put up a separate tutorial later. The TechNet site for Virtual Server has all the documentation that you will need to get Virtual Server up and running here: https://www.microsoft.com/technet/prodtechnol/virtualserver/default.mspx
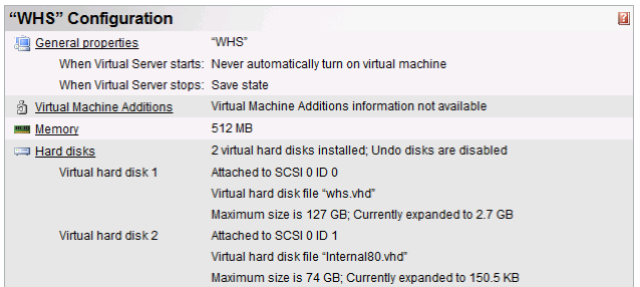
The first thing you want to do is create a new Virtual Machine within Virtual Server (again, this is rather basic... refer to the TechNet site if you need the steps). You will have the option of choosing the size of the Hard Drive, as well as the bus (IDE or SCSI). To make that decision, you will want to visit Ben Armstrong's post here: https://blogs.msdn.com/virtual_pc_guy/archive/2006/02/06/525487.aspx. The IDE option is more compatible, but limits the number of attached hard drives to 4, and the hard drive capacity to 127GB per device. With Virtual Server, I don't want to be artificially limited as to the number of drives or capacities, so I chose SCSI. You will want the primary hard drive (which in this case is virtual) to be as large as possible due to the way that WHS allocates space. Memory, however, is much less limited. I set memory to 512 MB (which works fine for Windows Home Server), set the CD-ROM drive to "Physical" (you can point to your ISO if you want), and the NIC to point to a spare NIC in my server. I inserted the Windows Home Server installation DVD and booted up. The first problem I encountered was the following:
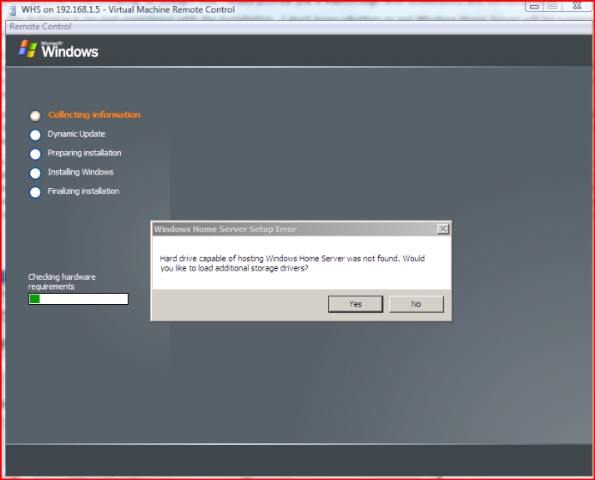
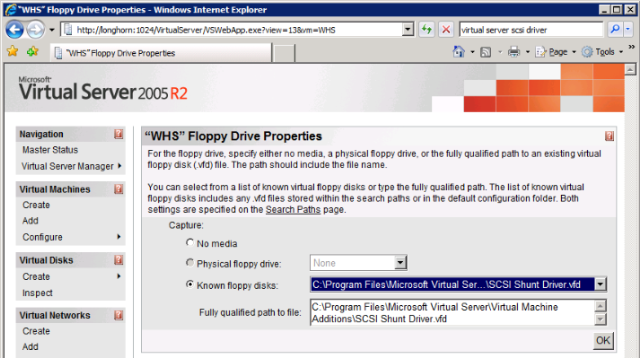
Windows Home Server does not have the driver for the emulated SCSI in Virtual Server. <sigh...> Back to the drawing board. Fortunately, the programmers on the Virtual Server Team anticipated that their SCSI card would not necessarily have drivers built in, and included them. To work around this problem, go into the properties of the Virtual Machine and click on "Floppy Drive". Under "Known floppy disks", you'll want to choose the included floppy called "SCSI Shunt Driver.vfd. (If you had selected and IDE Virtual Hard Drive initially, you can skip this step...
Reboot the virtual machine, and go into the BIOS (hit delete), as you will need to change the boot order. By default, Virtual Server boots to the floppy drive, and the virtual floppy you just selected is not bootable. Change the CD-ROM drive to be first in the boot order.
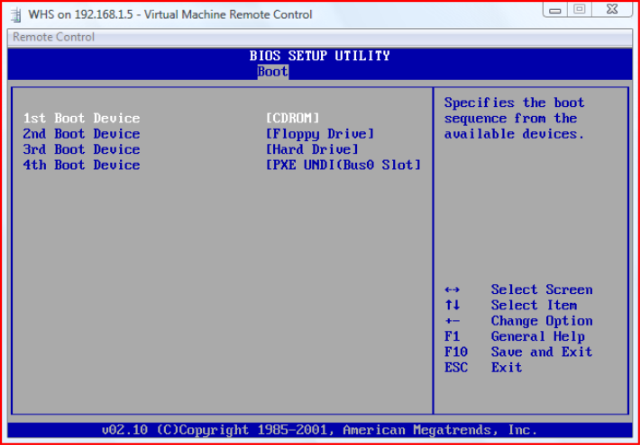
Hit F10 to save and exit, and reboot. This time when you get the "Hard Drive capable of hosting Windows Home Server could not be found" message, hit "yes", navigate to the A: drive, open the "Windows 2003" folder, and select the "msvmscsi" file. Hit "open", and "yes" to the message asking if you want to make the driver available to setup. At this point, installation will continue as expected:
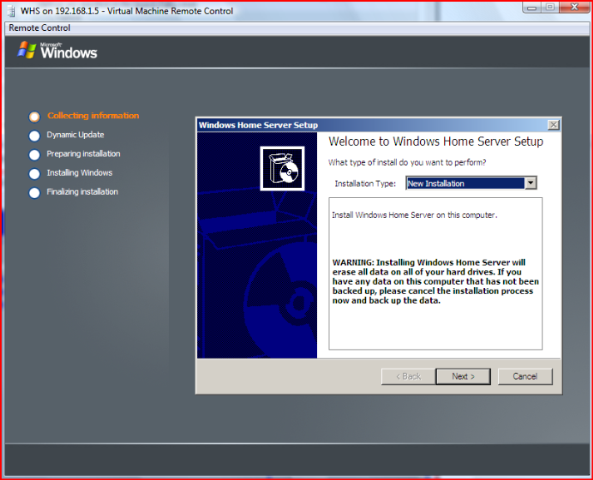
Now navigate through the install wizard, and let installation complete.
At this point, you may wonder why I am using Virtual Server instead of Virtual PC (for which I have written several posts, including this one: https://blogs.technet.com/seanearp/archive/2007/02/20/virtual-pc-2007-released.aspx). Although I would still recommend you visit that post for the performance tips (most of which work with both Virtual PC and Virtual Server), Virtual PC is not ideal for Windows Home Server. First of all, we want to be able to add multiple hard drives to increase the pool of storage on Windows Home Server, and Virtual PC is limited to 4 virtual IDE drives. As you saw in my last Windows Home Server post, I had 6 physical drives hooked up.
As with Virtual PC, Virtual Server does not allow you to directly attach physical drives. I know... I just tried it. Although you may stumble across the option to create a "Linked Physical Disk", you cannot actually boot a Virtual Machine if it has a linked disk attached. This option is present for converting an existing physical disk to a Virtual Hard Disk, and the instructions for doing so are present here: Copying a physical disk to a virtual hard disk
Let Windows Home server go through the entire process of installing. Once you reach the desktop, your first step should be to install the Virtual Machine additions. This will have a DRAMATIC effect on the speed of the virtual machine.
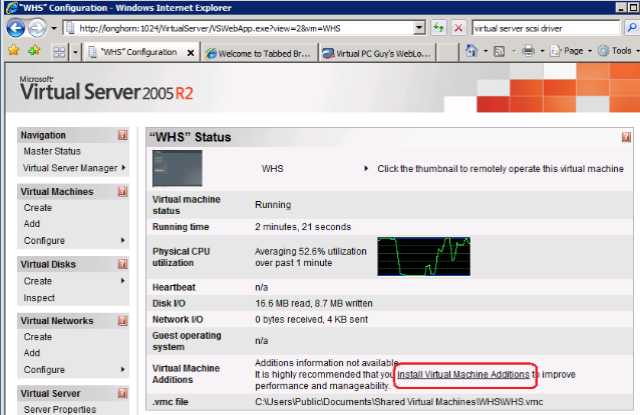
After installing the Virtual Machine Additions and Rebooting, your virtual Windows Home Server should be much more responsive. As we cannot link directly to a physical disk, you will need to workaround this by creating a Virtual Hard Drive (with a capacity slightly under the available space on your extra physical drive), and saving it on that additional physical disk. Attach the virtual hard drive to your virtual machine, and boot up.
Within the Windows Home Server console, you will have the the 2nd hard drive show up. You can now add it to the storage pool and use the space. Rinse, wash, and repeat for any other physical hard drives you want to add.
My conclusion? Although WHS works fine in Virtual Server, if you have multiple PHYSICAL disks that you want to add to the mix, this is not currently a simple or pleasant process. Grab that old PIII that you have in the back of your closet and use it for your Windows Home Server. The process will be much more pleasant for you :) For testing (with no additional physical drives to be added), Virtual Server works just fine with Windows Home Server.