Successful Skype for Business Meetings (Series – Module #3 Broadcast Meetings - part #1)
Taking a short detour from the Skype for Business meetings to do a quick 2 part series on Broadcast Meetings. Because this module is quite large I am breaking it up in to 2 parts. The setup, and the Broadcast itself.
Skype for Business Broadcast Meetings
When discussing Skype for Business Meetings, you cannot ignore that fact that sometimes 250 participants just isn’t enough. That or the need to have a massive Town Hall style meeting. This is where Skype for Business Broadcast meetings comes in.
Unlike Skype for Business meetings that we have been discussing during this series, Skype for Business Broadcast meetings allow for some unique features not found in your typical Skype for Business Meetings.
Some of the key features of Skype for Business Broadcast Meetings:
- Up to 10K attendees ( I say attendee for a reason)
- Live transcription
- FF, REW, Replay during a Broadcast
- Live Q&A
- Downloadable and redistributable
- Live Polling and Yammer feeds
- Generate Meeting reports.
The setup experience for Skype for Business Broadcast meeting is much different from the of a Skype for Business Online Meeting and so I will take you through this process start to finish as well as calling out some of the uniqueness of the features.
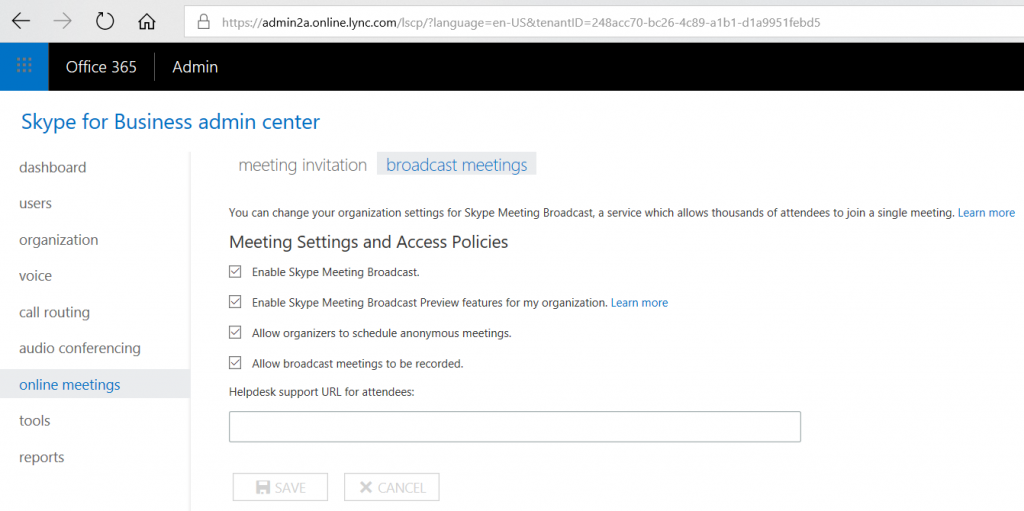
For starters, Skype for Business Broadcast is an online only service. This means at the very least, the creator of the meeting must be homed in Skype for Business Online. This of course means that you have a O365 tenant and that Skype for Business is in Hybrid mode – OR – you have a 100% online only tenant. If either of those conditions exist, you must then also enable your tenant for Skype for Business Broadcast. Next, it is important to note that while a Skype for Business Broadcast Meeting is live, there can be anywhere from a 30-60 sec delay from what is going on live until the attendees see it. This is important to note when setting feedback options such as Yammer, Q&A and Pulse. While the Presenter(s) are communicating in realtime, the attendees are seeing it up to 60 seconds after it happened. Therefore, the responses from attendees might appear to be non-existent to an impatient Presenter. The key here is to know this and to create a sort of time filler if you are expecting responses.
Once enabled, your users that are licensed and homed in Skype for Business Online can create Skype for Business Broadcast Meetings. Here are links to the licensing requirements for Skype for Business Broadcast
and
Creating a meeting
Creating meeting consist of a few steps:
- Creating the meeting.
- Setting attendee qualification.
- Adding Options to the meeting.
- Sending out the meeting invite.
To create a Skype for Business Broadcast meeting start by going and logging into this page. https://broadcast.skype.com 
From this page you will be able to see older meeting that have already past. (For the sake of screen shots, I created meetings that never were “run” which is why they show as “not started”. Should you have set certain feature which we will discuss in the future, you could click back into these meetings and get the meeting report, go thru the recorded video and see the security features that were set for that meeting. As you can see the calendar highlights dates where meetings exist.
Our next step would be to create a meeting. Click the  plus sign.
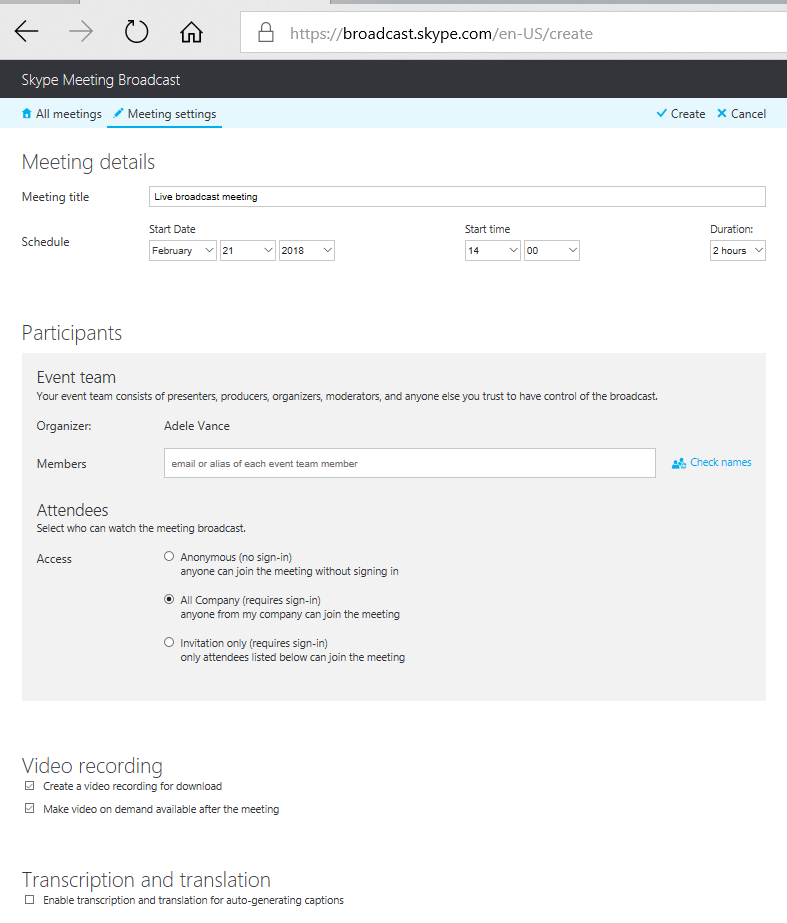
There are a number of options here so lets break them down.
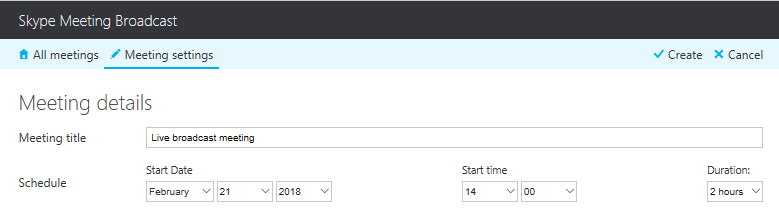
This section allows you to name the meeting, specify the date/time and rough duration of the call. This might lead you to believe that the meeting will expire after the duration expires. This is NOT the case. The meeting will continue as long as there is an active Presenter in the meeting.

Next we will set the attendee qualification level. You can see that the Organizer is already populated, you are then given the opportunity to add other presenters from within your organization only. We will have the ability to add federated outsiders at a later time. This is a “hidden feature” so I will call it out later in this article.
Now then, the attendees. I say attendees because these will be the viewers of this meeting. Their interaction with the presenters will be limited to the features that have been added to the meeting. (Yammer, Q&A, and Pulse). All attendees join via a web browser – not matter what. Listed Presenters (Team Members) will join via their Skype for Business Client and will have an entirely different set of features which I will list out later in this article.
Attendees fall into 3 categories:
- Anonymous – This can be anyone with an internet connection and the link to the meeting.
- All Company – Anyone who shares the same domain name as the Organizer and has a link to the meeting.
- Invitation Only – Those specific set of attendees within your organization that you have specifically invited via this form.
Note: The latter 2 type require a login from the attendees Azure Active directory (cloud) account. So as long as the attendee is listed in the tenant (native or hybrid) they can login with their user credentials.
Anonymous attendees do not need to login.
OK, now that we have set the attendees, we can move on with the rest of the meeting options.
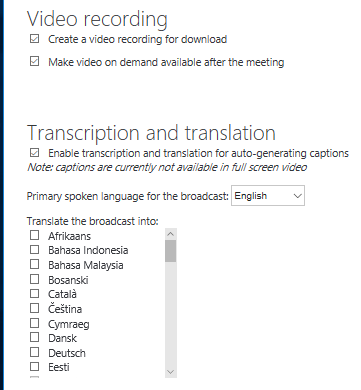
By checking “Create a video recording for download” You get just that. The meeting will automatically be recorded and be downloadable once the meeting ends.
Enabling “Make video on demand available after the meeting” allows attendees to join after the meeting ends and watch it in its entirety. (subject to retention times)
Should you wish to have a live transcript be displayed during the meeting, you will check the Transcription and Translation box. This allow you to pick up to 6 languages that attendees can choose from during the broadcast. The transcription will then be displayed as the meeting occurs. Attendees can switch between the allowed languages as the meeting is in progress or afterwards during the playback.
Let be clear about this point. This is a speech to text translation, not a speech to speech translation. That ability exists only in Skype Consumer.
Now that we have configured the basics for our meeting, click Create at the top right hand side.

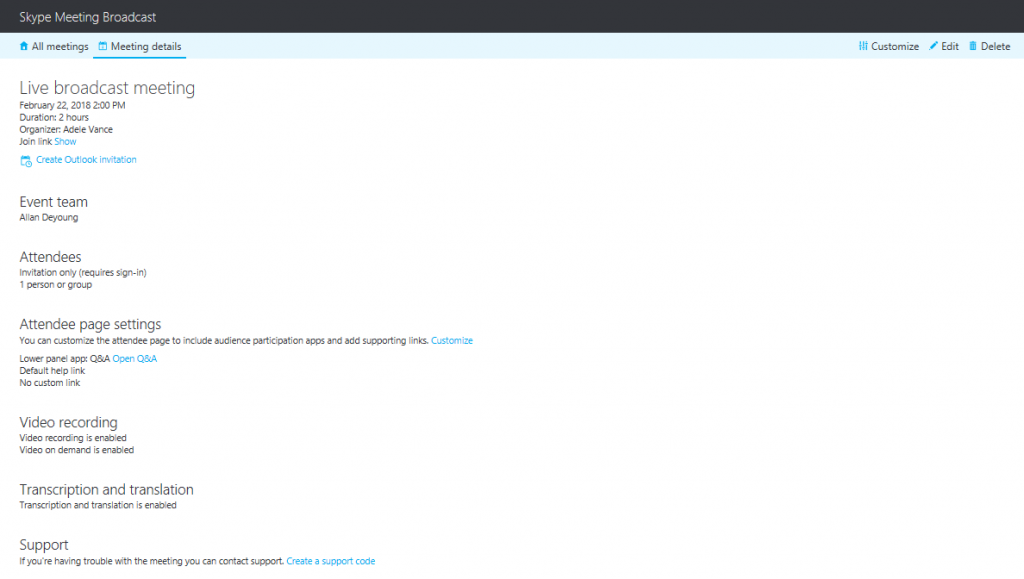
Your meeting review page will now be shown.
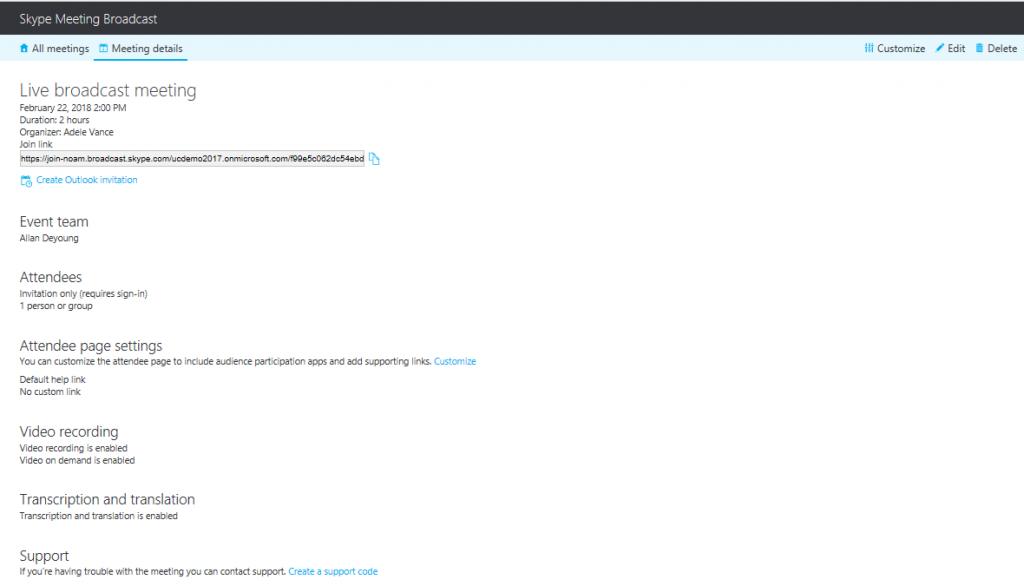
If a basic town hall style meeting is all you needed, then you are set. You can now expose the link and email it , or create an Outlook invite and email that. If you selected others to be presenters, I recommend using the Outlook invite as they will already be added to the invite.
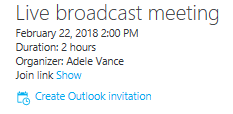
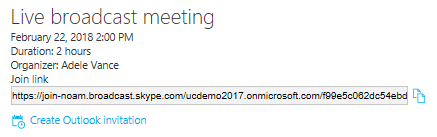
Clicking “show” will expose the meeting link.
Note, if you selected the “Invitation only” Attendee option, each attendee will already be populated in the Outlook invite as well as the Presenters.

Click send and you now have a meetings scheduled in Outlook.
Should you choose to add attendee feedback options, you would then click Customize in the upper right hand corner.

This takes you to the meeting customization page where you can add attendee feedback options.
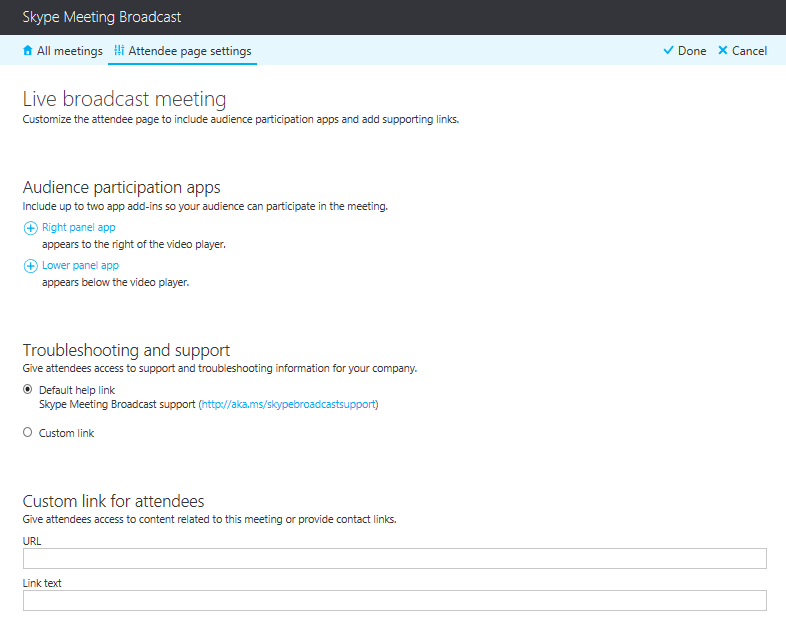
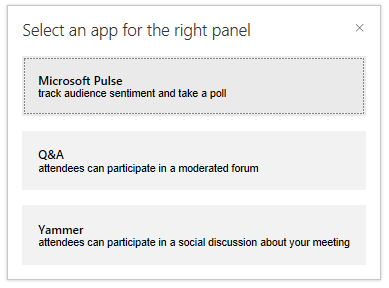
You can add 1 or 2 attendee options. One in the right hand panel and one in the lower panel which will show up below the presentation.
Your options are Yammer, Q&A and Pulse.
For Pulse you will have had to previously setup a Pulse account. We will not be covering that in this segment.
For Yammer, similarly, you will need the Yammer feed information as shown below.
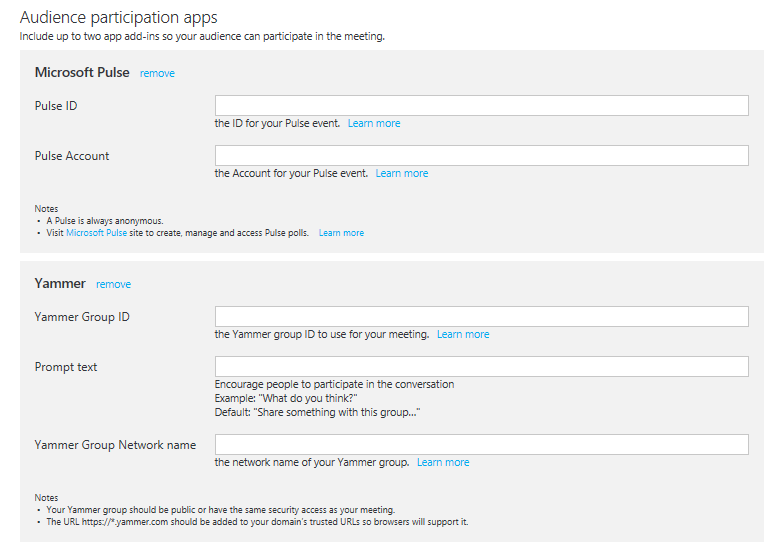
Q&A is a different animal altogether. Once added to a meeting some forethought must be put into the Presenter roles. A Predetermined Presenter must be allocated to login to the Q&A panel and act as the moderator.
To finish off this page, you have the ability to add customized hyper-links for troubleshooting support and other items that may be of use to attendees in your meeting. This could be a link to an embedded video or a website that contains pertinent information to your meeting or organization.
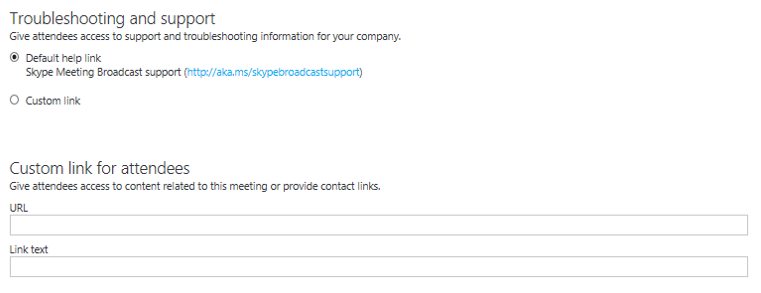
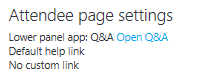
Once you have added your content, click “DONE” in the upper right hand corner. This will take you back to the meeting summary page that you will notice has now changed to include the added content.
At this point you would want to then create the Outlook email invite – or copy the link and send it out – which ever way you choose.
In part #2, we will take you thru logging in and both attending as well as presenting in Broadcast meetings.
Stay tuned