How to use a Recovery Storage Group in SBS 2008
[Today's post comes to us courtesy of John Bay]
In this post we will discuss how to use a recovery storage group in SBS 2008 to restore two lost important messages.
Our test user has two messages in his inbox that are important to him.

Somehow these two messages got deleted and for some reason we are unable to recover the messages using deleted item recovery in Outlook. We have a backup made prior to the deletion of the messages so we can use a recovery storage group to restore just this one user’s mailbox.
Restore Exchange
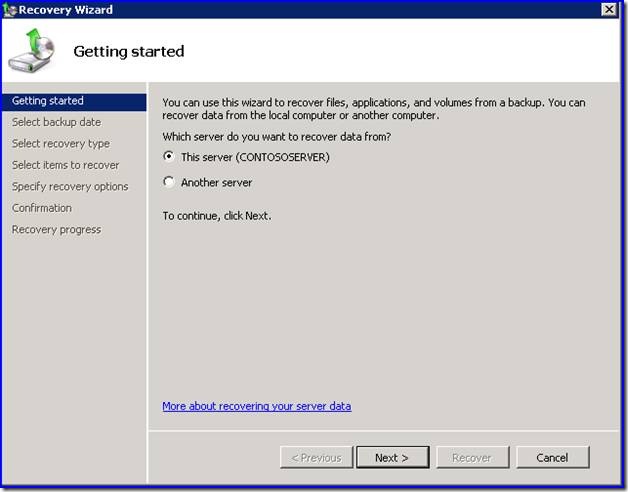
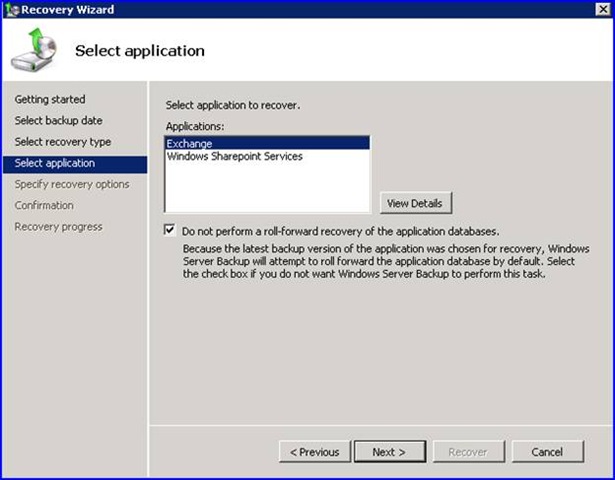
In order to use a recovery storage group you must first restore the Exchange databases to an alternate location.
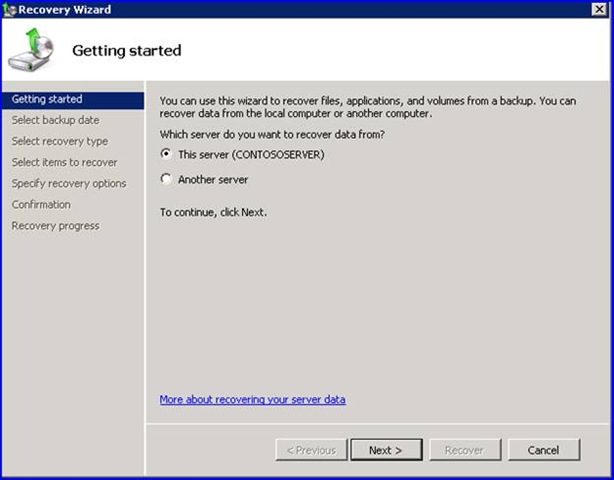
To do the restore we would launch Windows Server Backup from administrative tools and click recover.
Choose to recover This Server.
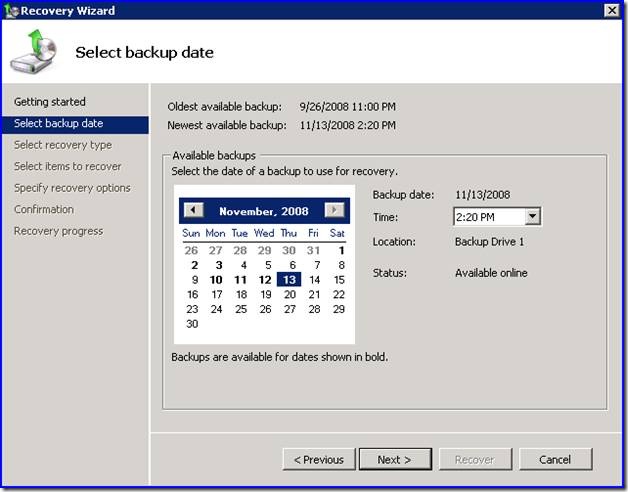
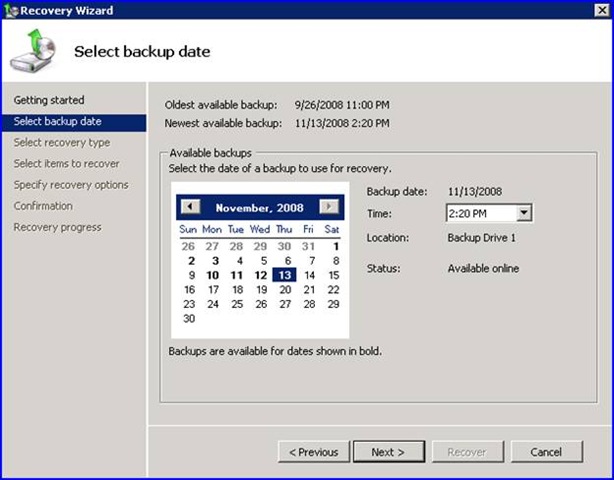
Pick the date of the backup job that contains the missing mail messages.
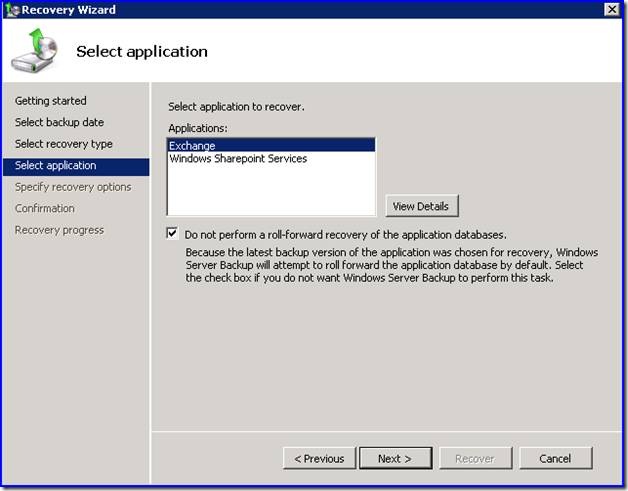
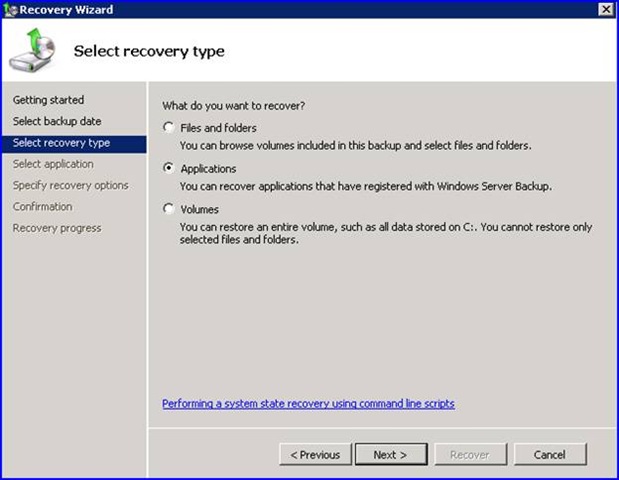
Choose to recover applications.

Choose to recover Exchange and if the checkbox for the option “Do not perform a roll-forward recovery of the application databases” is available to be checked, check it.
Choose to recover to another location and enter in the path.
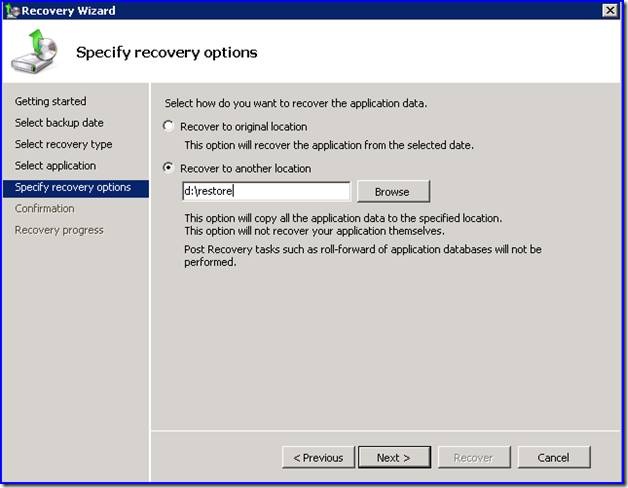
Choose to recover the databases. This will recover the databases and place in the specified path.

Create Recovery Storage Group
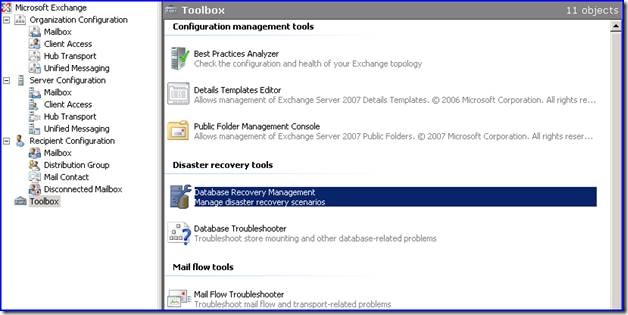
Once the databases are restored, you can run the Exchange Database Recovery Management to setup a recovery storage group with the databases that were just restored.
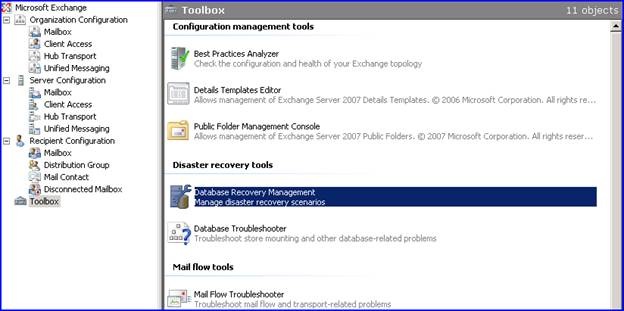
- Open the Exchange Management Console
- Select the Toolbox node
- Open the Database Recovery Manager
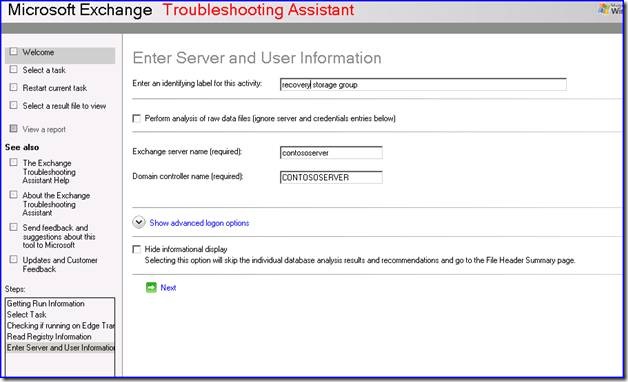
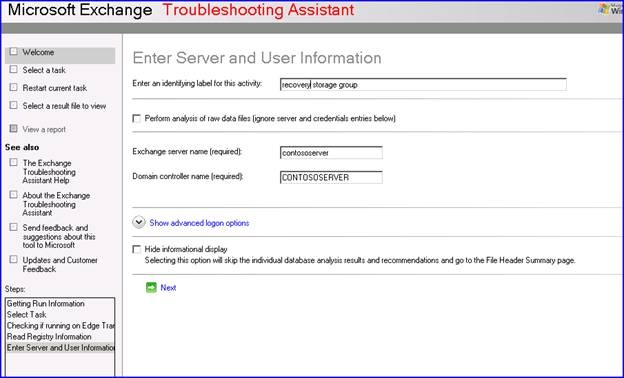
- Once on the welcome screen fill in the Exchange server name (the SBS 2008 server name) and click next.
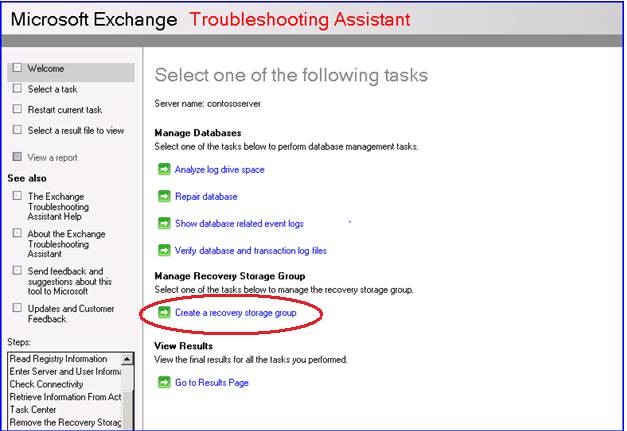
- Select create a recovery storage group
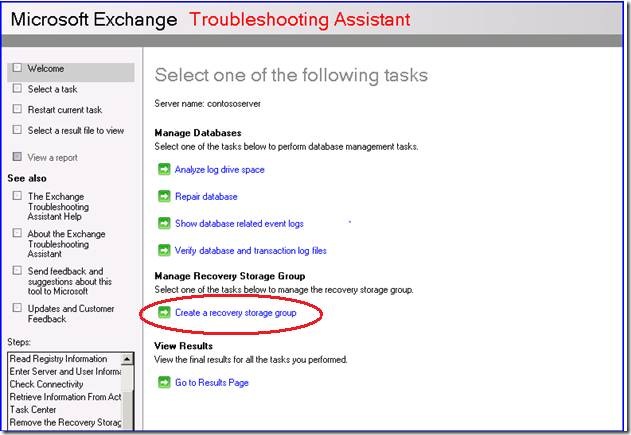
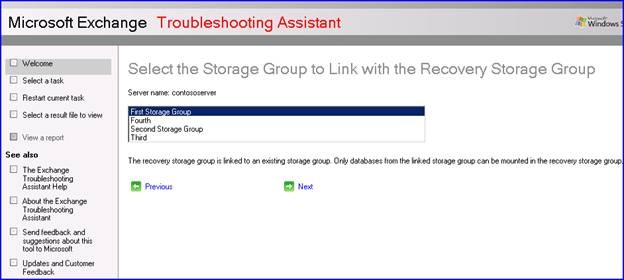
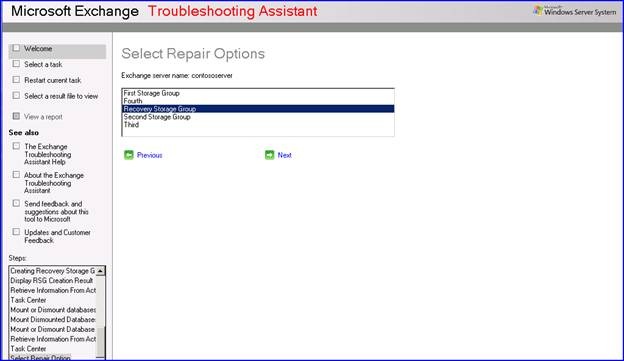
- Select the storage group you want to create it for.
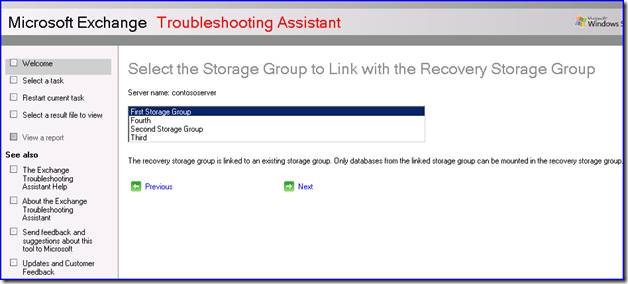
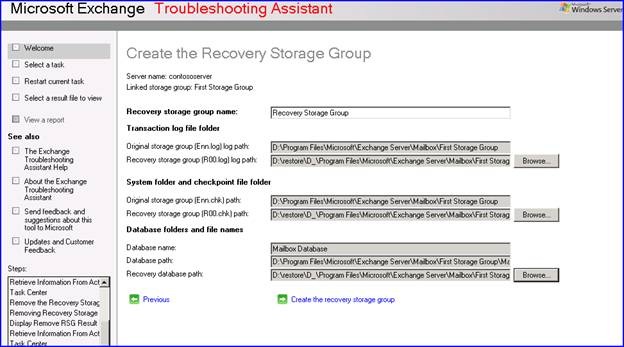
Note: First Storage Group contains your Mailbox store by default in SBS 2008 - Change the path of the Transaction Logs, the System Folders and the Database folders to point to the recently recovered database and then choose to create the recovery storage group.
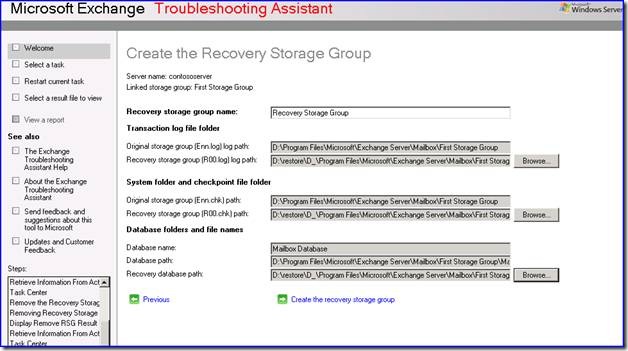
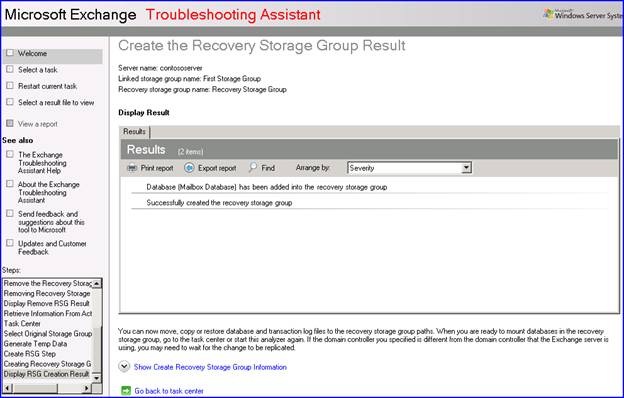
If everything goes correctly you should a screen similar to the following indicating that the recovery storage group was successfully created.
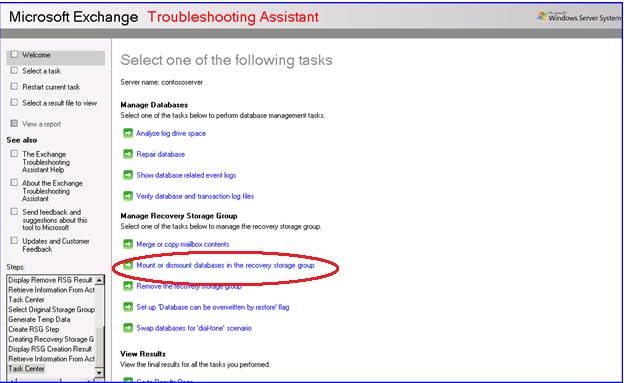
Mount Recovered Databases
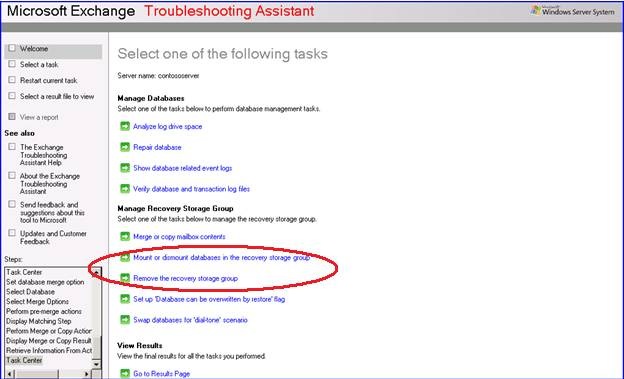
- Choose the option to Go Back to the Task Center
- Select the option to Mount or dismount databases in the recovery storage group
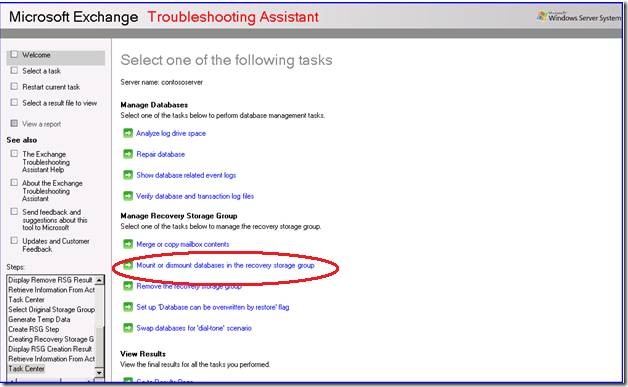
- Mount the mailbox store you just added.
How to Handle Corruption
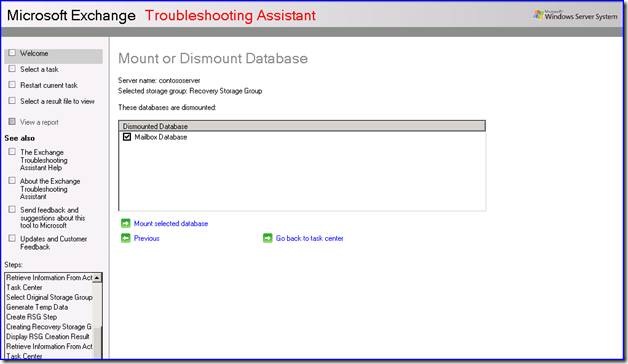
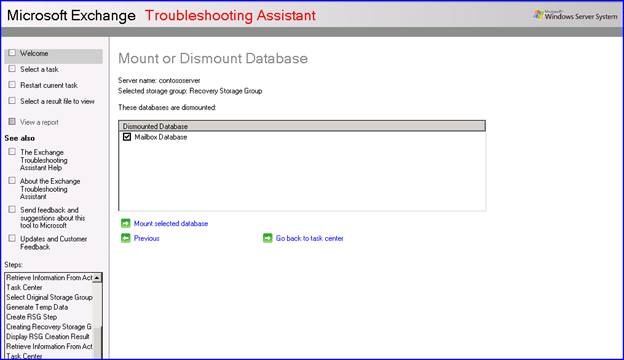
The database may fail to mount because it is in an inconsistent state. If it fails to mount you will see a screen similar to the following:
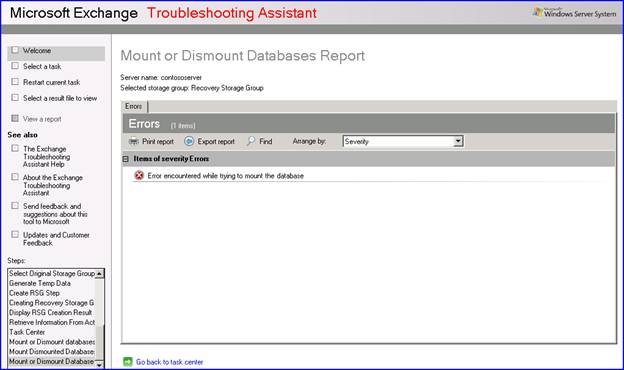
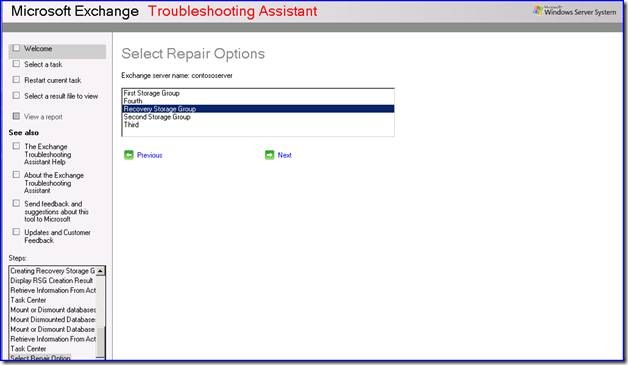
If you see this choose to Go Back to the Task Center and Choose the option in the task center to Repair Database.
- Choose the Recovery Storage Group
- Choose the mailbox database.
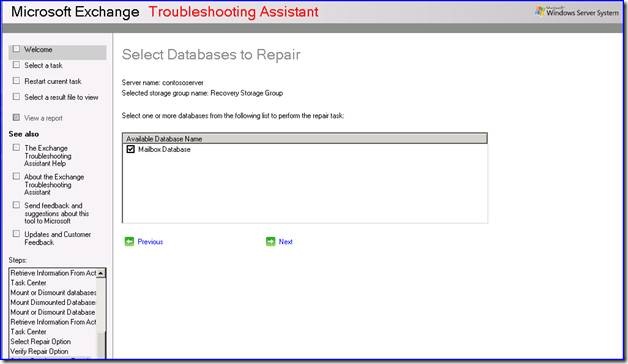
- Choose to Perform Repair Task. Exchange will run database repair procedure. If the repair is successful you will see a screen similar to the following.
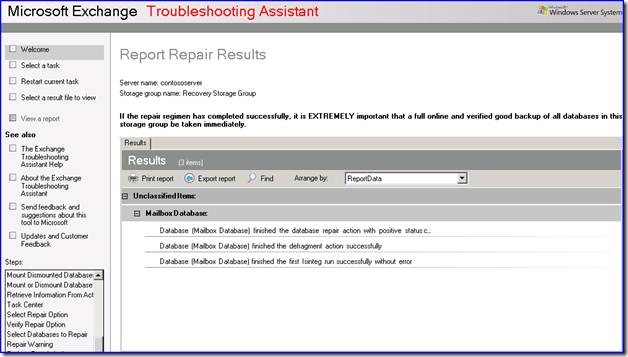
- Choose to Go Back to the Task Center and choose the option to Mount of dismount databases in the recovery storage group again and try to mount the mailbox database a second time.


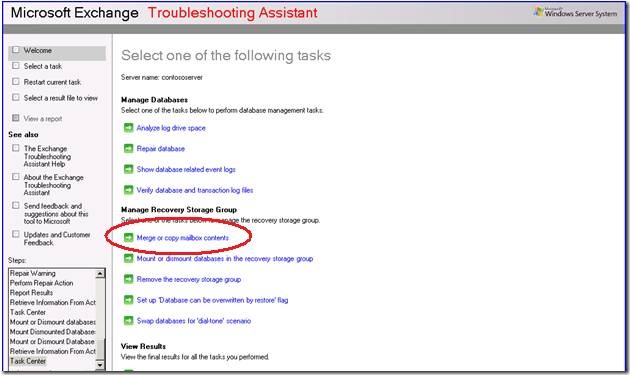
Merge Mailboxes
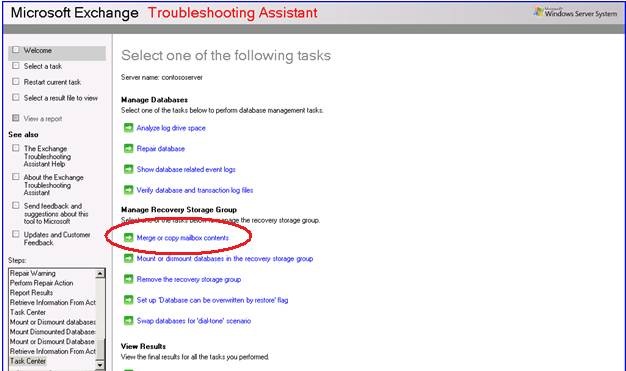
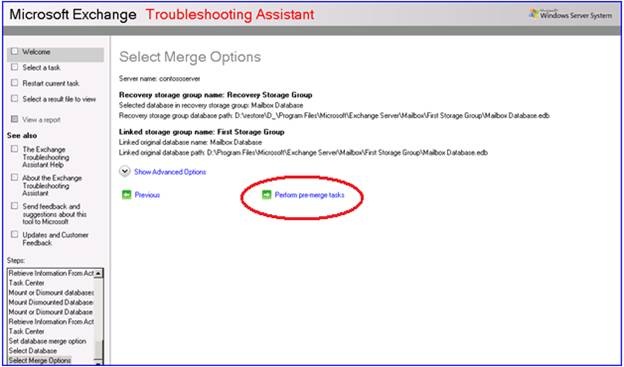
- Once the database mounts choose to Go Back to the Task Center and Once in the task center, select Merge or Copy mailbox contents to continue the merge process.
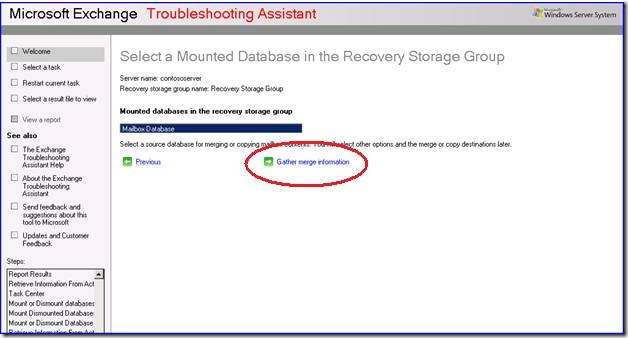
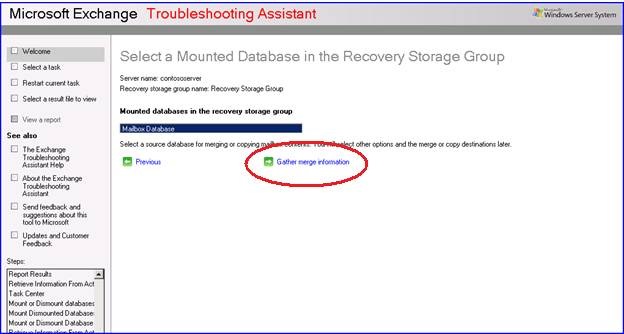
- Choose to Gather Merge Information
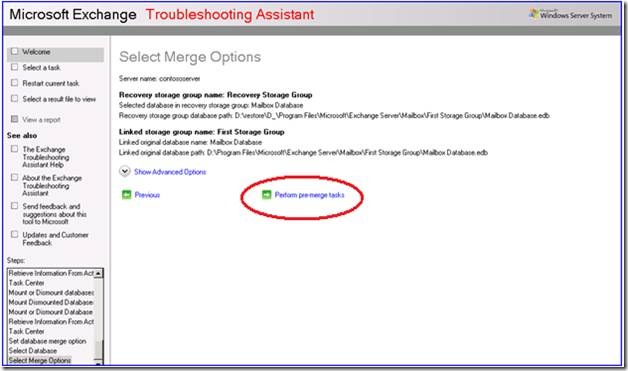
- Chose Perform Pre-Merge Tasks
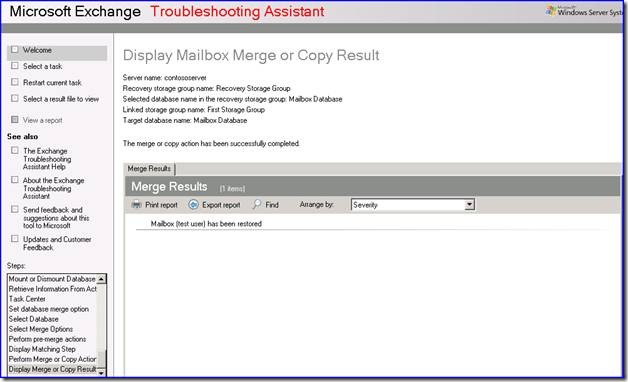
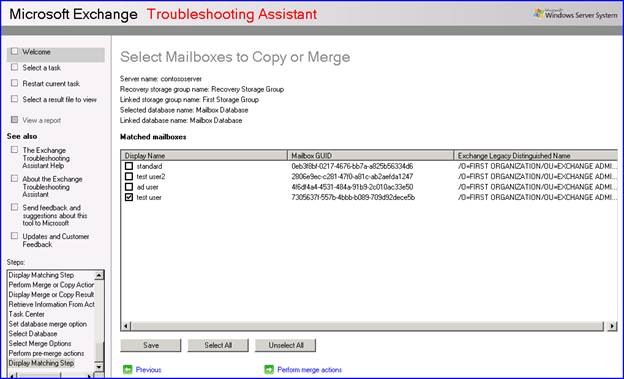
- Select the desired accounts to merge and choose perform merge actions.
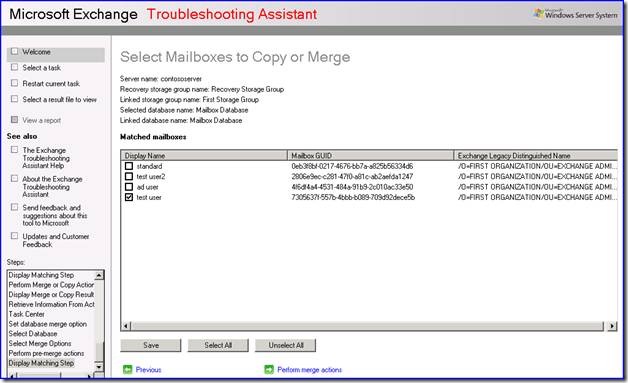
- The backup copy of the users mailbox will be merged into the current mailbox and the deleted mail should be restored.

This method will merge all of the contents of the restored mailbox and the current mailbox together. There are advanced options on the merge function that allow for selecting a date range or a specific subject. You can use these options to narrow down the amount of email to restore.
Note: Don’t forget to dismount the RSG mailbox and remove the RSG when finished.