WCF and SQL Server 2012
Welcome to a tutorial on how to connect SQL Server with your WCF service.
PRE REQUISITE :
1. Visual Studio 2013 (I am using the Ultimate version)
2. SQL Server 2012 Local DB (SQL Server Data Tools comes as a part of SQL 2012 and onwards, which is a VS Shell, which would do all that we need to do using VS.
Lets get started!
PART - I Connecting WCF to SQL Server
1. Open VS 2013 -> file -> new -> project -> Visual C# -> WCF. Name the project as TestService and click 'ok'.
.png)
2. Add the Database. Right click on the project name in solution explorer -> Add -> New Item ->Data -> SQL Server Database. Name the database as TestDatabase and click 'Add'.
.png)
.png)
.png)
Note : Click on 'Yes'.
3. Open the Server Explorer. To open Server Explorer, click on 'VIEW' on the top menu bar, find Server Explorer and click on it. It should be the third from the top in the list. Now, in the Server Explorer, right click on the Data Connection and click refresh. Click on TestDatabase . Right click on Tables -> click on Add New Table.
4. Change the name of the table at the bottom from Table to TestTable. Edit the columns and their DataType. In this table I am going to have two columns TestId and TestName of data type Int and varchar respectively. Then, click on "Update" at the top left. Refresh the TestDatabase and Tables, you will find your newly created table listed.
.png)
.png)
5. Now we have our table created. Lets explore how we can call this table in our service. See the two files IService1.cs and Service1.svc in the Solution Explorer? These are the two files we are going to be editing.
a) The "I" file, which is IService1.cs : this one contains all the interfaces for the methods that we are going to be using. Describe your ServiceContract, OperationContract and DataContract here.
b) The Service1.svc file : all the interfaces that you describe in IService1.cs file are implemented in this file.
The first thing we are going to do, define two OperationContracts (interfaces) and one DataContract (class for our TestTable).
.png)
6. Open Service1.svc.cs file. Add "using System.Data.SqlClient;". Next write the below code in "public string GetData(TestTable tb)".
.png)
The most important point here is to get the correct connection string. To get the connection string, right click on TestTable.mdf in Server Explorer -> click on Properties. From the properties pop-up, copy the connection string.
.png)
.png)
Another most important point is to edit the connection string in appropriate format. For this make two changes. One, change "\" with "\\", Second, change the " " " with " ' ".
The connection string that you will get will look like :
"Data Source=(LocalDB)\v11.0;AttachDbFilename="C:\Users\sakhare\documents\visual studio 2013\Projects\TestService\TestService\App_Data\TestDatabase.mdf";Integrated Security=True"
Make it look like :
"Data Source=(LocalDB)\\v11.0;AttachDbFilename='C:\\Users\\sakhare\\documents\\visual studio 2013\\Projects\\TestService\\TestService\\App_Data\\TestDatabase.mdf';Integrated Security=True"
7. Write the code for "public TestTable PutData()"
.png)
8. Press F5. This will run your service. Ideally browser should open up displaying all the files listed. From there click on Services1.svc and open it in new tab. This is the URL we are going to use for referencing this service in our client.
.png)
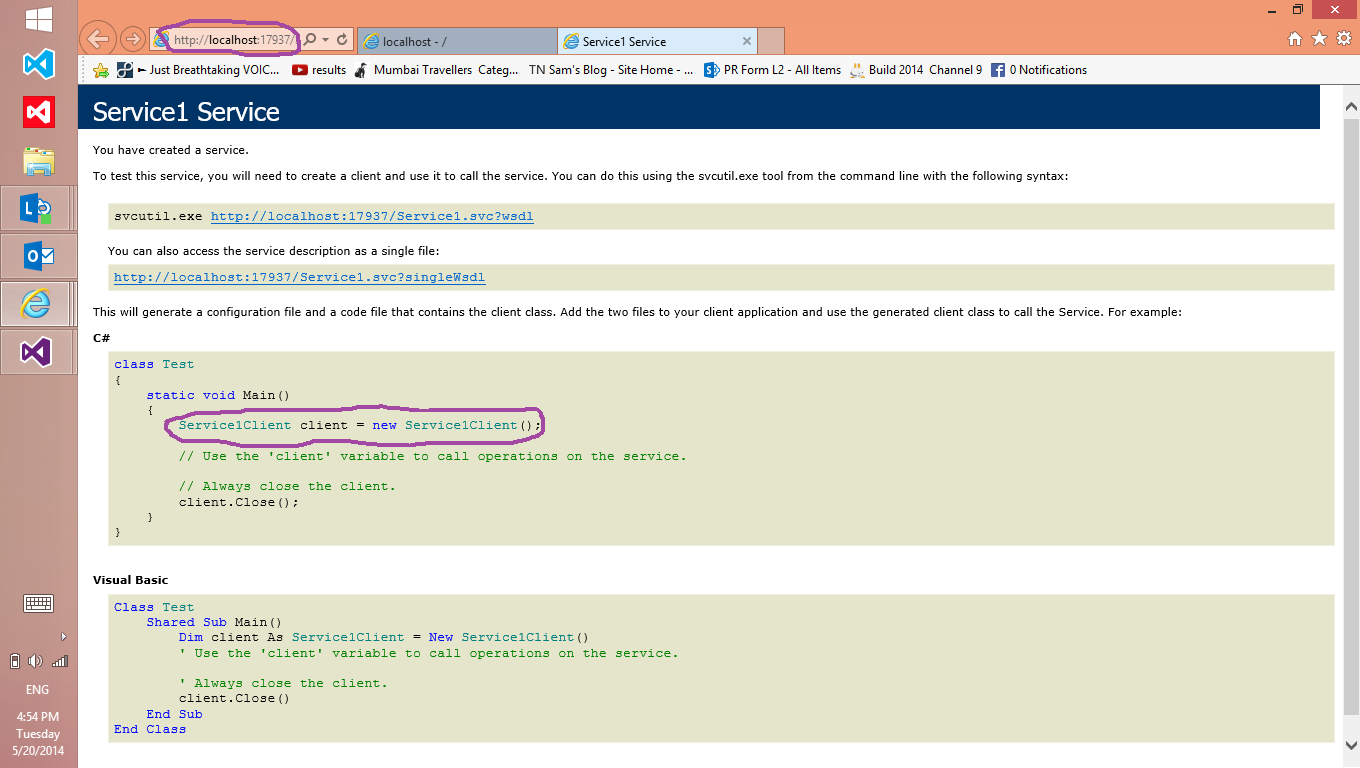
PART - II Referencing the Service in Client
1. Open Visual Studio 2013 -> New-> Websites
.png)
2. Open ASP .NET Web Forms Site. Name it as TestPortal and click 'ok'.
.png)
3. To make simpler for us, Right Click on TestPortal -> Add New Item -> Web Form. Name it as "Input.aspx" and click "Add".
.png)
.png)
4. One more thing, Right click on TestPortal in Solution Explorer, click on Start Options.. and change the Start page to Input.aspx.
.png)
5. Cool, now use the Toolbox (VIEWS->Toolbox) and design a dashboard. My Dashboard looks very minimalistic, you can make it fancy if you want to!
.png)
.png)
6. What we want to do is, on the On_Click event for "Submit" button, we want to call the GetData() method of our service and on the On_Click event of "Fetch from DB" button we want to call the PutData() method of our service and display the appropriate data in the text boxes. to use the methods from our service we will have to reference the service in this project. To do that, Right Click on TestPortal in Solution Explorer -> Add -> Service Reference. A pop will open up. Fill the URL of our service (refer step no. 8 in Part -I) and click 'Go'. Once that URL returns a service click 'Ok'.
.png)
.png)
7. Great! now put the using statement for your service "using ServiceReference1;". Make an object for your service and call the methods for each button's On_Click Events. Code as follows.
.png)
8. Press F5 and run the project. Fill the data and press the buttons.
.png)
.png)
If you like, you can check the Database for the entry of the data. REMEBER to refresh the Database Connection, TestDatabase.mdf, Tables, TestTable. Incase you are not able to see the updated values in the table keep refreshing your Database. Here we go!
.png)
I have attached the sample Code for your reference. Hope this helps! :)
Please don't forget to Rate/Comment below!