Steps to develop a RAS administration DLL using Visual Studio
Hello folks! We saw how useful a RAS administration DLL can be to admins who want to control what the RRAS server does. In this post, let us see how we can develop a RAS administration DLL using Visual Studio.
I have often seen requirements from admins to control the VPN server such that only one VPN connection can be made to a server using a single user name. This is basically to prevent users from distributing their usernames and hence resulting in lot of connections with the same username. So let us design and write a RAS administration DLL for this purpose.
Let us call it RestrictOneConnPerUser.dll.
Pre-requisites:
- Microsoft Visual Studio 2005
Start building the RAS administration DLL
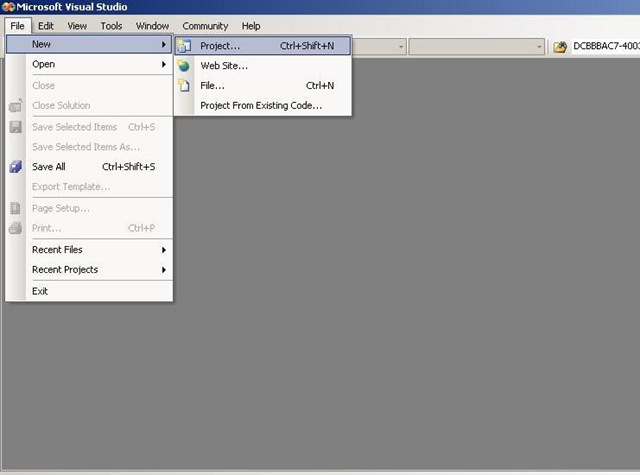
1) Create New Project: Open Microsoft Visual Studio and create a new project.
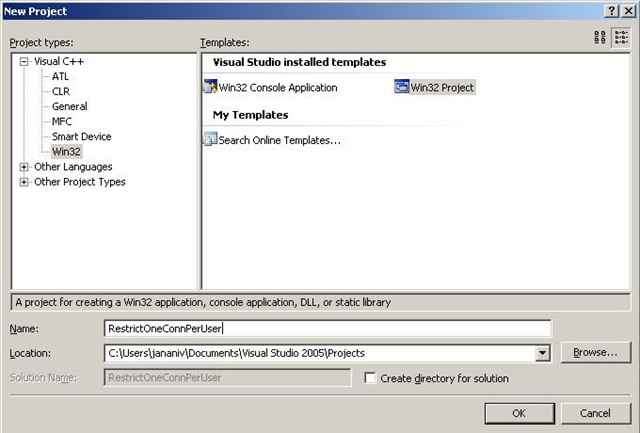
2) Select Project type: When you are asked to select the type of project, select Visual ++ --> Win32 --> Win32 Project. Type the name of the project as 'RestrictOneConnPerUser' and click on 'OK'.
Note down the location that is given in the 'Location' drop down. Your project would be created at this location. So the source files for your project will have to be copied to the C:\Users\User1\Documents\Visual Studio 2005\Projects\RestrictOneConnPerUser
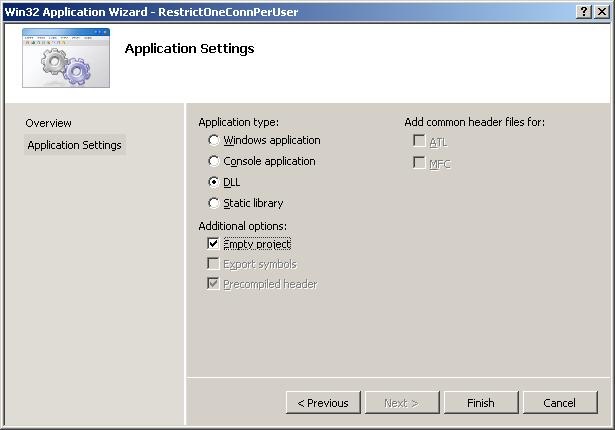
3) Choose Project Options: In the Win32 project type selection wizard that follows, select 'DLL' as the project type and choose 'Empty project'. Click on 'Finish'.

4) Write code: Now, we have created a DLL project. The next step to add the code. Let's do that now. Download the file which is provided as attachment to this post. The file has the code for three files - the header file, the C source and the exports definition file - for the DLL.
Click on Start --> Run --> Type 'notepad' --> Copy all the contents from the attached doc under 'UserRestrict.h' to the notepad and Save the file as 'UserRestrict.h'
Similarly, open new notepad files, paste the contents of 'UserRestrict.c' and 'UserRestrict.def' and save them with the names 'UserRestrict.c' and 'UserRestrict.def'.
Now, copy all these three files to the project location, which would be C:\Users\User1\Documents\Visual Studio 2005\Projects\RestrictOneConnPerUser for us now.
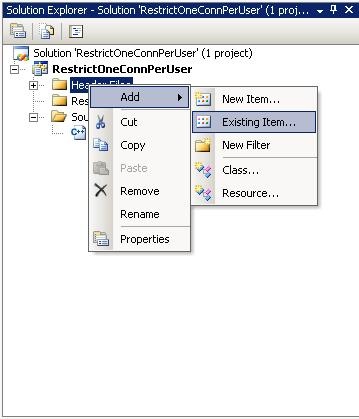
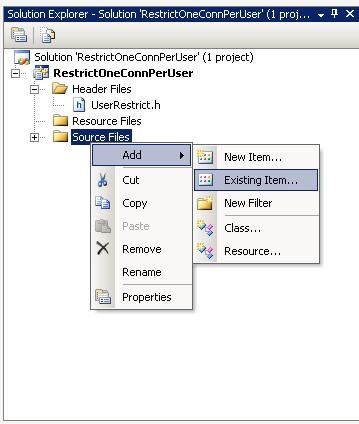
5) Include code files in project: Once the code has been written, it then has to be included in the Project. The below snapshot will show you how to do it.
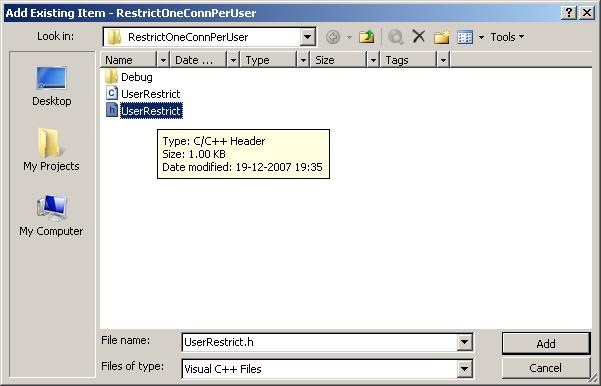
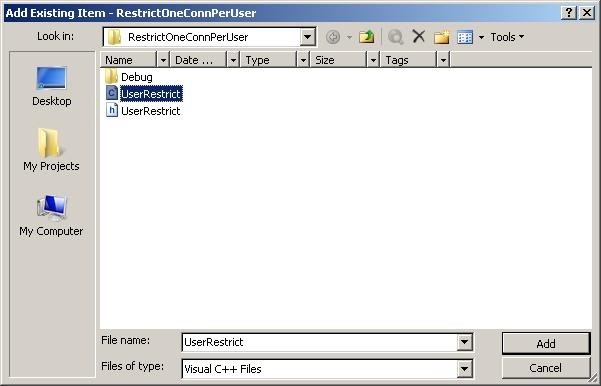
Right click on the project --> Add --> Existing Item --> Browse to the solution directory which is C:\Users\User1\Documents\Visual Studio 2005\Projects\RestrictOneConnPerUser. Select the file and add it to the project. Do this for the header and the C file.
6) Edit Project Properties: Now, we have created the project, added the code. The only thing left now is to build it and get our DLL! Ok, before that we would need to edit some project properties - to include additional libraries that this code needs, to specify that you want a C file like compilation (not C++) etc.
The steps that you would need to follow are outlined by the snapshots below:
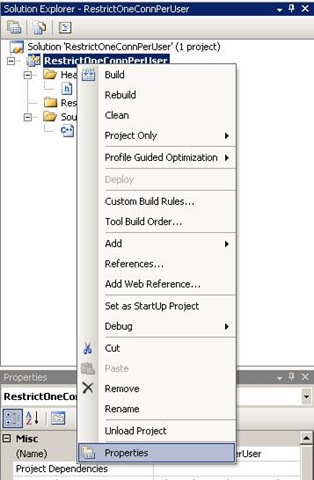
Open the project properties by right clicking on the Project --> Select Properties.
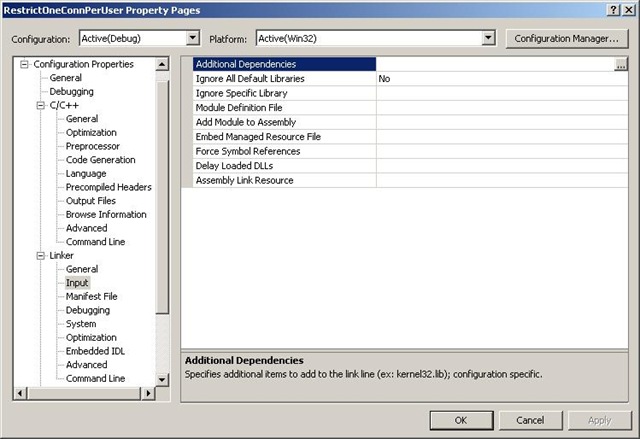
This will open up a window as below. Browse to 'Linker' --> 'Input' in the left hand side tree. You will the options like 'Additional dependencies' , 'Ignore all default libraries' etc. on the right hand side. This is how it will look for the project we created.
We would be adding 'Additional dependencies' and the 'Module Definition File' for our project.
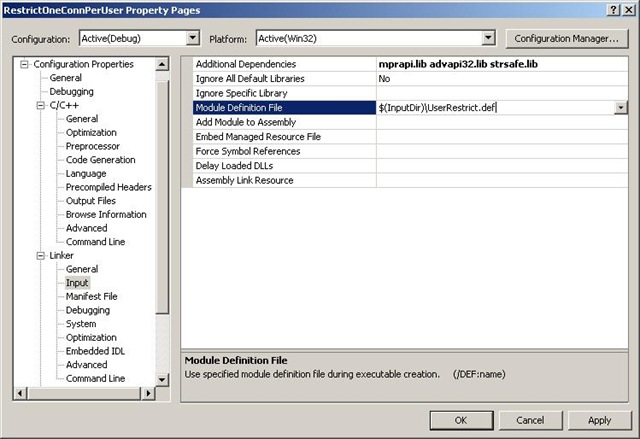
The below snapshot shows the additional dependency libraries that we need to add and the module definition file. The module definition file is nothing but the .DEF file that we created and copied to the solution folder in Step 4 above.
Once you have added the libraries and modified the module definition file, click on 'Apply' to save the settings.
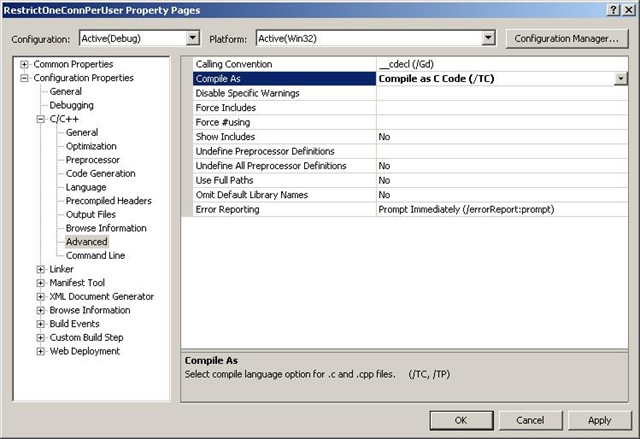
There's just one more property that we would like to change i.e. to instruct the compiler to compile this as a C code. This is done by browsing to the 'Configuration Properties' --> C/C++ --> Advanced on the left pane. Then, edit the option 'Compile As' on the right pane and select 'Compile as C code (/TC)' from the dropdown list. Click on 'Apply' to save the settings.
We are done with editing the project properties. So you can click 'OK' to go back to the project.
The below snapshots will help illustrate this.
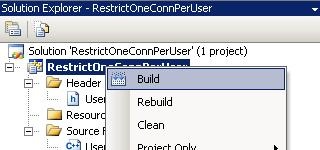
7) Build the code: We are all ready to build the code now. Right click on the Project --> click on 'Build Solution'. If everything goes well, you will see that the build succeeded and the DLL is present in the binaries location. For us, the binaries location would be C:\Users\User1\Documents\Visual Studio 2005\Projects\RestrictOneConnPerUser\Debug. You will find the DLL RestrictOneConnPerUser.dll here.
Here we are!! Our own admin DLL is ready. We just have to deploy this on the RRAS server as per the deployment guidelines in MSDN. You can refer to it here.
Folks - That's it for now. I'll come back with another post explaining what the code actually does to restrict only one connection per user. Feel free to post any comments/queries to rrasblog@online.microsoft.com**
**Remove the 'online.' from the mail ID above to actually mail us.
Janani Vasudevan
Software Design Engineer/Test
RRAS, Windows Enterprise Networking
[This posting is provided "AS IS" with no warranties, and confers no rights.]