Exchange 2010 Step by Step Install
Well last weekend I tried my hands installing the Beta version of Exchange 2010 in my lab. I am enclosing the steps that I did to install my lab with the screenshots.
Lab Setup – Windows 2008 x64bit Std edition VM running in a Hyper-V environment.
- For more information about the requirements for Exchange Server 2010, see Exchange 2010 System Requirements.
- For more information about the prerequisites for Exchange 2010, including those for the Edge Transport server role, see Exchange 2010 Prerequisites.
The pre-requisites that are required for the Exchange 2010 install are as follows -
- ServerManagerCmd -i RSAT-ADDS
- IIS pre-requisites
ServerManagerCmd -i Web-Server
ServerManagerCmd -i Web-ISAPI-Ext
ServerManagerCmd -i Web-Metabase
ServerManagerCmd -i Web-Lgcy-Mgmt-Console
ServerManagerCmd -i Web-Basic-Auth
ServerManagerCmd -i Web-Digest-Auth
ServerManagerCmd -i Web-Windows-Auth
ServerManagerCmd -i Web-Dyn-Compression
ServerManagerCmd -i NET-HTTP-Activation
ServerManagerCmd -I RPC-over-HTTP-proxy
As in my lab I am running UM role on the same Virtual machine so I had installed the Desktop Experience as well on this machine.
ServerManagerCmd -i Desktop-Experience
- Next, are the software pre-requisites, which include:
-
- Windows Remote Management (WinRM) 2.0 CTP 3
- Windows PowerShell 2.0 CTP 3
- Install the extensions for ASP.NET AJAX 1.0.
- Install the 2007 Office System Converter: Microsoft Filter Pack
- Update from KB 951725
- Update from KB 950888
- Update from KB 951116
- Update from KB 952664
- Update from KB 953290
- Update from KB 958178
Once the above pre-requisites have been installed, check Microsoft Update for any additional updates that might be needed. Make sure the system has been rebooted after installing any updates which require a reboot.
Launch Setup.exe from the AMD64 folder – (I had kept the software dump on a file share)
The first screen will check for the pre-requisites and if the pre-requisites are not met, it will highlight the Step 1 to 3. In my case, since all pre-requisites were met the Step1 to 3 are grayed out for me.
Introduction Screen will be launched once the file copy process is complete.
I had selected the default selection “Continue setup without language files” for now and will revert to it later.
Confirmation of the selection that I had done in the last screen -
Clicked Next to confirm the EULA ( License Agreement page):
Report to Microsoft for errors – I had selected the default (recommended) option as it will definitely help MS to make improvements based on error reporting.
I had selected the Custom Install as I was looking at installing all the roles on this VM for my lab -
As in Exchange 2010 we have a new concept on High Availability and clustering, there is no Installation option for any clustered mailbox server roles “Active or Passive”.
New High Availability Functionality
Exchange 2010 integrates high availability into the core architecture of Microsoft Exchange to enable customers of all sizes and in all segments to economically deploy a messaging continuity service in their organization.
Exchange 2010 combines the key availability and resilience features of cluster continuous replication (CCR) and standby continuous replication (SCR) into a single high availability solution that handles both on-site data replication and off-site data replication. Mailbox servers can be defined as part of a Database Availability Group to provide automatic recovery at the individual mailbox database level instead of at the server level. Each mailbox database can have up to 16 copies.
The following features in Exchange 2007 and Exchange 2007 Service Pack 1 (SP1) no longer exist in Exchange 2010:
Local continuous replication (LCR)
Single copy clusters (SCC)
In addition to these features, the concept of a clustered mailbox server no longer exists in Exchange 2010. For more information about Exchange 2010 high availability features, see New High Availability Functionality.
Do refer this article on “What's New in Exchange Server 2010” to get an insight on what has been introduced in Exchange 2010
I had selected my Organization name as “E14lab” and then clicked Next
If the Exchange organization uses Outlook 2003 or earlier, or Microsoft Entourage, then a public folder database is needed so that those clients can access system data, such as Free/Busy information. In that case, you would select Yes on this page. Since my organization does not use Outlook 2003 or earlier, or Entourage, I can leave the default setting of No and click Next.
The Customer Experience Improvement Program (CEIP) page appears – I had selected the default option here.
As you can see the readiness checks went well and all the signals are GREEN, I went ahead and clicked on Install.
I had rebooted the system after the setup was complete. (Unselected the check box).
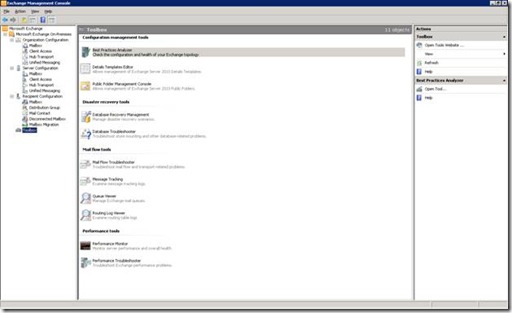
First look at the Exchange 2010 Management console -


