Simple look at OMS Alert Remediation with Runbooks: Part 1
Alerting in OMS was recently updated with the GA release. One of the great features this offers is the ability to automatically trigger an Azure Automation Runbook.
There are already some great blogs out there, but in this series I wanted to take a simple look how this works, now it's generally available.
This is part 1.
Triggering a simple Runbook
In this first blog we'll look at how to create a basic Runbook which is triggered by an OMS Alert.
The Runbook will simply write out the details of the alert.
Step 1: Create a Runbook
To start, let's create the Runbook which we want to be trigged by an alert.
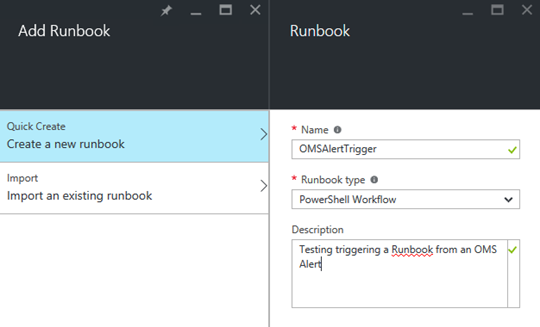
Go to your Automation account & create a new Runbook. Here, I've created a PowerShell Workflow Runbook called OMSAlertTrigger:
This Runbook will take the alert information as the input. To do that, we need to create an input parameter called $WebhookData.
OMS will automatically handle passing the alert detail into the $WebhookData parameter.
This $WebhookData is documented at https://azure.microsoft.com/en-us/documentation/articles/automation-webhooks/ if you want to know more.
Essentially, it has 3 bits of information in its payload:
- WebhookName
- RequestHeader
- RequestBody
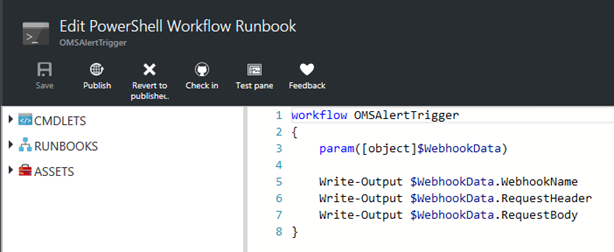
So we can understand what these 3 things are, this first Runbook is just going to write each of them as output.
In my Runbook, I entered the following PowerShell to write out the WebhookData info. Next, I clicked Save and then Publish.
NOTE: I have not manually created a Webhook on this Runbook. OMS will do this for me automatically.
Step 2: Create an on demand Alert
OK, now it's time to trigger the Runbook from an alert!
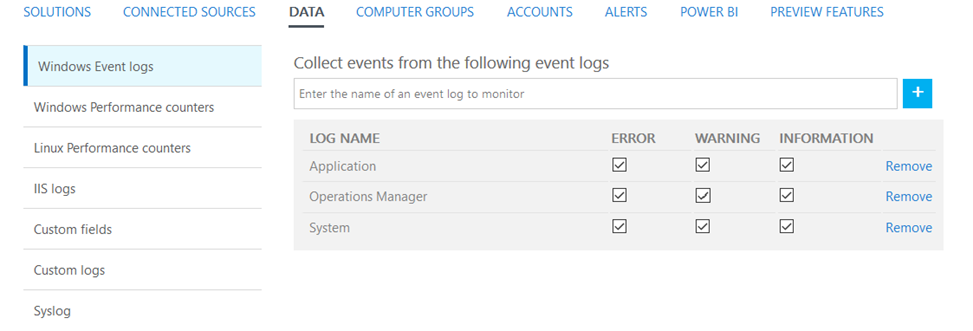
I've already configured OMS to collect the Application event logs from my Windows agents. Therefore, I know I can create an alert, based on anything in this event log.
In case you're not collecting Event Log data, it's configured from Settings > Data:
For this example, I want to be able to manually create an event, so I can test my Runbook on demand.
To do this, I'm using the Write-EventLog cmdlet in PowerShell.
Simply, go to any machine which is reporting to your OMS workspace, and run the following PowerShell:
Write-EventLog -LogName Application -Source MsiInstaller -EventId 123 -Message "hello"

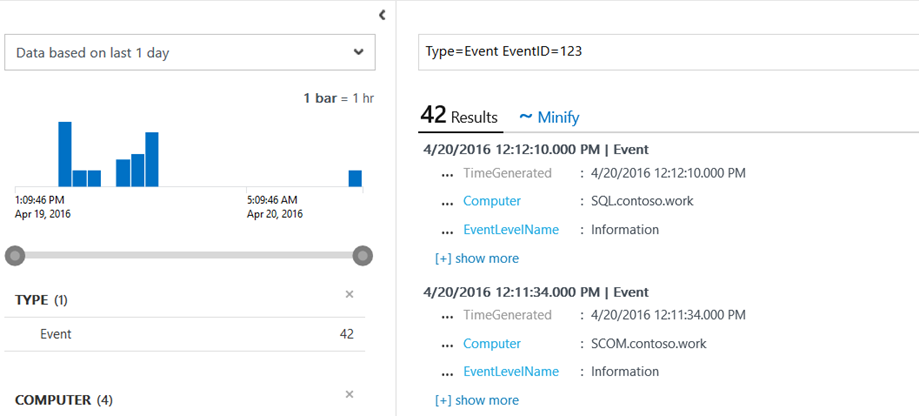
Shortly after, I can see this in the OMS Log Search, by running the following query:
Type=Event EventID=123
And I can see the entries where I've created this event manually:
I want to setup an alert for this Event 123. So I click the Alert button:

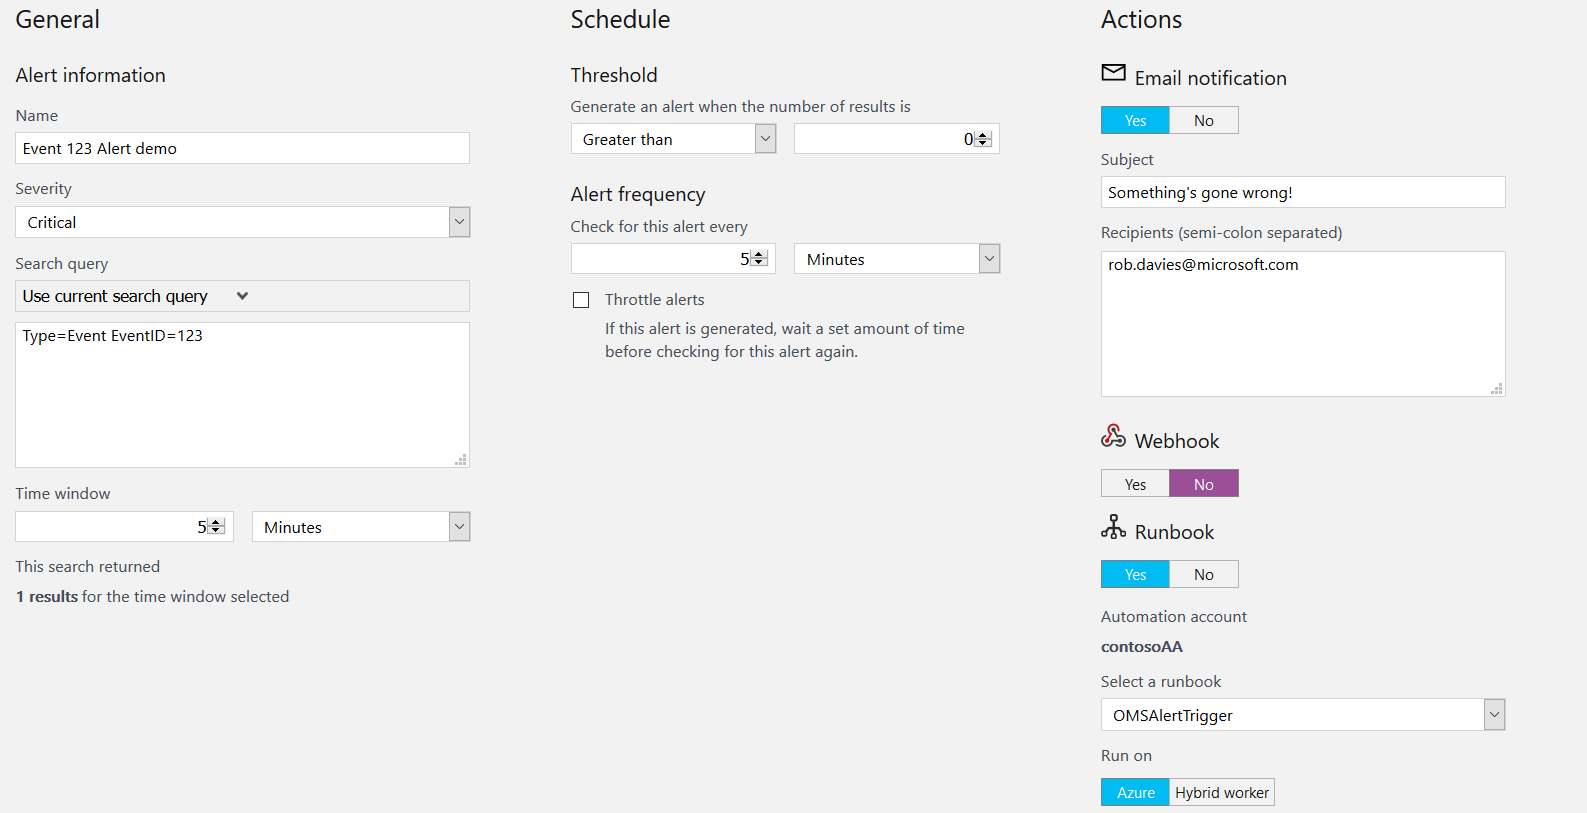
Here's how I've configured my alert:
- You can see I'm checking every 5 minutes
- The Threshold is > 0, so this will fire if there are any 123 events
- I've configured this to send me an email
- Finally, you can see I've picked out to run my OMSAlertTrigger runbook
Click Save to activate this alert
Step 3: Trigger the Alert
OK! Now we're ready to see this in action.
I'll go to one of my OMS Agents and run the following PS to raise event 123 in the event log:
Write-EventLog -LogName Application -Source MsiInstaller -EventId 123 -Message "hello"
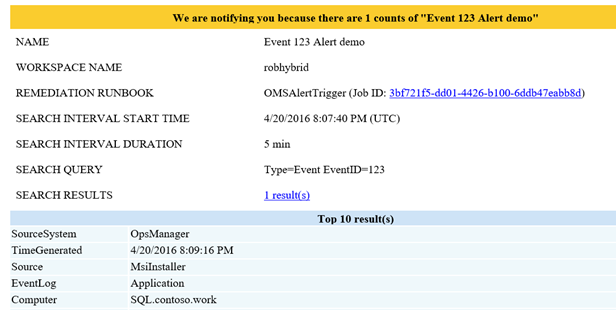
Shortly after, I got the email from my alert!
OK so hopefully this will have trigged our Runbook! To see this:
- Go to your Automation Account in the portal
- Click on the Jobs tile:
You should be able to see the OMSAlertTrigger has run:

- Click this job to see the details
In the details of this Job, we can see it completed successfully.
Click Output to see what our Runbook Wrote out:
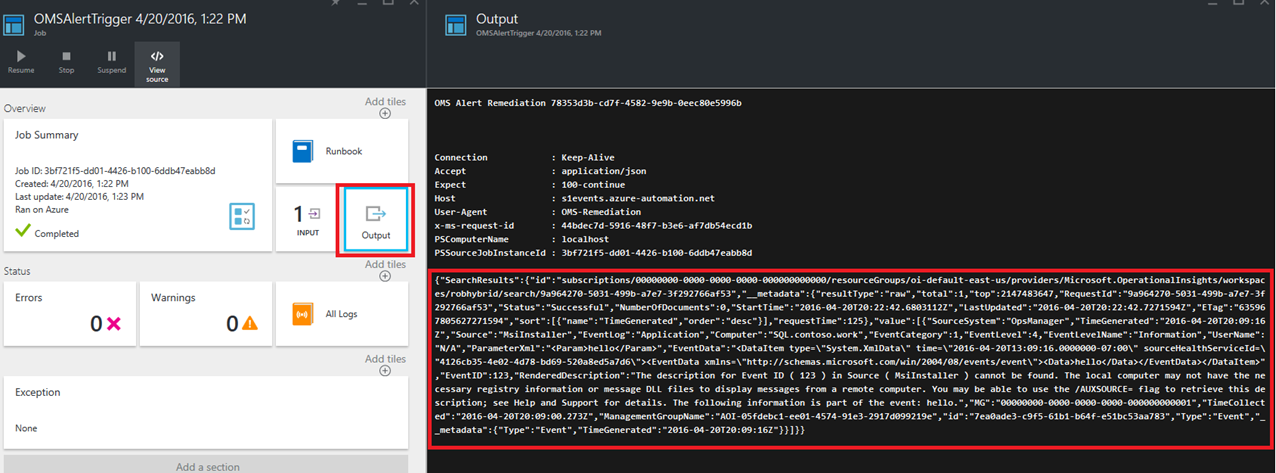
Remember, the Runbook wrote out the following:
Write-Output $WebhookData.WebhookName
Write-Output $WebhookData.RequestHeader
Write-Output $WebhookData.RequestBody
That's what we can see in the screenshot above.
- WebhookName: Not that useful for us
- RequestHeader: Can see some information in there from the header. Again, not that useful
- RequestBody (in the red square): This is useful! This is all of the detail from the alert!
So you may be thinking that all that info looks a little cryptic! Don't worry, that's what we'll look at in Part 2…