Lync 2013 Delegates Pt.2 (Lync Enterprise Voice enabled delegation)
In the first part of this article we discussed delegation within Lync and Outlook\Exchange when the user was not enabled for Enterprise Voice (EV). Now we will explore what that process looks like if the Delegator (Manager) is EV enabled. I will also create a part 3 as per request to look at what happens if the delegator in not enabled for EV and then gets EV enabled. Let's jump into part 2.
I am going to assume we already enabled both the Delegator (Manager) and Delegate (Assistant) for EV.
Delegator (Manager) = User25
Delegate (Assistant) = User24
Let's first open up the Lync client for User23 and go to Options\Tools\Call Forwarding Settings. Down at the bottom of this screen you will see "Edit my delegate members" (Figure 1). Before clicking on this let me explain what setting causes this link to be displayed. Within User23's voice policy there is a parameter called "EnableDelegation" (Figure 2) and if this is set to false users will not see this link. As you can see it is set to true for User23's voice policy so that option is exposed in the Lync Client GUI.
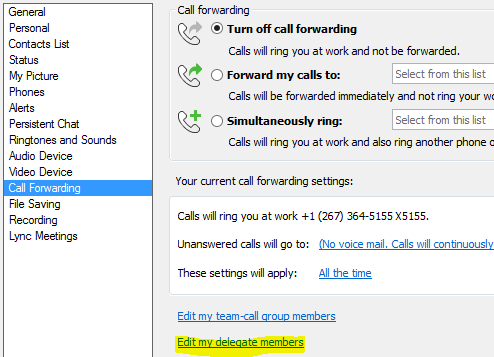
Figure 1
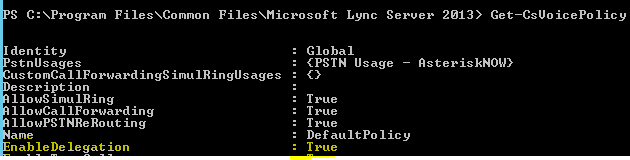
Figure 2
Now let's click on the "Edit my delegate members" and then choose "Add" to select our delegate (Figure 3). You will notice when selecting delegates that if a user is not EV enabled the "Ok" button will never light up for you to click. After you select the delegate and choose "Ok" you will be back in the Call Forwarding window where you can check or uncheck delegates and also see the amount of seconds before this delegate will ring after you are called. Click "Ok" to accept this delegate. Now you will see a notification pop up (Figure 4) that you must enabled Simultaneous Ring or Forward Calls to. Select "Ok" and click the radio button for Simultaneously Ring and choose "My Delegates" (Figure 5) and finally select "Ok".
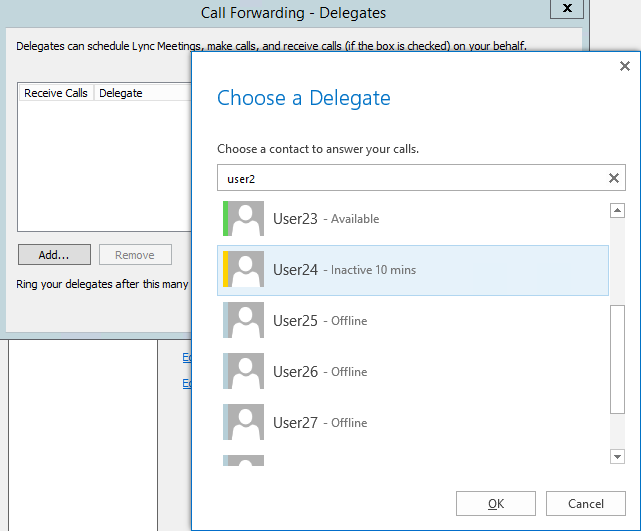
Figure 3
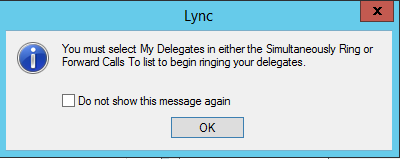
Figure 4
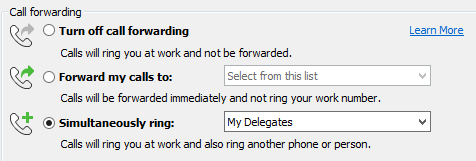
Figure 5
The next question you might have would be so how does a delegator (User25 - EV enabled) delegate to a user who is non EV enabled (Figure 6 in which User29 is not EV enabled). You would use the same method from part 1 of this article by using Outlook delegates. Remember when users are EV enabled they are delegating calls and meeting creation (we will discuss this shortly) but if the users are not EV enabled it's just meeting creation.
Let's take a quick look at what happens when User1 calls User25 (Figure 6).
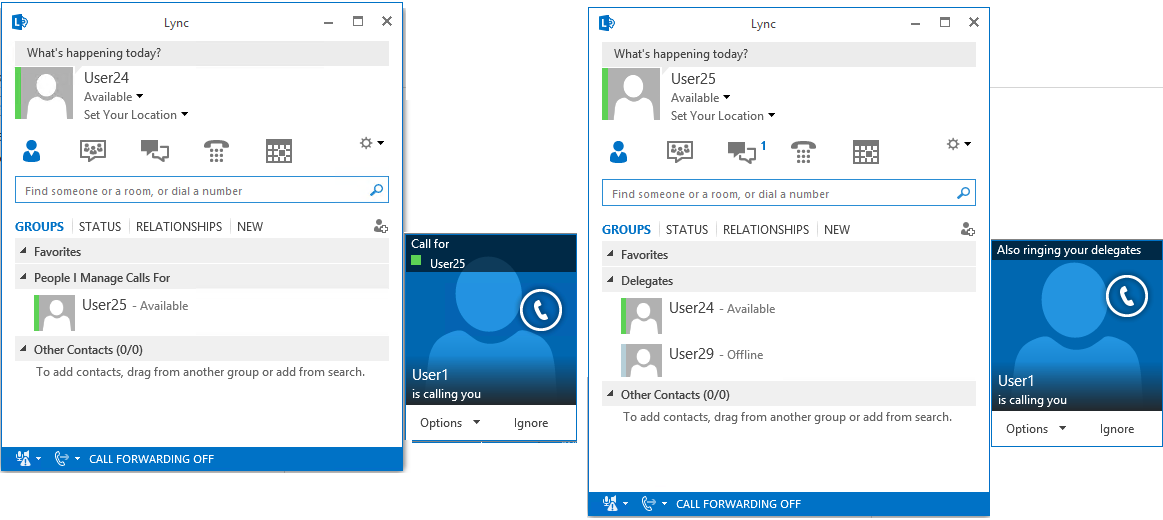
Figure 6
Now what about meeting creation? Right now do you think we can schedule a Lync meeting using User24's Outlook for User25 since we already did delegation? The answer is "No". We still need to add User24 as a delegate within User25's Outlook similar to part 1. This also requires similar to part 1 that User25 have a client policy with EnableExchangeDelegateSync set to true (Set-CsClientPolicy <policy_name> –EnableExchangeDelegateSync $True). If this is not set when the delegate (User24) opens the delegator's (User25) calendar and clicks "New Lync Meeting" nothing will happen. No error or action it will just seem like you didn’t click on the icon.
Our next step is going to be to set the delegator's (User25) client policy within Lync to EnableExchangeDelegateSync set to true. Next we will add the delegate (User24) to the delegator's (User25) Outlook delegates. Please follow part one that has instructions how to perform these tasks. In figure 7 you will see what this looks like in the delegator's (User25) Outlook. Now the delegate (User24) can schedule a Lync meeting for their delegator (User25) as you can see in figure 8.
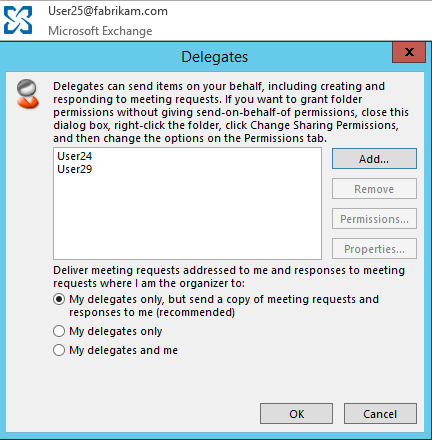
Figure 7

Figure 8: User 24 booking Lync meeting for User 25
Everything from a delegation standpoint is working great at this point. Now let's assume the delegator (User25) wants to remove delegation to User24. Before removing the delegate from Outlook I want to remove it from Lync to show the behavior. In the Lync 2013 client the delegator (User25) right clicks delegate (User24) and chooses "Remove from Group" (Figure 9). This step was similar to what we had to do in part 1 of this article. Unfortunately we don’t get the same result because now the delegator (User25) is EV enabled. When we select "Remove from Group" a message pops up saying that "Delegates can only be removed in the Call Forwarding Settings". If we select "Yes" this will take us to the Call Forwarding section in Lync options. From here we need to remove the delegate (User24) just we added them. We click on the delegate (User24) and select "Remove" then click "Ok" twice. Just a warning that if this is the last delegate or no other delegates are selected you will get a warning say you need to turn off simultaneous ring. You can do this by checking the radio button for "Turn off call forwarding".
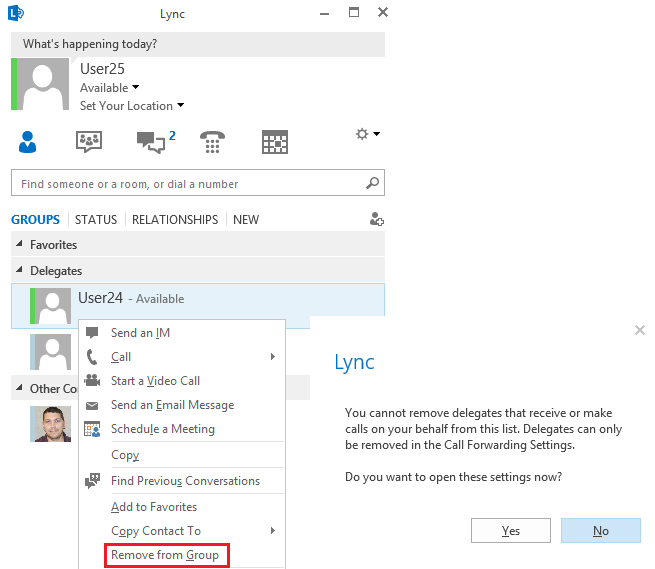
Figure 9
Immediately after the delegator (User25) removes the delegate (User24) from Lync those respective users are removed from the Lync client (Figure 10). At this time these entries are also removed from the SQL database dbo.delegate table.
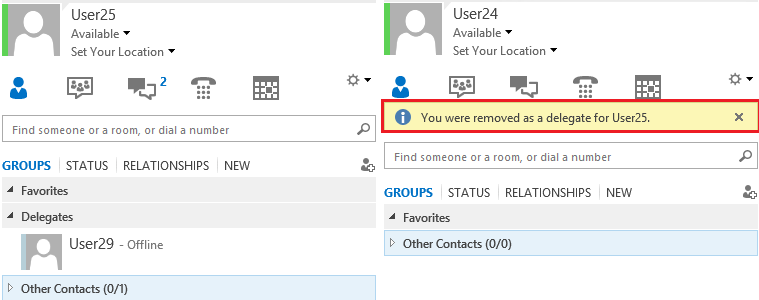
Figure 10
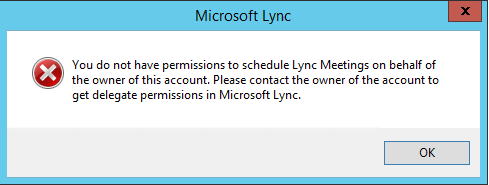
Remember that the delegator (User25) didn’t remove the delegate from delegate (User24) from Outlook. What happens if the delegate (User24) now tries to create a Lync meeting for the delegator (User25)? It will fail with the message below (Figure 11). Why? Remember that in part 1 when the delegator (User25) added the delegate (User24) to Outlook it created the entry in the SQL dbo.delegate table. But now when the delegator (User25) is EV enabled removing the delegate (User24) from "Call Forwarding Settings" also deletes that SQL entry. The delegate (User24) would still be able to schedule regular meetings for the delegator (User25) just not Lync meetings. If the delegator (User25) also wanted to remove that functionality they would need to remove the delegate (User24) from Outlook.
Hope this helps explain this topic further. Stay tuned for part 3.