How to add a custom domain name in SharePoint Online with a federated domain environment
If you already use a federated domain environment with Office 365, you cannot add a custom domain name at the domain menu in SharePoint Online directly. In this case, you can use the new-MSolFedratedDomain cmdlet in the Microsoft Online Services Module for Windows PowerShell.
(Post courtesy Soon Im Kim)
As a SharePoint Online Administrator you can create a public Website. When you setup the site, you can use a custom domain name that your company owns. In this case, if your environment is federated, you should use a new-MSolFedratedDomain cmdlet in "Microsoft Online Services Module for Windows PowerShell"
This article describes how to create a public-facing Website by using a custom domain name and you can see below 3 blocks:
- Add a custom domain name
- Create a Public Web Site by using a custom domain name
- Create a CNAME record
Add a custom domain name
To add a custom domain name, use these steps.
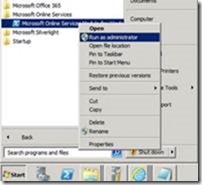
1. Navigate to Microsoft Online Services Module for Windows PowerShell by going to Start-> All Programs -> Microsoft Online Services. Right click on Microsoft Online Services Module for Windows PowerShell and click Run as administrator.
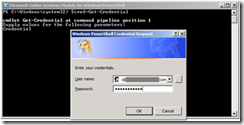
2. Once PowerShell is open, run $cred=Get-Credential. When the cmdlet prompts you for credentials, type your Office 365 admin username and password.
3. Run Connect-MsolService -Credential $cred. This cmdlet connects PowerShell session to your Office 365 account.
4. Confirm domain names in the Office 365 tenant domain using Get-MSolDomain.
5. Add a custom domain name you want to use as a public Web site address using new-MSolFederatedDomain cmdlet. Then, you can confirm your custom domain name is added using Get-MSolDomain again.
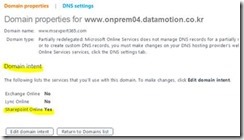
6. Now you can find your custom domain (in this example, www.onprem04.datamotion.co.kr ) at the Office 365 Domains and using Domain Intent menu, you can make this domain as a SharePoint Online Services as below.
Create a Public Web Site by using a custom domain name
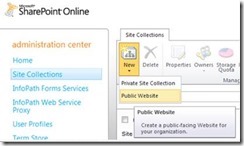
1. Go to SharePoint Online Administration Center and Click ‘Site Collections’.
2. Click ‘New’ button and Click ‘Public Website’.
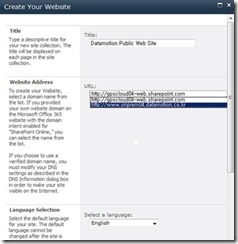
3. Create your Public Website. At the URL, choose the custom domain name you want to use as a SharePoint Public Website address.
Create a CNAME record
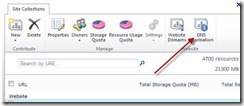
Now click DNS Information and find what is suggested to add as CNAME then go to your domain manager and add a CNAME record in the DNS as per the information provided.
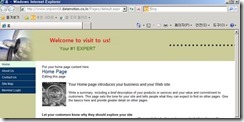
After updating DNS you can browse your site from internet using your domain name. Now we can find the Public Website as below.
Additional Information
To learn more, check out the following articles:
· Article 1, https://office.microsoft.com/en-us/sharepoint-online-enterprise-help/set-up-a-public-website-HA102476205.aspx
· Article 2, https://onlinehelp.microsoft.com/en-us/office365-enterprises/ff637595.aspx
