Creating Task Sequence for Client OS migration (From Windows XP to Windows 7)
System Center Configuration Manager 2007 allows you to customize your automated deployment tasks by using Task Sequences. Task Sequences provide the mechanism for performing multiple steps or tasks on a client computer at the command-line level without requiring user intervention. The power of task sequences lies in their flexibility and administrators can use these to configure client settings, distribute software, update drivers, edit user states, and of course automate operating system deployments.
Welcome to the third post about Operating System Deployment using System Center Configuration Manager 2007.
(post courtesy Simone Pace)
After we generated our Windows 7 WIM image (see my post Capture a Windows 7 image form reference computer using Capture Media ), we prepared a package to allow USMT (User State Migration Tool) to collect user’s data and settings in the post User State Migration Package creation for Operating System Deployment) .
Now we have all the pieces we need to create our Task Sequence that will be executed by the clients we are going to “upgrade” to Windows 7.
Testing lab description screenshots and computer names used in this article refers to a Virtual scenario running on a Hyper-V R2 host:
- All Servers are Windows 2008 R2 Enterprise servers.
- Domain: contoso.com
- SCCM Primary Site: C01
1. Start the Task Sequence Wizard
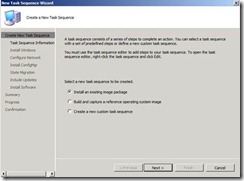
- On the New Task Sequence Wizard, select Install an existing image package and click Next. This will start the TS creation wizard from a template which already includes some steps we need.
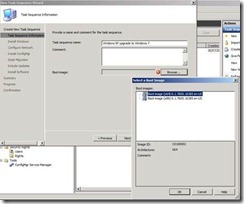
Give the task sequence a name and click Browse to select the boot image that will be used with it. Chose the one that fit your target computer’s CPU architecture and click OK.
Like any other setting in the Task Sequence, you can always change this later.
Note Whatever you write in the comment field will be seen by users when they seek for details in the upgrade notification. This is useful to inform users about what is going to happen to their computers, for example you could write something like: “This program will install Windows 7 on your computer keeping your document and settings”. You can add or change the comment any time after you created the TS.
Click Next.
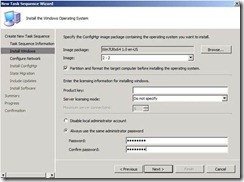
- On the Install Windows section, browse and select the WIM image you want to deploy and, if it contains more than one, select the partition image that has OS system bits (see the note below). Set whether to disable or set a password for the Local Administrator account, please note that if you disable the local Administrator and don’t join the computer in a domain (we’ll see how to do in the next step), you will end up in having a computer you cannot log in to.
Note depending on how you captured the WIM image you can have more than one image in it. As I used the SCCM 2007 OSD Capture CD on a PC where Windows 7 was manually installed, it captured not only the partition where Windows was installed (2-2), but also the “bitlocker enablement” 100MB boot partition (1-1), and stored both partitions as images in the WIM file.
To install Windows 7 files, we only need the partition 2-2 from this package.
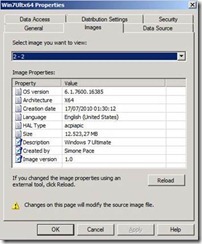
Tip By opening the Image Package properties, you can browse the images it contains to see which one has the Operating System bits in it.
The OS partition is the image that has information next to the fields "OS version", "Architecture" and the appropriate size :).
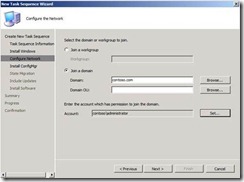
- On the Configure Network section, choose whether you want the computer to join a workgroup or a domain and provide the proper account credentials with permission to join computers to the domain. Click Next.
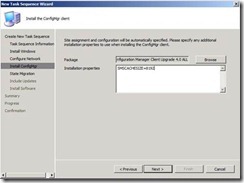
- On the Install ConfigMgr section, browse and select the SCCM client package and set the required parameters as needed (see About Configuration Manager Client Installation Properties https://technet.microsoft.com/en-us/library/bb680980.aspx). In the example I raised the client cache size to 8Gb, up from the 4Gb default size. Click Next.
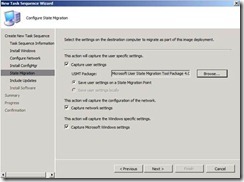
- It’s time to use our USMT Package! On the State Migration section, as we do want to transfer to the new computer the user’s settings, we check the flag “Capture user settings” and we provide the USMT package we have previously created. Check the flags on Network and Windows settings according to your needs and click Next.
Note We are saving user settings on a State Migration point which is a Site System role installed and configured with a network Share.
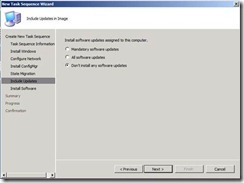
- On the Include Updates section, select the updates you may want to include. I don’t have any in my lab :). Click Next.
- On the Install Software, add the packages you want to install on the computer. I added the SCCM Toolkit which includes useful tools for SCCM client management. Click OK then click Next.
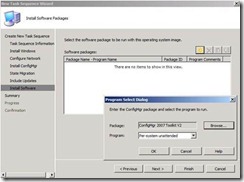
Note: Per-system unattended program is selected by default.
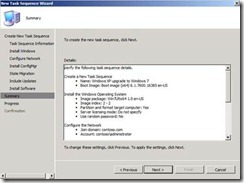
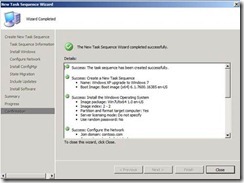
- Review the summary and complete the New Task Sequence Wizard.
2. Edit the Task Sequence
We created our Task Sequence starting from a template and going step-by-step through the Wizard. In order to be sure that everything goes as we want, we need to make some adjustment to the newly created TS. Editing is also a good way to adapt your TS to changes in your deployment strategy.
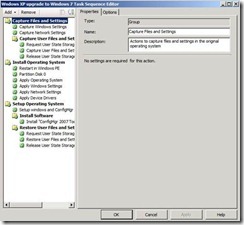
- Identify and edit the Task Sequence in Computer Management > Operating System Deployment > Task Sequences. Your TS should look like this.
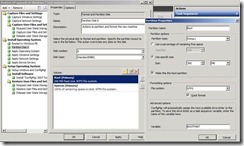
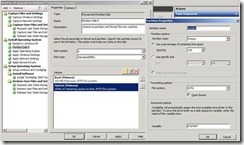
- The first setting we’d like to change is the Disk Partition. Select the node Partition Disk 0 and change the disk format option as required. In my example, due we want to preserve the option to use BitLocker, I added a boot partition with a size of 300Mb. The rest of the disk will be the left for the System Partition.
The boot partition is set to be 300Mb in size and to be quick formatted in NTFS. Make sure to check the flag Make this the boot partition. Also note the Variable set to BOOTPART. This variable gives us the option to reference this partition when we will indicate where to install OS system files later in the TS.
- The second partition will be the System and will take the rest of the available space on the physical disk 0. Note I gave the variable name here as well: SYSPART.
3. Go to the Apply Operating System node and reference the destination partition we set in the previous step by selecting Logical drive letter stored in a variable from the drop down list and type in the name: SYSPART
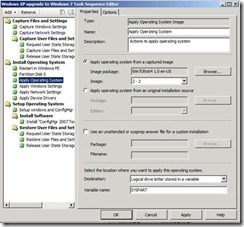
Note: At the “Setup Windows and ConfigMgr” task, the OSD Task Sequence will figure what type of Boot Manager is needed (XP/2003 vs. Vista/2008/Win7) based on what OS was deployed during the "Apply Operating System" task, and then install it on the appropriate partition. Whichever partition/volume is marked as “Make this the boot partition” in the “Format and Partition Disk” task, is determined to be the partition where the Boot Manager and boot files will be installed.
· Change the windows registration and licensing settings as desired.
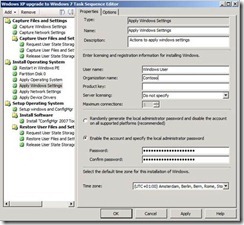
- Review other TS nodes settings. Apply changes and close the TS.
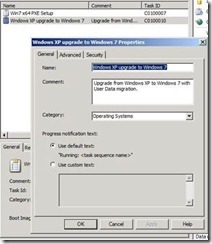
- By opening the TS properties after you created it, you can add some useful information:
you can add or review and change the comment and set a category for the deployment (just typing in).
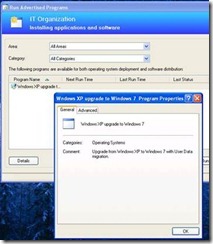
Users will see that information in the program details in the “Run Advertised Programs” window, as illustrate in the following pictures.
· We are now ready to advertise our TS and start upgrading computers.
