Federated Identities to Windows Azure Pack through AD FS – Part 2 of 3
In few of the previous posts, Anders Ravnholt discussed Installation & Configuration of WAP and Reconfiguration with FQDNs, ports and Trusted Certificates in detail. In this series, I will discuss how to configure AD FS and enable it to provide Identities to your WAP installation.
Scenario
Contoso Inc. is a Service Provider that hosts a private cloud stack and offers Compute resources to their customers. Contoso wants to install a Windows Azure Pack stack and
- Provide administrative access to users from its own Active Directory
- Provide self-service access to the Tenant Portal to users from Fabrikam Corp, one of its customers.
In the first part of this blog series, we discussed how Contoso can set up an AD FS Farm in their Corp domain pcloud.contoso.corp.
In this second part, we will discuss how Contoso can set up trust between the AD FS instance and the WAP Admin Portal and provides its users, access to the Management Portal.
In the third part, we will discuss how Contoso can enable Fabrikam's users to access the Tenant portal by establishing trust between Fabrikam's AD FS and Contoso's AD FS.
 Personas

Rob is a Fabric Administrator who is responsible for maintaining the infrastructure. Rob was tasked with installing the Windows Azure Pack Stack for Contoso Inc.
Mary is the Domain administrator for pcloud.contoso.corp domain in Contoso's Active Directory. Mary has necessary permissions to configure the AD FS linked to the domain.
Alan is a Tenant Administrator who is responsible for Creating and Managing Plans and Subscriptions in Windows Azure Pack.
Scope
- In this scenario, we assume the following about the environment:
- Windows Azure Pack is already set up in the pcloud.contoso.corp domain
- AD FS is enabled and configured for the pcloud.contoso.corp domain
- Alan has a user id in the pcloud.contoso.corp domain
- All the components in the environment have been configured with certificates from a Trusted CA
- We also assume the following about you, the reader:
-
- You are familiar with the installation of the Windows Azure Pack. For more information about Windows Azure Pack deployment, visit https://technet.microsoft.com/en-us/library/dn296432.aspx
- You are familiar with some fundamentals of Claims based Authentication (Refer white paper at https://download.microsoft.com/download/6/F/7/6F7BB9DD-0D65-492F-9180-75A47A520F80/Claims-Based Authentication in WAP.docx )
- You are familiar with setting up AD FS and the AD FS Console. For more information about AD FS visit https://technet.microsoft.com/en-us/library/hh831502.aspx
This post will describe, how to perform the scenario using the AD FS Console
This post will not talk about performing the scenarios using AD FS PowerShell
Federating AD FS with WAP
In Order to enable AD FS to provide Identities with WAP, configurations need to happen in two places:
- Mary, who is the domain administrator, needs to add the WAP Admin Portal as a Relying Party with AD FS. This is to let AD FS know that the Admin portal will be requesting identities from it
- Rob, who has access to the infrastructure, needs to configure the WAP Admin Portal to forward users to AD FS to get their identities validated.
AD FS Configuration
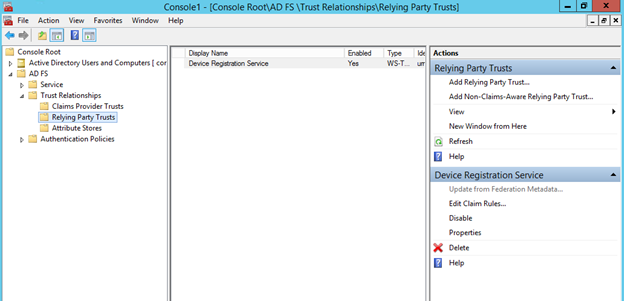
Mary opens the AD FS Console, from either the Server Manager, or by adding the AD FS snapin from the mmc console

On the AD FS console, selects “Relying Party Trusts” and clicks on “Add Relying Party Trust” from the Actions sidebar to open the “Add Relying Party Trust Wizard”

In the Select Data Source step, Mary points the wizard to pick up federation metadata settings from the WAP admin Portal. The federation metadata file can usually be found at
https://<adminPortalUri>/federationmetadata/2007-06/federationmetadata.xml
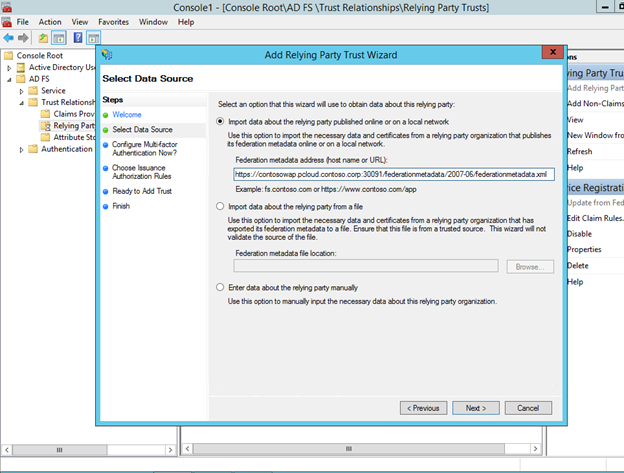
Alternatively, this metadata file can also be downloaded from the above location and imported into the wizard from a file
She specifies a friendly display name for the Admin Portal and clicks Next

The remaining steps in the wizard deals with configuring Multifactor Authentication, Issuance Authorization rules etc which are not currently needed for this scenario and so she leaves them as is with the default values and completes the wizard
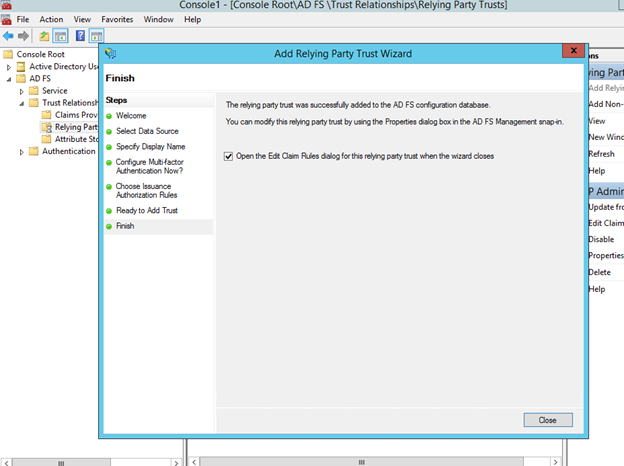
Once the Relying Party has successfully been added, Mary will have to configure the Claim Transformation Rules so that ADFS is aware of what claims to send to the particular relying party, in this case, the WAP Admin Portal. The WAP portals can understand two kinds of Claims, UPN and Group Claims. So there are four rules that have to be created in ADFS to issue these claims
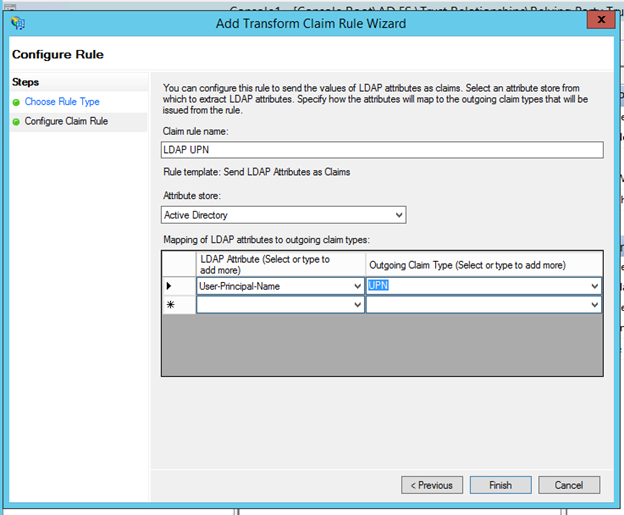
In the “Add Transform Claim rule Wizard” , the Claim rule template should be selected as " ”Send LDAP Attributes as Claims” and click Next
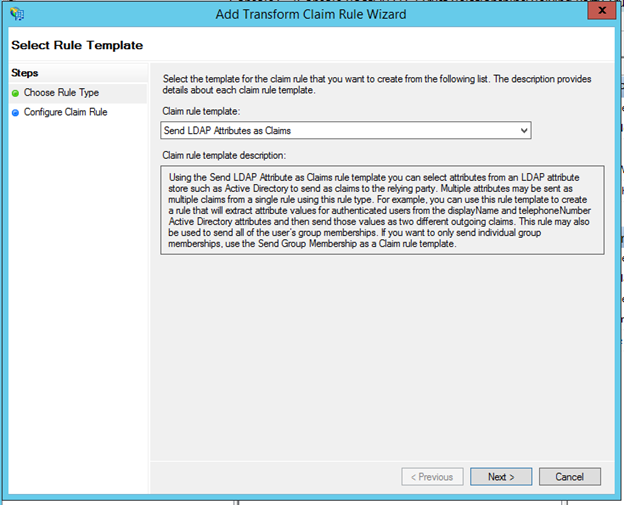
In the next step, Mary provides a Friendly rule name and selects the Attribute store as Active Directory and in the Mapping table, maps User-Principal-Name to UPN outgoing claim.
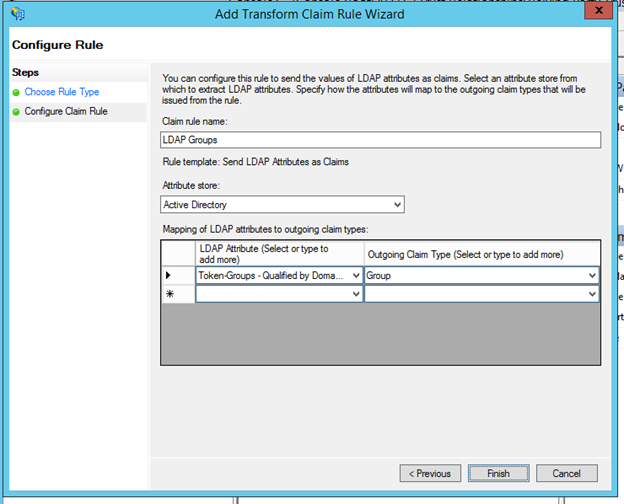
A similar process is repeated for adding Group Claims. Select Token-Groups – Qualified by Domain to map to Group outgoing claim
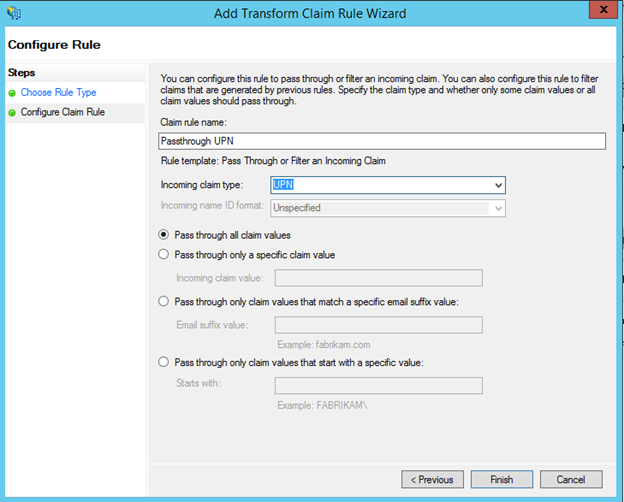
In some cases a UPN might already be available to AD FS. To handle these scenarios, there are two additional rules that need to be added to flow the UPN claims through as-is. In the “Add Transform Claim rule Wizard” select, “Pass Through or Filter an Incoming Claim”

in the next step, she provides a friendly name to the rule, and specifies the Incoming Claim Type as UPN and clicks Finish
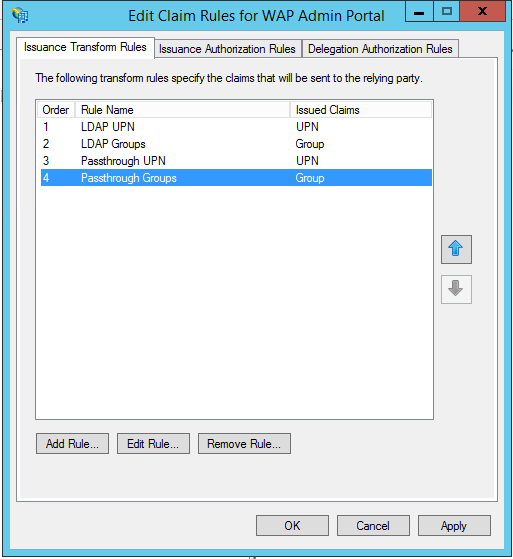
A similar process is repeated for the Group Claim

Now that all four rules are added for this relying party, she finally clicks on Apply and is done with the Claim Transformation Rules
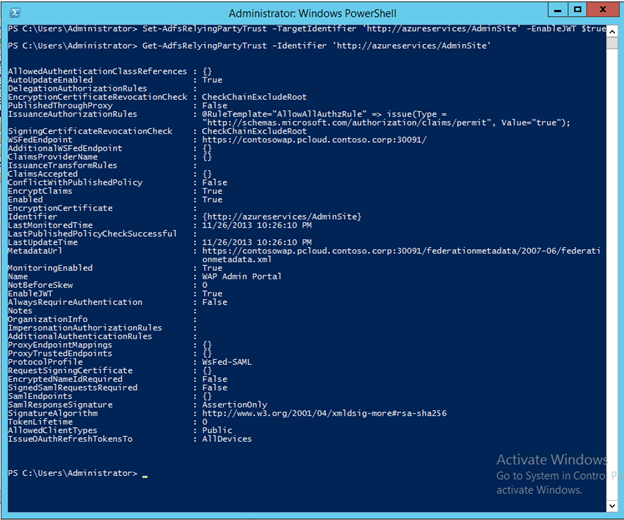
Now that this is done, as the final step, Mary has to enable JWT tokens for the Relying Party. This cannot be done via UI and so she opens up a PowerShell window and verifies the settings of the Relying Party that was just added. The command is as below
1: Get-AdfsRelyingPartyTrust -Name "WAP Admin Portal"
She notes down the Identifier for the relying Party which is typically “https://azureservices/AdminSite” and confirms that the EnableJWT value is set to False. This now needs to be set to true to enable JWT tokens. She uses the cmd below to do this
1: Set-AdfsRelyingPartyTrust -TargetIdentifier 'https://azureservices/AdminSite' -EnableJWT $true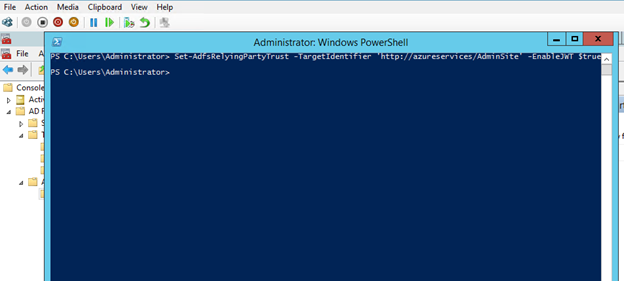


With that, the AD FS side of things is done and ready to go!
WAP Configuration
Once Mary is done configuring AD FS, Rob, the fabric administrator, can now come in and configure the WAP Admin Portal to add AD FS as the Identity Provider. Rob will also have to give Alan permissions to Administer Plans and subscriptions and maintain the WAP stack.
Rob logs on to the machine where WAP is installed, and runs the following PowerShell
    1: $fqdn = 'adfs.pcloud.contoso.corp'
    2: $dbServer = 'ContosoWAP'
    3: $dbPassword = 'pass@word1'
    4: $portalConfigStoreConnectionString = [string]::Format('Data Source={0};Initial Catalog=Microsoft.MgmtSvc.PortalConfigStore;User ID=sa;Password={1}', $dbServer, $dbPassword)
    5:
    6: Set-MgmtSvcRelyingPartySettings -Target Admin `
    7:     -MetadataEndpoint https://$fqdn/FederationMetadata/2007-06/FederationMetadata.xml `
    8:     -ConnectionString $portalConfigStoreConnectionString
the $fqdn variable refers to the Federation Service Name of AD FS
The only thing left to do is to give Alan permissions to access the Admin portal. ie. add him as an administrator. This can be done by the following PowerShell command
Note: The name specified in the Principal parameter should match exactly with the UPN that is supplied by AD FS.
    1: $dbServer = 'ContosoWAP'
    2: $dbPassword = 'pass@word1'
    3: $portalConfigStoreConnectionString = [string]::Format('Data Source={0};Initial Catalog=Microsoft.MgmtSvc.Store;User ID=sa;Password={1}', $dbServer, $dbPassword)
    4:
    5: Add-MgmtSvcAdminUser -Principal alanj@pcloud.contoso.corp -ConnectionString $portalConfigStoreConnectionString
Now Alan can sign in with his credentials to the Admin Portal
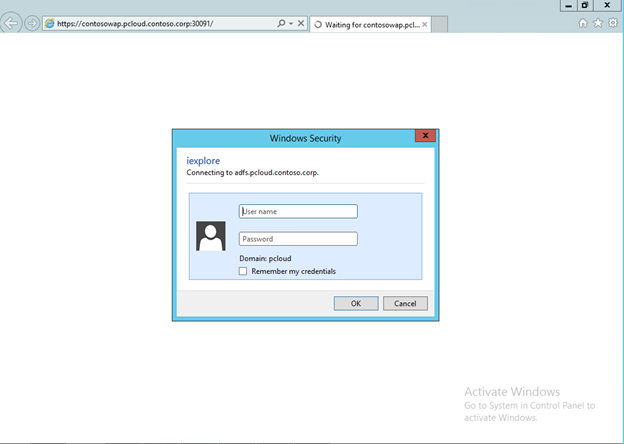
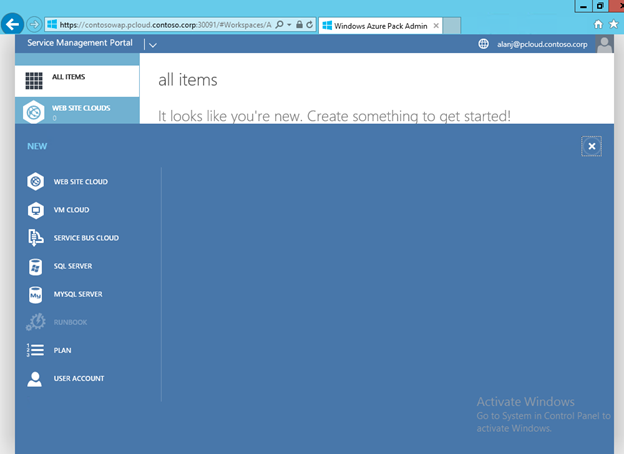
That’s it!  Alan can take over from here and administer Windows Azure Pack .
In the next part, we will take a look at the tenant side of things and how to federate Fabrikam’s AD FS with Contoso to provide tenant identities.