Application Management – Using Linux in Service Templates
For various reasons, Linux is commonplace in large environments. Deploying VMs running Linux with VMM is a useful feature but there can be some confusion around how to do it. In this post, I’ll be going through preparation of Linux images and deployment of Linux in service templates.
Linux Preparation
There’s a bit of necessary preparation that must be done to a disk image containing a Linux installation prior to its use in a template. As such, I wanted to take a moment to discuss what must be done. For the operating system, VMM supports Red Hat, SUSE, CentOS, and Ubuntu. Obviously, if you have other products in your environment that interact with your VMs, you should check the supported OSs for those products. I’m going to go through a quick example of preparing a VHD for Linux using Ubuntu Server 12.04 LTS. Now, Ubuntu Server 12.04 LTS has the Hyper-V Integration Services already installed, so we don’t have to worry about that piece. If you’re using an OS that doesn’t have the Hyper-V Integration Services, you’ll need to install those. I downloaded the Ubuntu “64-bit PC (AMD64) server install CD” ISO and created a new VM in Hyper-V, choosing to boot from that ISO image. I don’t want to spend a lot of time walking through the Linux installation, as this will vary by distribution. Suffice it to say that I chose all the defaults except for username/password, as they have no defaults. It’s probably a good idea to run an update after installation.
Once the OS install has completed, the next task is to install the VMM guest additions (assuming Hyper-V Integration Services are already installed). On the VMM machine, navigate to %ProgramFiles%\Microsoft System Center 2012\Virtual Machine Manager\agents\Linux and you’ll find 3 files: an install script and two tarballs. It’s important to use the correct versions for your VMM server and using the files in this directory will do this. Grab the install script and the appropriate package for your architecture (the *.x64.tar, in our case), and copy those to the Linux VM. I use a disk image for this purpose. You can create a disk image, add a 10MB FAT partition, and then place the files in that disk image. This way, you can add this disk image to the Linux VM to install the guest additions. However you choose to get the files onto the Linux VM, the next step is the installation, which should require nothing more than running the installation script:
Once the VMM guest additions have been installed, the image preparation is complete and you can shutdown the machine. After shutdown, add the disk image for the machine into the VMM Library, and you’re all set to deploy Linux VMs. Make sure that you remember the username/password for a privileged account (for simplicity, I’m using root, but you probably don’t want to use root in your environment).
Linux LAMP
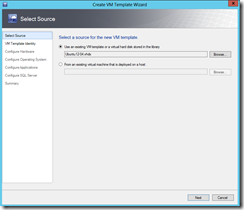
There are probably thousands of guides on the internet on how to setup a LAMP server in Linux. In fact, some distros have single installation packages for this. It’s common and it’s easy, so it’s a good candidate for a basic service template deployment. First, I create a simple VM template using the disk image:
Give the template some kind of name:
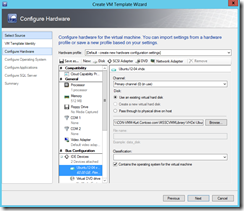
Configure any hardware settings, you’ll probably want to connect the network card:
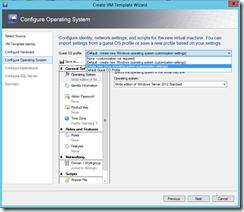
In the Operating System configuration, select the Linux option:
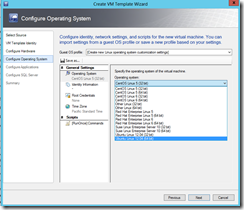
Now, specify which distribution and version:
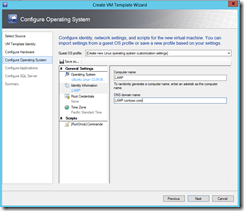
Provide a computer name and DNS name for the machine:
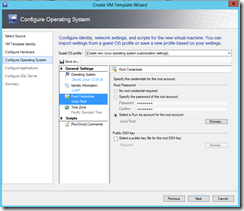
Provide the root password or select a Run As account:
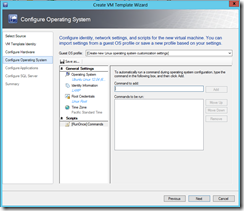
Now comes the scripts to add. Each command will be passed to the shell, but make sure no command requires interaction.
For a simple LAMP server configuration, we can rely on the package manager for installation. 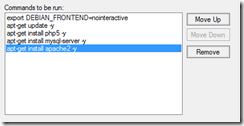
The command we want to run are as follows:
# Disable interactive prompts (MySQL password prompt) export DEBIAN_FRONTEND=nointeractive # Run update apt-get update -y # Install PHP apt-get install php5 -y # Install MySQL apt-get install mysql-server -y # Install Apache2 apt-get install apache2 –y
This is a simple example and shouldn't really be used for a production environment, but the basic process should be clear. At this point, we can deploy this template and have our own Linux LAMP VM.
Linux Distributed Database Cluster
Distributed databases are a popular way to store information. Some of the more popular names like Dynamo and GFS are propietary technologies, so I’ll be using an open-source database called Riak. This is an exmaple that would need to be adjusted for production environments, but should showcase the concepts without getting too far into details.
When Linux configurations become significantly complicated, scripts will need to execute based on some kind of logic. So, we’ll create our disk image in the same way, but we’ll add a script. This script will perform the configuration steps for us.
So, before installing the VMM additions and shutting the VM down, edit a new file at /root/install.sh whose content will be:
# Disable interactive prompts ```export DEBIAN_FRONTEND=nointeractive # Authorize the apt-key curl https://apt.basho.com/gpg/basho.apt.key | sudo apt-key add - # Add repo source echo deb https://apt.basho.com $(lsb_release -sc) main > /etc/apt/sources.list.d/basho.list # Update repos apt-get update -y # Install Riak apt-get install riak -y # Update the configuration with IP address IP=ip addr show dev eth0 | grep '.......' | awk '{print $2}' | sed 's|/.*||g'sed -i "s|-name riak@127\.0\.0\.1|-name riak@$IP" /etc/riak/vm.args /usr/sbin/riak start if [ "$1" = $HOSTNAME ]; then # Joining existing cluster MASTER=nslookup $HOSTNAME | grep 'Address: [0-9]' | awk '{print $1}'` /usr/sbin/riak-admin cluster join riak@$MASTER /usr/sbin/riak-admin cluster plan /usr/sbin/riak-admin cluster commit fi``
Shutdown the VM and copy the disk as before and we'll make a template to deploy this. First, we’ll create a blank service template:
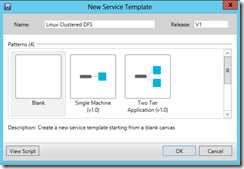
 This will bring up the Service Template Designer, and we’ll choose Blank:
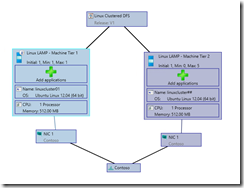
Now, drag and drop the VM Template to the canvas to create a new tier twice:
Edit the properties of the first tier and let’s change the computer name to linuxcluster01 (and the DNS name), and then change the second tier’s computer name (and the DNS name) to linuxcluster##. The ‘##’ will allow VMM to assign the next available computer name numerically (linuxcluster02, linuxcluster03…) at deployment. If we leave the second tier hard-coded, it cannot be scaled-out. Also, you’ll want to change the disk to the new disk we created (you must remove the existing disk before adding the new disk).
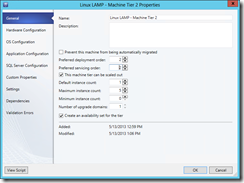
On the second tier’s General properties, we’ll set a few things. First, set the order to ‘2’ instead of 1, so that we’re certain this tier will always be deployed after the first. Next, select ‘This machine tier can be scaled out’ and set the maximum instance count to whatever you see fit. You can also choose to create an availability set for this tier, which will prefer VMs in this teir to be deployed to different hosts when possible.
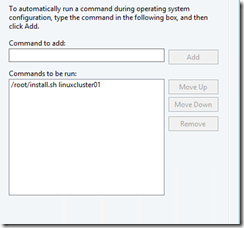
 The last step is configuration. In the properties of each tier, select OS Configuration and remove the existing scripts. On each node add only the script we created and the name of the first node (which will be passed to the script):
 Now, our template can be deployed!
Hopefully, you’ve learned a few things concerning capabilities of Linux in service templates that you can apply to your own environment.

