Customizing the IDP images in the Home Realm Discovery page
One of the great benefits of the latest version of ADFS is that you do not need to know HTML or anything fancy to customize the user's graphical experience. Changing the background, the logo, the text, adding some support information, hyperlinks... Pretty much everything is described in the following TechNet article:
Yet there are some small details that will force you to go deeper in the customization. You want to add some JavaScript, or simply change the color and size of the font by touching the CSS and it becomes a little bit trickier. The TechNet has a good article about that:
So what? What would you change that is not covered by this? One of the things that I have been asked once was to customize the Home Realm Discovery page. More precisely the images associated with it.
Default Home Realm Discovery page
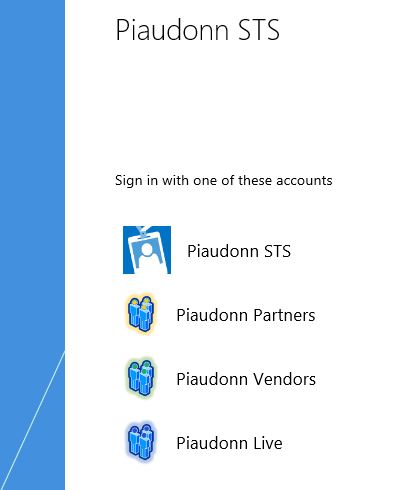
This is what it looks like out of the box (well my ADFS is not really out of the box since in my case I already have 3 additional claims provider trusts):
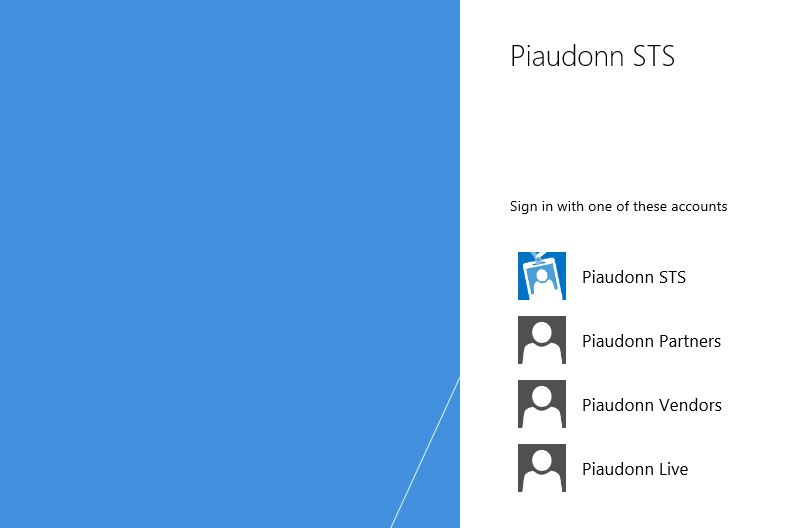
On the the top there is my Active Directory trust, here it is called Piaudonn STS. You cannot really modify the display name other than modifying the display name of your entire farm. You can do this in the ADFS management console by selecting the link Edit Federation Service Properties:
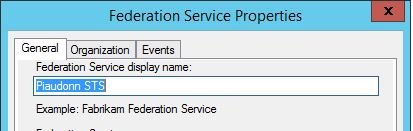
If I change that display name it will also change the title above the list. Now is that a problem? Not really, you can replace this title by a logo anyway. Note that changing the display name of the federation service does not disrupt anything and does not require any service restart. The display name is simply not a part of the federation metadata.
The rest of the list represents all my active trusts. In the ADFS management console, it looks like this:
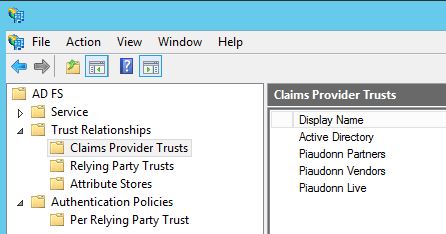
With the exception of the Active Directory (which corresponds to my Piaudonn STS), the display names are those which are visible in the home realm discovery page.
How do I change the images?
First of all, before doing anything, you should create your own custom template (in fact, some of the modifications we are going to do require to have a custom template and will not be possible to perform on a template called default).
New-AdfsWebTheme –Name PiaudonnTheme –SourceName default
This will create a new theme called PiaudonnTheme based on the default one.
Then you set it as the active theme:
Set-AdfsWebConfig -ActiveThemeName PiaudonnTheme
From now on, if something goes wrong, you can still set back your default theme using the same command.
Let's have a closer look at what this theme is composed of:
md c:\PiaudonnTheme
Export-AdfsWebTheme –Name PiaudonnTheme –DirectoryPath c:\PiaudonnTheme
The first line creates a folder and the second exports the data of the selected theme into it.
| C:\>TREE C:\PiaudonnTheme /FC:\PIAUDONNTHEME+---css¦ style.css¦ style.rtl.css¦+---illustration¦ illustration.png¦+---images¦ +---idp¦ idp.png¦ localsts.png¦ otherorganizations.png¦+---script onload.js |
The IDP images are under the images/idp subfolder. There are three possibilities:
 |
LocalSTS.png It will be displayed if it is your Active Directory trust |
 |
OtherOrganizations.png |
 |
IDP.png It will be displayed if you added another IDP to your Claims Provider Trust list. |
The one we want to change is obviously the IDP one. To change it, create a new image and save it for example in the structure you created under the same subfolder than the others. This my very original creation (taken from the Visio TechNet Stencils):

I named it idp-piaudonn.png. I kept the same ratio (80x80 pixels) but used a bit more space (5kb instead of the less one 1Kb for the default one, keep in mind that this image should be displayed on the screen quite quickly and will be showed rarely -because of the realm discovery cookie- so don't go too fancy). This is how you enable it:
Set-AdfsWebTheme -TargetName PiaudonnTheme -AdditionalFileResource @{Uri="/adfs/portal/images/idp/idp.png";path="C:\PiaudonnTheme\images\idp\idp-piaudonn.png"}
For this customization, there is no dedicated parameter with auto-completion. You have to tell your server what is the URI you want to modify and with what you want to modify it. Technically, the source of the page will still contain the source /adfs/portal/images/idp/idp.png but the image it will return is your custom image. Here is the result:
A different image per IDP. Is it a goner?
We are not that flexible, if we change it for one IDP, we change it for every IDP. So can we change it per IDP? Yes, but it gets a bit tricky. What we can do is try to identity what distinguishes the different IDPs from an HTML perspective and then use some JavaScript to rewrite the source of the image. Let's use the developer view of IE11 when displaying the home realm page and point to the image with the DOM Explorer (F12 then Ctrl+B):
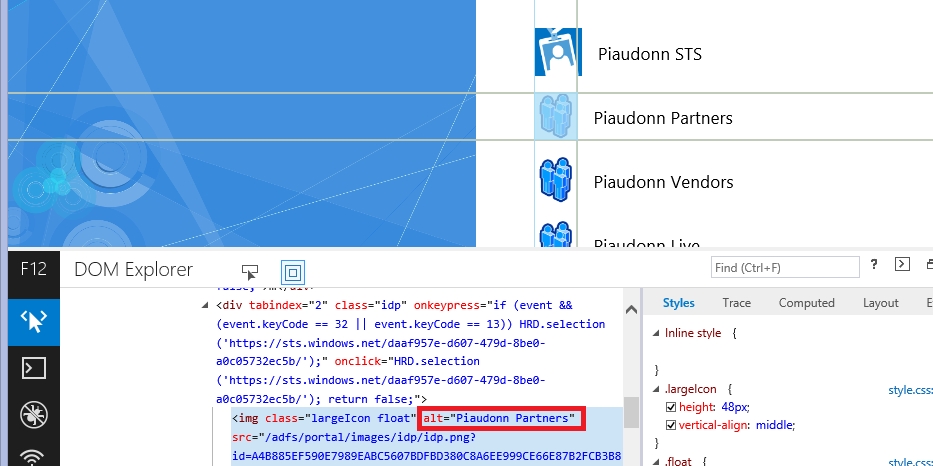
You could have just looked at the source of the page but I like the DOM Explorer feature. It points you exactly to the right section of the source. You see that the images are in the <div> section which has no identifier. The <img> section has a custom class but still no identifier. The "alt" property is what will enable us to identify which <img> is what. This property contains an alternative text in case the browser cannot display the image. In our case, it contains the display name of the claims provider trust. We have our unique identifier in the page, now we just have to write some JavaScript to replace the image with something else depending on the value of the alt property.
Before looking at the JavaScript, we need to prepare our images. In my case, I will use three different images:
 |
Piaudonn Partners idp-piaudonn-partners.png |
 |
Piaudonn Vendors idp-piaudonn-vendors.png |
 |
Piaudonn Live idp-piaudonn-live.png |
We need to host these images in a way we can call them from the actual page. We could host them in a different site and/or in a different server but the cross website requires that HTTPS is enabled on the site hosting them and I personally don't really like calling another site for the content (it might scare the network guys seeing traffic going to different URLs, not even mentioning the administrative overhead of maintaining this extra site). So we are going to create custom URIe. This is provided AS-IS, if you create your own URI and Microsoft ends up using the same URI on a future update, it might break things!
Here are the three URIes I created:
Set-AdfsWebTheme -TargetName PiaudonnTheme -AdditionalFileResource @{Uri="/adfs/portal/images/idp/idp-piaudonn-partners.png";path="C:\PiaudonnTheme\images\idp\idp-piaudonn-partners.png"}
Set-AdfsWebTheme -TargetName PiaudonnTheme -AdditionalFileResource @{Uri="/adfs/portal/images/idp/idp-piaudonn-vendors.png";path="C:\PiaudonnTheme\images\idp\idp-piaudonn-vendors.png"}
Set-AdfsWebTheme -TargetName PiaudonnTheme -AdditionalFileResource @{Uri="/adfs/portal/images/idp/idp-piaudonn-live.png";path="C:\PiaudonnTheme\images\idp\idp-piaudonn-live.png"}
From now on, we can call those URIes from the webpage and it will display the images we referenced. Now let's modify the webpage. As you might know, we cannot modify the HTML of the page. But we can modify the JavaScript of the page. So let's modify the JavaScript.
First I create a copy of the exported onload.js (it is under the script folder) and rename it onload-piaudonn.js. Then I add the following at the end of it:
| var listAllIdpImg = document.getElementsByTagName("img");var inc;for (inc = 0; inc < listAllIdpImg.length; inc++) { switch ( listAllIdpImg[inc].getAttribute('alt') ) { case "Piaudonn Partners": listAllIdpImg[inc].src = "/adfs/portal/images/idp/idp-piaudonn-partners.png" ; break; case "Piaudonn Vendors": listAllIdpImg[inc].src = "/adfs/portal/images/idp/idp-piaudonn-vendors.png" ; break; case "Piaudonn Live": listAllIdpImg[inc].src = "/adfs/portal/images/idp/idp-piaudonn-live.png" ; break; }} |
Basically what it does is listing all images on the page, if the alt property is equal to something present in the switch statement, we replace the URI of the source by our custom image. There are many other ways to do it, this is just a working example. Then you modify the URI for the JavaScript:
Set-AdfsWebTheme -TargetName PiaudonnTheme -AdditionalFileResource @{Uri="/adfs/portal/script/onload.js";path="C:\PiaudonnTheme\script\onload-piaudonn.js"}
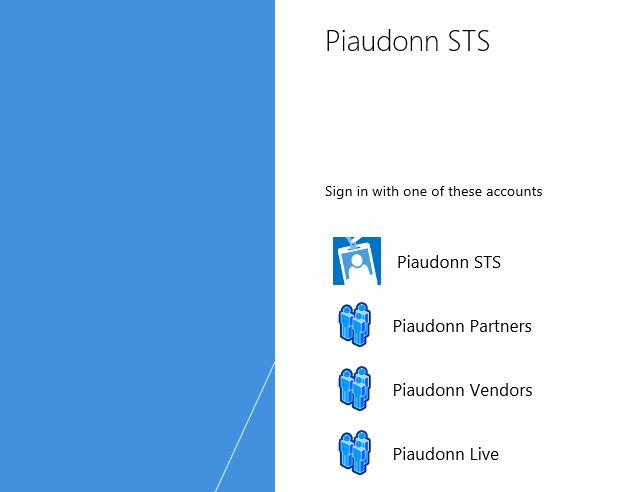
Here is the final result:
Ok, the glowing isn't very visible... I am not much of a MSPaint artist. You can do better :) you can even post links of your creations if you want to show us what is possible.