How to configure FBA (Forms-Based Authentication) in SharePoint Server 2010 using IIS 7 and ASP .NET Membership Database (SQL) like in MOSS 2007!!!
After testing many times and configuring FBA in many Virtual environments, finally I think I wrote the easiest and clearest procedure and hope what I'm saying is true, please read carefully and do not skip any step.
To configure FBA using SQL Server with Windows Integrated Authentication (recommended) we’ll follow the following steps.
Pre-requisites
a) Knowledge about SharePoint 2010, IIS 7.5 and SQL Server 2008
b) SQL Server configured as Windows Integrated Authentication
c) ASP.Net SQL Server Database (Membership database)
d) Windows Domain user account (Can be SharePoint Farm Administrator)
e) Make sure you backup web.config files for Central Administration Site, Security Token Service web service and also the Web Application you will use for FBA
Steps to configure FBA
- Configure SQL Server security settings to use Windows Integrated Authentication
- Add the Domain User Account to SQL Logins
- Create SQL FBA database to store non-Windows domain users
- Grant SQL Login (Domain user) permissions for the new SQL FBA database
- Configure SharePoint Central Administration
- Configure SharePoint Security Token Service
- Create the new Web Application to use FBA and Site Collection
- Configure IIS Default providers for the new web application
- Create IIS Site to administer ASP.NET users
Configure SQL Server to use Windows Integrated Authentication
Basically when you install SQL Server by default Windows Integrated Authentication is already set, in case your DBA team configured SQL Server with Mixed-Mode you have to do the following:
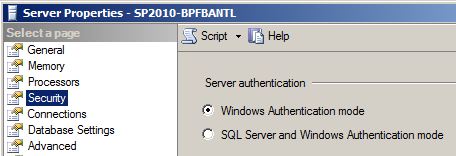
- Go into the Management Studio of the instance of your SharePoint database server
- Right click on SQL Server Instance name and choose properties
- On the left pane go to Security
- On the right pane choose the option Windows Authentication mode
If you did the change you MUST restart SQL Server service or reboot the server
Add the Domain User Account to SQL Logins
Now we need to add the Domain user account to the SQL Logins in order to provide full access to the ASP.NET membership database we’ll create later.
Two things are important here, you have to decide if you will use the SharePoint Farm Administrator account you are already using or create a new Windows domain user account to manage the access to the ASP.NET membership database. I recommend using SharePoint Farm administrator, whatever you decide here are the steps. (Ask for your DBA team to help you creating the new login)
- Once you have decided which account to use open SQL Server Management Studio
- On the left pane expand the SQL Server instance and choose Security folder
- On Logins right click and choose New Login
- Look for your Windows domain user account and keep Windows authentication option marked
- Click OK
Create SQL FBA database to store non-Windows domain users
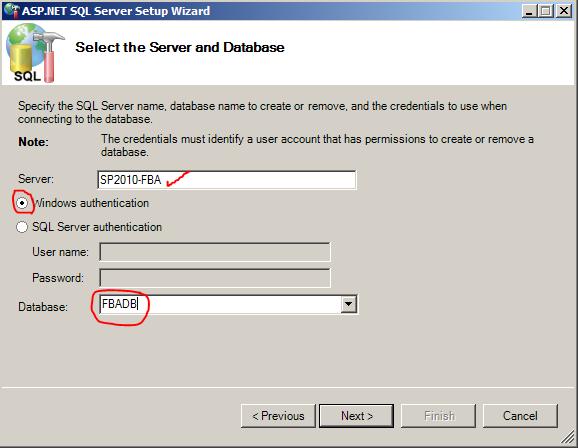
Open the ASP.Net wizard and creating the database which will store non-Windows domain users for your extranet access:
- Go to the path: C:\Windows\Microsoft.NET\Framework\v2.0.50727\aspnet_regsql.exe
- Choose “Configure SQL Server for application services”
- Type the SQL Server name you want. You don’t have to use the SharePoint database server
- Keep Windows Authentication as default
- Use “Default” or type the database name you will create at the end of the process

The first time you create the ASP.NET database you have to choose Windows Authentication and create or USE an existing database*
- Just confirm the settings and that’s it for this part
*You can create a new ASP.NET database to store new users or you ALSO use the one you already have in your MOSS2007, just make sure you are having the correct permissions over the migrated database to the new SQL Login you already created in steps before.
Grant SQL Login (Domain user) permissions for the new SQL FBA database
- Go back to the SQL Server Management Studio
- Locate the ASP.NET membership database you already created or restored
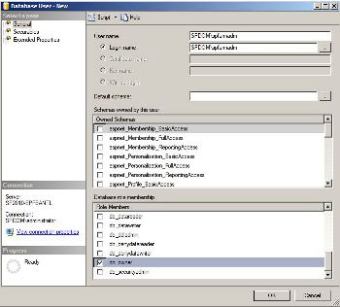
- Right click and choose properties
- On the right pane click on the square with dots and look for your domain user account (Type domainname\username) and click OK
- Copy the name from the field Login name to the upper field named User name
- At the bottom of the window locate Database Role Membership section and mark db_owner and click OK
Configure SharePoint Central Administration
Now we have to create a Connection String, Role Provider, and Membership Provider in IIS Manager to get access to the ASP.NET membership database that we already created.
Let’s do this once for SharePoint Central Administration site and then repeat the steps for the Security Token serviceweb service, the SharePoint Web Application and at the end for the IIS site that we will use to mange ASP .NET Memberships.
Do not forget to have a backup of web.config file, is very important in case you need to roll-back. Also use a test environment first
- Open IIS Manager and locate SharePoint Central Administration v4 site under Sites folder
- On the right pane double click on Connection Strings
- On the very right pane called Actionsclick on Add
- Type a name
- Type the name of the SQL Server
- Type the name of the database server you already created
- Keep selected the option Use Windows Integrated Security
- Click OK
- Go back to the IIS to create both providers
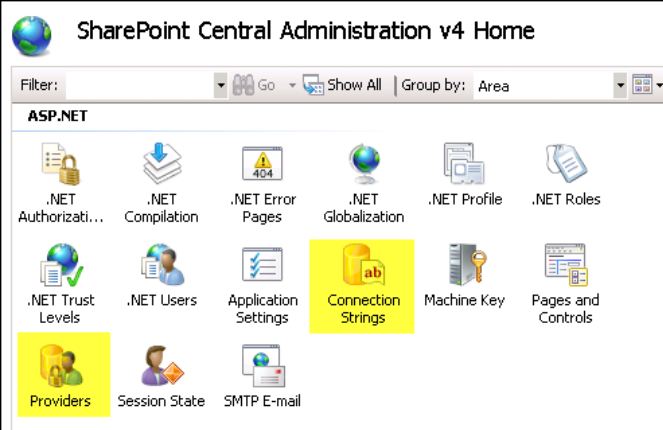
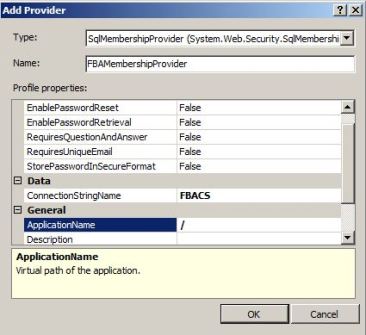
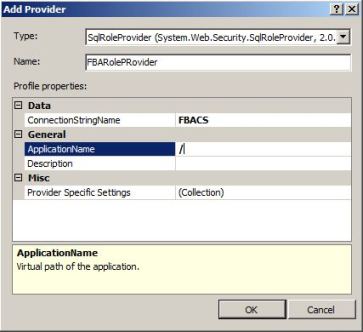
- Double click on Providers in IIS Features view and create Role Provider and Membership Provider
- On Features drop down menu click .Net Roles first to configure role provider, then click on .Net Users to configure Membership provider
- This is it for Central Administration site
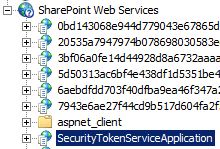
Configure SharePoint Security Token Service
Repeat the steps just before to configure Security Token service web service. Use same Connection String, Role Provider and Membership Provider names
Create the new Web Application to use FBA and Site Collection
Open SharePoint Central Administration Site and let’s create the new Web Application that you will use to configure Forms-Based Authentication
Remember in SharePoint 2010 the only way to configure FBA is creating web applications with Authentication option “Claims Based Authentication” otherwise you won’t be able to do it.
- So open Central Administration web site
- Go to Application Management category and click on Manage Web Application
- On the ribbon click on New
- Choose Claims Based Authentication authentication option in order to enable Forms Based Authentication options

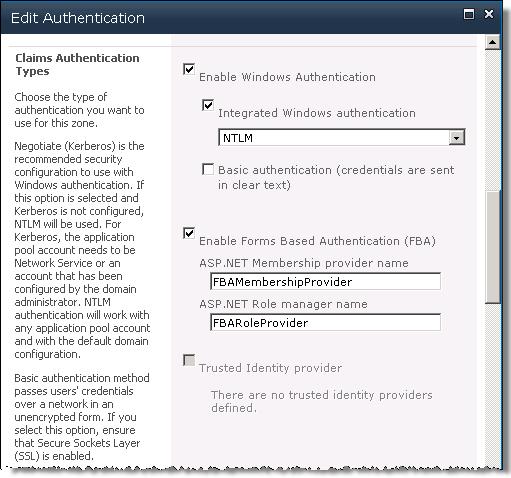
- It is important for you to keep Enable Windows Authentication with NTLM check box marked for two things:
- Crawl works for that content database
- Active Directory users will use Authentication page to get the content
- Now check Enable Forms Based Authentication (FBA) and type both Membership Provider and Role Provider
- Now we have to create a Site Collection, you may use the one for Teams or any other, it’s up to you
- At this point the Site Collection Administrator MUST be the SharePoint Farm Administrator since our ASP.NET SQL database is empty
- Create the Connection String, Role Provider, and Membership Provider following the same steps like we did for Central Administration v4 Site
SharePoint Server 2010 has to use “i” as default Membership Provider and “c” as default Role Provider since “I” provider is linked to: Microsoft.SharePoint.Administration.Claims.SPClaimsAuthMembershipProvider. (https://msdn.microsoft.com/en-us/library/microsoft.sharepoint.administration.claims.spclaimsauthmembershipprovider_members.aspx)
Create IIS Site to administer ASP.NET users
Create an IIS site to manage roles and user account that will live in our ASP.NET membership database
- Create the IIS Site from IIS Manager
- Review again the steps we performed for Central Administration v4 site in order to configure:
- Connection String
- Role Provider
- Membership Provider
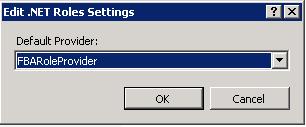
- For the IIS Site you should not revert the default provider to “i” or “c”, this time default providers will be FBARoleProvider & FBAMembershipProvider
- Test time, log in to the new SharePoint site configured with FBA
- First use Windows Integrated Authentication, successful?
- Now choose sign in with a different user, successful? I’m sure not since you have not granted permissions for FBA users yet
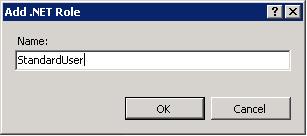
- Go back to IIS Manager and create FBA roles and users
- Ok, now we can add FBA users to SharePoint sites, login back with SharePoint Farm Administrator
- Open Site Actions > Site Permissions
- Pick a group you want to add the new FBA user
- Click New
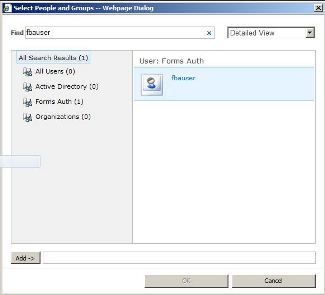
- Click the address book or type the name of the FBA user
I wish you good luck and remember that feedback is very important for us, please let me know if this post is really useful and if it was easy to configure FBA in SharePoint 2010 as I wrote