OneNote Class Notebook Creator customization
Microsoft announced a new version of the OneNote Class Notebook Creator in December 2014 with additional features, including support for ten different languages. This tool is meant for use by teachers to set up shared documents, collaboration space, and individual student workspaces for each of their classes, as described in the OneNoteForTeachers.com interactive guide. The tool works in the context of an Office 365 deployment, and is available as a SharePoint app from the Microsoft store for a SharePoint Team Site or OneDrive for Business.
A colleague in The Netherlands shared the release with a number of educators, and their initial use quickly prompted some feedback. Among other things were the following questions that we'll investigate:
- Is there any way to customize the Welcome page for the specific school or institution?
- How can the initial Welcome page be changed to the Dutch (or other) language?
This blog entry and following blog entries will provide details on solving these challenges.
The OneNote Class Notebook Creator app is downloaded and installed to a SharePoint site within your Office 365 environment, and can be accessed and run from the Site Contents page.
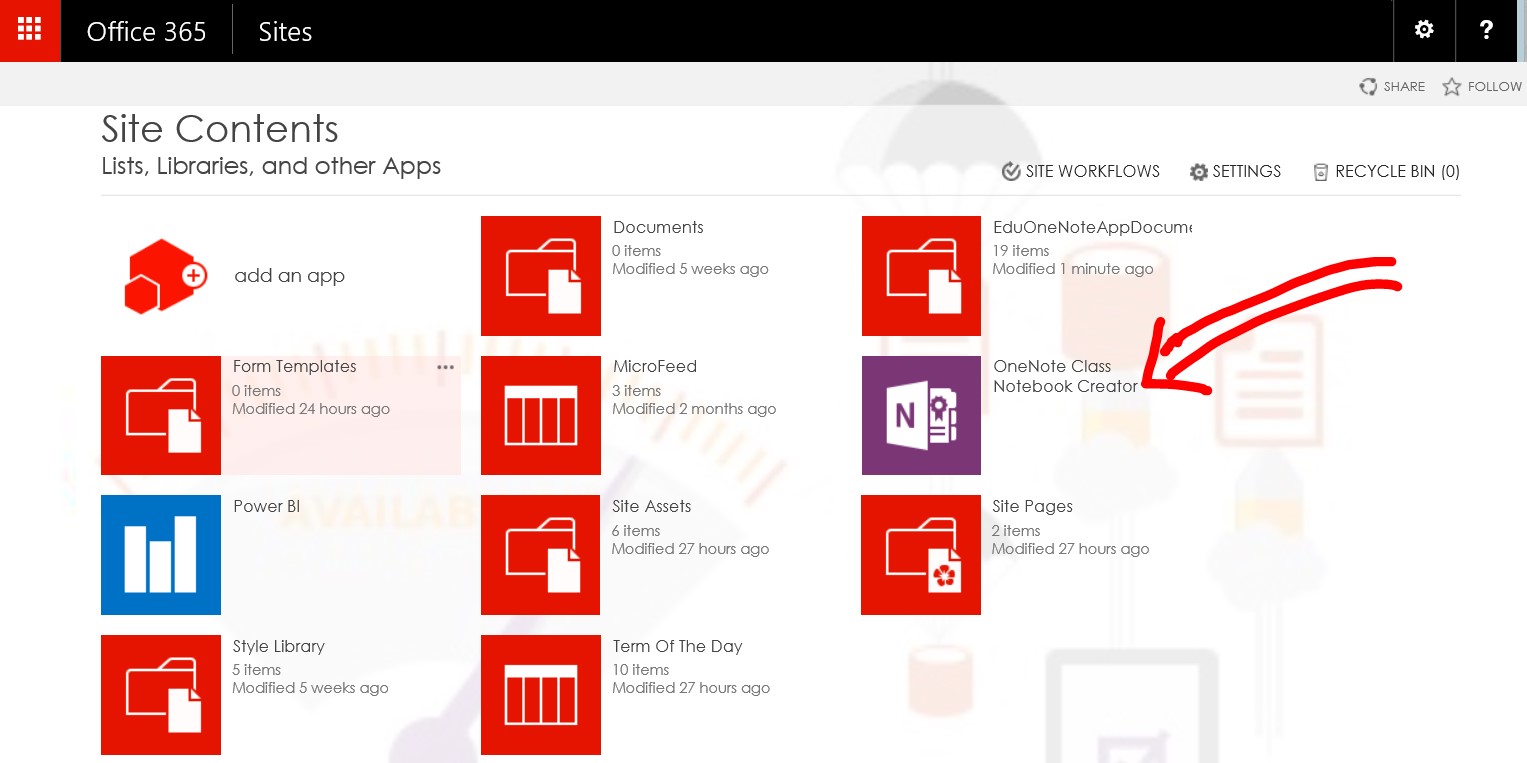
Figure 1. The installed app in your Office 365 site
The OneNote Class wizard presents you with some top-level actions to perform, including creation of a new notebook for a specific class:
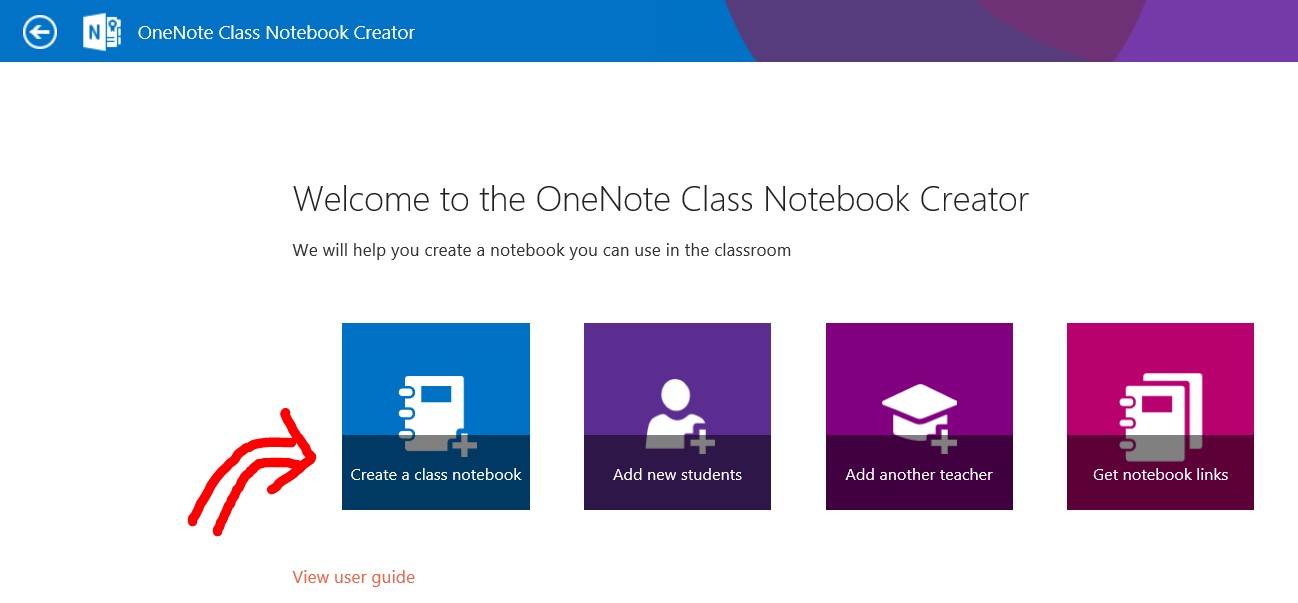
Figure 2. The high-level actions available within the Creator app
The Welcome page is one of several elements created when the teacher runs the Creator.
The standard Welcome page contains links to the three standard workspaces: Collaboration Space, Content Library, and per-student notebooks (only one shown in this example):
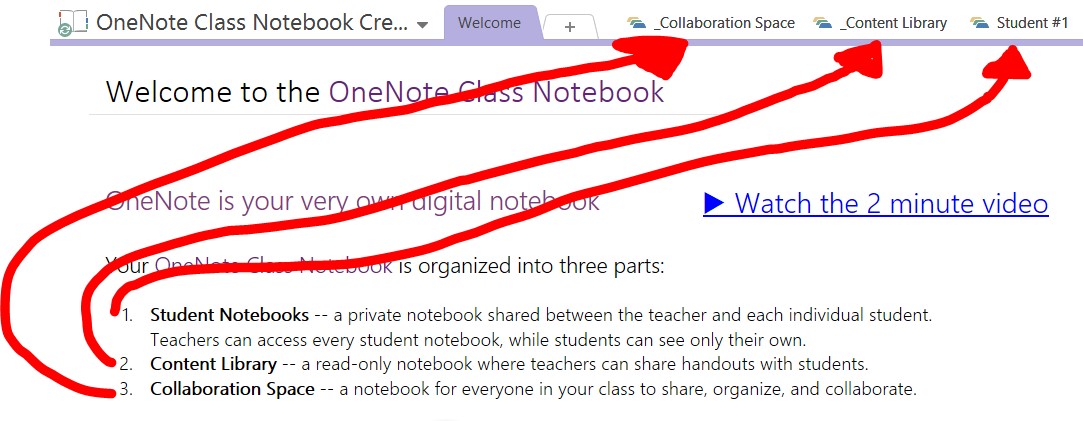
Figure 3. The default Welcome page, showing the default elements of a class notebook
Within the SharePoint site, several folders are created along with the first class notebook. At the top-level, found within the Site Contents page, is EduOneNoteAppDocuments. This contains a folder in the format teacherName@school.domain_Courses, and within this you will find each class notebook that has been created. These folders may also be listed in the "Recent" links on the top bar of your SharePoint site, if that link is enabled.
Another element created along with your first class notebook is an internal SharePoint List, in the format EduOneNoteSetupToolList_NNNNNNNN_NNNN_NNNN_NNNNNNNN, where the NNN values indicate a unique UID value for your SharePoint site. Contained within this list is the key to creating a customized Welcome page, in the form of a templates folder. This folder will be named based on the default language of the SharePoint site where the OneNote Class Notebook Creator is installed, e.g. templates (en-us) . Although this folder is visible as a List item, it is not directly accessible via the SharePoint site interface (i.e. using the browser), and clicking through to it will result in an error message, There are no items to show in this view of the "EduOneNoteSetupToolList_<unique_UID>" list.
The templates folder will, however, be available from the OneNote application, via the FILE=>Export mechanism. So the following steps will allow you to create a customized Welcome page, to be applied to each subsequent Class Notebook.
1. After installing the OneNote Class Notebook Creator app in your Office 365 SharePoint site, run it and use the wizard to create a notebook called Template.
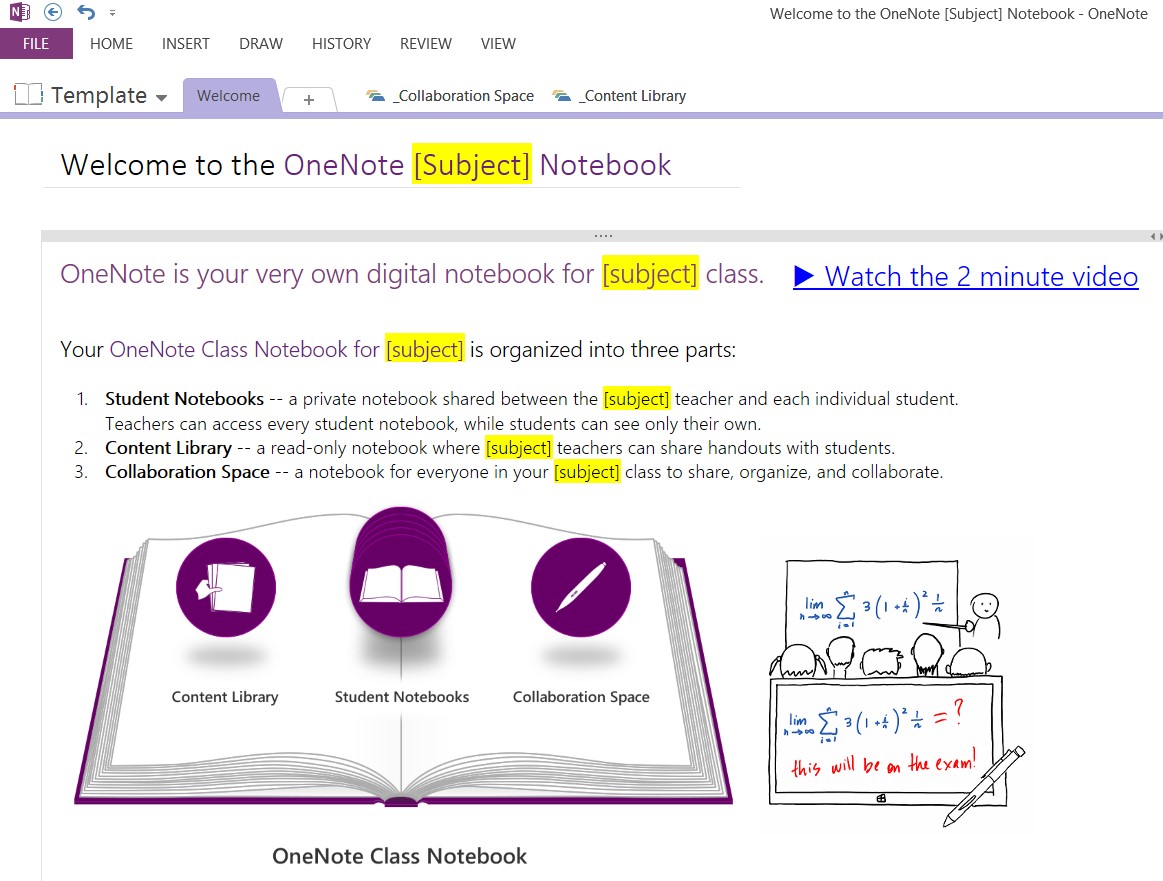
2. Modify the Welcome page in this Template notebook in the style you want subsequent notebooks to follow. You can leave placeholders for words or elements that might change from class to class, as in the following highlighted example:
3. Export this page to the templates (en-us) folder, via FILE => Export => Export, specifying "Page" and "OneNote 2010-2013 Section" format. This will require using the Save As dialog to change the folder from the current location to the overall templates folder, by going up to the <SharePointSite>/Lists folder, then back down to the EduOneNoteSetupToolList_NNNNNNNN_NNNN_NNNN_NNNNNNNN/ Templates (en-us) folder.
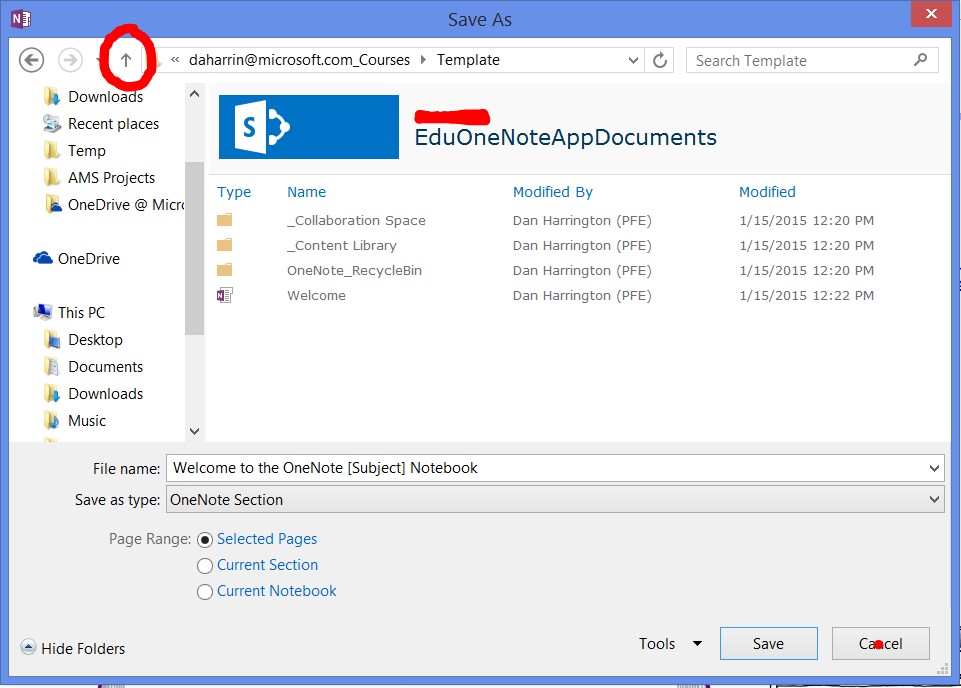
Use the up arrow (circled) to move to upper folders in the SharePoint site hierarchy.
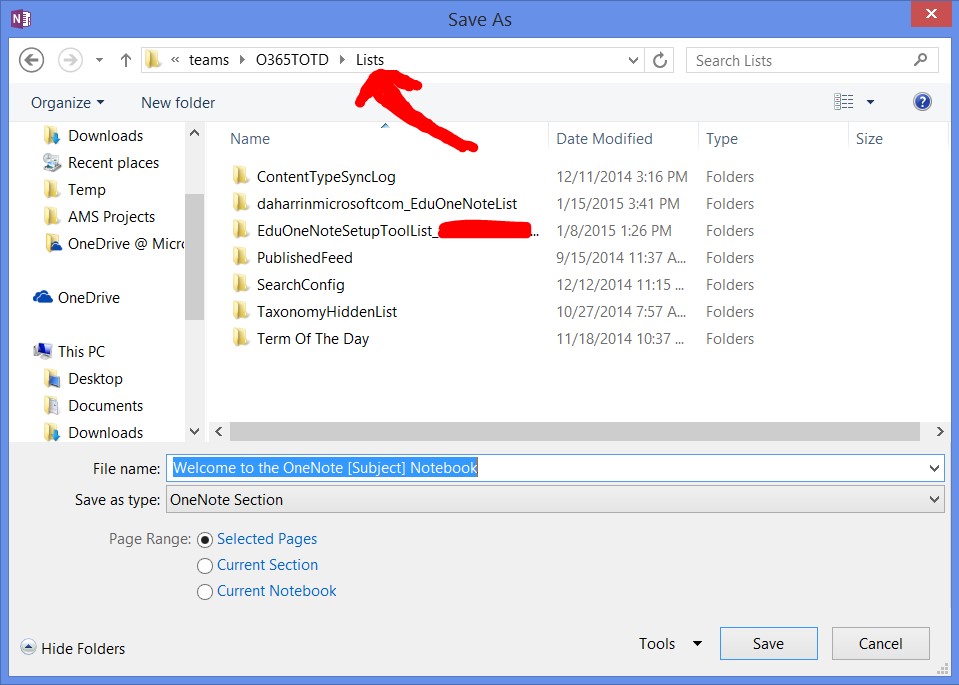
Then from the Lists folder, click down into the specified folder to reach the templates folder, and into it also.
4. You can use the file dialog box to first save the existing file Welcome.one by renaming it to e.g. Welcome_DISTRIBUTION.one.
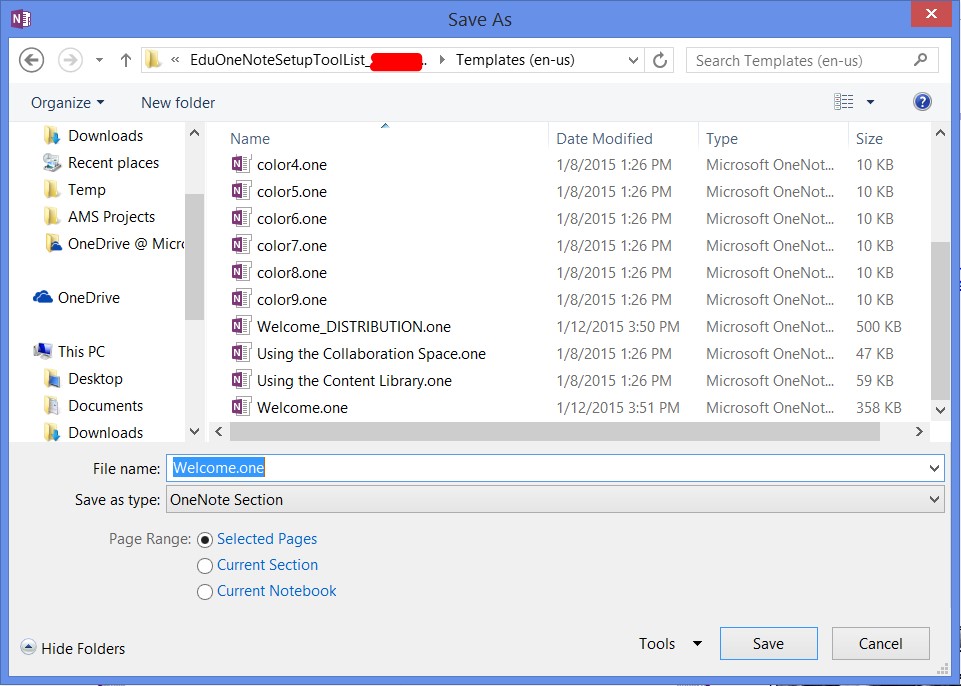
Finally, save the updated page as the new Welcome.one page.
Any subsequent Class Notebooks you create will have this new modified page as its default Welcome page, and it can be customized by the subject teacher as needed for a particular class. In this example, the modifications were very minor, but a school might choose to have a highly customized Welcome page with their own logo, images, and links.