Building a self-service private cloud using Windows Azure Pack
This is the first article in a series of blog posts that will guide you through a simple implementation of a self-service private cloud interface using Windows Azure Pack. There are many layers of the application, and the underlying infrastructure, when implementing this solution. As we progress through the series, we will lay out a scenario, a set of requirements, as well as provide guidance on how to implement each of the numerous prerequisites, with the ultimate goal of a self-service portal that your team can use to create and manage their own virtual machines.
This article defines our scenario and requirements, general architecture, and prerequisite installation. The roadmap for this and subsequent articles is:
- Requirements, Architecture, and Prerequisites (This Article)
- Configuring the VMM fabric
- Configuring Service Provider Foundation
- Windows Azure Pack installation
- Windows Azure Pack configuration
- Windows Azure Pack Usage
- Windows Azure Pack customization
Scenario
Your team is in need of a private cloud. System Center Virtual Machine Manager 2012 (VMM) provides the functionality required, but that solution requires a high administrative effort to configure VMs for users as needed without providing privileges to the user directly on the VMM cluster. VMM lets you build a "fabric" consisting of multiple resources, both physical and virtual. The underlying fabric can then be utilized by the administrator to create a virtual environment for users. Enter Windows Azure Pack (WAP). WAP provides the ability for users to create their own virtual machines, databases, and other resources through a familiar Windows Azure type interface, utilizing your own VMM cluster hardware and the fabric that was setup on the VMM cluster.
Together VMM and WAP provide a lot of functionality to truly deliver a custom solution, including tenant configurations, virtualized networking, even monetization of your private cloud. Most of these features go above and beyond what we need for our requirements. In the following sections we'll go over the individual requirements for our scenario, as well as describe the existing architecture that we have available.
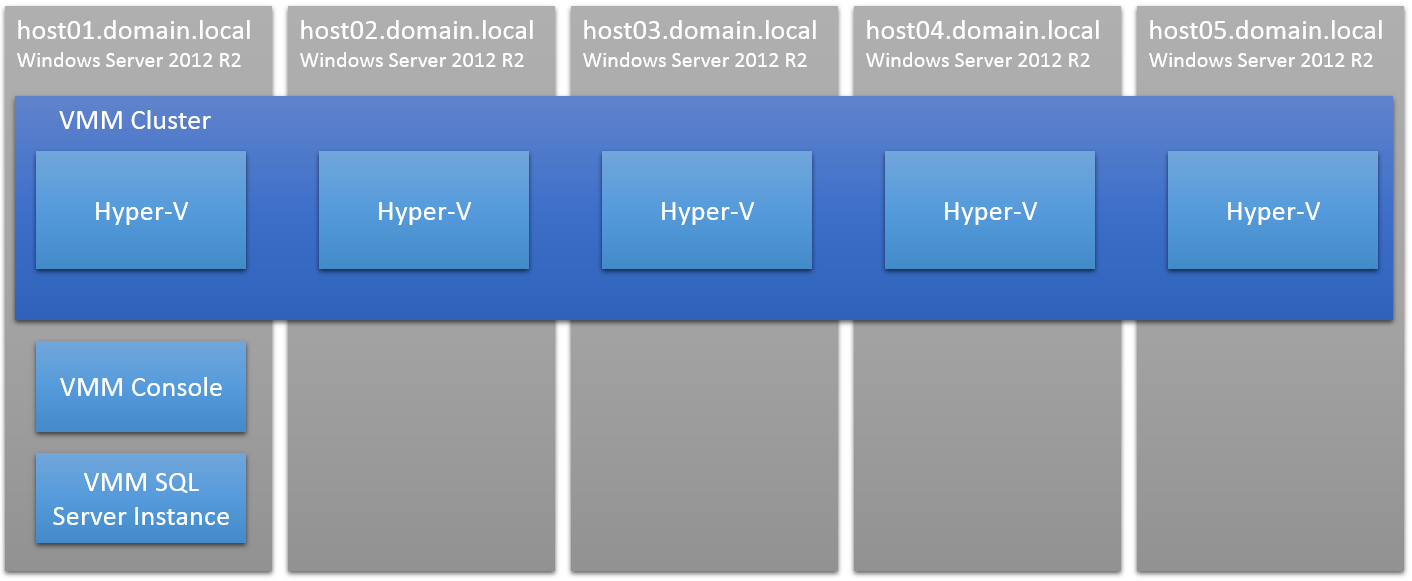
Hardware
In our scenario, we have a set of 5 physical nodes, with the following hardware:
- Windows Server 2012 (R2 Preferred)
- 24G of ram
- 16 logical cores (2x Intel® Xeon® CPU L5630 @ 2.13GHz)
- 1 single connected Ethernet connection
- 8x 300GB 10K SCSI disks in a RAID5 configuration, 1.86TB Usable Disk
The size of the VMM cluster and the number of nodes that we have available isn’t an actual requirement. While our hardware may not be ideal for a VMM cluster, it’s what we have available in this scenario. This gives us a cluster with over 100G of ram, 80 Cores, and over 9TB of direct attached storage. A solution could be as simple as a single-node Hyper-V cluster, managed by VMM, with a VM hosting the other required components, including WAP and SQL.
Note: All of the physical machines in our solution are domain joined machines.
The default configuration of our machines in our scenario have a single OS disk (C:) and a single large-capacity data disk (D:).
Networking
In our example, we have a predefined network which was provided to us. This could be as simple as the team’s current network. The network in our scenario provides a range of IP addresses by DHCP, as well as a DNS server. In our example, we are going to need to be able to create our own DNS entries, which means we’ll either need our own DNS server, or the ability to add our own entries to the existing DNS server. Each machine has a single Ethernet connection, so extra care will need to be taken when configuring the virtualized networking for our cluster.
Architecture Components
There are many components that make up the architecture, below is a list of some of the major components that we will be utilizing our solution.
- Active Directory Domain Services (ADDS) – Provides us with authentication, as well as DNS automation, among other things
- SQL Server (SQL) – Provides us with configuration databases for multiple components, but is also service that is available to users in WAP
- Hyper-V (HV) – Virtualization role installed on each node in the cluster. Provides the ability to host Virtual Machines (VM)
- System Center Virtual Machine Manager (VMM) – Service to automate configuration, management, and operation of a group of HV nodes
- Windows Assessment and Deployment Kit (ADK) - Library source for VMM. This component is a requirement for VMM.
- System Center Service Provider Foundation (SPF) – Service to provide interface for VMM that is used by WAP
- Windows Azure Pack (WAP) – Collection of IIS websites and configuration databases that utilize a VMM cluster through the SPF
This article will assume that there already is an AD DS with an established domain that is available to us and that we are a Domain Admin on this domain. We will need to be able to add service accounts as well as create DNS entries on the DNS server.
Prerequisite Installation
Following are the steps that need to be performed to install VMM on our new Windows Server 2012 R2 cluster.
AD Service Accounts
Along with your account, which requires membership in the Domain Admins group, there are a number of service accounts that will need to be created for the different services in our configuration. For this step in the series however, the VMM service account, and VMM SQL service account are the only required service accounts for this step in the series however.
- _wapvmm_sa – Account for running VMM
- Cannot be changed once VMM is installed
- Must be a member of the local administrators group on VMM node
- _wapvmmsql_sa – Account for running VMM SQL Instance
Hyper-V
Our first step in setting up our VMM cluster is to get all of the nodes in the cluster setup with the Hyper-V role. The following TechNet article goes over the installation of the role:
Install Hyper-V and Configure a Virtual Machine
Install the role on all of the servers in the cluster which will be hosting virtual machines. Final configuration of the Hyper-V settings will come later when the VMM service is installed and configured.
SQL Server
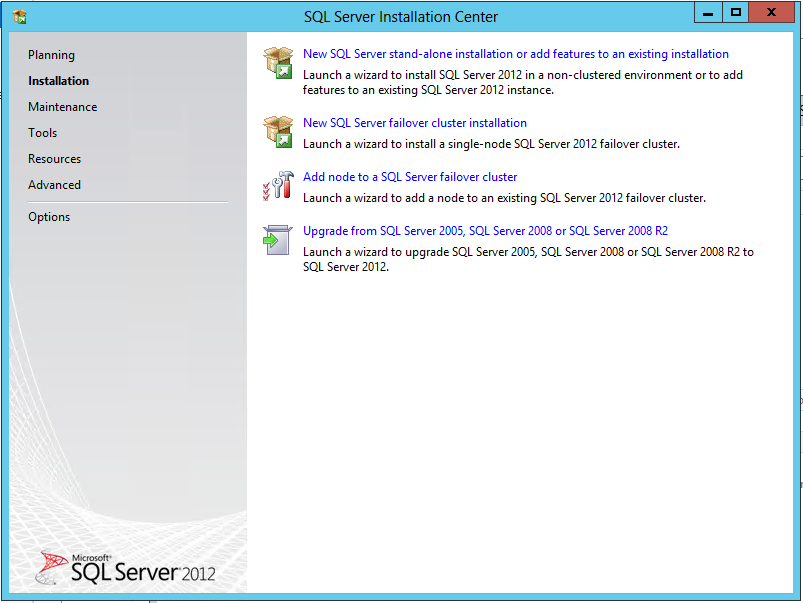
VMM requires its own instance of SQL Server to hold the status and configuration of the VMM cluster. This section will go over a basic installation of SQL, with the settings required by the VMM service. In this case, we are installing the SQL Server instance on the VMM node directly. Additional SQL server instances can also be installed here for the other components (WAP or for cloud resources for example) as well, but this is not required.
To start, run setup.exe from the SQL Server 2012 installation media, click Installation, and click New SQL Server Standalone Installation to start up the installation wizard.
The wizard starts by running a few checks, which may result in a warning about the Windows Firewall rules. This warning can be safely ignored, as we will not be accessing the VMM database remotely.
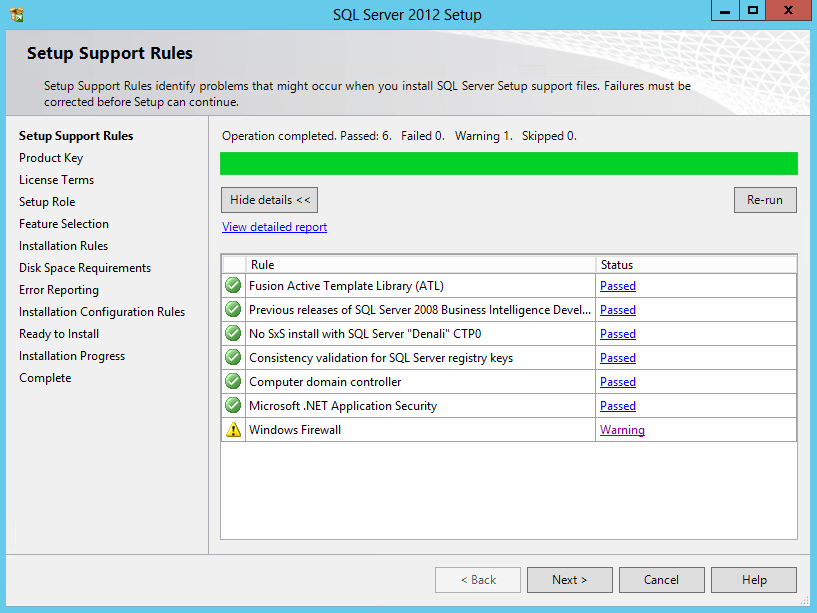
Proceed by clicking Next.
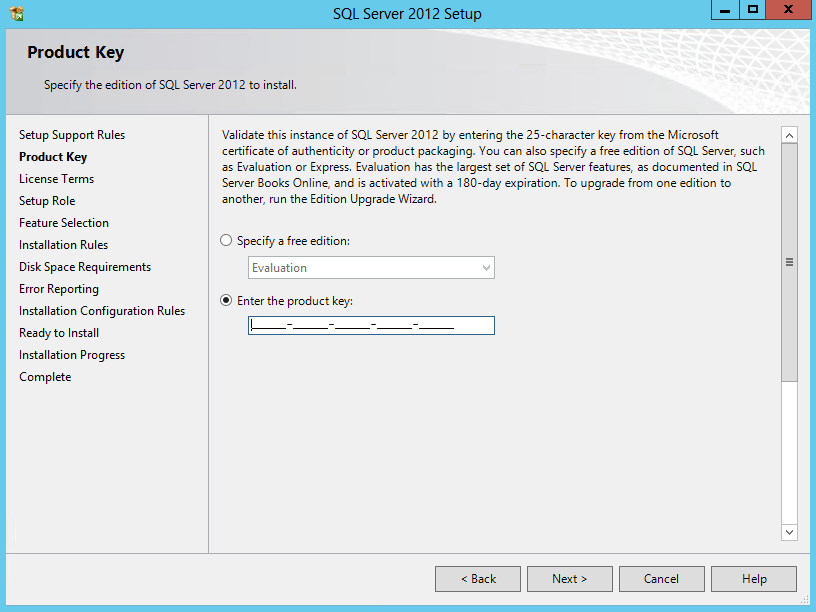
Enter the product key, or select the edition of SQL Server to install, and click Next.
The Wizard will then prompt you for License Terms, Windows Updates settings, and may prompt you for Customer Experience settings. Proceed through the wizard until it installs the setup files, and prompts you for feature selection. For the feature selection, select the following features, and hit Next:
- Instance Features -> Database Engine Services
- Shared Features -> Management Tools -> Complete
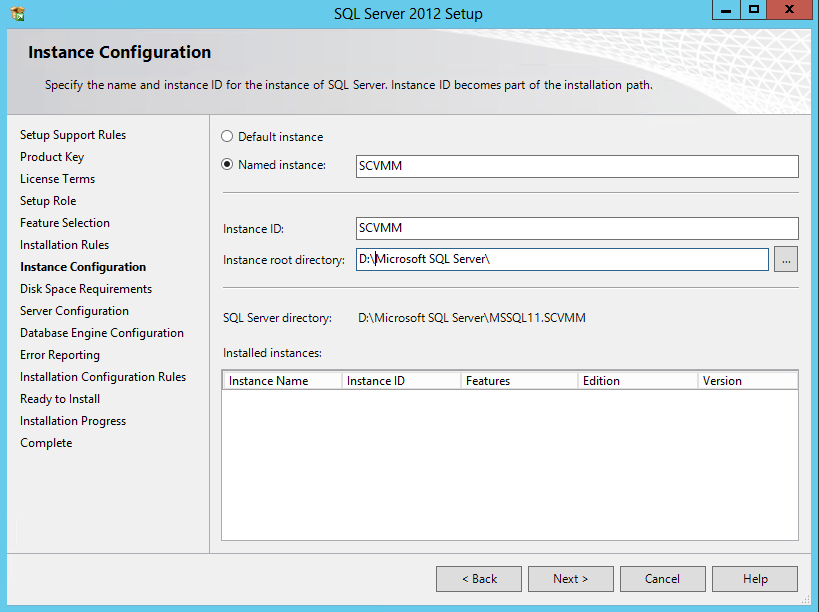
For the Instance configuration, specify a Named instance, and modify the root directory to use if other than the OS disk if disk space is an issue, and hit Next.
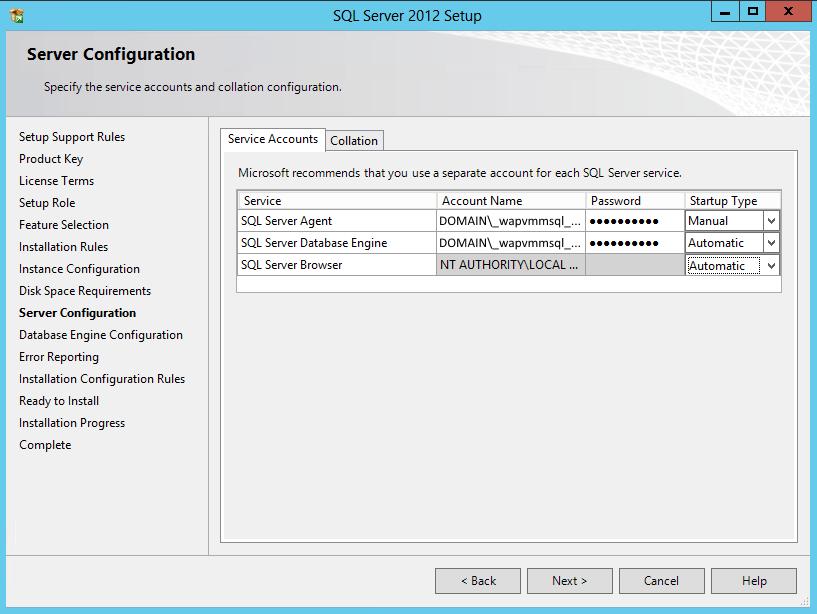
The Server Configuration requires us to select our service accounts that were created for VMM. Under Account Name, click the box and browse to select the service account created above, DOMAIN\_wapvmmsql_sa, and specify the service accounts password. Do this for the SQL Server Agent as well as the SQL Server Database Engine, and click Next.
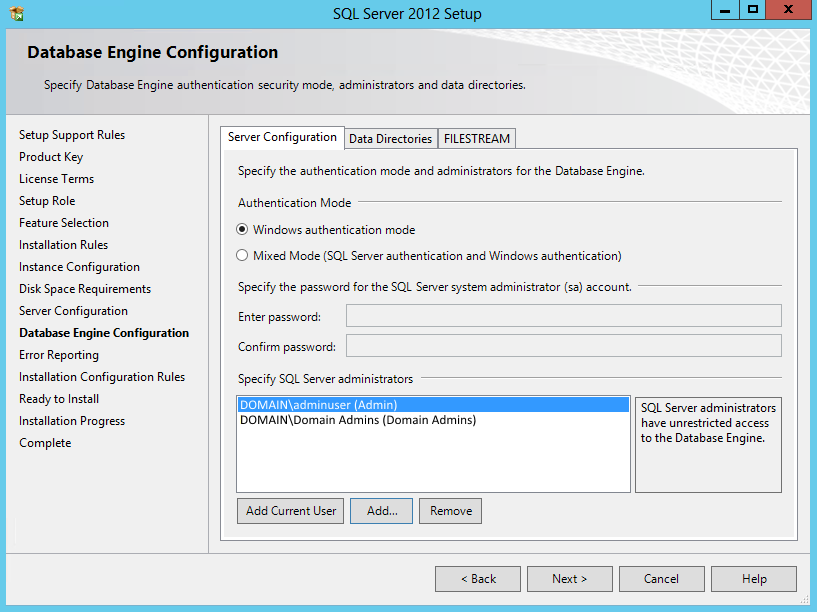
The Database Engine Configuration page allows you to specify users who can access the database directly. You can specify Mixed Mode Authentication, setup a password for the sa (system administrator) account, or just use AD. In our case, we are specifying the current user, as well as an AD security group.
Proceed with the wizard, and install all of the selected features. Click close once the installation is complete.
Windows Assessment and Deployment Kit (ADK)
There are several features from the Windows Assessment and Deployment Kit that are required for VMM. The following link is the download page for the ADK
Windows Assessment and Deployment Kit (ADK) Download
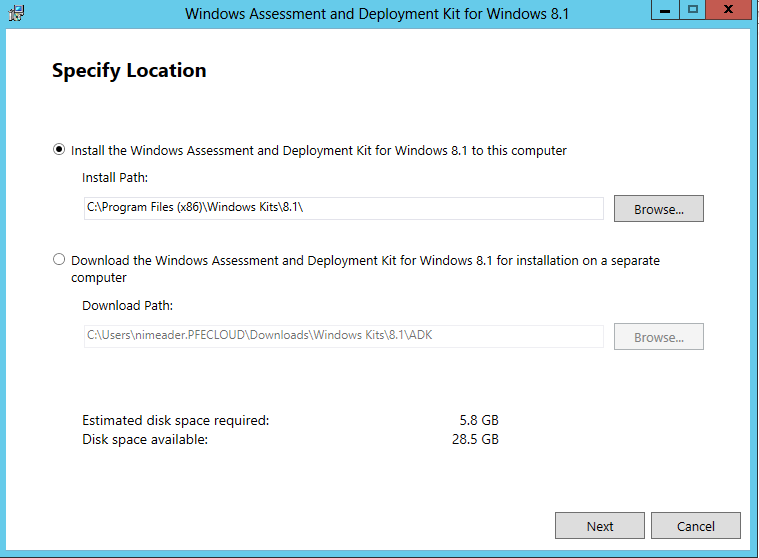
Once the installer is downloaded, run adksetup.exe. Use the default installation paths, and click Next.
The installer will prompt you for Customer Experience settings, and License Agreement. Proceed with the installer until you reach the feature selection page. Select the Deployment Tools, and Windows Preinstallation Environment, while unchecking any other settings as seen below. Proceed by clicking Install.
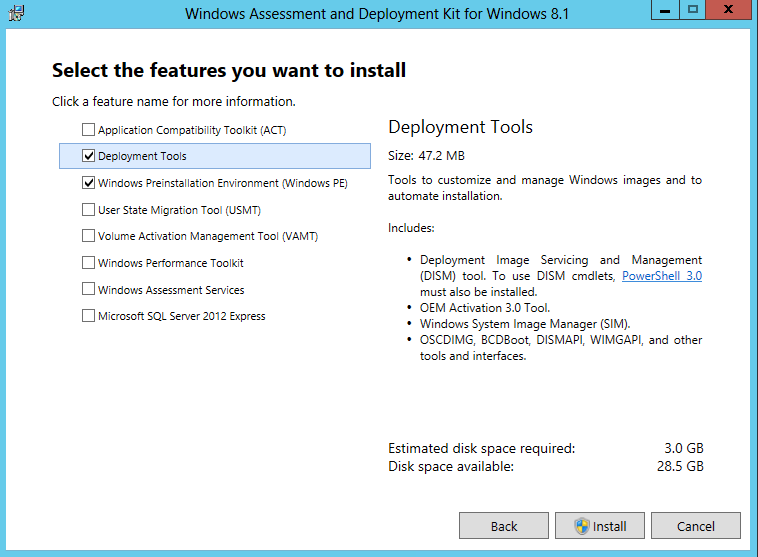
Note: this process may take a while to complete
Click close once the installation has completed.
Virtual Machine Manager
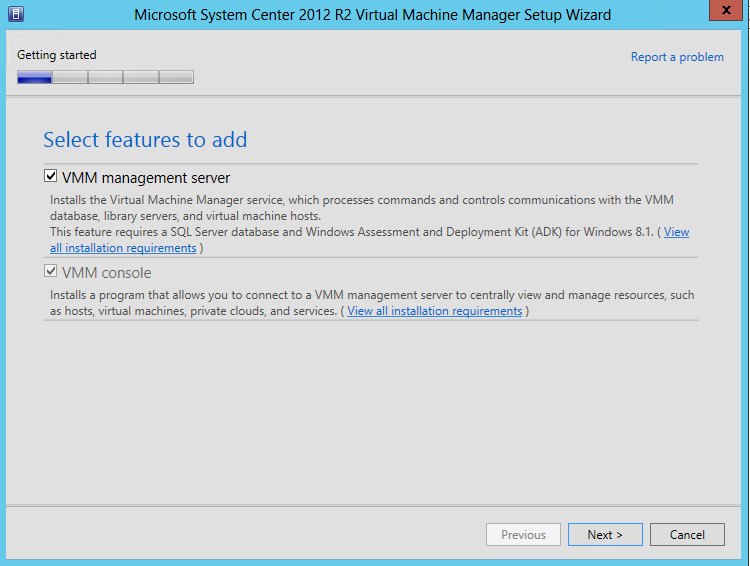
Once all the VMM prerequisites are set up, we are able to install the VMM service itself. Open the installation media by clicking setup.exe, and click on Install to bring up the installation wizard. On the feature selection page, select VMM management server, and click Next.
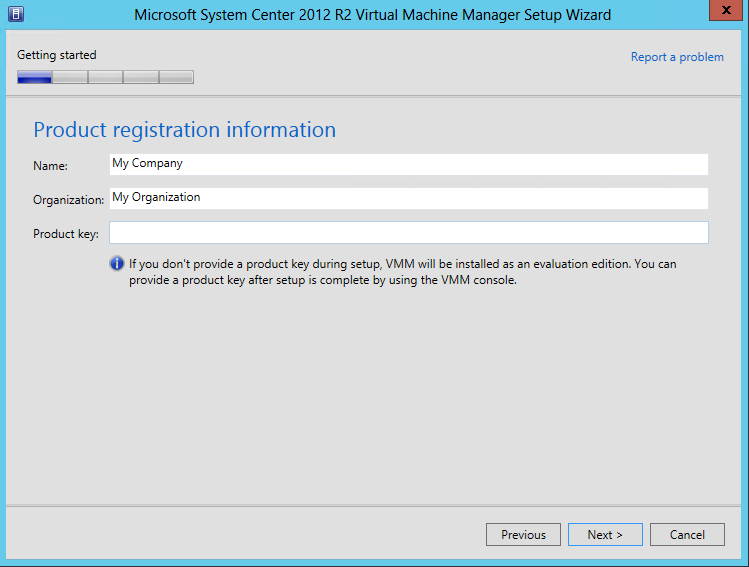
Specify your organization settings, and enter the product key for System Center, and click Next.
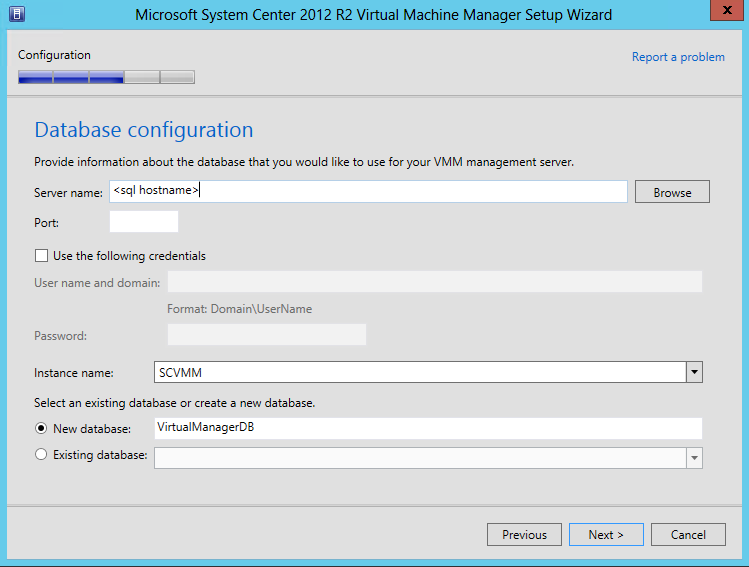
The wizard will then prompt you through the License Agreement, Customer Experience settings, Microsoft Update settings, and installation location. Proceed through these steps until you get to the Database configuration. For the Server name, select the FQDN of the server where the VMM SQL instance was installed (in our case, this was the VMM server itself). Select our named instance from the Instance name menu, and click Next.
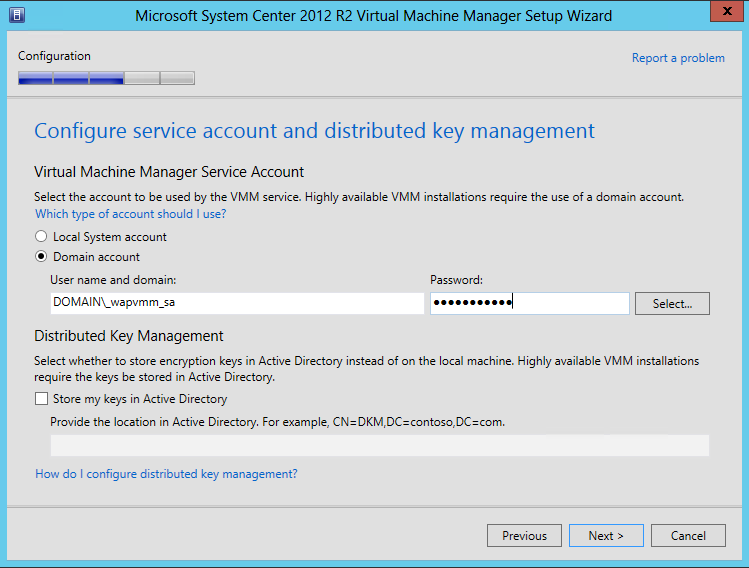
On the Configure Service Account page, we will set up the credentials that VMM will be running under. Select Domain account, and click select to specify the account DOMAIN\_wapvmm_sa, and enter the service accounts password.
Note: This service account must be added to the local administrator group on the VMM node.
Note: Once this account is specified, it cannot be changed unless the service is uninstalled and reinstalled
Proceed to the port configuration by clicking Next, accept the default port configuration, and proceed to the Library Configuration by clicking Next.
For the Library Configuration, change the default share location to a location on the data disk. Click Next and proceed to the Install. Once the installation is complete, click close, and the VMM console will start.
Initial setup of VMM
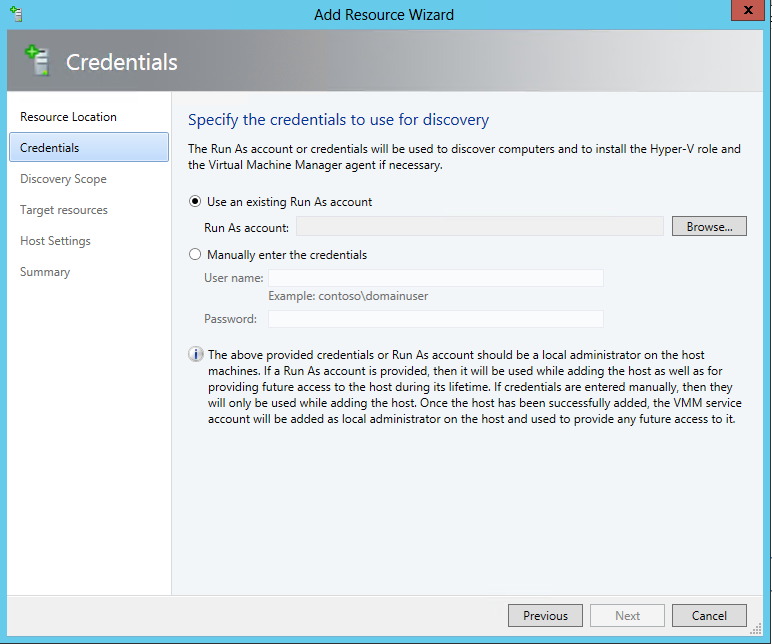
Once all the prerequisite software and VMM service are installed, the next thing to do is to define the Hyper-V servers that will be managed by VMM. To do this, click on Fabric -> Add Resources -> Hyper-V Hosts and Clusters and a resource wizard will start up. Select the option for Windows Server computers in a trusted Active Directory domain, and click Next. For the credentials, either specify a new Run As account, or enter credentials with appropriate permissions on the nodes. In either case, the credentials will need to be a user with administrative access to the machines, such as a user added to the Administrators or Domain Admins groups. This user may be separate from the service account created above. In our case, we are using our own user account, which is a member of the Domain Admins group, which provides administrative access to all machines in the VMM cluster.
Click Next to begin the discovery of hardware.
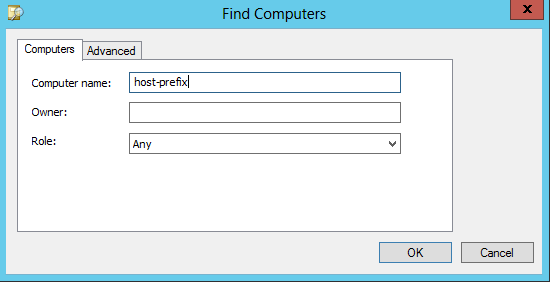
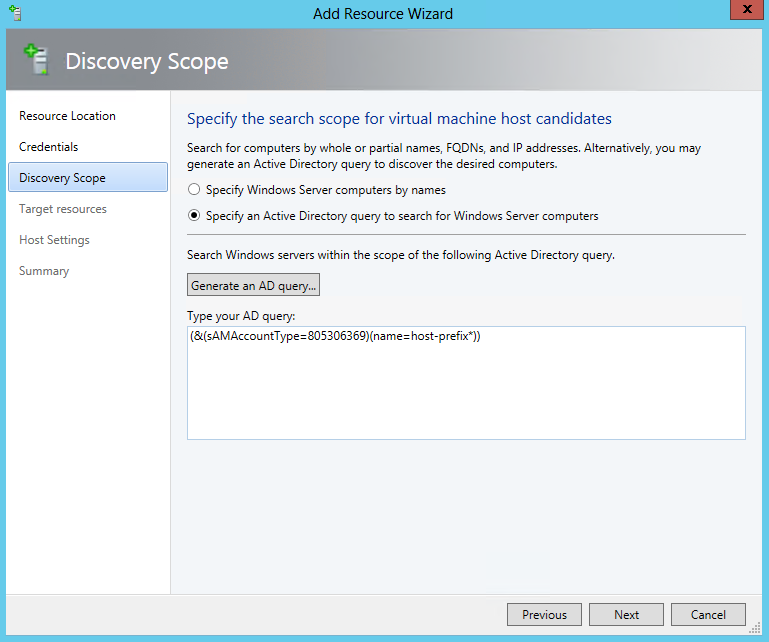
To select the hardware for the cluster, for ease, select Specify an Active Directory query, and click Generate an AD query. Enter your host prefix, and hit ok to show the AD query.
Click Next to select the target servers.
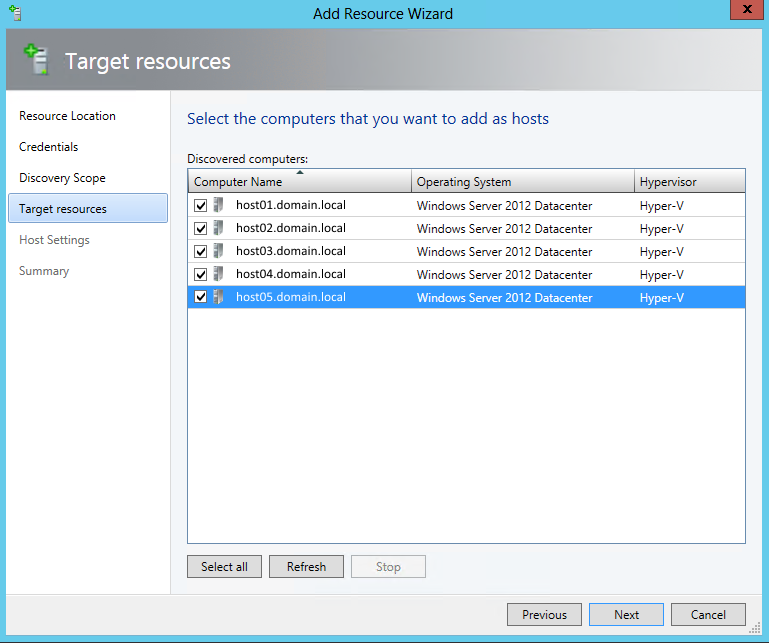
Add a checkmark next to the appropriate servers and click Next.
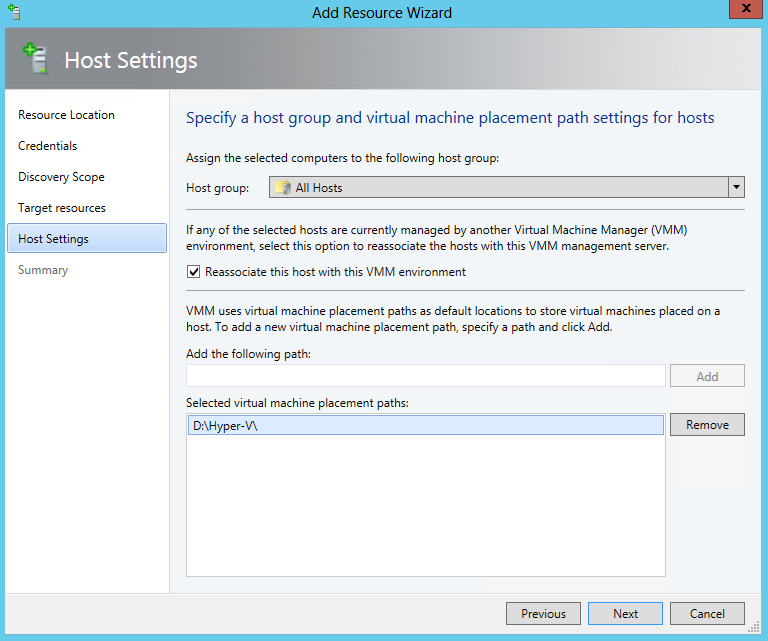
Leave All Hosts selected for the Host Group, as we can modify this later while we are configuring the fabric. Select Reassociate this host... to ensure that the agent installed on the Hyper-V nodes are correctly configured for this VMM. Select the correct placement path (preferably on a data disk), and click add, and click Next.
The wizard will then create a job for each VM in the cluster, and once all have completed, all should be visible under Fabric -> Servers -> All Hosts.
Finishing Up and Next Steps
At this point, we should have a functioning VMM cluster, with a default fabric. Creating VMs at this point may not provide optimal results, as the fabric has not yet been configured. Our next steps will be to prepare the fabric on the VMM cluster to prepare for WAP. Creating the fabric for WAP includes configuring the virtual network components on the Hyper-V nodes using VMM, creating a virtual network, and installing the Service Provider Foundation, which allows WAP to interact with the VMM cluster.
- Requirements, Architecture, and Prerequisites
- Configuring the VMM fabric (the next installment)
- Configuring Service Provider Foundation
- Windows Azure Pack installation
- Windows Azure Pack configuration
- Windows Azure Pack Usage
- Windows Azure Pack customization