Enable custom security trimming with FAST Search for Sharepoint and Documentum
Enable custom security trimming with FAST Search for Sharepoint and Documentum
With the new FAST Search for Sharepoint Feb CU that came out this week(2/29/2012) is some new bits for custom security trimming. Now these bits are made specifically to connect to Documentum and use AD style security credentials but you can also use them to create custom connectors. Today I will just be covering the process on how to setup the FAST farm for these bits and how to setup all the backend services to get custom security running.
If you are looking for troubleshooting that will be the next Blog entry I will be putting up 3/5/2012(too big for for one entry).
System Requirements
The following are required to use this feature:
• Feb CU 2012 installed on SP and FAST
• Windows Server 2008 R2
• SharePoint 2010
• FastSearch for SharePoint 2010
• 8 GB RAM on each node minimum
• An AD LDS Windows Server instance
• Documentum Content Server 5, 6 or 6.5
• Microsoft Documentum
Connector with TCS support with Documentum Foundation Services DLLs. I.e. the
DLLs for the DFS Productivity Layer v6.5 SP2 with DFS hotfix.
Copy to
%FASTSEARCH%\bin on the FAST farm and the GAC on your SP farm.
- Emc.Documentum.FS.DataModel.Core.dll
- Emc.Documentum.FS.DataModel.Shared.dll
- Emc.Documentum.FS.Runtime.dll
- Emc.Documentum.FS.Services.Core.dll
On the SharePoint crawler components edit the DCTMConfig.xml file and set the PersistDCTMACL to “True” for the Connector which will then
store ACLs as crawled properties, default is “False”.
This file is usually located at C:\Program Files\Common Files\Microsoft
Shared\Web Server Extensions\14\CONFIG\SearchConnectors\Documentum\DCTMConfig.xml
- Stop the ISS FASTSearchAppPool or stop IIS completely or the %FASTSEARCH%\bin\Microsoft.sharepoint.search.extended.utils.dll
will be locked. - Install the Feb CU as you would any other CU
Run the included PowerShell script to enable custom security trimming
For each FAST farm node in the deployment:
- Open a PowerShell v2 with Administrator rights.
- To enable custom security trimming:
% customsecurity.ps1 –action enable
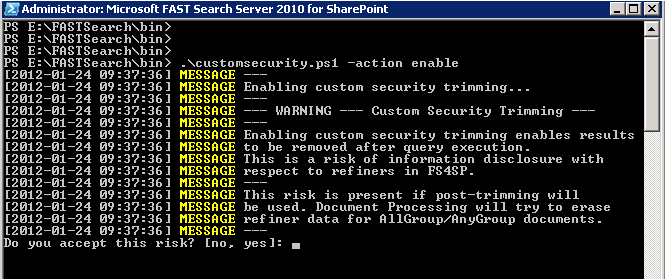
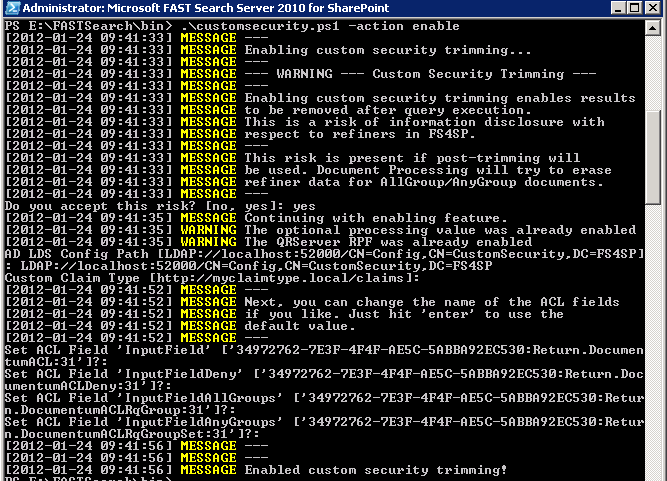
The script will ask you for the location of the AD LDS. For example:
LDAP://localhost:52000/CN=Config,CN=CustomSecurity,DC=FS4SP
The script will also allow you to change the claim type for the claim that will contain the group memberships from Documentum. This is a URI format but not a URI that points to a physical reachable object.
For instance:
https://custom.documentum.local/claims/group
Security Sync Service
The Security Sync Service connects to the Documentum Server.
It populates the AD LDS with group membership data from the Documentum Content Server.
There are two part to this service, 1) edit the security sync configuration file, 2) start the service as FAST service user and 3) edit the
CustomSecurityTrimming,xml file to alter the incoming ACL behavior for crawled DCTM documents.
- Edit the configuration file %FASTSEARCH%\bin\Microsoft.SharePoint.Search.Extended.Security.TrimmingSync.exe.config:
- In the <DataSource.Documentum> section
- Set the Documentum login. This is typically a super user of the Documentum Content Server.
- Set the Documentum password for this login.
- Set the name of the Documentum repository. This can be a repository that has TCS enabled.
- Set the location of the DFS, i.e. the URI for the Documentum Foundation Services.
- In the <DataSource.Documentum> section
Optional: Modify the syncIntervalMinutes to adjust the synchronization interval (default is 60 minutes).
Adjust the connectivity configuration settings to the Documentum Server by follow the same connection instructions given this article:
https://technet.microsoft.com/en-us/library/ff721973.aspx
2. Start the sync service
Designate one or more of the Select one node for it, preferably close to the Ad LDS instance.
Set the user credentials for this service to be to be the same as the FastSearch for SharePoint 2010 service user
Open the Server Manager in Windows.
-
- Expand the Configuration and Services in the left column.
- Locate the service named “FAST Search Server for SharePoint Security
Sync” and open its properties. - Click on the “Log On” tab, select log on as “This account” to type in
credentials for the FS4SP user. - Adjust the startup type from Manual to Automatic.
3. Edit %FASTSEARCH%\etc\CustomSecurityTrimming.xml file:
<param name="OverwriteOutputAttr" value="1" type="int"/>
Changing this from the default value “0” will alter the behavior and strip away any other values that may have been set earlier in the pipeline stage which usually includes another style of authentication.
AD LDS
An AD LDS location will be used by the Security Sync service. Specifically, user and group membership information will be populated on a regular interval from the Documentum Content Server directly.
Follow the generic AD LDS instructions on TechNet to add the instance and create a partition for it.
Use the MS-InetOrgPerson schema rather than creating a custom one.
https://technet.microsoft.com/en-us/library/cc770639(WS.10).aspx
A suggested name for the partition is
CN=CustomSecurity,DC=FS4SP
This should imply that your AD LDS instance or farm configuration full address would be
LDAP://localhost:52000/CN=Config,CN=CustomSecurity,DC=FS4SP
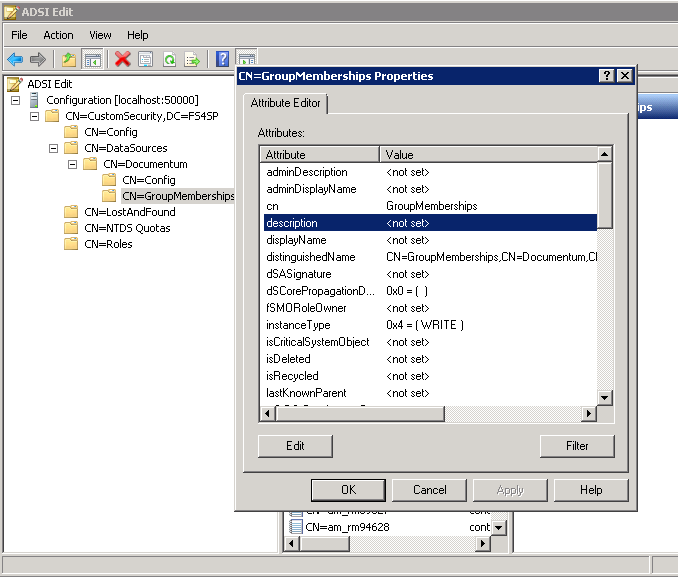
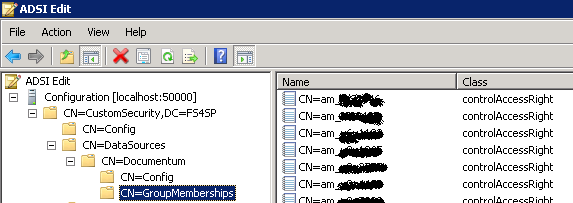
Once set up and the Security Sync service has been run, have a look at the following interesting keys, you can use AD LDS edit to complete this.
CN=Config |
CN=Setup
Note:
If CN=Config is missing, you must create a container named Config.
If the CN=Setup under CN=Config is missing, then create a controlAccessRight named Setup.
The “description” field must contain a DataSource value of the CN=Setup node.
DataSource:CN=Documentum,CN=DataSources,CN=CustomSecurity,DC=FS4SP
CN=Config
CN=Setup
The “description” : DataSource:CN=Documentum,CN=DataSo…
CN=DataSources
CN=Documentum
CN=Config
The “description” can be used to set hidden unsupported parameters.
CN=GroupMemberships
The “description” field contains the group membership info, which is semi-colon
separated.
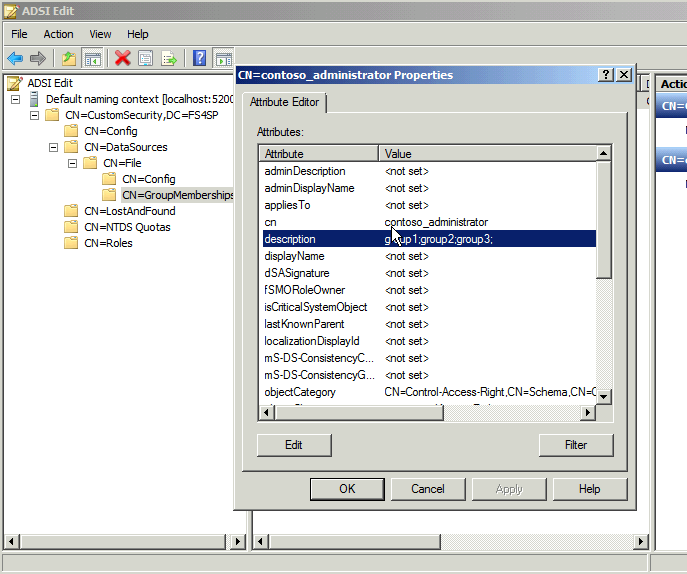
Force run the security sync service again and you should see under GroupMemberships your users filling in as format CN=DOMAIN_user:
From here you can add the DCTM crawl on the SharePoint CA under the FAST Content SSA. You can follow the rest of these instructions on TechNet:
https://technet.microsoft.com/en-us/library/ff721975.aspx
After a crawl you should be able to see the newly crawled documents in the index and have specific users search on documents that these users have access to.
More info on this subject coming soon as we see it released into the wild. Also look here and at my blog for upcoming troubleshooting for this subject.
-Thanks
-Kris