Using OMPM Part 2 – Performing Bulk Conversion
Brought to you by our compatibility guru Curtis Sawin.
Still using OMPM? Give Office Telemetry Dashboard a try!
Overview
In Part 1 of this series, we discussed how to use OMPM to identify “conversion candidates,” which are documents that pose virtually no compatibility risks when you convert them from the binary format (e.g., xls, doc, and ppt files) to the Open XML format (e.g., xlsx, docx, pptx).
Let’s take a look at the process of actually converting the documents. This involves using the Office File Converter Tool (OFC.EXE), and using an exported list from the OMPM Reporting Tool (OMPM.accdr).
Converting the conversion candidates
To recap, you can use the OMPM reporting tool to create a “low risk” filter to identify documents that:
- haven’t been modified in n days (eg, n = 30)
- have only “green” conversion issues identified by OMPM
- don’t have any conversion issues identified by OMPM
- don’t have macro issues identified by OMPM
The following WHERE clause can be used to meet this criteria:
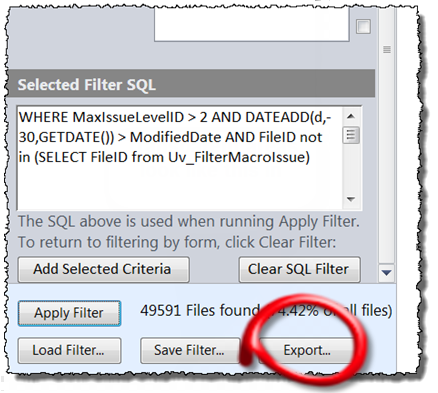
WHERE MaxIssueLevelID > 2 AND DATEADD(d,-30,GETDATE()) > ModifiedDate AND FileID not in (SELECT FileID from Uv_FilterMacroIssue)
To convert files that meet these criteria, you can use the OMPM reporting tool to export the filtered list. After you’ve selected Apply Filter to add your criteria, select the Export… button to export the list of files.
The output will be one or more XML files that contain the full path to all the files in your result set. The folder in which the files have been exported will be referenced by the file conversion tool, OFC.exe
Next, open the OFC.ini file (found in the “TOOLS” folder when you download and extract the OMPM Toolset), and modify the FileListFolder item to point to the same folder where you exported the files. For example, if you exported the file list to the D:\DataExport folder, the FileListFolder item would look like this:
FileListFolder=D:\DataExport
Using the FileListFolder item will result in OFC.exe converting all the files that have been exported by the OMPM reporting tool. Further, using FileListFolder rather than the [FoldersToConvert] section of the OFC.ini allows you to ensure that you’re only converting files that you’ve specifically tagged as low-risk “conversion candidates.” Using [FoldersToConvert] section simply points OFC.exe at one or more folders and says “convert everything.” In some cases this can be helpful, but if your goal is to selectively convert files while retaining the ability to automate the conversion, using FileListFolder provides much more control.

To facilitate moving the converted files to the original location(s), the ofc.ini file has a [ConversionInfo] section that allows you specify the destination folder structure. For example, you could reproduce the folder structure by specifying the following:
[ConversionInfo]
SourcePathTemplate=*\*\*\*\*\*\*\*\*\
DestinationPathTemplate=X:\*1\*2\*3\*4\*5\*6\*7\*8\*9
This would result in the converted files being placed in a folder structure similar to the source folder in on the “X:\” drive. OFC.exe also adds the computer name to the destination path. If you can reproduce the folder structure, you’re in position to implement a repeatable process to move the new files and delete the old ones. Even better, you could create a script to automate such a process.
Also, OFC can convert to a maximum depth of 10 folders. For example, DestinationPathTemplate=I:\Converted\*1\*2\*3\*4\*5\*6\*7\*8\*9\ works correctly. However, DestinationPathTemplate=I:\Converted\*1\*2\*3\*4\*5\*6\*7\*8\*9\*10\ does not work.
One mitigation for this is to map a drive letter to a folder structure (ie, connect the “x:\” drive to \\myserver\myshare\folder1\folder2\folder3\folder4) and perform a find-and-replace in the exported XML file(s) to replace the folder structure with the drive letter.
The impact of this limitation should be minimal, but it’s a pain to troubleshoot, so we wanted to make sure you’re aware of this limitation.
Below are some screen shots that show examples of the various components.
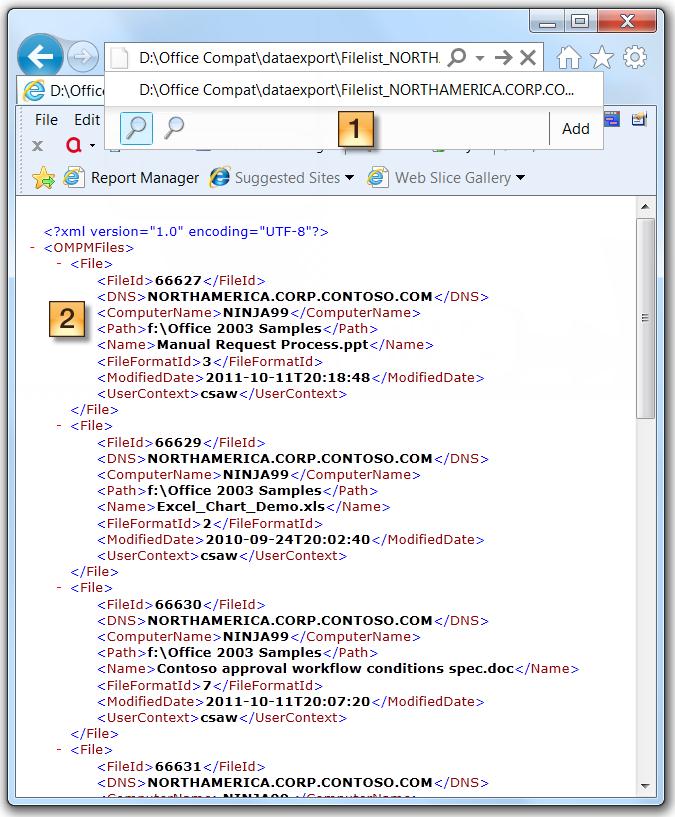
Here is an exported XML file from the OMPM Reporting tool:
Notes:
- Check out the Path to the XML file (D:\Office Compat\DataExport). This is where we exported our filtered list using the OMPM Reporting Tool
- Check out the ComputerName and Path values. These will be seen in the destination folder structure.
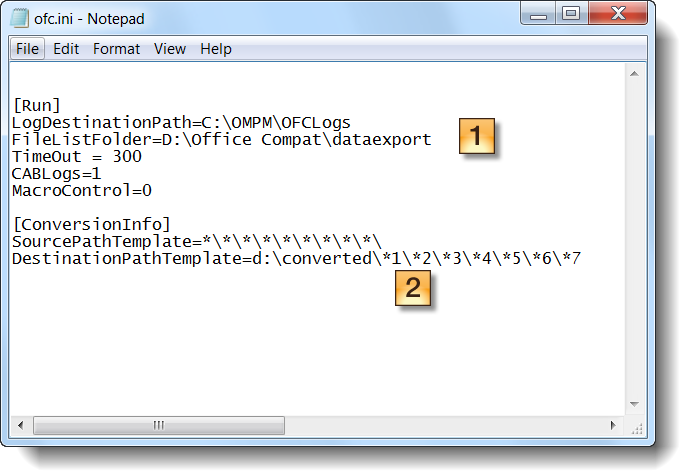
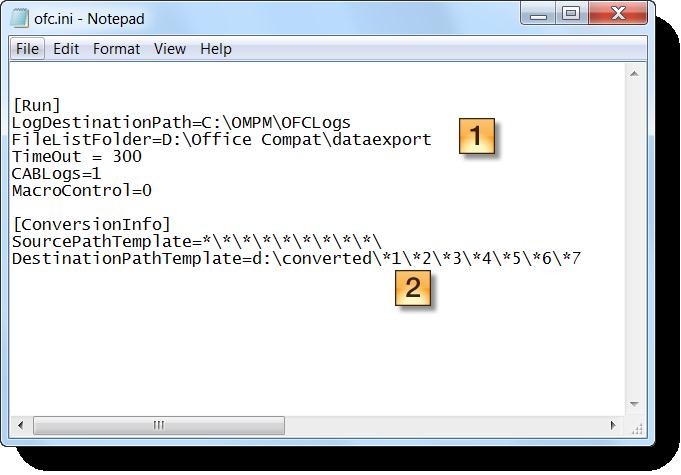
Here is an OFC.INI file (with all the comments removed):
Notes:
- Check out the FileListFolder value (D:\Office Compat\DataExport). This is where we exported our filtered list using the OMPM Reporting Tool
- Check out the DestinationPathTemplate value. This indicates that our converted files will be placed in a folder structure within the D:\Converted folder.
You can find more information about the items in the OFC.ini file in the TechNet article Convert binary Office files by using the Office File Converter (OFC) and Version Extraction Tool (VET)
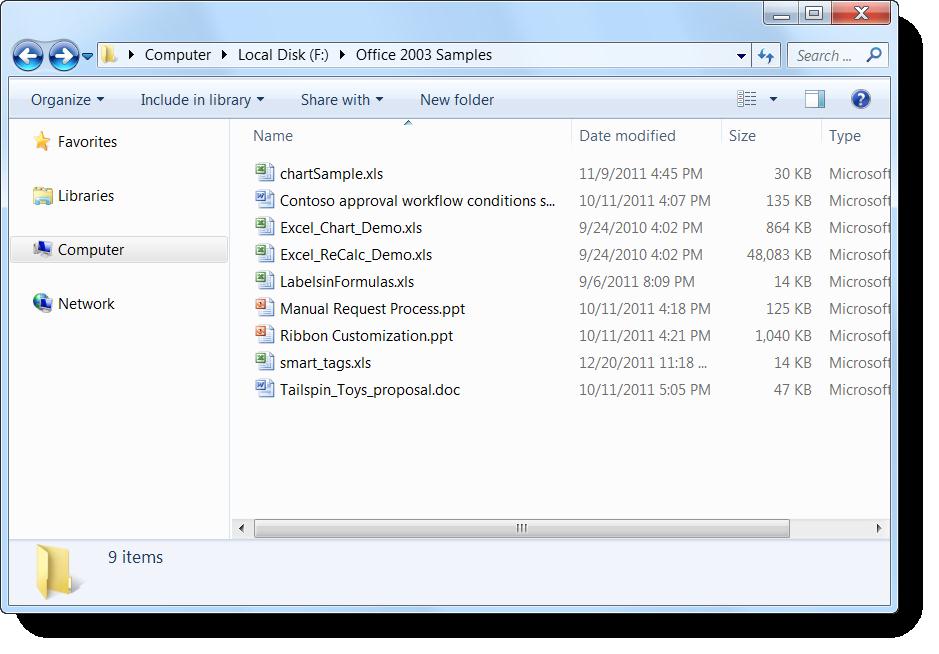
Here is my source location of my legacy files:

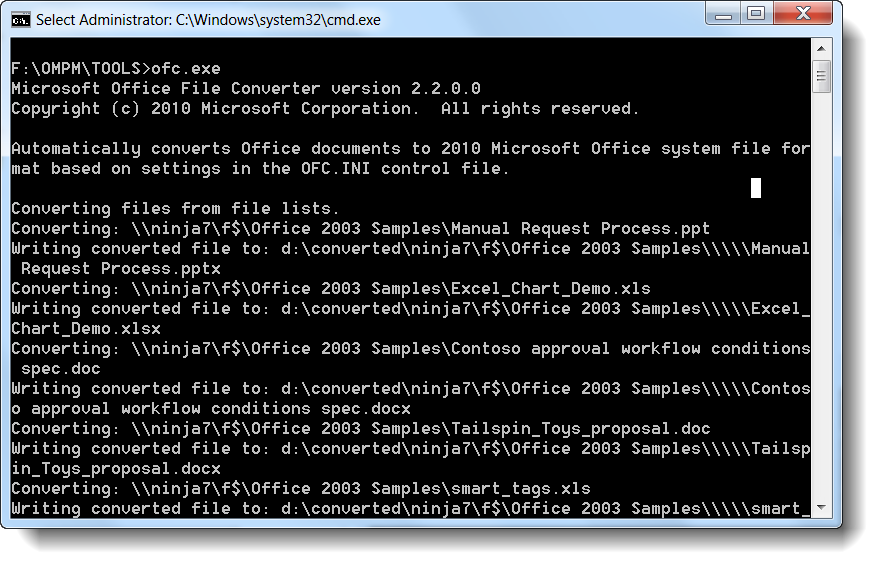
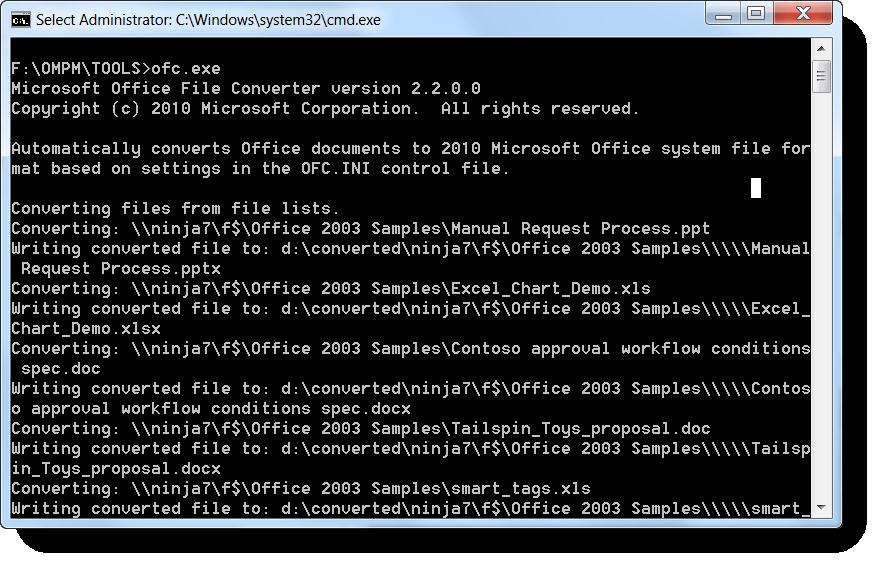
The next step is to run OFC.exe from a command-prompt. No command-line parameters are needed if you have the ofc.ini in the same folder. Here is a screen shot of OFC.exe running:
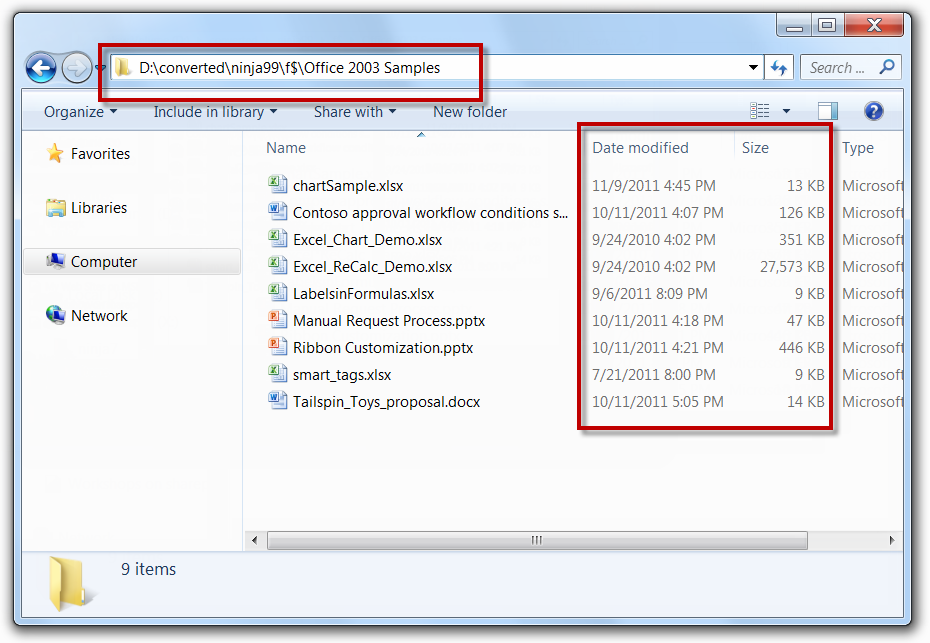
Below is a screen shot of the resulting folder:

Check out the folder structure D:\Converted\Ninja99\f$\Converted. The Destination Path includes the computer name and drive letter (or UNC name) in the folder structure. This facilitates moving the files back to the original location.
Also, note the Date Modified and Size columns. The conversion process retains the original modified, accessed, and created time stamps (which is good if you have archive/storage solutions that are triggered using these time stamps), and the sizes are significantly smaller than the previous versions.
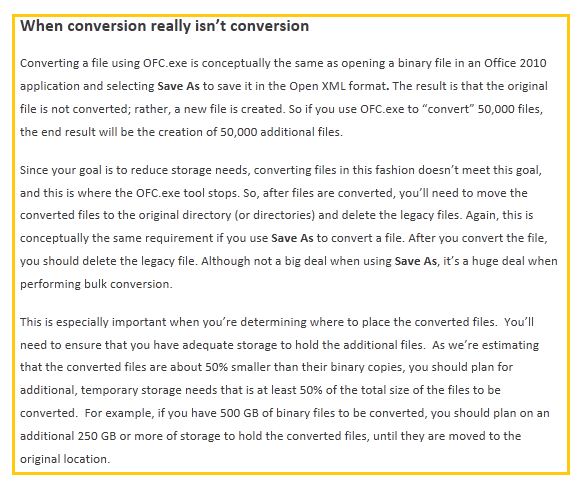
So keep in mind that using OFC.exe to “convert” files will require you to clean up the legacy files and replace them with the converted ones. Thus, when determining the ROI of a bulk conversion project, the time investment of this clean up activity must be considered.
Summary
Performing bulk conversion is an environment optimization task that will help you realize the value of your investment in Office 2010 by reducing your storage needs, which will save you money. Bulk conversion should be considered an optional task, and it should not be performed when preparing to deploy Office 2010, it should be used only post-deployment...and on low-risk files.