Using the Office Customization Tool to install a KMS key for Visio 2010
We've had questions about whether the Office Customization Tool can be used to install a Key Management Service (KMS) key for a volume licensed version of Visio 2010 Standard. The short answer is yes. Here are the details:
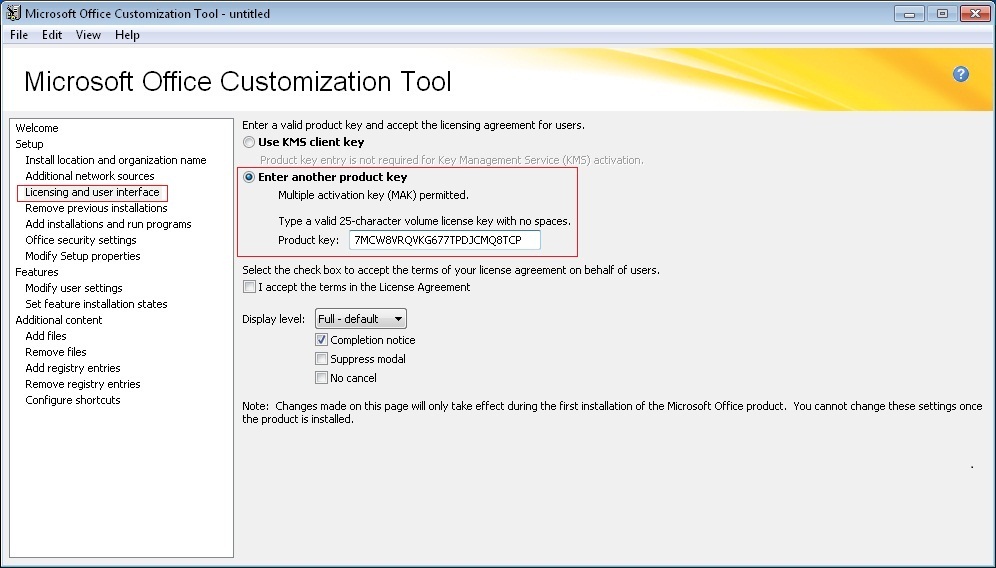
The Enter another product key option in the Licensing and user interface section of the OCT is intended for entering a Multiple Activation Key (MAK) key. You can also use the Enter another product key option (shown below) to enter a KMS key for volume license versions of Microsoft Visio Standard 2010 or Microsoft Visio Professional 2010. Visio 2010 is preinstalled with the Microsoft Visio Premium 2010 KMS client key by default. This enables all the Microsoft Visio Premium 2010 features. However, if you have a license agreement for either Microsoft Visio Standard 2010 or Microsoft Visio Professional 2010, you must install the appropriate KMS client key. The features that are available depend on the key that you install.
For more information, see Deploy Visio 2010 in Deploy volume activation of Office 2010, and the Office Deployment team blog, Volume License editions of Visio 2010 install Premium edition by default.
The following table shows the KMS client keys for Visio 2010 editions. If you have a license agreement for Microsoft Visio Standard 2010 or Microsoft Visio Professional 2010, you can enter the appropriate KMS client key in the OCT when you perform an initial installation of Visio.
Visio edition |
KMS client key |
Visio Standard 2010 |
767HD-QGMWX-8QTDB-9G3R2-KHFGJ |
Visio Professional 2010 |
7MCW8-VRQVK-G677T-PDJCM-Q8TCP |
Visio Premium 2010 |
D9DWC-HPYVV-JGF4P-BTWQB-WX8BJ |
To create a Setup customization .msp file to install the Visio KMS key with the OCT:
Run the OCT from the network installation point (the shared network location that contains the Visio Standard 2010 or Visio Professional 2010 source files).
From the root of the network installation point, run the setup.exe /admin command line to start the OCT. For example:
\\server\share\Office2010\Visio2010Pro\x86\setup.exe /adminSelect the Visio product (Visio Professional 2010 32-bit in this example) that you want to configure, and then click OK.
In the left pane, click Licensing and user interface.
In the right pane, select Enter another product key (shown below), and enter the appropriate Visio KMS license key without spaces in the Product key text box. For example, for Visio Professional 2010, enter: 7MCW8VRQVKG677TPDJCMQ8TCP
Click Save on the File menu, and then save the Setup customization .msp file in the Updates folder at the root of the network installation point for Visio (x86 folder in this example).
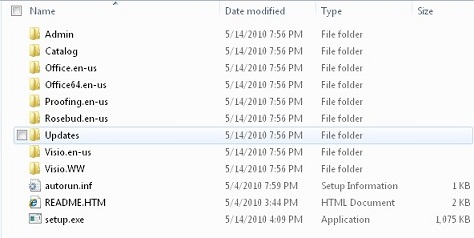
When you run Setup.exe from the network installation point, Setup looks in the Updates folder for Setup customization .msp file for the product that you are installing.
To learn about the Office Activation Technologies, see Volume activation overview for Office 2010.
For information about how to use the OCT to customize Setup, see Customize Setup before installing Office 2010. This video demonstrates how to use the OCT: Office 2010 client: Office Customization Tool walkthrough (https://go.microsoft.com/fwlink/?LinkId=203127).