Migrate to SharePoint Online (O365–SPO) from On-Premise SharePoint or fileshare using new PowerShell migration APIs
**Updated to include SharePoint On-Prem to Office 365 SharePoint Online Scenario
Important
-
- This documentation covers features that are currently in preview and not yet finalized for use in production code.
- Replace <TENANT> with actual tenant prefix, <SPOSite> with SPO Site prefix and <On-PremSPSite> with SP On-Prem Site Prefix in all PowerShell cmdlets.
- Triple-click in code box to copy Code / PowerShell cmdlets if they don’t fit on screen!
Prerequisites
-
Valid Office 365 subscription
Valid Microsoft Azure subscription
Install SharePoint Online management shell version 16.0.4017.1200 or above from here. More details at https://technet.microsoft.com/en-us/library/fp161372.aspx
Run SharePoint Online management shell as Administrator and connect SPO service using the below cmdlet
Connect-SPOService -Url https://<TENANT>-admin.sharepoint.com
To keep things simple, lets divide the entire process in few steps:
Step 1 - Create SPO Migration Package
Step 1a – Create SPO Migration Package from SharePoint On-Prem Content
-
RDP to a WFE for On Premise SharePoint Server
Open SharePoint Management Shell as administrator
Export the Web / Site Collection using the below cmdlet
Export-SPWeb -Identity "https://<On-PremSPSite>" -ItemUrl "/OnPremDocLib" -Path "C:\SPOnPremExport" -NoFileCompression -IncludeVersions 4
-
- Note:
-
-
- -NoFileCompression is specified so output will be created in a folder and hence -Path is given without .cmp
- -ItemUrl parameter has to be a relative path i.e. if absolute URL is https://SharePoint.contoso.com/DocLib then –ItemUrl will be just “/DocLib”
- At this time, SPO migration pipe is oriented for list and document library content only. Hence, -ItemUrl is required.
More Info: Export-SPWeb https://technet.microsoft.com/en-us/library/ff607895.aspx
-
-
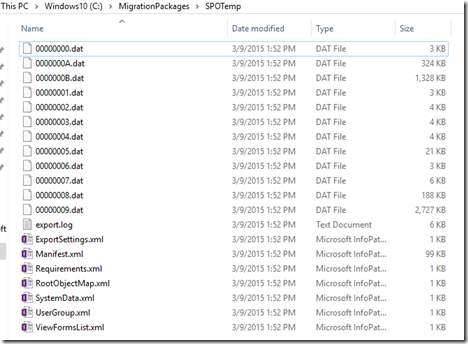
- Copy Data: Copy the Contents of this folder to the location on machine which has SharePoint Online Management Shell installed. i.e. I copied contents from C:\SPOnPremExport from my SharePoint On-Prem Server to C:\MigrationPackages\SPOTemp on my laptop.
OR
Step 1b – Create SPO Migration Package from a file share
-
Copy data / files to be migrated to SPO into a local / network folder e.g. \\nishant-lptp\SPOTEMP
- Note: Blocked file types for SPO is by default same as https://technet.microsoft.com/en-us/library/cc262496.aspx
Create a new migration package using below cmdlet
New-SPOMigrationPackage -SourceFilesPath "\\nishant-lptp\SPOTEMP" -OutputPackagePath "C:\MigrationPackages\SPOTEMP" -TargetWebUrl "https://<SPOSite>.sharepoint.com/" -TargetDocumentLibraryPath "SPOMigration"More Info: New-SPOMigrationPackage https://technet.microsoft.com/en-us/library/mt143603.aspx
Note:
-
- OutputPackagePath folder hierarchy will be created if it doesn’t exist
Step 2 - Prepare Final SPO Migration Package
-
Prepare data / files to be migrated using below cmdlet
For Step 1a
ConvertTo-SPOMigrationTargetedPackage -SourceFilesPath "C:\MigrationPackages\SPOTEMP" -SourcePackagePath "C:\MigrationPackages\SPOTEMP" -OutputPackagePath "C:\MigrationPackages\SPOMigrationPackage" -TargetWebUrl "https://<SPOSite>.sharepoint.com/" -TargetDocumentLibraryPath "SPOMigration"
-
For Step1b
ConvertTo-SPOMigrationTargetedPackage -SourceFilesPath "\\nishant-lptp\SPOTEMP" -SourcePackagePath "C:\MigrationPackages\SPOTEMP" -OutputPackagePath "C:\MigrationPackages\SPOMigrationPackage" -TargetWebUrl "https://<SPOSite>.sharepoint.com/" -TargetDocumentLibraryPath "SPOMigration"There are six required parameters to enter (others are optional)
- TargetwebURL: points to the destination Web
- SourceFilesPath: points to the you want to migrate
- SourcePackagePath: points to your Temporary package folder
- OutputPackagePath: points to your final package folder
- TargetDocumentLibraryPath: the path to your destination library
- Credentials: SPO credential that has admin rights to the destination site
More Info: ConvertTo-SPOMigrationTargetedPackage - https://technet.microsoft.com/en-us/library/mt143609.aspx
Step 3 - Upload SPO Migration Package to Azure Blob Containers
-
Follow the below steps to get Storage Account Name and two container names inside it. If you already have a storage account, you could use the same
- Login to Azure Portal via https://manage.windowsazure.com
- Browse to Storage > Create a new storage account e.g. nO365mig
- In newly created storage account create two containers e.g. migration-files, migration-package
Prepare to upload the prepared data / files to Azure Blob Containers using below cmdlet
For Step 1a
$azurelocations = Set-SPOMigrationPackageAzureSource -SourceFilesPath "C:\MigrationPackages\SPOTEMP" -SourcePackagePath "C:\MigrationPackages\SPOMigrationPackage" -FileContainerName migration-files -PackageContainerName migration-package -AccountName nO365mig -AccountKey "REAPLCE_WITH_YOUR_AZURE_STORAGE_ACCOUNT_ACCESS_KEY"For Step1b
$azurelocations = Set-SPOMigrationPackageAzureSource -SourceFilesPath "\\nishant-lptp\SPOTEMP" -SourcePackagePath "C:\MigrationPackages\SPOMigrationPackage" -FileContainerName migration-files -PackageContainerName migration-package -AccountName nO365mig -AccountKey "REAPLCE_WITH_YOUR_AZURE_STORAGE_ACCOUNT_ACCESS_KEY"More Info: Set-SPOMigrationPackageAzureSource - https://technet.microsoft.com/en-us/library/mt143606.aspx
Step 4 - Submit Migration Job
-
Submit Migration Job to transfer data from Source <to> Azure Blob Containers <to> SPO Site Collection using below cmdlet
Submit-SPOMigrationJob -TargetWebUrl "https://<SPOSite>.sharepoint.com/" -MigrationPackageAzureLocations $azurelocationsAbove cmdlet is generic and applies to both Step1a and Step1b
More Info: Submit-SPOMigrationJob - https://technet.microsoft.com/en-us/library/mt143605.aspx
Step 5 (Optional) - Check Migration Job Status
-
Check migration job (to transfer data from Azure Blob Containers to SPO Site Collection) status using below cmdlet
Get-SPOMigrationJobStatus -TargetWebUrl https://<SPOSite>.sharepoint.com/
Step 1a
Step 1b
Step 6 (Optional) - Remove Migration Job
-
In case if the migration job is stuck or if it needs to be removed for any reason you could use the below cmdlet (Note: This will work only if the job is not already completed)
Remove-SPOMigrationJob -JobId e79c5022-3aa1-446c-a8e6-2431063706fa -TargetWebUrl https://<SPOSite>.sharepoint.com/More Info: Remove-SPOMigrationJob - https://technet.microsoft.com/en-us/library/mt143607.aspx


