How to host an existing on-prem SharePoint 2013 virtual machine environment onto Microsoft Azure IaaS step-by-step
I have a functional, on premise SharePoint 2013 Test / Dev environment. I now want to host this environment at Microsoft Azure and take advantage of features Microsoft Azure IaaS (Infrastructure as a Service) has to offer. Here's how to go about it -
Prerequisite: You'll need an active Microsoft Azure subscription > Verify by browsing to https://manage.windowsazure.com/ (or new portal at https://portal.azure.com/) and sign-in using your Windows Live ID associated with Microsoft Azure subscription.
1. Create a Virtual Network > Give it a name and choose the region > Leave the DNS Server blank for now, we'll come back for it > Choose IP address range (Class A / B /C) and or add subnets as needed

2. (Optional) Download and Install "Microsoft Online Services Sign-in Assistant" from https://go.microsoft.com/fwlink/?LinkId=221500&clcid=0x409
3. Download and Install "Windows Azure PowerShell" from https://go.microsoft.com/?linkid=9811175&clcid=0x409
Note: .NET Framework 4.5 is a prerequisite to "Windows Azure PowerShell" so if not already installed, Web Platform Installer will download and install it.
a. Documentation: https://azure.microsoft.com/en-us/documentation/articles/install-configure-powershell/
b. Script Center: https://azure.microsoft.com/en-us/documentation/scripts/
4. Find out your Microsoft Azure Storage account URL and note it down

5. Locate your local VHD and note down the local path
6. Run "Windows Azure PowerShell" as Administrator
7. Run the below PowerShell command, this will open a browser window, sign in again if needed and it will download a file e.g. <SubScriptionName>-<Date>-credentials.publishsettings > Save this file locally
Get-AzurePublishSettingsFile
8. Run the below PowerShell command to Import the publishSettings file
Import-AzurePublishSettingsFile -PublishSettingsFile "C:\<SubScriptionName>-<DownloadDate>-credentials.publishsettings"

9. Type the below PowerShell command to verify the PowerShell connection to your Microsoft Azure Subscription
Get-AzureSubscription
10. Run the below PowerShell command to upload the VHD to Microsoft Azure storage
Add-AzureVhd -Destination " https://<AzureStorageAccountPath>/VHDName.vhd " -LocalFilePath "<LocalVHDPath>\VHDName.vhd"
It will first calculate MD5 hash of the VHD and then it will upload the VHD


11. Browse to Microsoft Azure Management Portal https://manage.windowsazure.com/
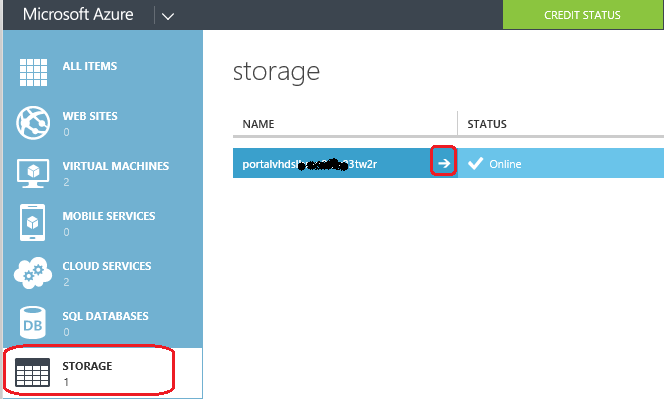
12. You could verify the VHD shows up in Storage by clicking on Storage > Select storage > Containers > Select appropriate container

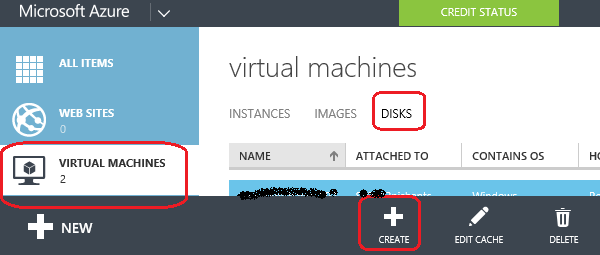
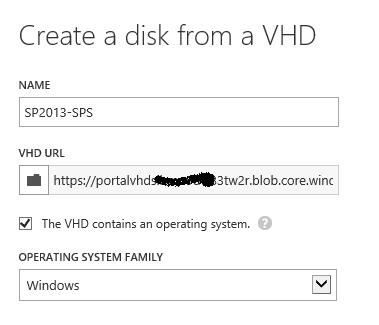
13. Create a Disk from VHD by clicking on Virtual Machines > Disks > Create > Select the appropriate VHD and give it a name > Put a check mark on "This VHD contains an operating system" and choose Windows as the OS family > It will start creating a disk and should complete in a minute or so
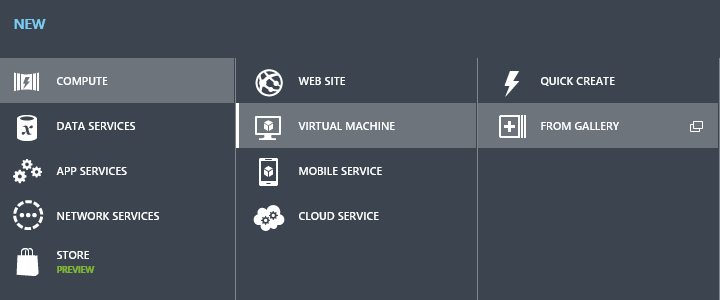
14. Now create a VM by clicking on Virtual Machines > New > Compute > Virtual Machine > From Gallery > Choose My Disks > Choose the appropriate disk > Click next

15. Provide VM name > Choose Size as appropriate > Click next > Choose to create a new cloud service and sure cloud service name is not duplicate (green tick) > Choose Network and subnet as designed in first step > Expose additional end points if needed > Finish the wizard > This should complete in a few minutes

16. (Optional unless you have your own DNS Server / DC) Click on Networks > Select your network > Note down IP address of DNS Server/ Domain controller machine > Click configure and provide DNS Server hostname and IP address > Click Save

17. Once ready, you can click on Connect to RDP to the VM

Note:
I. Since the Network Adapter will change, you'll need to re-assign the old IP addresses for DNS Servers if needed (especially if you have your own ADDS running on Microsoft Azure too). Otherwise name resolution and hence other services may fail.
II. Guest Windows OS may require re-activation in some cases.
III. It is possible to have simultaneous uploads for different VHDs to Microsoft Azure from different local machines.
· In case if you wish to download the VHD again from Microsoft Azure -
a. From UI: You can browse to Storage > Select storage > Containers > Select appropriate container > Choose VHD > Download.

II. Using PowerShell: You could use the following PowerShell command to download the VHD from Microsoft Azure.
Save-AzureVhd -Source " https://<AzureStorageAccountPath>/VHDName.vhd " -LocalFilePath "<LocalVHDPath>\VHDName.vhd"