Customizing the User Interface
Perhaps it’s already known, but I’m going to let the cat out of the bag. You can move your windows around and re-dock them in different places within the capture tab window. Our UI developer may flip out because he’s told me before this isn’t supported. He tells me there is a chance your layout may not be saved or you’ll end up in a state that you’ll have to reset. Also, if you upgrade, expect your window layout to also be reset. Just read that as a disclaimer and let’s mix things up in the UI.
Press Shift While Moving a Window
Shift is the key to making the window placement easy! [Dern puns] If you hold the shift key, and grab onto a window title, you will see a shaded area that previews how the window will dock. You can dock as a TAB when the shaded area fills the entire window area. Or you can split the window up/down or side to side. If you release the Shift button while dragging, and then release the window, the result is a floating window. This might be useful, except it’s limited to the confines of the parent capture tab. For me, docking is the way to go.
Recovering From “Disaster”
If you make a mistake or as the disclaimer mentions something strange happens, have no fear! There’s a way to recover easily. Just simply go to the View menu->Window and click “Restore Default Layout”. This will restore the original Network Monitor layout. Then feel free to try a completely new customized layout.
Paul’s Favorite Setup
My main requirement is to have plenty of space for the frame summary. I want to have as many columns as I could and as much width for the information, in particular the description. While I use the Hex display probably more than most users, I don’t need it front and center. So here are the steps to show you how I accomplish my favorite setup.
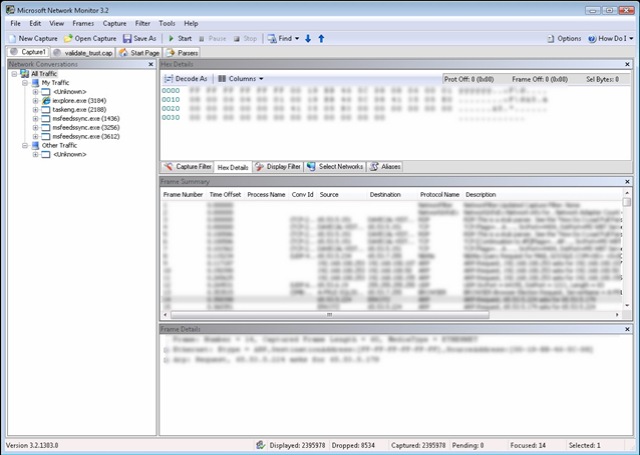
First, I move the Hex details in the Display Filter section as another TAB. After this step, it looks like this.
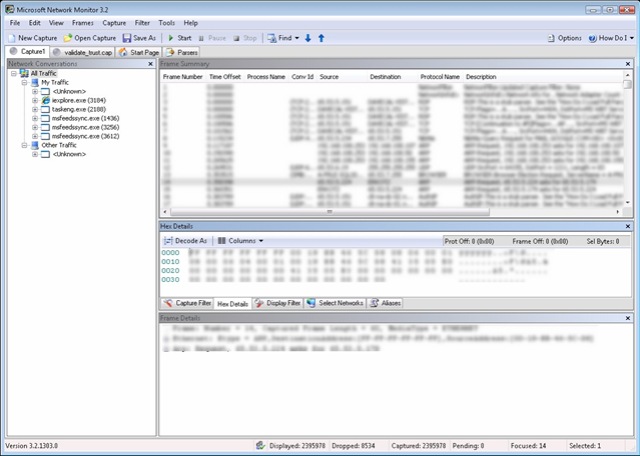
Next I move the Hex Details/Filters/Alias/Select Networks Tab section to the middle.
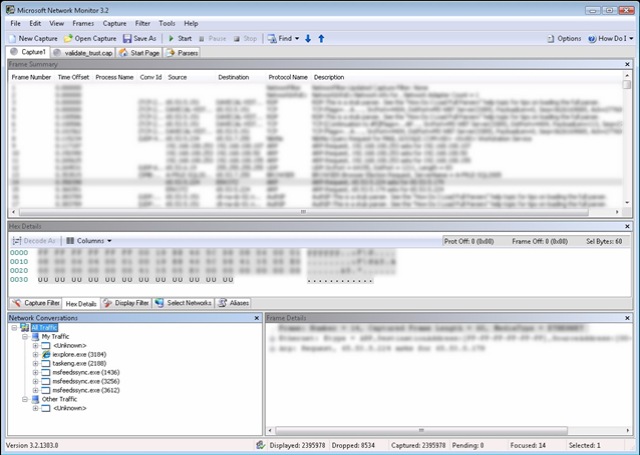
Then I move the Conversation Tree so it’s on the left side of the Frame Details.
Finally I put the Hex Details/Filters/Alias/Select Networks Tab section above the Frame Details. I end up with the following layout.
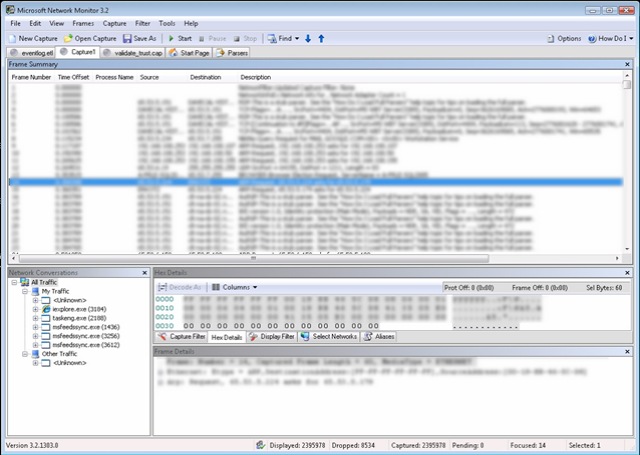
I prefer this setup because it gives me maximum column width for the Frame Summary. Also I have plenty of width for my Frame Details, which I can extend vertically by shrinking the Frame Summary window length.
Column Rearrangement
I’m not going to stop there. I also feel I can optimize the column layout. This is a supported change and it’s easy to move columns around by dragging and dropping. You can also right click the headings and choose “Choose Columns…” for more customization. But for my general setup, I will simply move the columns already there.
With the addition of the Find Conversation Feature, I no longer need the ConvID column. So I move it to the right of the description. I also find the Protocol Column is always repeated in the description, so I will also move this to the right of the description. With this change, my resulting setup looks like this below.
Now that I’m happy with this setup, I will save my column setup by right clicking and selecting “Save Column Layout”. The window layout will be saved once I exit.
A Custom Fit
While changing the Window layout isn’t a “supported” scenario, it does work well enough that I believe it’s safe to change. And if you do have to reset your window layout, it’s not that difficult to rearrange again. Each window in the Capture Tab Window is movable so I’m sure you can find a layout which best suits your needs.