Rebuild an Entire Database Availability Group
A database availability group (DAG), together with mailbox database copies, can provide automatic recovery from a variety of server, storage, network, and other hardware failures. A DAG can also provide a site resilience solution so that you can perform a datacenter switchover in the event of a site-level disaster. But even a comprehensive, intelligent, and robust solution such as a DAG can't protect you from all possible disasters, including disasters that affect an entire DAG.
Example of Exchange Environment
We'll work with a two-member DAG named DAG1 that contains 2 HUB/CAS/Mailbox servers named HCM1 and HCM2. HCM1 hosts the active copy of a database named DAG1-DB1, which is replicated to HCM2. In addition to hosting the passive copy of DAG1-DB1, HCM2 also hosts the active copy of DAG1-DB2, which is replicated to HCM1.
We also have an Edge server in the DMZ.
In this article we'll only focus on the required steps to rebuild an entire DAG, it will not covers the recovery of the Edge server.
Note: The required steps to bring back the DAG online are different from what is described in this article https://technet.microsoft.com/en-us/library/gg513521(v=exchg.141).aspx as we can start any cleanup operation from the Exchange Management shell because we've lost all the Exchange servers except the Edge that we could not use to perform those tasks. |
To be able to perform successfully the recovery you should have documented the following information:
- IP Addresses
- Hostname
- LUNs configuration
- Database copies that the server hosted
- The installation and databases / logfiles path. This is necessary because after adding the server back into the DAG, the databases and logfiles will be created on the previous location. The database and log location can be retrieved by looking at other servers in the DAG.
- The Exchange installation path : can be obtained by looking at the "MsExchInstallPath" attribute in the following key: CN=ExServerName,CN=Servers,CN=First Administrative Group,CN=Administrative Groups,CN=ExOrg Name,CN=Microsoft Exchange,CN=Services,CN=Configuration,DC=DomainName,CN=Com
Prepare the DAG for Recovery
- Using Active Directory Users and Computers, locate the CNO for the DAG. In our example, the name of the CNO is DAG1.
- Right-click the computer account for DAG1, point to All Tasks, and then select Reset Account.
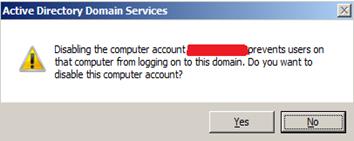
- Right-click the computer account for DAG1, point to All Tasks, and then select Disable Account. When the prompt appears, click Yes, and then click OK.
|
|
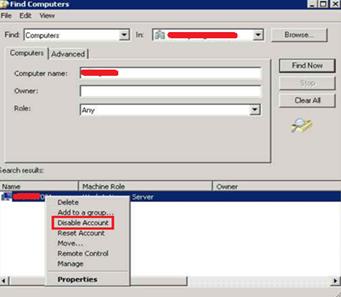
Right-click the computer account for HCM1, point to All Tasks, and then select Reset Account.
Right-click the computer account for HCM2, point to All Tasks, and then select Disable Account. When the prompt appears, click Yes, and then click OK
Repeat Step 4 and 5 to HCM2
Open ADSIEDIT, connectto Configuration partition
From ADSIEDIT browse to Services -> Microsoft Exchange –> Org Name –> Administrative Groups –> Exchange Administrative Group (FYDIBOHF23SPDLT) –> Servers –> HCM1
|
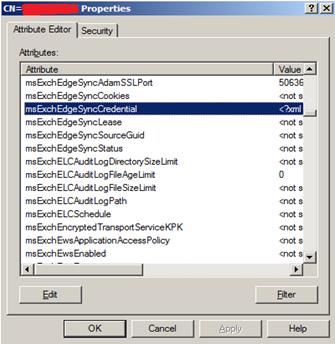
Right click the server and select properties
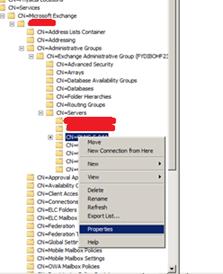
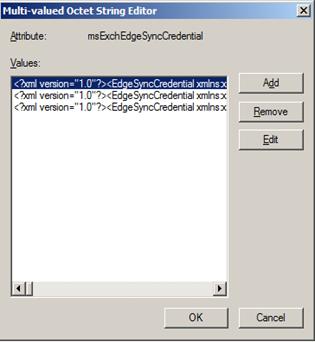
Double click the attribute msExchEdgeSyncCredential and then removeall the values
|
|
- Double click the attribute msExchMDBAvailabilityGroupLink and then removethe value
Build Replacement Mailbox Servers
Install and configure Windows Server.
Rename the computer with the appropriate name.
Configure the server as the one you lost (same IP addresses, LUNs, OS, etc…)
Join the computer to the appropriate Active Directory domain.
Install the prerequisites for running installed Exchange server roles. For details, see Exchange 2010 System Requirements
Insert the Exchange Media
From the first node you're going to restore
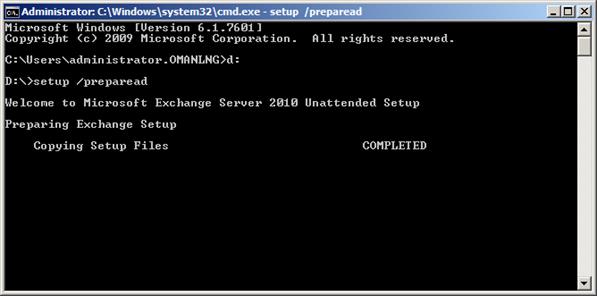
Run Setup /preparead
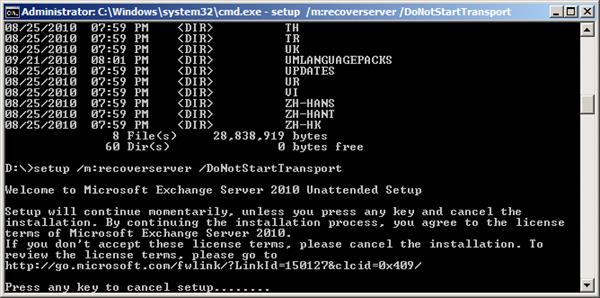
Run the following Command
Setup /m:recoverserver /DoNotStartTransport
- Restart the server
Perform the Cleanup Operation to Prepare for DAG Recovery
- Form the first server you restored run the following Exchange Management Shell commands to remove the databases copies
Remove-MailboxDatabaseCopy -Identity DAG1-DB1\HCM2 -Confirm:$False Remove-MailboxDatabaseCopy -Identity DAG1-DB2\HCM1 -Confirm:$False |
- Form the first server you restored run the following Exchange Management Shell command to remove the remaining node from the DAG
Remove-DatabaseAvailabilityGroupServer -Identity DAG1 -MailboxServer HCM2 -ConfigurationOnly:$True -Confirm:$False |
- Run the following Exchange Management Shell command to verify that the remaining node was successfully removed from the DAG
Get-DatabaseAvailabilityGroup -Identity DAG1 | Format-List Servers |
Add back the servers to the DAG
- Run the following Exchange Management Shell command to Add back the HCM1 to the DAG
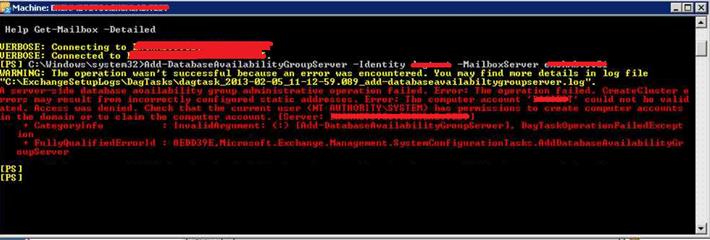
Add-DatabaseAvailabilityGroupServer -Identity DAG1 -MailboxServer HCM1 |
- If you received an error related to a lack of permission to update the CNO proceed with Step 3 to 5
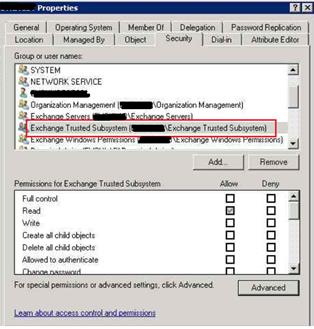
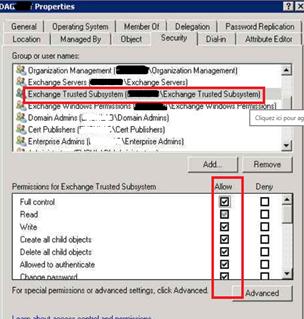
From "Active Directory Users and Computers", right click the Cluster Name Object (DAG1) and go to the security tab to affect full control to the "Exchange Trusted Subsystem" Security Group
|
|
Run again the command described in Step1
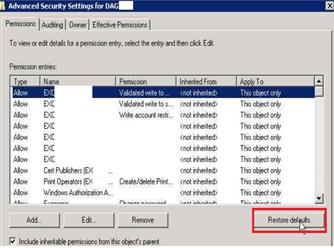
Set back the default permissions of the "Exchange Trusted Subsystem" Security Group as described below
|
|

- Run the following Exchange Management Shell command to Add back the second server HCM2 to the DAG
Add-DatabaseAvailabilityGroupServer -Identity DAG1 -MailboxServer HCM2 |
Add Mailbox Database Copies to the DAG
The final step is to add mailbox database copies back to the appropriate DAG member. Depending on the nature of the failure, the previously passive copies of the databases hosted on these servers may not be available. If the files on disk are preserved and in their original location or copied to the original location, the Microsoft Exchange Replication service may be able to perform an incremental resynchronization of the passive copies, thereby eliminating the need for a full reseed. However, if the original passive copies aren't available, you'll need to perform a full reseed.
- To add the mailbox database copies back to the DAG, run the following commands.
Add-MailboxDatabaseCopy -Identity DAG1-DB1 -MailboxServer HCM2 Add-MailboxDatabaseCopy -Identity DAG1-DB2 -MailboxServer HCM1 |
- Verify the health and status of all mailbox database copies with the following commands
Get-mailboxDatabse | Get-MailboxDatabaseCopyStatus |
Ghazi Boufaden from NEPA team.