Introducing the Nano Server Image Builder
Hi there,
Scott Johnson here to talk about the new Nano Server Image Builder tool, my new favorite time-saver. The Nano Server Image Builder helps you create a custom Nano Server image and bootable USB media with the aid of a graphical interface. Based on the inputs you provide, it generates images for deployment and creates reusable PowerShell scripts that allow you to create installations of Nano Server running either Windows Server 2016 Datacenter or Standard editions. The Nano Server Image Builder is now available for download on the Microsoft download center. If you need to download it later you can use this memorable shortcut: https://aka.ms/NanoServerImageBuilder. To run the tool, you must also install the Windows Assessment and Deployment Kit (ADK).
Nano Server is 20 to 25 times smaller than a full version of Windows Server 2016 with desktop experience.
To make a version of Windows this small, we had to remove some things that were not critical to running server workloads – and one of the things we removed was setup.exe, including the Windows Welcome experience. To setup and configure a Nano Server, we need to leverage Sysprep services in Windows and use an unattended.xml file to automate the installation sequences.
Deploying Headless Servers – A New Challenge!
The Nano Server Image Builder creates VHD, VHDX and .WIM files that can be used to deploy Nano Server in a virtual machine or directly on hardware, even without a display monitor, a.k.a. the “Headless Server”. You will find a /NanoServerImageGenerator folder on the Windows Server 2016 media – it contains new cmdlets, such as New-NanoServerImage, which is supported on Windows 8.1, Windows 10, Windows Server 2012 R2, and Windows Server 2016. This new cmdlet enables you to create a custom Nano Server image using the computer name of your choice and a couple dozen other unique settings.
~
Creating the perfect syntax for these PowerShell cmdlets can be challenging and so this tool was created to simplify these tasks:
1) Graphical UI creation of Nano Server media with dozens of custom settings.
2) Create a USB key to detect the firmware and hardware settings of a server.
3) Creation of a bootable USB key that can be used to deploy Nano Server directly on hardware.
4) Optionally create a bootable ISO file that can be used to deploy from DVD or BMC-connected servers.
5) Create PowerShell commands that can be reused by simply changing the machine name.
The Nano Server Image Builder automates deployment settings:
• Accepting the license agreement terms.
• Choose from VHD, VHDX or WIM formats and an option to create a bootable ISO.
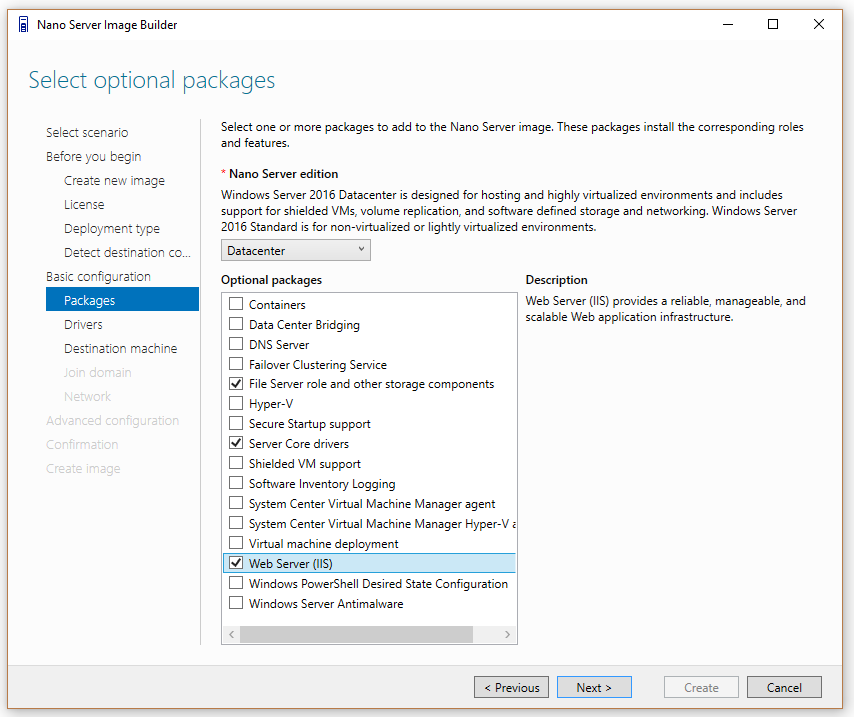
• Select server roles to install.
• Add device drivers to install.
• Set machine name, administrator password, logfile path, and time zone.
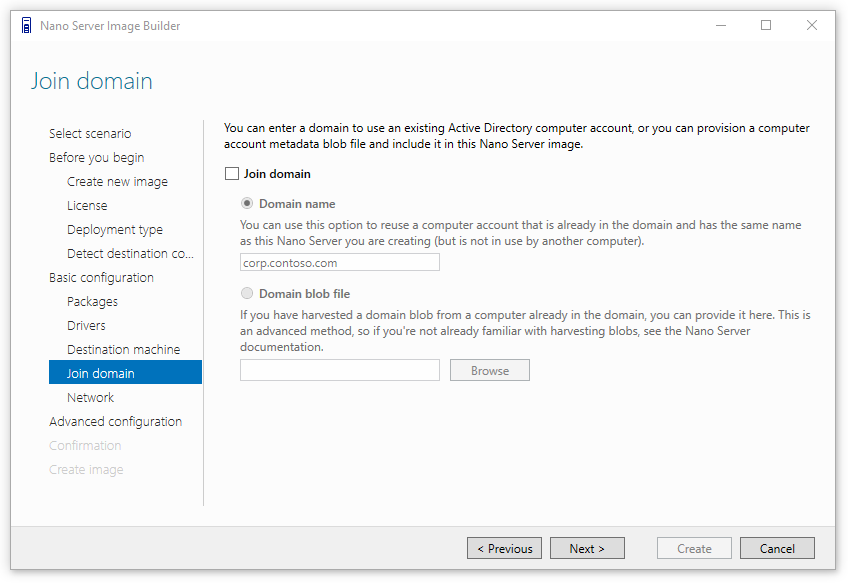
• Join a domain by using an existing Active Directory account or a harvested domain-join blob.
• Enable WinRM for communication outside the local subnet.
• Enable Virtual LAN IDs and configure static IP addresses.
• Inject new servicing packages on the fly.
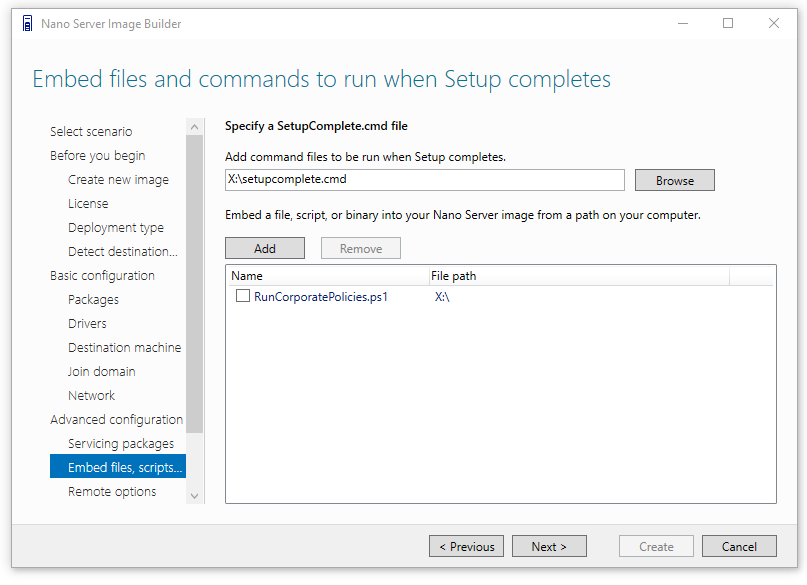
• Add a setupcomplete.cmd or other custom scripts to run after the unattend.xml is processed.
• Enable Emergency Management Services (EMS) for serial port console access.
• Enable development services to enable test signed drivers and unsigned applications, PowerShell default shell.
• Enable debugging over serial, USB, TCP/IP, or IEEE 1394 protocols.
• Create USB media using WinPE that will partition the server and deploy the Nano Server image.
Hardware Detection USB Drive
The Nano Server Image Builder can also create a USB drive using WinPE that will detect your existing Nano Server hardware configuration and report the details on-screen and in a log file.
This hardware detection includes:
- Network interface index – We use it to target IP address assignments. In the future, we will move to use MAC-address targeting. Occasionally the network interface index will randomly change as Tron battles inner electrons in a race to see which networking card enumerates first.
- Boot firmware type – The system creates different partitions depending on your firmware type. Most new servers are UEFI.
- System board information – Validate that you are targeting the right server.
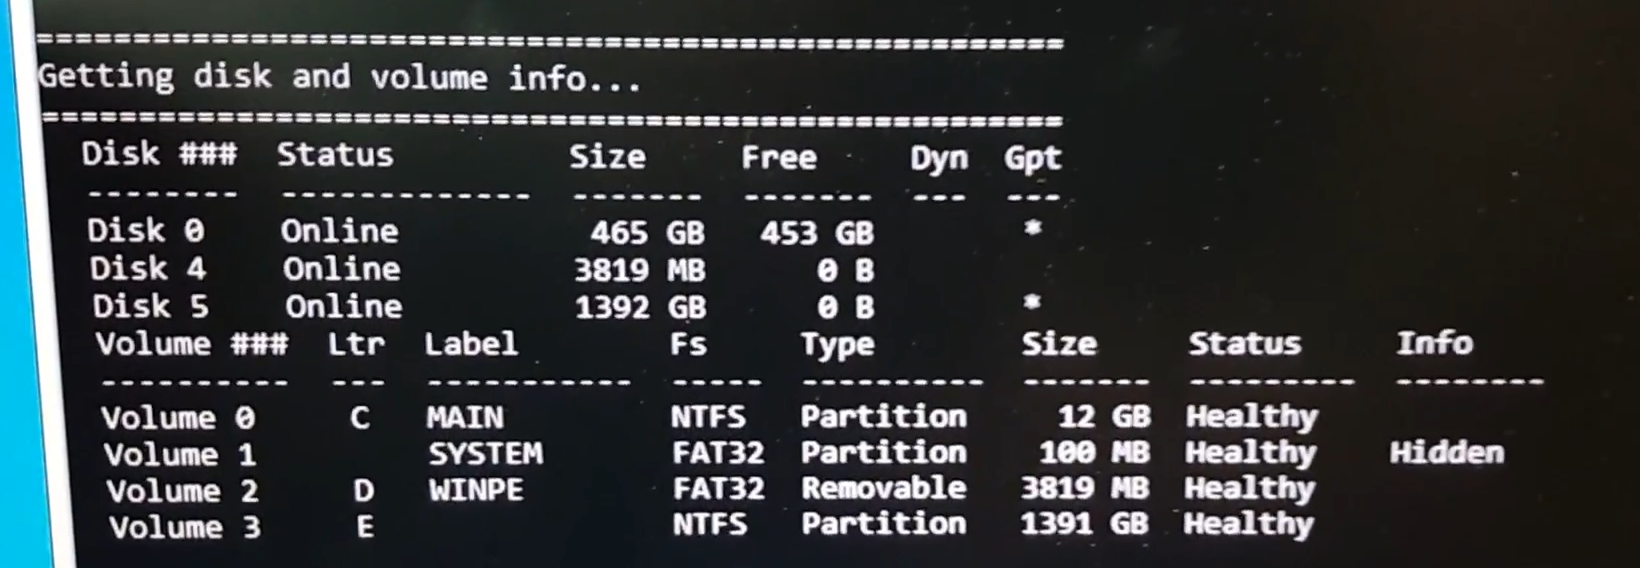
- Disks and volumes – Choose wisely when selecting a disk partition to format.
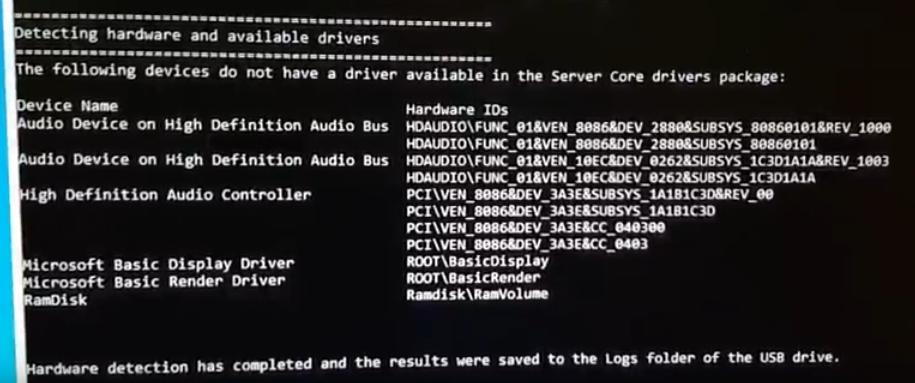
- Devices without a driver! - List devices that have no driver in the Server Core drivers package. Useful!
Hardware Detection Experience: 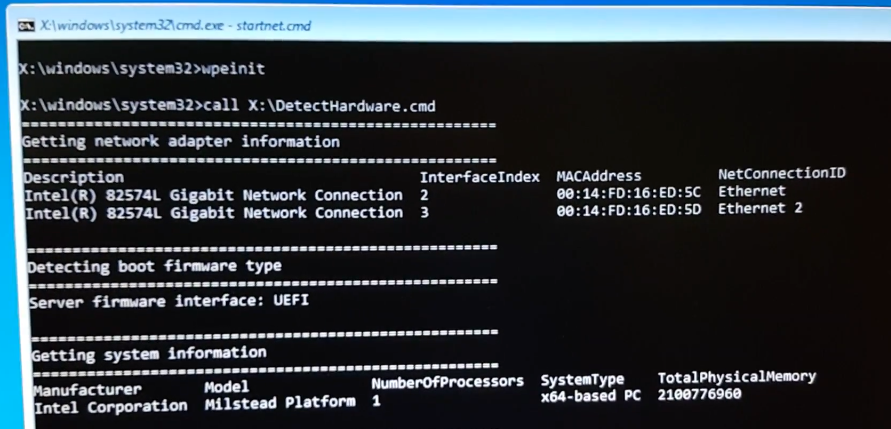
Screenshot Walkthrough
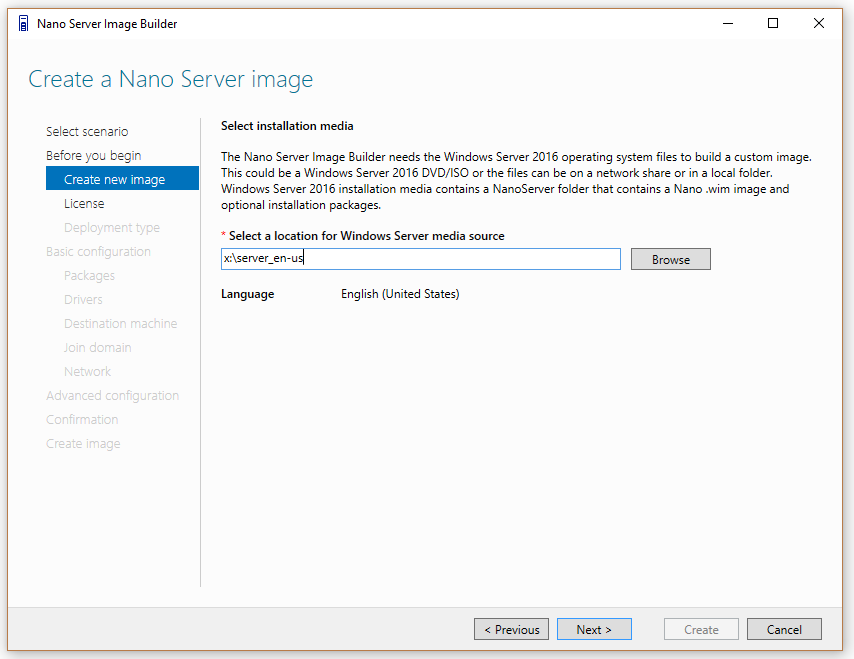
Two sequences: Create Nano Server images or bootable USB media :
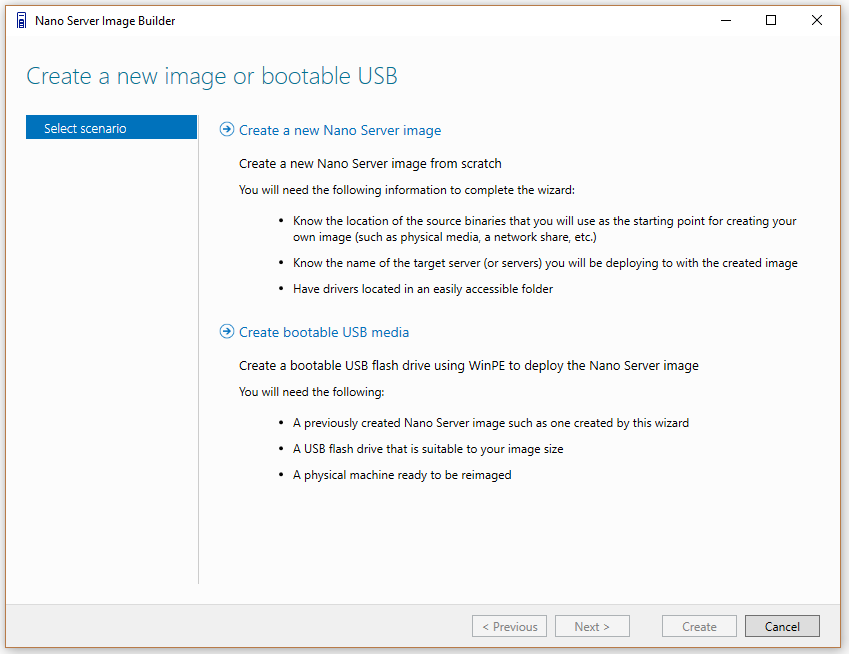
You’ll need a copy of Windows Server 2016:
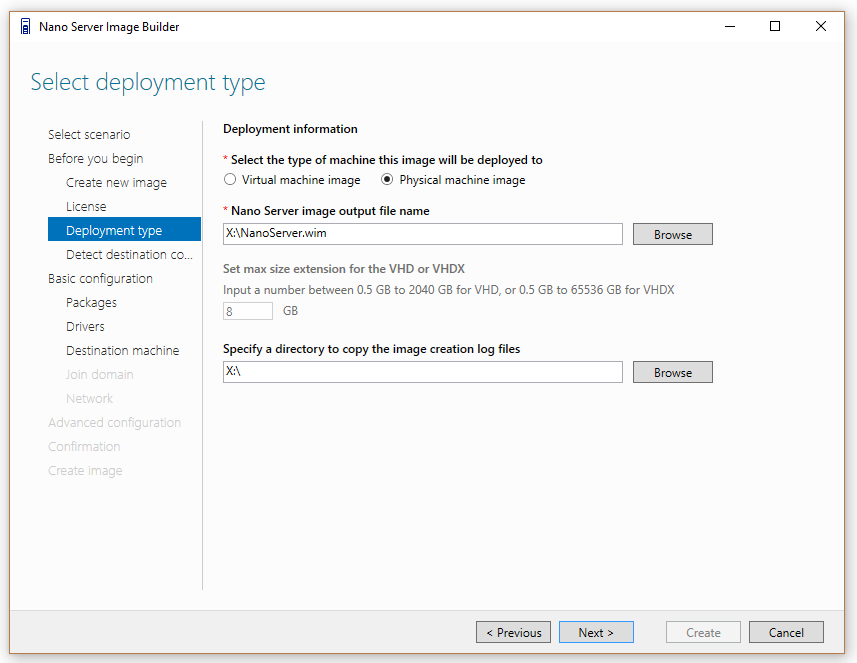
Choose your deployment type:
Virtual machine images can be .vhd or .vhdx
Physical machine images can be .vhd, .vhdx or .wim
Accept the License Agreement (Nano Server requires customers have Software Assurance on the device) 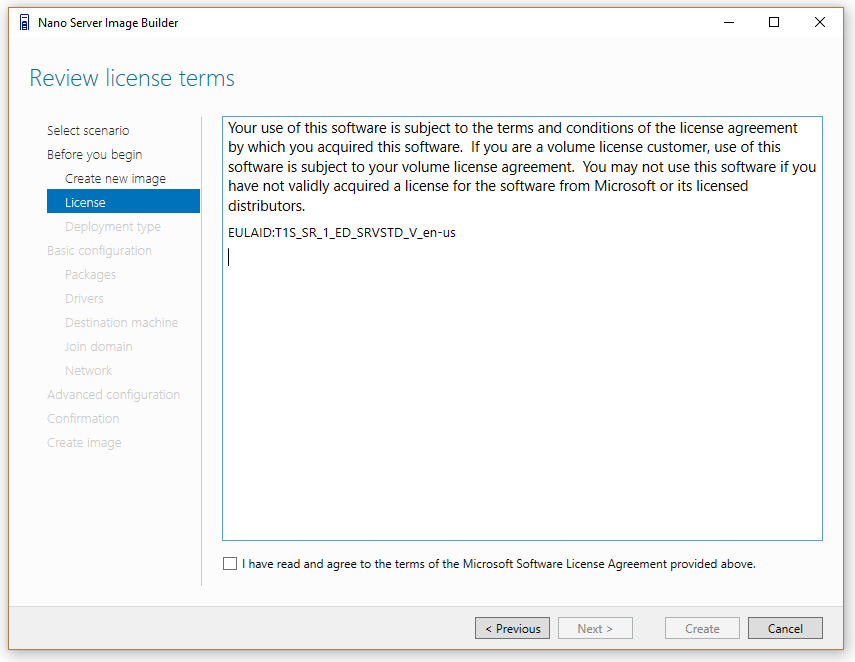
Create a hardware-detection USB drive to analyze your system:
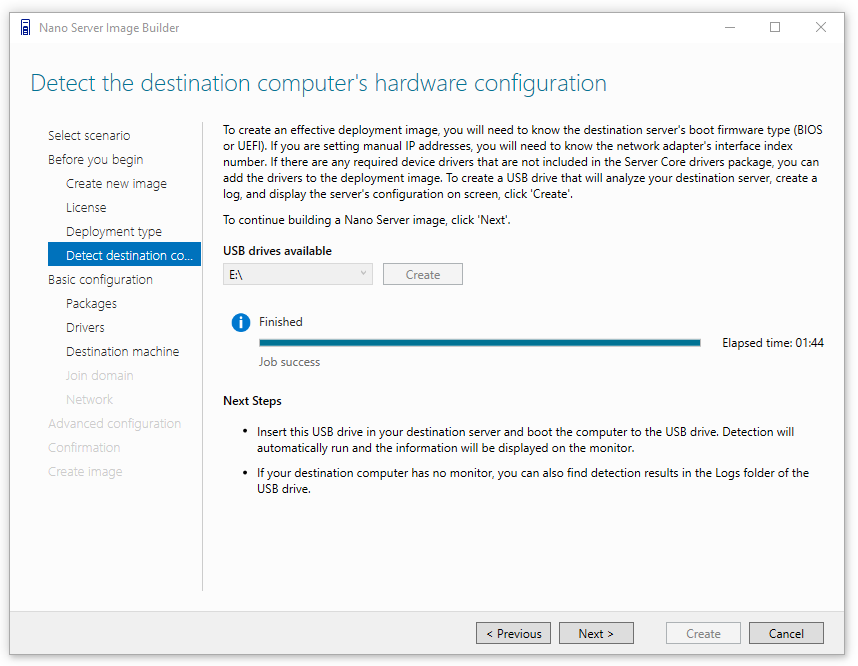
See the WinPE screenshots above to see how the USB hardware detection works.
~
Choose the roles you want to run - Nano Server only loads what you are planning to use:
Add special device drivers to the image if you need them:
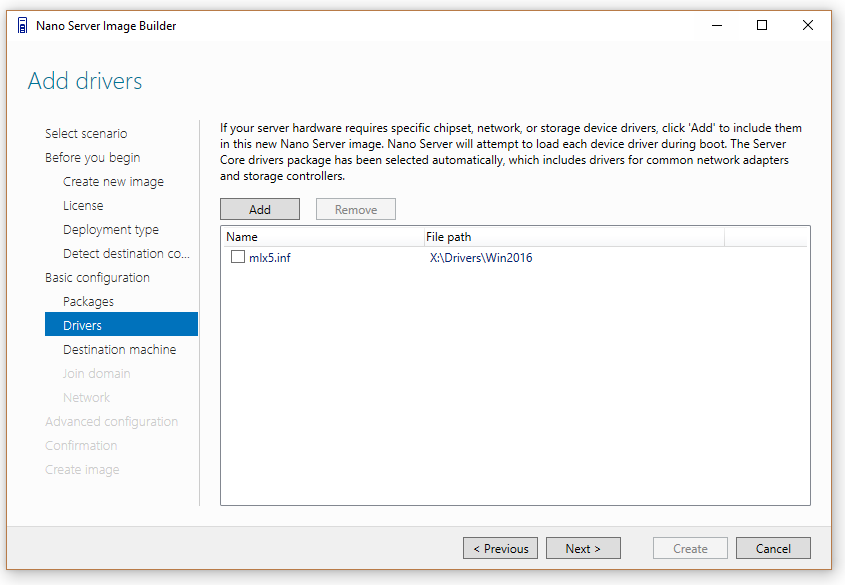
Use the USB hardware detection process to see which devices need drivers. Pro-tip: Audio drivers are not necessary.
Choose your machine name and password: 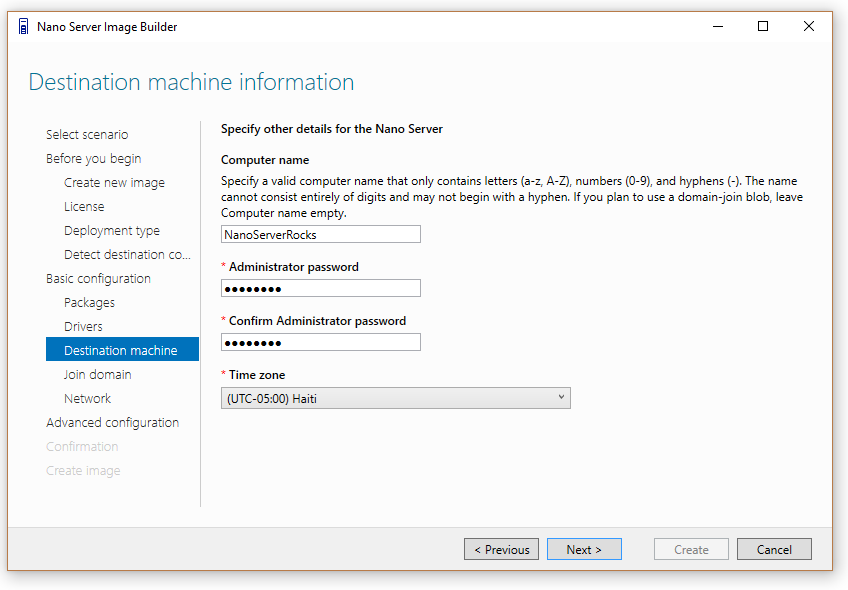
Join the Active Directory domain:
Enable WinRM, Virtual LAN and set static IP addresses: 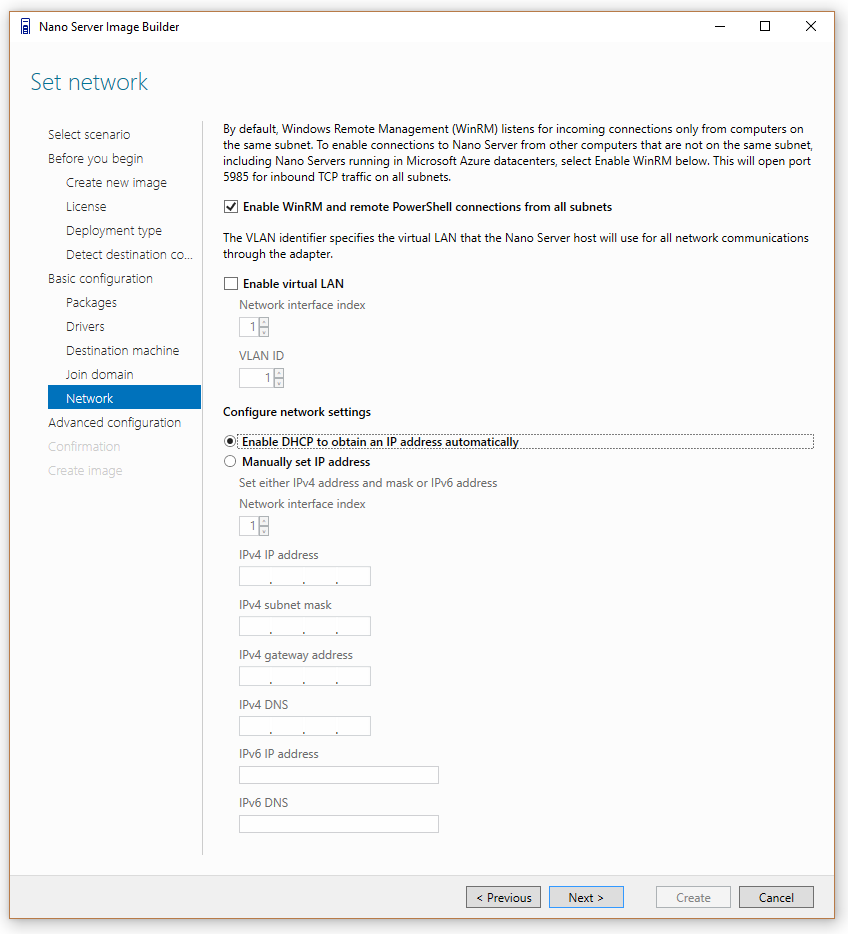
Use the hardware detection USB drive to figure out which network adapter interface index to target.
~
You are ready to create a basic Nano Server image – or continue to advanced settings: 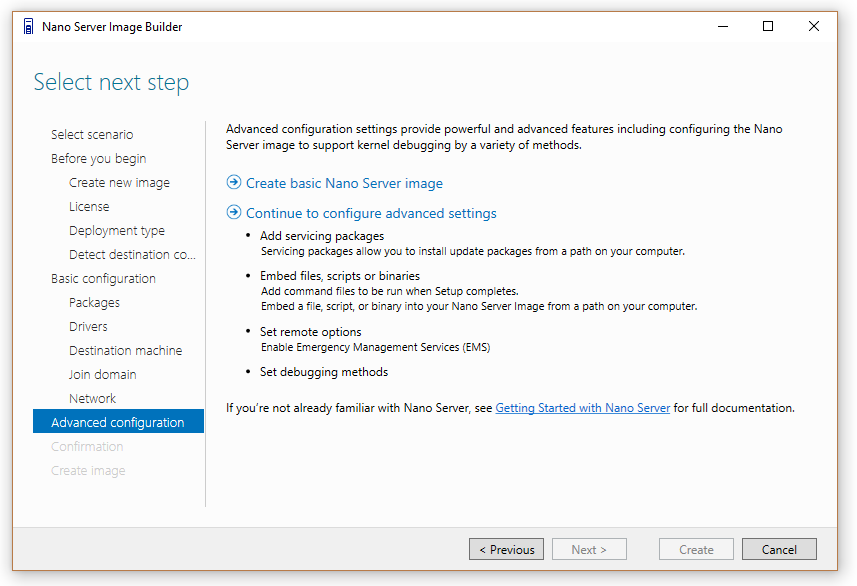
Update Nano Server to the latest revision using a servicing package: 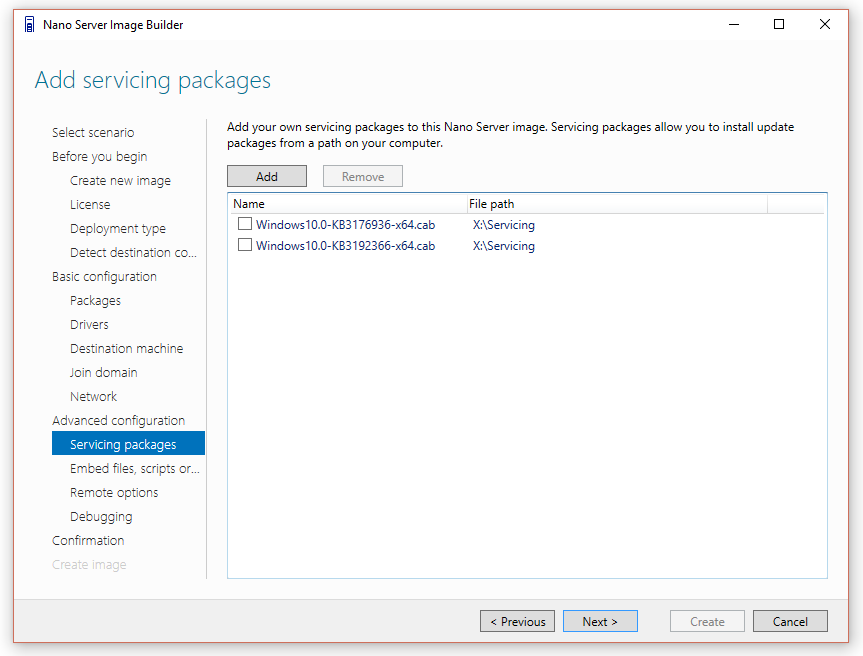
Learn about the servicing options for Nano Server.
~
Add your own scripts to the deployment process:
~
Emergency Management Services:
Get out your serial cable and an RS-232-accessible console. If you have no monitor and no networking is working, this might be your only way into the server.
I use putty.exe or my 1998 copy of hyper-terminal. 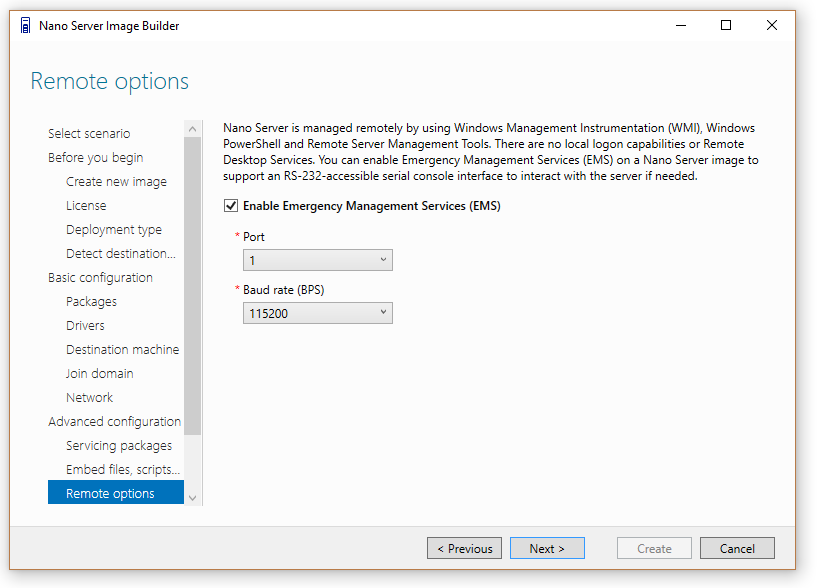
~
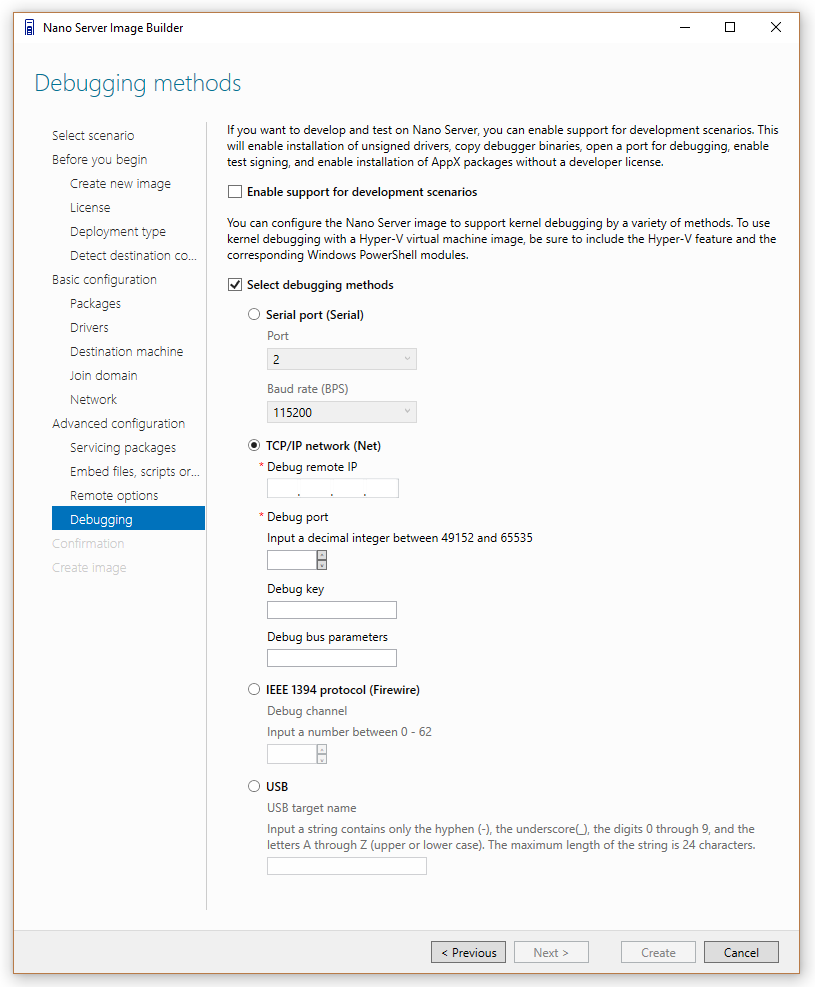
Developers like to debug their code using a wide variety of connections:
~
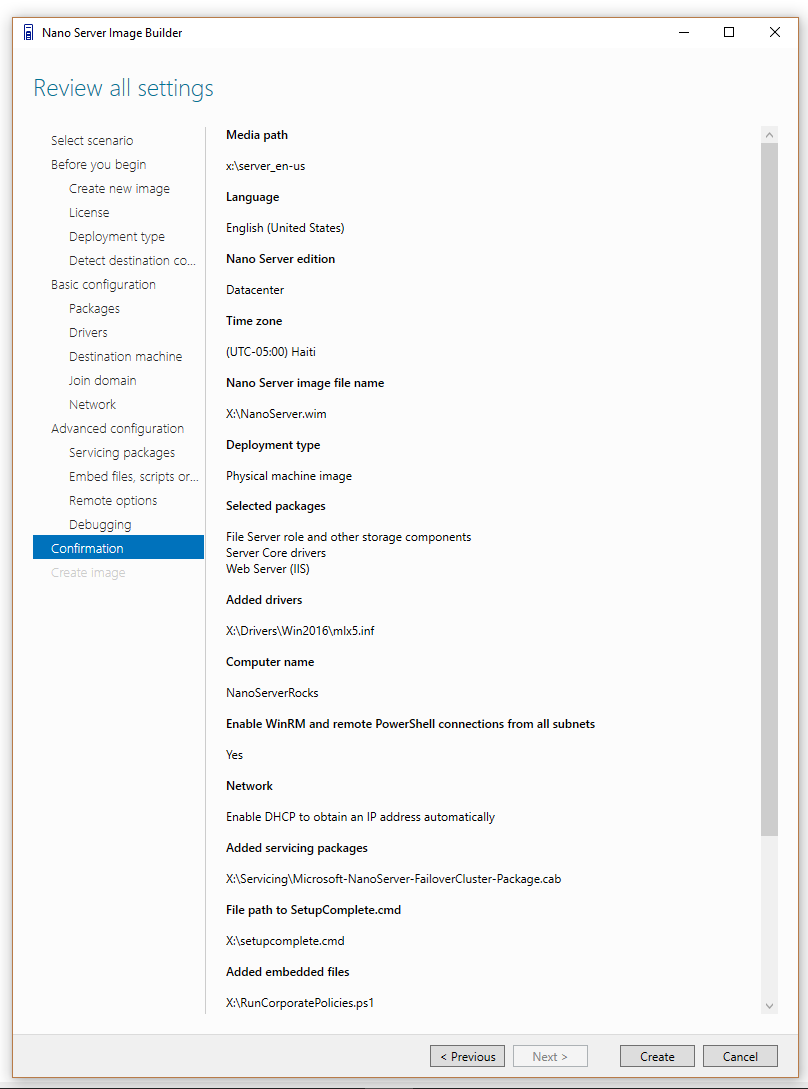
Final review of all the settings:
~
Image creation is done, now you can create a bootable USB key:
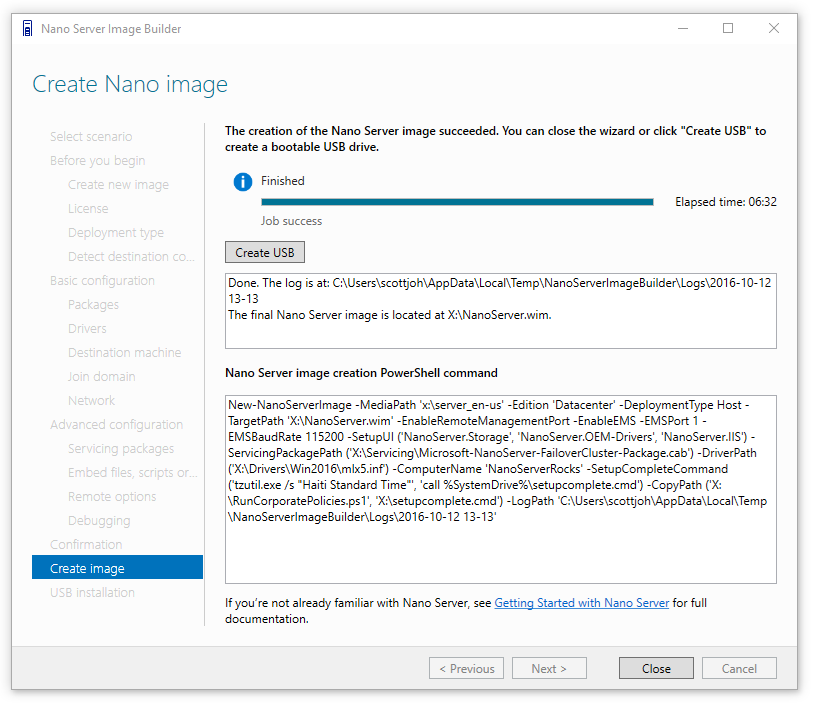
Pro-tip: Copy the PowerShell script somewhere to use it directly without using the GUI tool in the future.
Just change the machine name and you can have a new Nano Server image in a matter of minutes.
Select your USB drive: 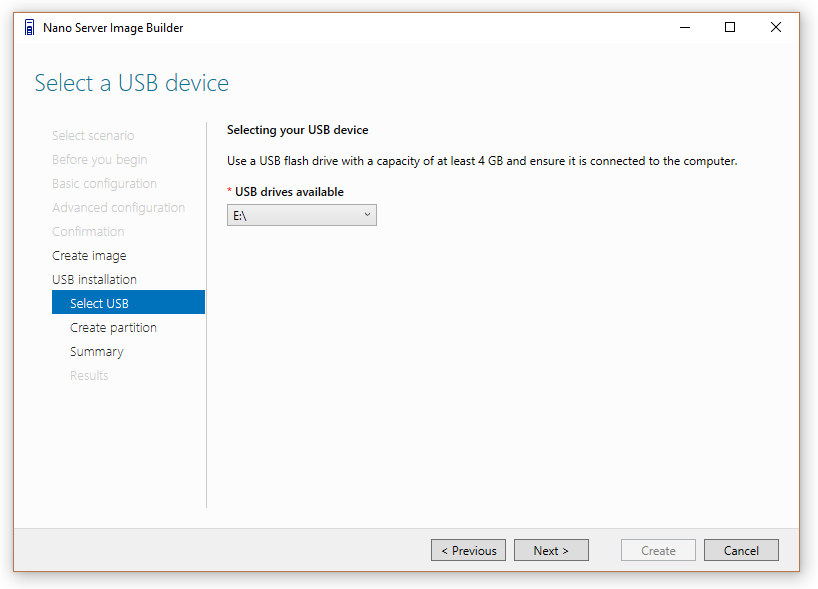
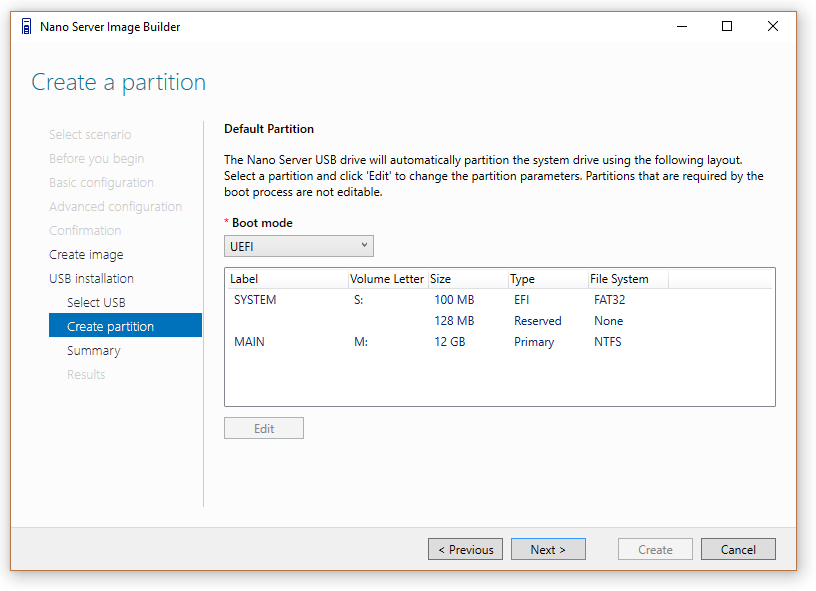
Select boot firmware type and optionally modify the partition schema:
Now you have a bootable USB drive to deploy and you can optionally create a bootable ISO file using the same binaries: 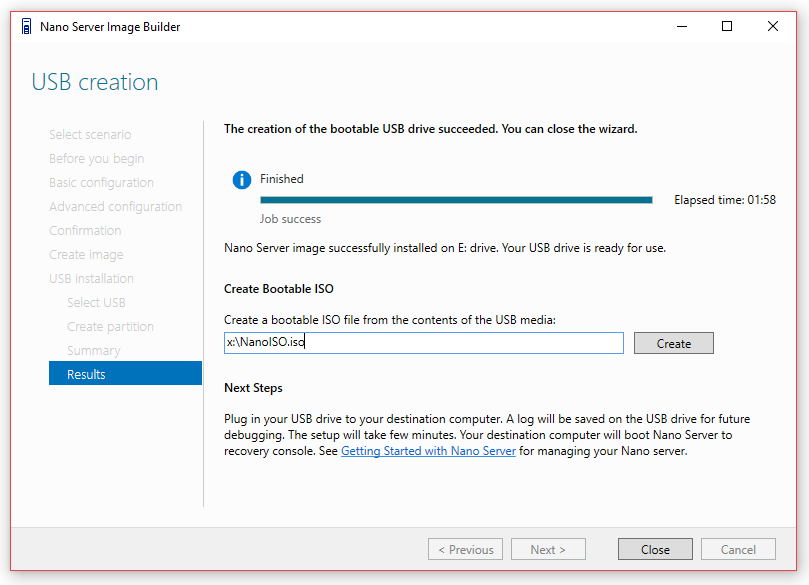
I hope you enjoy the new Nano Server Image Builder, if you have any feature suggestions or error reports, please let us know on the user voice web site.
Cheers,
Scott Johnson
Senior Program Manager
Windows Storage Server
@Supersquatchy