Windows MultiPoint Server 2012 – Disk Protection
Today's post comes from Ratnesh Yadav from the Windows MultiPoint Server team. (Updated March 8th, 2013 with additional instructions for using alternate disk partitions at the end)
Windows MultiPoint Server (WMS) 2012 has a very cool new feature called Disk Protection. This feature allows an administrator to protect the system volume (that’s the drive where Windows is installed—usually C:) from unwanted changes. Changes made to the system volume are stored in a temporary location so that simply restarting the computer discards them and automatically returns the system to the previous known-good state. The administrator can easily install software or make configuration changes by temporarily disabling disk protection. In order to keep the system current with Windows Updates and anti-malware definitions, Disk Protection schedules a maintenance window to download and install updates. The administrator can also provide a custom script to run during the maintenance window to accommodate any maintenance needs beyond Windows Update. Readers familiar with the earlier Windows SteadyState product will recognize some of its core features here.
When Disk Protection is enabled for the first time, it prepares the system by installing a driver and creating a cache file on the system volume. The cache file is used to temporarily store any changes made to the system volume while Disk Protection is active. Because changes are stored in the cache file, they do not alter the “real” contents of the volume outside of the cache file. Each time the system is booted, the cache file is reset which essentially discards any changes stored there from the last boot. Thus, the system always boots up in the same state as when Disk Protection was enabled.
There are a few special files that Windows does need to update and make changes that are not discarded. To accommodate those, Disk Protection creates a new volume named DpReserved when it is enabled for the first time, and then moves the system pagefile, crash dump location, and event logs to this volume. The DpReserved partition is not protected, so writes to these files will persist across restarts, even when Disk Protection is enabled.
Let’s take a look at some of the basic tasks related to Disk Protection.
Enable Disk Protection
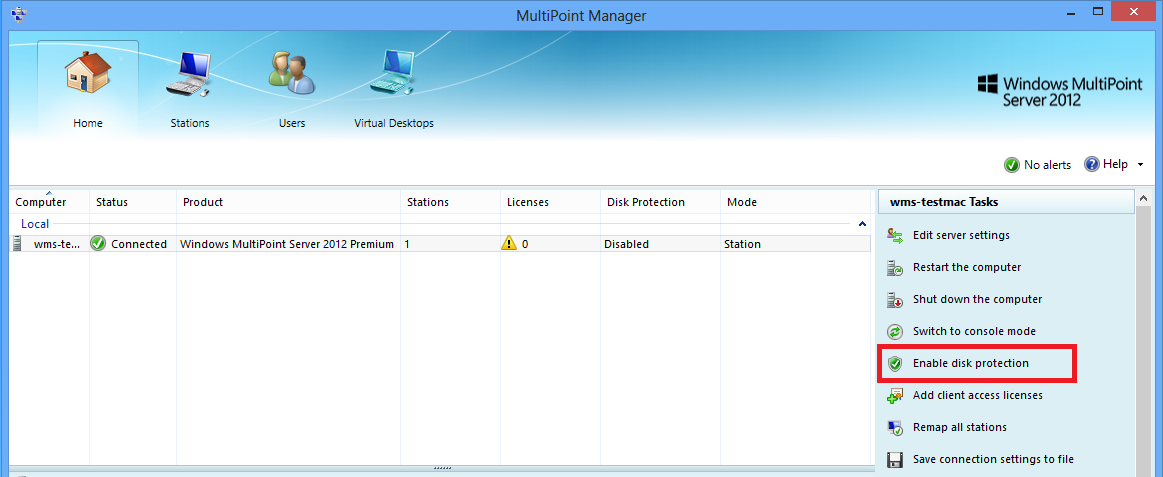
Open MultiPoint Manager, go to the Home tab, and click Enable disk protection.
After clicking on Enable Disk Protection, you will see the following warning dialog box:

Clicking OK will install Disk Protection, then automatically reboot the computer to enable protection. From this point on, changes made on the system volume will be discarded each time the system is rebooted. Other volumes will not be affected, so you may want to move user profiles to a new location on another volume.
Schedule Software Updates
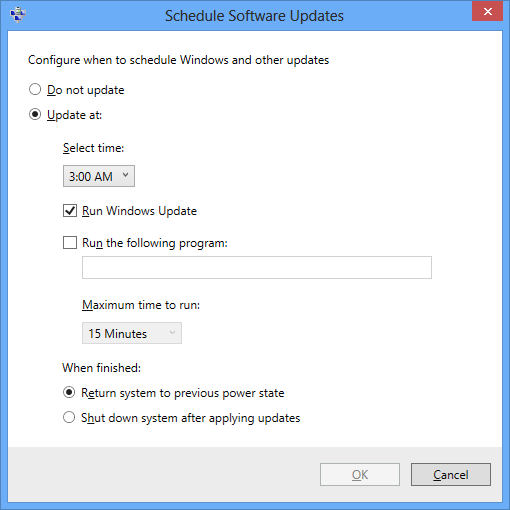
If Windows is configured to automatically install Windows Updates, Disk Protection will prepare the system to allow these updates to occur at the configured time without being discarded. For example, if Windows Updates are set for 3:00 AM, then Disk Protection feature will inherit this behavior and each day at 3:00 AM, will check for updates. If any updates are found, WMS will temporarily disable Disk Protection, apply the updates, then re-enable Disk Protection.
Disable Disk Protection
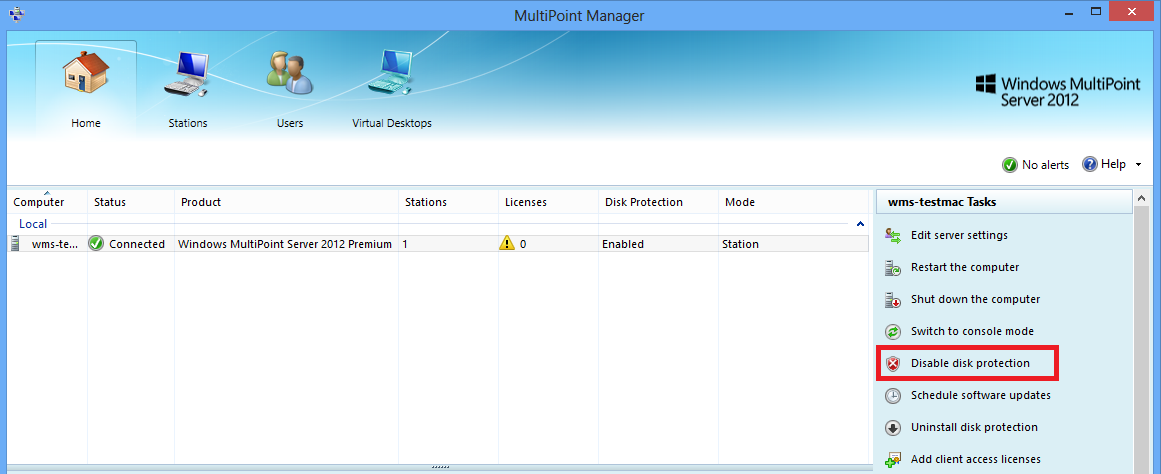
An administrator can temporarily disable the Disk Protection feature to install software, make changes in system settings, or perform other maintenance tasks. Open MultiPoint Manager, go to the Home tab, and click Disable disk protection.
After clicking on Disable Disk Protection, you will see the following warning dialog box:
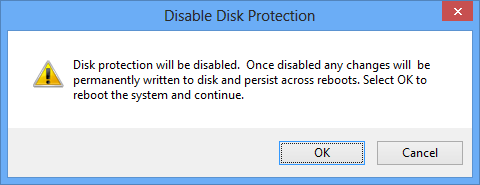
Clicking OK will reboot the computer. When it boots up, Disk Protection will be disabled, so any changes to the system volume will be permanent.
- IMPORTANT: Remember to re-enable Disk Protection once maintenance is complete. The system will not be protected again until the administrator explicitly re-enables Disk Protection.
Uninstall Disk Protection
Uninstalling Disk Protection removes the driver and the cache file, so this should only be done if you want to stop using Disk Protection long-term. If you simply want to perform maintenance or stop protection temporarily, we recommend using the Disable disk protection task instead.
Disk Protection can be uninstalled from either the enabled or disabled states. Open MultiPoint Manager, go to the Home tab and click Uninstall disk protection.
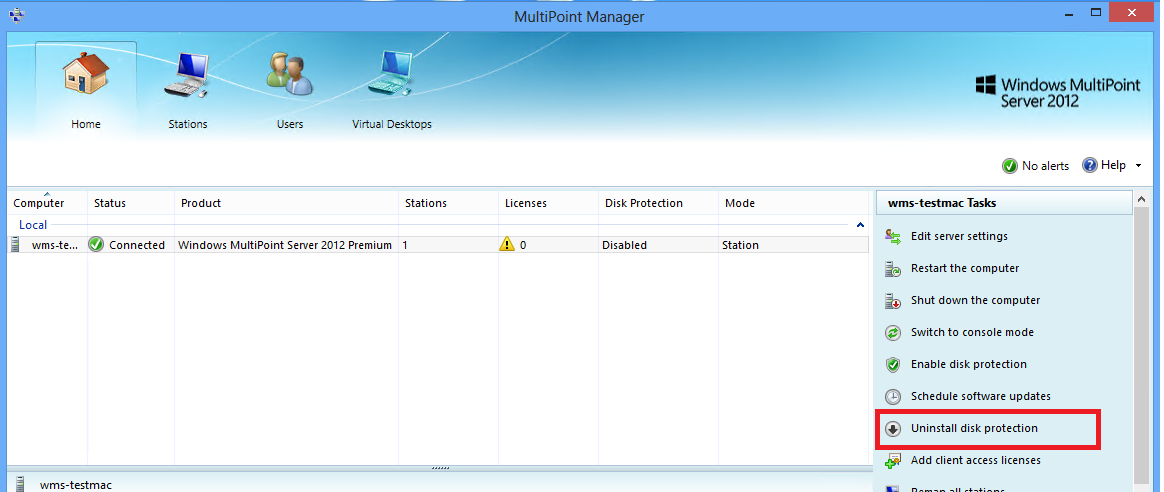
After clicking on Uninstall disk protection, you will see following information dialog box:
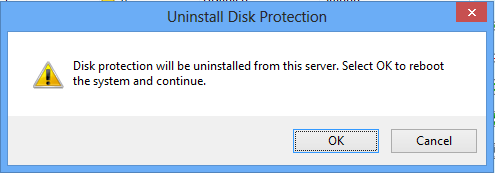
Clicking OK will reboot the computer. The uninstallation process will require several reboots, during which the driver and cache file will be removed. The DpReserved partition will remain, and the pagefile, crash dump location, and event log files will remain configured to use the DpReserved partition.
You can watch a 2 minute Disk Protection demo here
UPDATE: March 8th, 2013
How to use an existing partition instead of the DpReserved partition
(This update also courtesy of Ratnesh Yadav of the WMS team) Earlier I explained the Disk Protection feature, how to enable disk protection, schedule software updates, disable disk protection and uninstall disk protection. I also mentioned that a new volume is created as a reserved partition when the disk protection feature is enabled. In this blog we will go through the steps for using an existing disk partition\volume as the reserved partition for the Disk Protection feature for administrators who don't want the additional partition.
Step 1: Make sure disk protection is uninstalled. (And not just disabled)
Step 2: Create a DpReserveDriveLetter registry key by executing the following command:
REG ADD "HKLM\Software\Microsoft\Windows MultiPoint Server" /v DpReserveDriveLetter /t REG_SZ /d [Existing Partition]
Existing Partition à Existing partition drive letter, example “D”, “E” etc.
Example: REG ADD "HKLM\Software\Microsoft\Windows MultiPoint Server" /V DpReserveDriveLetter /T REG_SZ /D E
Step 3: Open MultiPoint Manager ( MPM ) and click on Enable disk protection:

After clicking on Enable disk protection, the Enable Disk Protection warning dialog will be displayed:
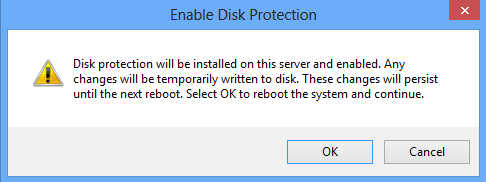
Clicking Ok will restart the computer with disk protection enabled.
Note that if the partition is not large enough to fit the page, dump, and log files an error dialog will be displayed and disk protection will not be installed.
Step 4: After the restart, the partition specified in step 2 will be used as the reserved partition for disk protection. In the example above, partition E will be used for the page, dump, and log files so that these files are not affected by restarts when disk protection is enabled.