Understanding MultiPoint Server 2011 and Hyper-V
One of the cool yet relatively unknown features of Windows MultiPoint Server 2011 Premium is the ability to use it as a Hyper-V host or as a Hyper-V guest operating system. And because of the 1+1 licensing with Windows MultiPoint, one copy of MultiPoint 2011 Premium can actually run as both the Hyper-V host and in a virtual machine on the same piece of hardware. With this model, you are able to use one MultiPoint Server 2011 Premium license on both the base and VM installations.
Note: When using one copy of MultiPoint as both a host and in a VM, you should only be using the virtualization role in the host. While there will still be several other roles installed and running, the MultiPoint 1+1 licensing does not allow for those additional roles to be in use on the host server.
MultiPoint isn’t a “typical” Hyper-V host in that some of the product was designed with the intent to stay running, even when being run as a Hyper-V host. Because of that, it can be a little tricky to figure out the best practices when deploying.
This post will cover installing the Hyper-V role on MultiPoint, installing MultiPoint in a Hyper-V VM, and some helpful hints about 1:1 deployment. If you are using MultiPoint as a host, you will need to complete all of the MultiPoint setup process prior to installing the Hyper-V role.
How to install the Hyper-V role on MultiPoint Server 2011 Premium:
1. Start Server Manager by going to the start menu and running it.
2. Navigate to the “Roles” section:
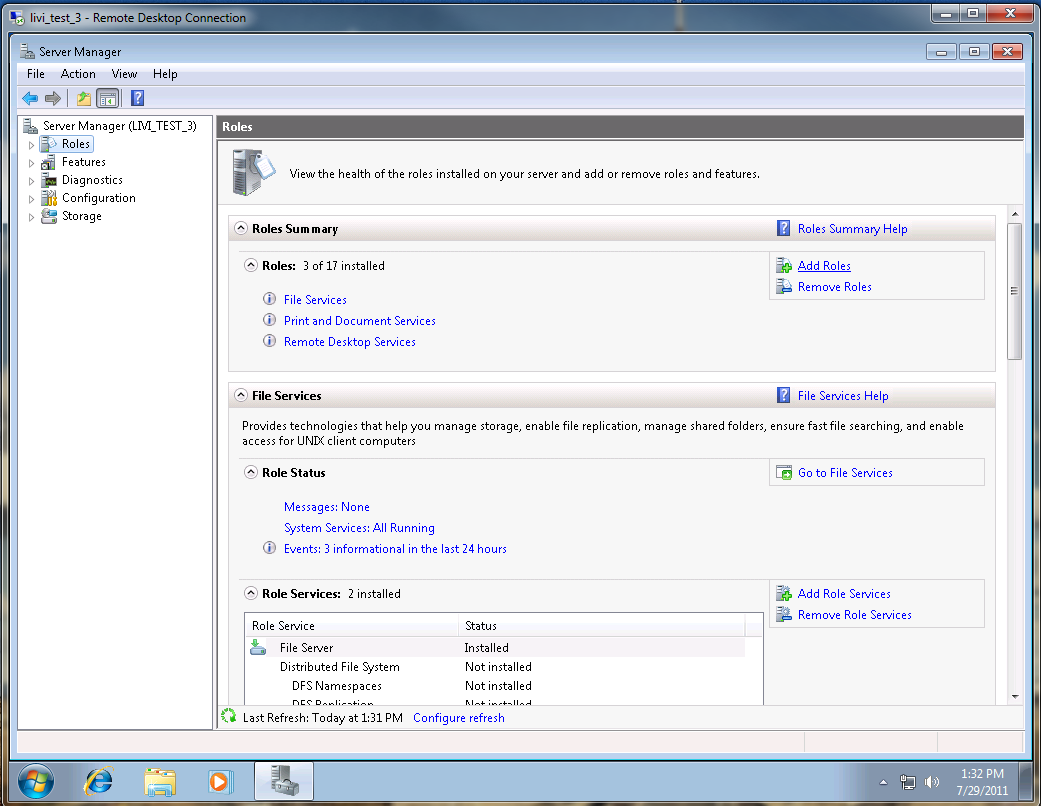
3. Click “Add Roles” to bring up the Wizard for adding a role. Read the “Before you Begin” page and then click Next.
4. Select “Hyper-V” in the list and click next.
5. Read the page that follows for an introduction to Hyper-V and view the links under “Additional Information”.
6. Click Next to continue with installation.
7. Select a network adapter to connect your virtual network if desired. You can read more about virtual networks on the link at the bottom of the wizard page.
8. Click Next to continue.
9. Read over the information and click “Install”.
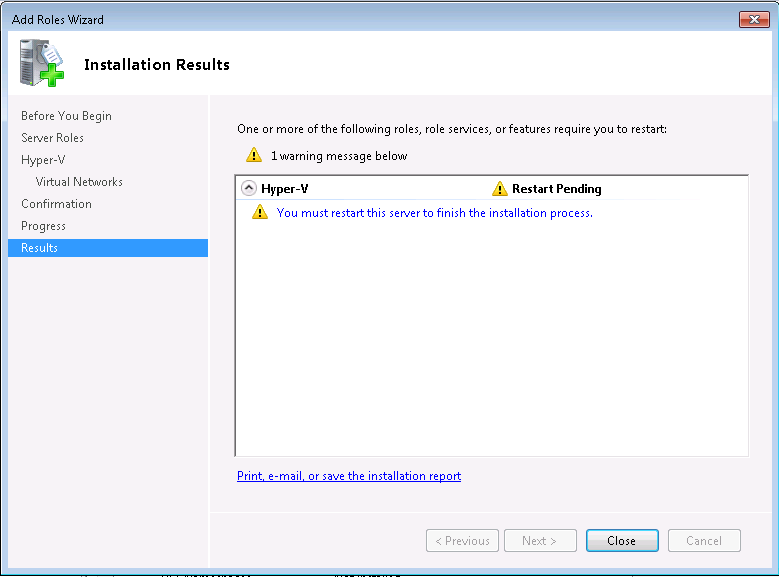
10. Click close and restart your server to finish the Hyper-V installation process.
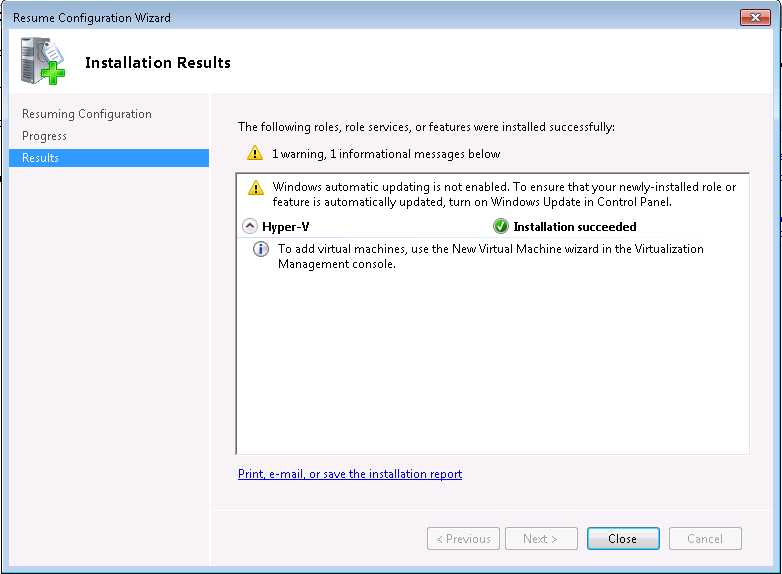
11. After restarting, the Configuration wizard will open automatically and resume configuration. Once it is finished configuring, you can close the wizard and Hyper-V manager will be available as a server role.
Uninstall Note: If you install Hyper-V on MultiPoint and then uninstall the role, you will need to run ConfigWiz.exe to repair loopback adapters, but otherwise, nothing will change in the base OS.
Installing Windows MultiPoint Server in a Virtual Machine on Hyper-V
In addition to providing a server base for Hyper-V, MultiPoint Server 2011 can also run in a virtual machine on Hyper-V as the operating system. You can also install MultiPoint in a VM in any Hyper-V enabled server SKU, such as Windows Server 2008 R2.
Note that when you are using MultiPoint in a VM, the only types of stations that can be used are LAN connected stations. USB and Direct Connect stations will not work on a VM instance of MultiPoint Server.
1. Start Hyper-V manager by going to the start menu. If you haven’t enabled Hyper-V yet, view the steps above.
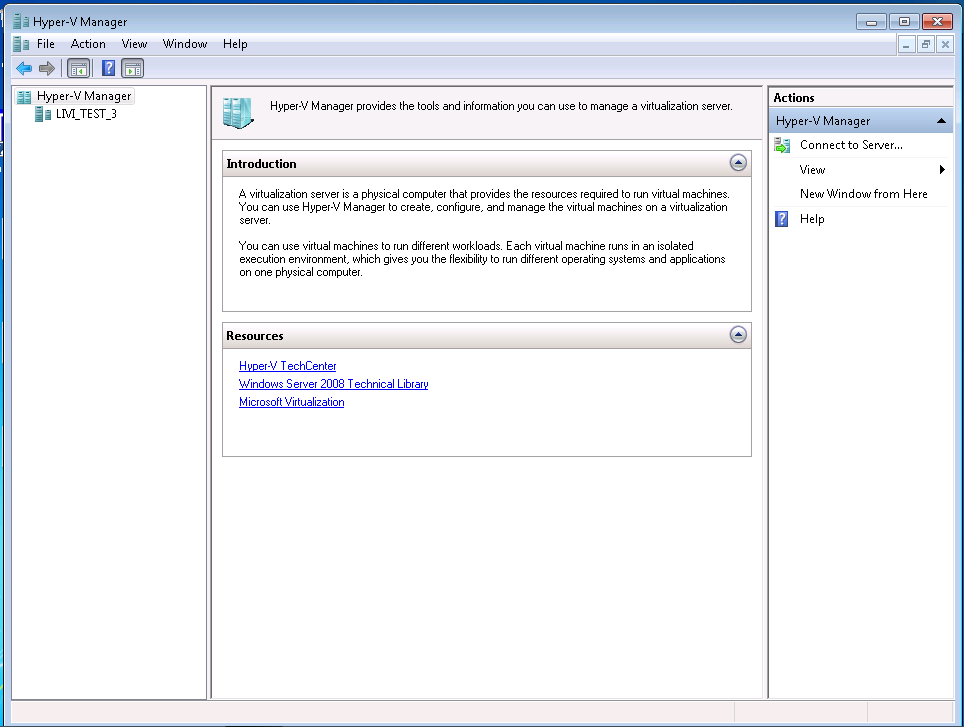
2. Click “Connect to Server” and select “Okay”. If you want to change the server to a different computer than the one you are running Hyper-V on, select that setting and fill in the required information.
3. In the “Actions” panel, you will notice a variety of options after connecting to the desired server. Since we’re going to install a new copy of Windows MultiPoint Server on a new VM, click on “New” and select “Virtual Machine”.
4. The “New Virtual Machine” Wizard will open and you can read about creating virtual machines. Once you have gone through this information, click “Next” to continue.
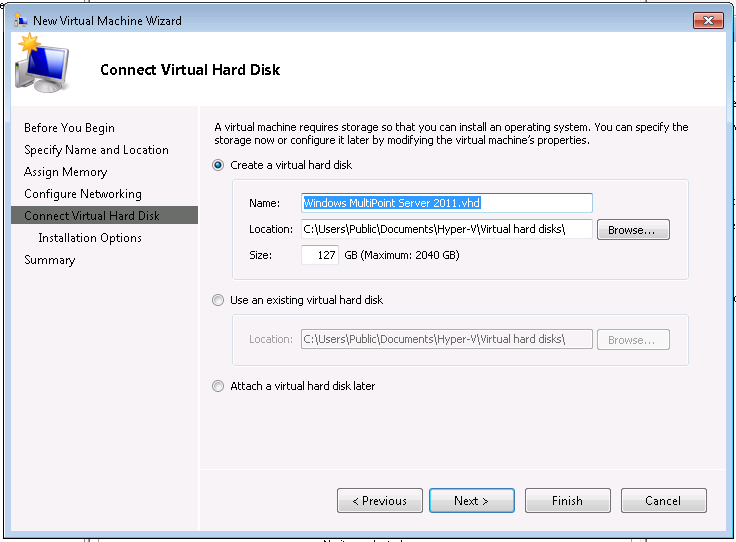
5. Name your virtual machine. The default location of the virtual machine will be shown under the name text box. If you would like to change the location, you can do so by clicking “Browse…”
6. Assign memory for your virtual machine. This will depend on your processes/workload. MultiPoint Server recommends a minimum of 2GB of memory.
7. Select your network if desired and click “Next”.
8. Create a Virtual Hard Disk for your VM.
9. Click “Next” to move to the installation options. We’ve downloaded the Windows MultiPoint Server 2011 Premium .iso from the web, so we’re going to configure our VM to install from that. Select the appropriate option for your scenario and, if necessary, navigate to the correct folder as needed.
10. Select “Next” to view a summary of your virtual machine, or click “Finish” to create it. You will then see your VM in the Hyper-V Manager.
Helpful Hints
License Keys: Installing MultiPoint on top of MultiPoint (as both a base for Hyper-V and in a VM on Hyper-V) is supported with our 1+1 licensing method. There are no special keys required for the virtual copy of MultiPoint Server, and you should use the same key to activate both the base and VM. You will still need the appropriate CALs for your stations. When installing in a 1+1 environment, CALs are only required for the guest OS, not the host.
Disabling MultiPoint Features: If you are using MultiPoint Server inside of a VM and as the host OS on the same server, you may be tempted to remove some of the MultiPoint features on the host OS to free some resources for your VM.
We know that most Hyper-V deployments on Windows Server have only the Hyper-V role running on the host OS, and nothing else. This isn’t the case with MultiPoint Server. When installing Hyper-V on MultiPoint Server, it is okay to have some of the other roles running. These roles really won’t take up too many computer resources. And as long as you aren’t using the other roles, you will still be in compliance with your license terms.
Because this isn’t typical Hyper-V host behavior, we’ve included some things that you can tweak, but we strongly discourage deleting or turning off anything else. Some of them are required for the MultiPoint Server to operate correctly.
- To stop the MultiPoint Manager from auto-launching: Go into “Task Manager” and look at the list of scheduled tasks. Find the one entitled “SRCManager – admin”. Double click on it to open the task itself and select the option to delete the task. This will require an administrator to manually open the dashboard.
- By default, MultiPoint Server 2011 does not allow stations to be created by plugging in a USB keyboard and mouse directly to the computer (“root” hubs). You may want to bypass that requirement on the Hyper-V Host machine.
If you know which ports on your server box are connected to each root hub, you can override this. Take caution when modifying the registry. It is always recommended that you back up the registry before changing it.
- Open the registry editor by running RegEdit
- Hierarchy for the root hub key:
- Computer\HKEY_LOCAL_MACHINE\SOFTWARE\Microsoft\Windows MultiPoint Server
- Right click the folder for Windows MultiPoint Server and select “New” to create a new DWord value key
- Set the name of this key to be “AllowRootHubsAsStationHubs” and set the value to 1.
It is important that you know which ports go with each root hub, because keyboards and mice plugged into different root hubs will act as though they are plugged into different stations.
Final Notes
You may, at this point, be wondering why you would use MultiPoint Server 2011 in a 1+1 (host + guest) configuration. First of all, by allowing the same copy of MultiPoint to act as the host and guest OS, you do not need to purchase additional software or a different operating system simply to provide the host layer.
Additionally, running MultiPoint in a VM provides an easy way to restore your system from snapshots, so if you get into a bad state with your machine, you can revert back to a place in time where everything was the way you wanted it.
You can also run multiple servers as VMs on the same host computer, if you have the hardware to support it. There are multiple scenarios where this is useful.
In one example, you could have a single classroom with more than 20 stations, and use a single piece of hardware to host multiple instances of MultiPoint on the same physical machine, linked together through the multi-server management wizard.
Another example would be to use a virtual instance of MultiPoint Server 2011 alongside some other virtual instance of Small Business Server on the same machine. By using MultiPoint as your host OS, you can install MultiPoint in one VM, and Small Business Server in a separate VM, and run them both off the same box at the same time. This is great for charities, non-profits, schools or other organizations that use SBS and WMS in the same environment.
If you have any questions, head over to the TechNet forums and leave us a post!