How To Monitor Disk Usage with System Center Operations Manager
Written by Michel Audet, Microsoft Premier Field Engineer.
 Monitoring how much data is stored on a particular drive and displaying it in a graph and/or report format is often requested by customers running Microsoft System Center Operations Manager. Writing a standalone VBScript or PowerShell script isn’t overly complicated, but it generally resides outside of enterprise applications and is often managed and administered by too few individuals. Surely we can use Operations Manager (i.e. OpsMgr) to perform this simple data collection?
If the Windows Server Operating System Management Pack (MP) has been imported in Operations Manager, one of the performance collection rules enabled by default will collect data from the Logical Disk\Free Megabytes performance counter on the OpsMgr agent. Performance counters can be easily collected for items that aren’t included in an imported MP. Unfortunately, there is no “disk used” performance counter available in Windows, so capturing disk usage is slightly more complicated. The good news is that we can query WMI through a script and that the Win32_LogicalDisk class has two properties—FreeSpace and Size—that can help us calculate used storage by building a probe-based collection rule in Operations Manager.
Below are the overall steps:
- Develop (or find
) a script to calculate the disk storage used on a logical disk.
- Create a probe-based performance collection rule with the script.
- Provide the right performance mapping information.
- Target the rule appropriately.
- Monitor the deployment of the rule to make sure it works.
Let’s go through the steps.
1. Develop a Script to Calculate the Disk Storage Used on a Logical Disk
Below is a script that makes a WMI query to return the free space and disk size properties of a logical disk and then uses these values to calculate the amount of data on the drive:
- On Error Resume Next
- CONST GB = 1073741824
- Dim oAPI, oBag
- Set oAPI = CreateObject("MOM.ScriptAPI")
- Set oArgs = WScript.Arguments
- drive = oArgs(0)
- strComputer = "."
- Set objWMIService = GetObject("winmgmts:\\" & strComputer & "\root\cimv2")
- Set colLogicalDisk = objWMIService.ExecQuery("Select * from Win32_LogicalDisk Where DeviceID= '" & drive & "'")
- For each objLogicalDisk in colLogicalDisk
- diskUsedGB = ((objLogicalDisk.size - objLogicalDisk.freespace)/GB)
- Next
- Set oBag = oAPI.CreatePropertyBag()
- Call oBag.AddValue("DiskUsed",diskUsedGB)
- Call oAPI.Return(oBag)
A few comments on the script:
- Line 2 defines the constant that we will use to convert the return values from bytes to gigabytes (GB).
- Lines 4-7 are specific to scripting for OpsMgr.
- Lines 9-16 are the core lines of this VBScript script. This is the part that should be tested outside of Operations Manager to see if it works and what values you expect to collect.
- Lines 18-20 are also scripting for OpsMgr. In line 19, we provide the result of the calculation, “diskUsedGB”, to Operations Manager “DiskUsed”; we’ll reuse “DiskUsed” later on when specifying the performance mapping information.
2. Create a Probe-Based Performance Collection Rule
- In the Operations Manager Administrator Console, under Authoring, expand Management Pack Objects, and click on Rules.
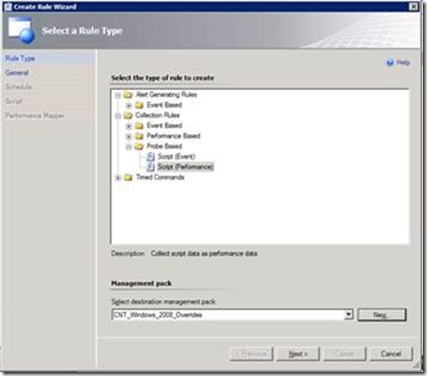
- In the Actions Pane, click on Create a Rule to bring up the Create Rule Wizard window (figure 1).
- Expand Collection Rules, then Probe Based and select Script (Performance).
- In the Select a Rule Type screen (figure 1), under Management Pack, select the appropriate Management Pack to save this performance collection rule.
- Click Next.
Figure 1 - Select a Rule Type Screen
- In the Rule Name and Description screen (figure 2), type in a Rule name.
I prefer to prefix custom rules and monitors with my site code to make it easier to search and identify what I’ve built in my environment.
- Notice that Rule is enabled is unchecked.
This disables the rule and will allow you to target to more specific groups, such as file servers (dynamically or explicitly defined).
- Click Next.
Figure 2 - Rule Name and Description Screen
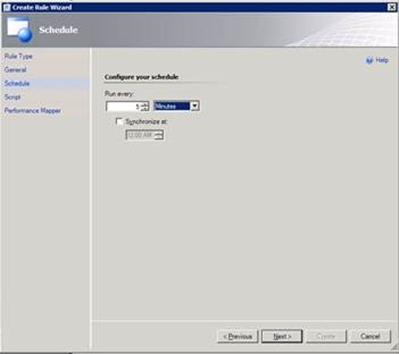
- In the Schedule screen (figure 3), configure how often to run the performance collection rule.
I’ve set it to 5 minutes so that I can monitor if it’s working and collect data quickly as I fine tune the rule. Once I confirm that everything works I’ll change it to something like once a day or every few days.
- Click Next.
Figure 3 - Schedule Screen
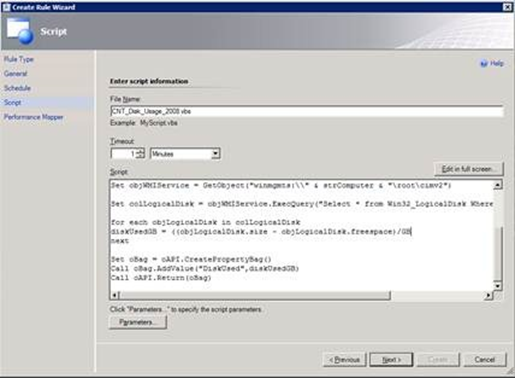
- In the Script screen (figure 4), specify a File Name for the script and Timeoutvalue.
- Paste the script in the Script box.
- Click on Parameters at the bottom of the screen.
Figure 4 - Script Screen
3. Provide the Right Performance Mapping Information
We need to provide the script an Operations Manager parameter for the logical drive (“oArgs”) so that the performance rule runs against each logical drive found on the system.
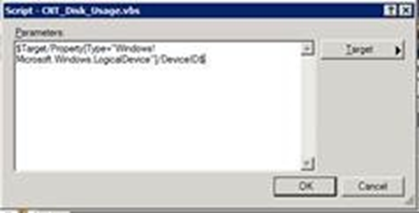
- From the Script screen (figure 4), click on Parameters to bring up the Parameters screen (figure 5).
The parameter to provide to the script is $Target/Property[Type=”Windows!Microsoft.Windows.LogicalDevice”]/DeviceID$ .
- Click on Target and select Device ID (Windows Logical Hardware Component).
- Click OK.
Figure 5 - Parameter Screen
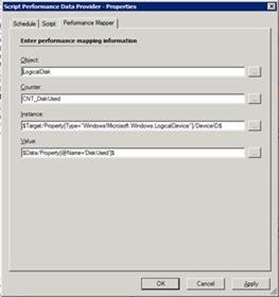
- On the next screen (figure 6), enter the performance mapping informationas shown below:
- Object: LogicalDisk
- Counter: <SiteCode>_DiskUsed (I prefer to use my site code as a prefix)
- Instance: $Target/Property[Type=”Windows!Microsoft.Windows.LogicalDevice”]/DeviceID$
- Value: $Data/Property[@Name=’DiskUsed’]$
Note that the default value for data is $Data/Property[@Name=’PerfValue’]$. The variable is referenced in the script (lines 18-20). In our script we used DiskUsed instead.
Set oBag = oAPI.CreatePropertyBag()
Call oBag.AddValue("DiskUsed",diskUsedGB)
Call oAPI.Return(oBag)
Figure 6 - Performance Mapper Tab
4. Target the Rule Appropriately
Those who’ve used Operations Manager for a while will certainly have found out the hard way (we all have…) that you cannot target rules to a group. Now, here we could simply target to Windows Server 2008 Logical Disk or to Windows Server 2003 Logical Disk (both of these are part of a sealed MP) and the performance collection rule will work. If we want to target only a subset of agents (for example, file servers defined in a custom group), we would create an override to enable the rule and target the group for which we want to collect disk usage information.
5. Monitor the Deployment of the Rule
Once we save the probe, our targeted agents will begin a configuration update cycle. Under the local Event Logs, Applications, Operations Manager Events, we should see a number of events being written to the Operations Manager Application log on the agent(s) to monitor deployment. Note that if there are syntax errors with the script, they will generate warnings in the Operations Manager application event log. Once data has begun collecting and we can see it in the Performance View of the agent in the Administrator console, it’s time to change the collection interval (see figure 3, above).
The data is then available in reporting. For example:
- In the Operations Manager Console, under Reporting, select Microsoft Generic Report Library, select Performance Detail.
- Under Objects, click on Change.
- In the Settings windows, select New Series, and then in the Series Details, click on Add Group and select the desired agent(s).
- Under the Rule option, click on Browse… and Search for the performance rule created (this is where adding the site code as a prefix to the rule comes in handy).
- Specify the instances of drives to display and click OK.
Hope you found this helpful. Comments are welcome.
