How To Find Which Exchange 2010 CAS Server a Client Connects To
Written by Dan Erelis, Microsoft Premier Field Engineer.
With Exchange 2010 comes the new Client access layer, a true middle tier approach in this version of Exchange. No longer do your clients connect to the backend mailbox server but typically through a VIP (Virtual IP address) of a load balancer with multiple Client Access Servers (CAS) belonging to a CAS Array behind the scenes. If you are not deploying a CAS array this does not apply since you will be connecting directly to a server address.
So what do you see at the client level if you are troubleshooting an issue? You see a FQDN of the CAS array which is just a DNS entry pointing to the VIP. If a user is experiencing a problem logging in you might want to know what CAS server they are connected to during their session.
Here’s how you do it. Perform these steps on each CAS server in your array.
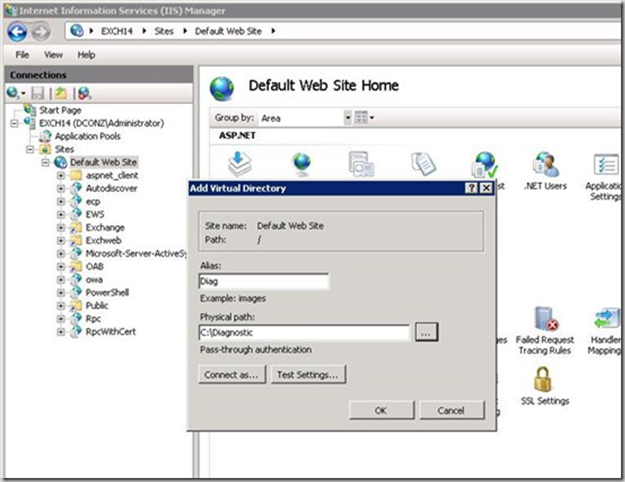
1. Open up IIS manager and create a new virtual directory, give it a standard name such as Diag that is documented and everyone knows. Assign a path of your choice.
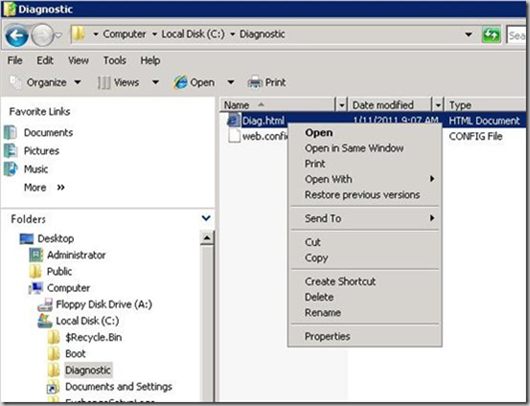
2. Inside the directory specified create a simple text file and add the html extension.
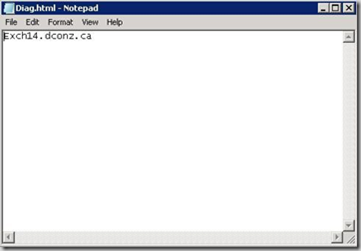
3. Edit the file with notepad or other editor and add a single line of text, specify the server name you are currently working on. Save the file and exit.
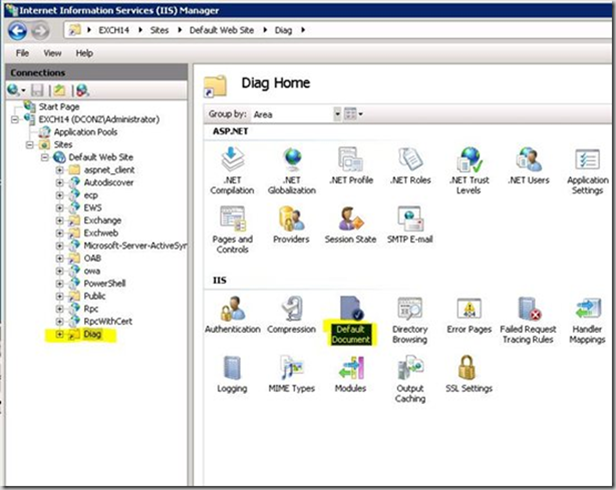
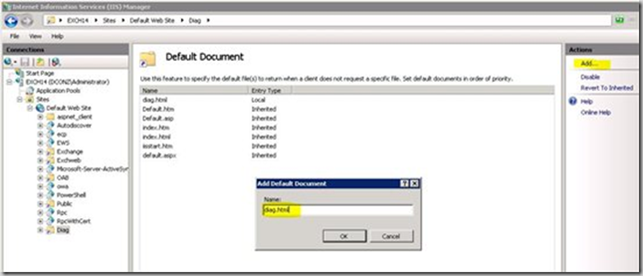
4. In IIS manager, select the new virtual directory you created in the right hand pane. On the left open up the default document option.
5. Click add and specify the file name of the text file you created. Hit ok, make sure it’s at the top of the list.
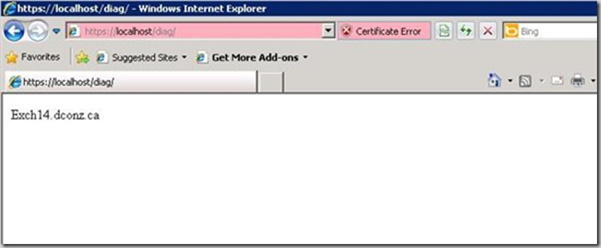
6. Now test your config. In you browser enter the CAS Array FQDN with the addition of the new path you have created as follows. In my case I don’t have an array in this lab but you get the idea. Now what you get back is the specific text file contents on that CAS server showing you which physical server you are connected to.
7. Repeat this step for each CAS server in your array and update each text/HTML file to reflect the individual server name.
As well, Pat Richard (an Exchange MVP and author), points out that:
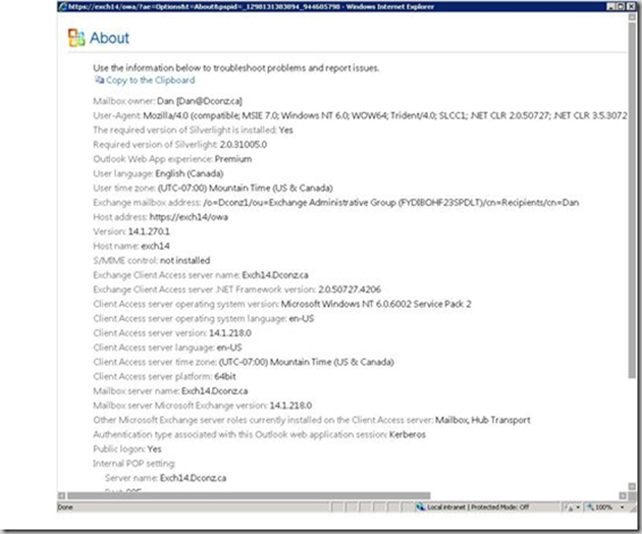
If you are connecting to a CAS server, you can also click on "?" and then click "About". The resulting screen will show information, including a field called "Exchange Client Access server name" that will tell you the server (node) name.
Here’s a visual what Pat pointed out. If you are able to login you can simply check the specific host you are connected to this way:
