Building a security lab in Azure
Building your own lab for security research or penetration testing is a must for any security professional. There are many good reasons for building a lab:
- Test various security solutions before implementing them on a production environment
- Learn a new skill or technique by doing it on isolated environment
- Study for a security certification (OSCP, for example)
Hosting your lab
You can buy a used server and run the lab in your home, but you need to consider hardware costs, license costs, energy costs and noise. Fortunately, these days you can use cloud services for hosting your lab. By using cloud services, you don't have to deal with hardware, you will pay only for the resources you are consuming (Virtual Machines are billed per-second, for example), and you can cancel it when you don't need it any more. In addition, you can access your lab from any place in the world (only internet connectivity is required).
This blog post covers building your lab in Azure.
Lab environment
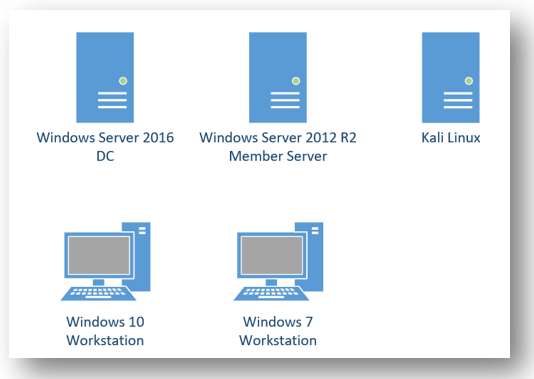
Basic lab setup is consisting of the following components:
- Windows 10 - Windows workstation joined to Active Directory
- Windows 7 SP1 ENT – Windows workstation joined to Active Directory (Optional, require MSDN subscription)
- Windows Server 2012 R2 - "Applications" Server joined to Active Directory
- Windows Server 2016 – Domain Controller
- Kali Linux
I am usually not testing other versions of Windows, unless I'm looking for a specific OS issue. I should also mention that Windows 7 and Window 8.1 virtual machines in Azure can only be used by MSDN subscribers.
Azure lab costs
In Azure you are paying for the resources you are consuming, and there is a big difference between using your lab around 3 hours a night about 14 nights a month or running your VMs permanently. Because it is a lab, let's assume the first option and calculate the costs using Azure Price Calculator for 4 Windows hosts and 1 Linux host (sample prices based on 5/11/2018 rates) :
| Service type | Region | Description | Estimated Cost |
| Virtual Machines | North Europe | 1 D2 (2 vCPU(s), 7 GB RAM) x 42 Hours; Windows – (OS Only); Pay as you go; 0 managed OS disks – S4 | $10.84 |
| Virtual Machines | North Europe | 1 D2 (2 vCPU(s), 7 GB RAM) x 42 Hours; Windows – (OS Only); Pay as you go; 0 managed OS disks – S4 | $10.84 |
| Virtual Machines | North Europe | 1 D2 (2 vCPU(s), 7 GB RAM) x 42 Hours; Windows – (OS Only); Pay as you go; 0 managed OS disks – S4 | $10.84 |
| Virtual Machines | North Europe | 1 D2 (2 vCPU(s), 7 GB RAM) x 42 Hours; Windows – (OS Only); Pay as you go; 0 managed OS disks – S4 | $10.84 |
| Virtual Machines | North Europe | 1 D2 (2 vCPU(s), 7 GB RAM) x 42 Hours; Linux – Ubuntu; Pay as you go; 0 managed OS disks – S4 | $6.13 |
| Monthly Total | $49.48 |
These are just estimations obviously. You can save money by choosing a smaller instance size or using reserved/burst instances types.
Azure lab setup
Follow these three steps to build the essential components for a security lab:
- Build Azure VM resources
- Create Active Directory Domain
- Add users and computers to your domain
At the end of this post you will have fully functional Active Directory security lab.
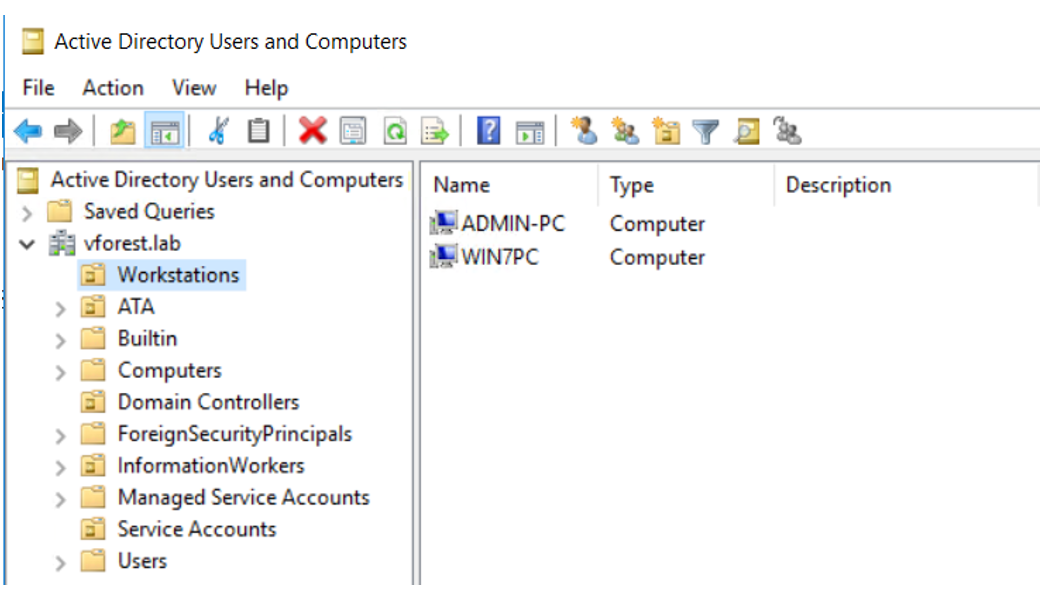
Domain overview:
Building the foundation
Using Azure to create and manage resources is easy, but we need to consider some aspects of the Azure platform before building our workloads. Without proper planning we may need to redeploy some workloads in the future, so let's avoid it as much as we can.
If you are new to Azure platform, please review the following links:
- https://azure.microsoft.com/en-us/get-started/
- https://azure.microsoft.com/en-us/resources/videos/get-started-with-azure-portal/
- https://azure.microsoft.com/en-us/free/
After ramping-up with these resources, please login to the Azure portal.
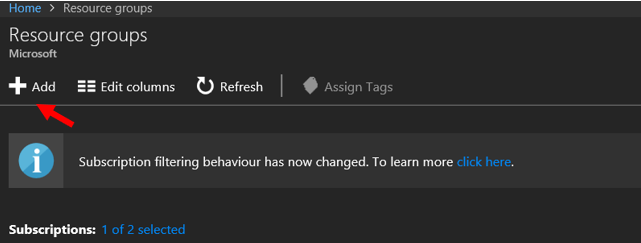
1. Creating resource group – The first step is to use a dedicated Resource Group to organize all lab resources
in one place.
2. From the portal (https://portal.azure.com) open Resource Groups and select Add
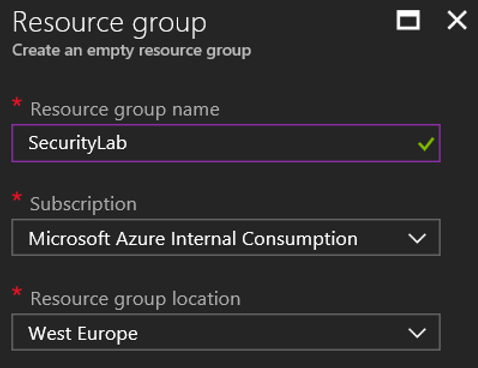
3. Specify a name for resource group, and select a geographical location that is near to you
4. The first resource in our resource group will be the Virtual Network. In Azure, Virtual Machine (VM) is bound to a Virtual Network (VNet), and in addition Virtual Network provides DNS services for the hosts. If you want to
use VPN to connect the VMs it is important that the portion of network addresses that you assign to Azure do not conflict with existing on-premises address ranges.
5. Let's create a network by selecting Virtual Network and then Add
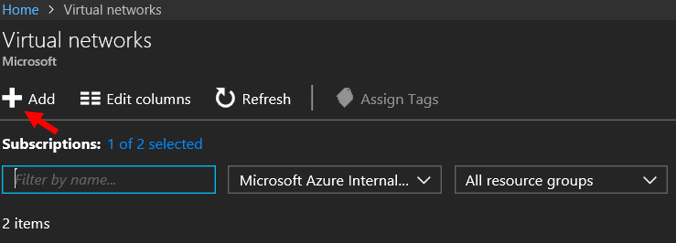
6. Specify a name to the new Virtual Network and select Address space (Note: You need to create this Virtual Network on the same Resource Group from the previous step)

7. Now we have a resource group and a Virtual network, and the next step will be creating the Virtual machines inside these resources.
Creating Azure instances
Configuring the Domain Controller (Windows Server 2016)
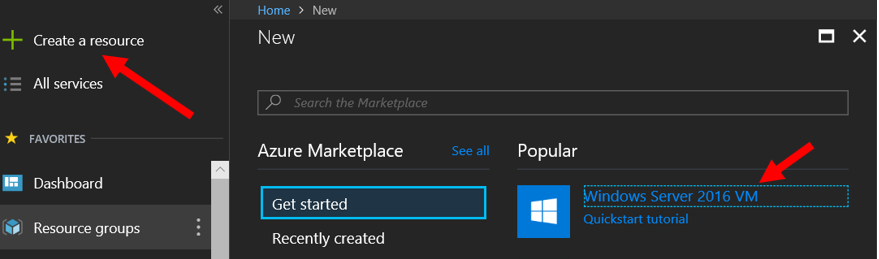
8. In Azure portal select Create a resource and then select Windows Server 2016 VM
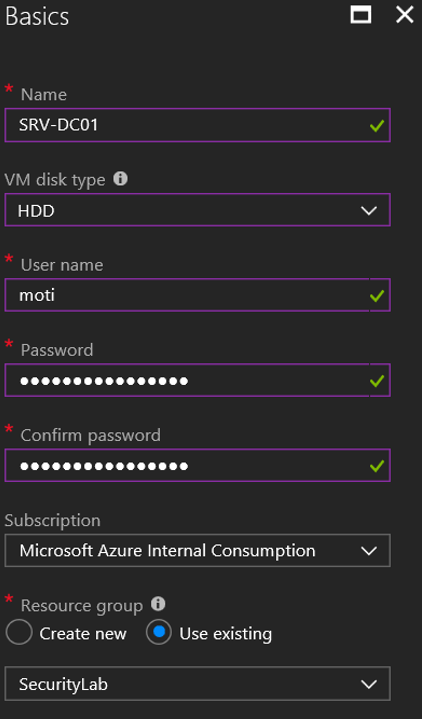
9. Configure the following VM properties:
· VM name can be a maximum of 15 characters
· Select user name
· Passwords must be 12 - 123 characters in length and meet Azure passwords complexity requirements
· Select HDD as disk type, and managed disk (you can accept the defaults for all other options)
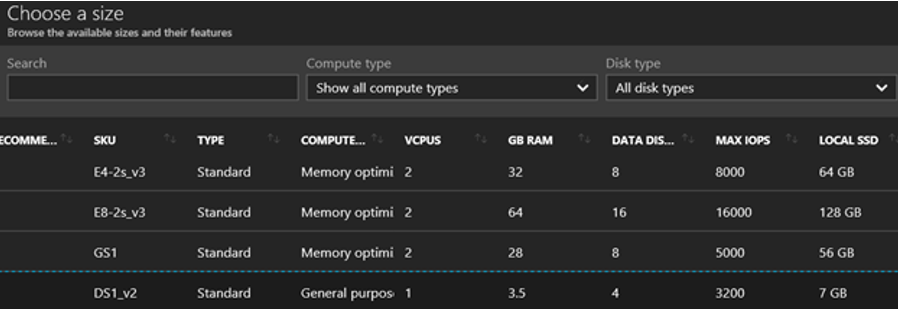
10. Select the VM size (Pick DS2_V2 or any other size)
11. Once your machine is ready, the status will be changed to Running, please click on the
Domain Controller machine (in this example: SRV-DC01 machine)

12. When you at the Virtual Machine page select Networking
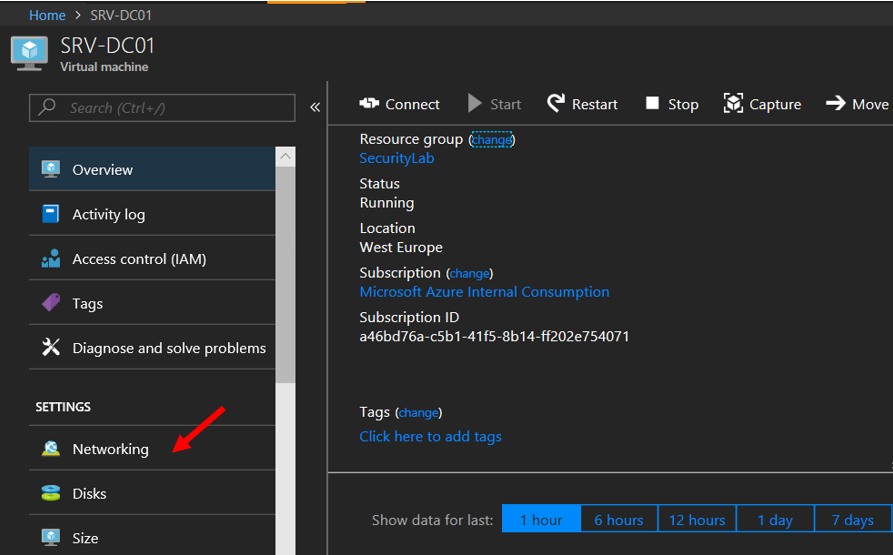
13. find the instance's Network Interface card and click on it
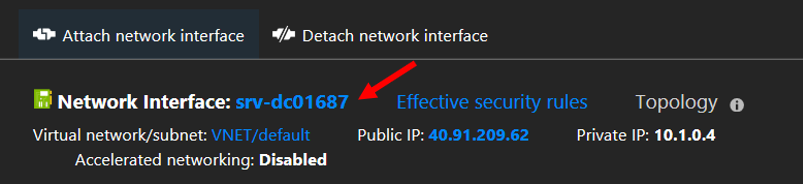
14. Select IP Configuration

15. Configure static IP address for the Domain Controller machine – Domain Controller must have a static IP address, you need to configure it using the portal and NOT by editing the IP configuration inside the virtual machine.

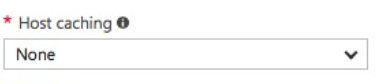
16. Domain Controller' databases must be on non-caching data disk to be supported and to avoid USN
rollbacks. We will attach new disk for the database and leave OS disk with default caching.

18. Select add data disk
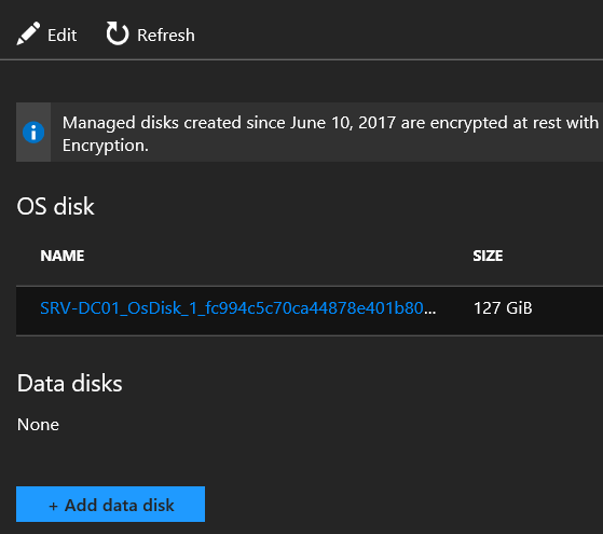
19. Add new disk (Select 10 GB)
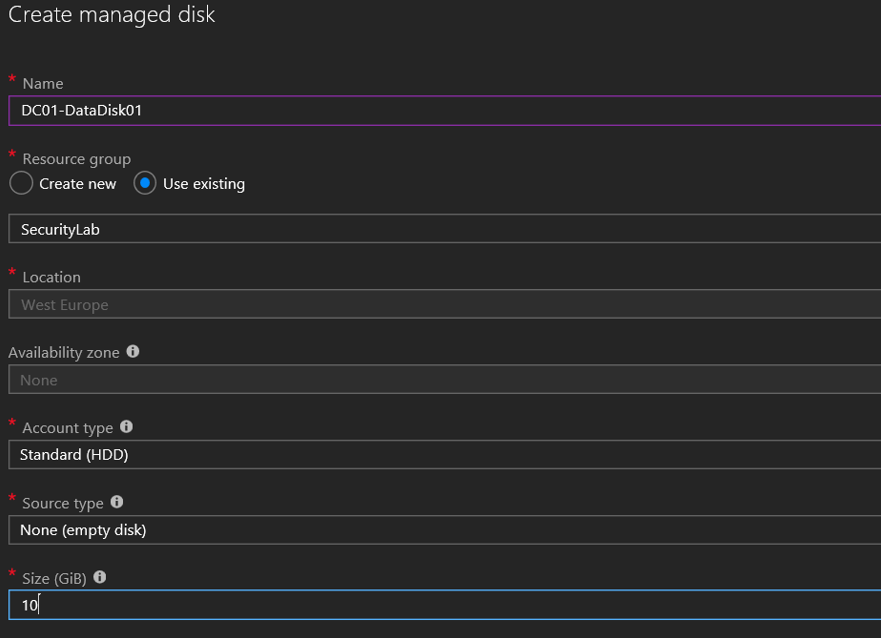
20. Make sure host caching is set to None
21. Go back to the resource group and select the Virtual Network under the resource group
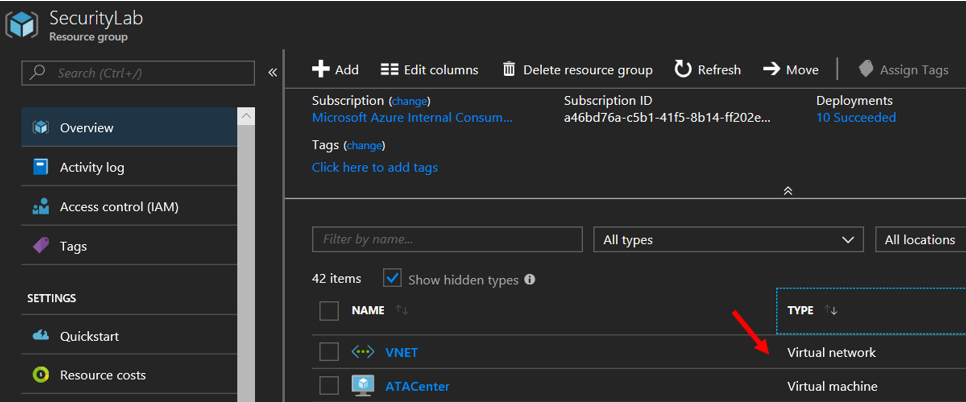
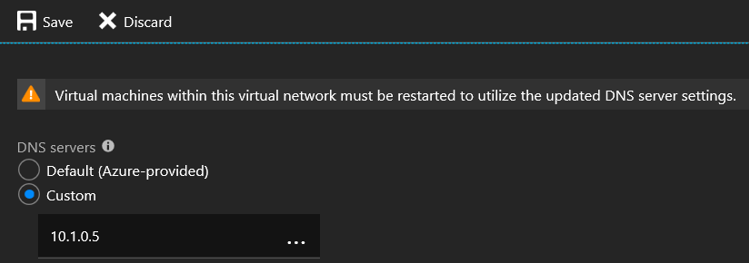
22. Select DNS Servers
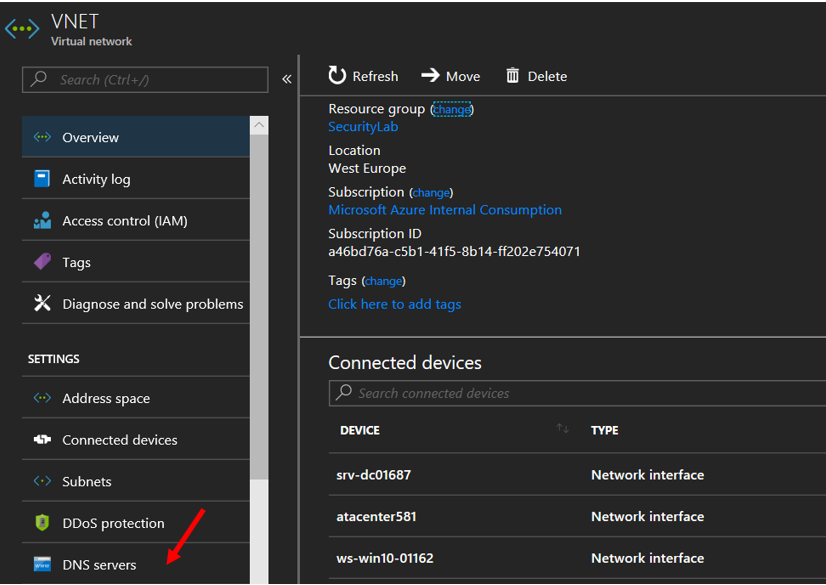
23. Configure the Domain Controller IP address as DNS server on the same Virtual Network you created before
24. Log on to server and install Active Directory

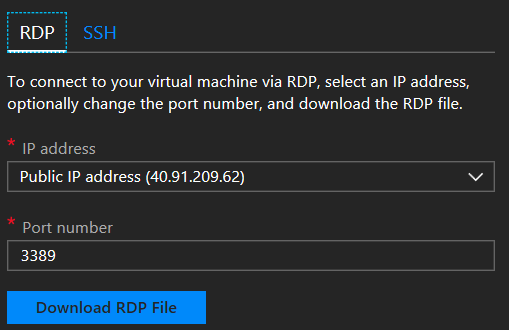
25. Select Public IP network and Download RDP file
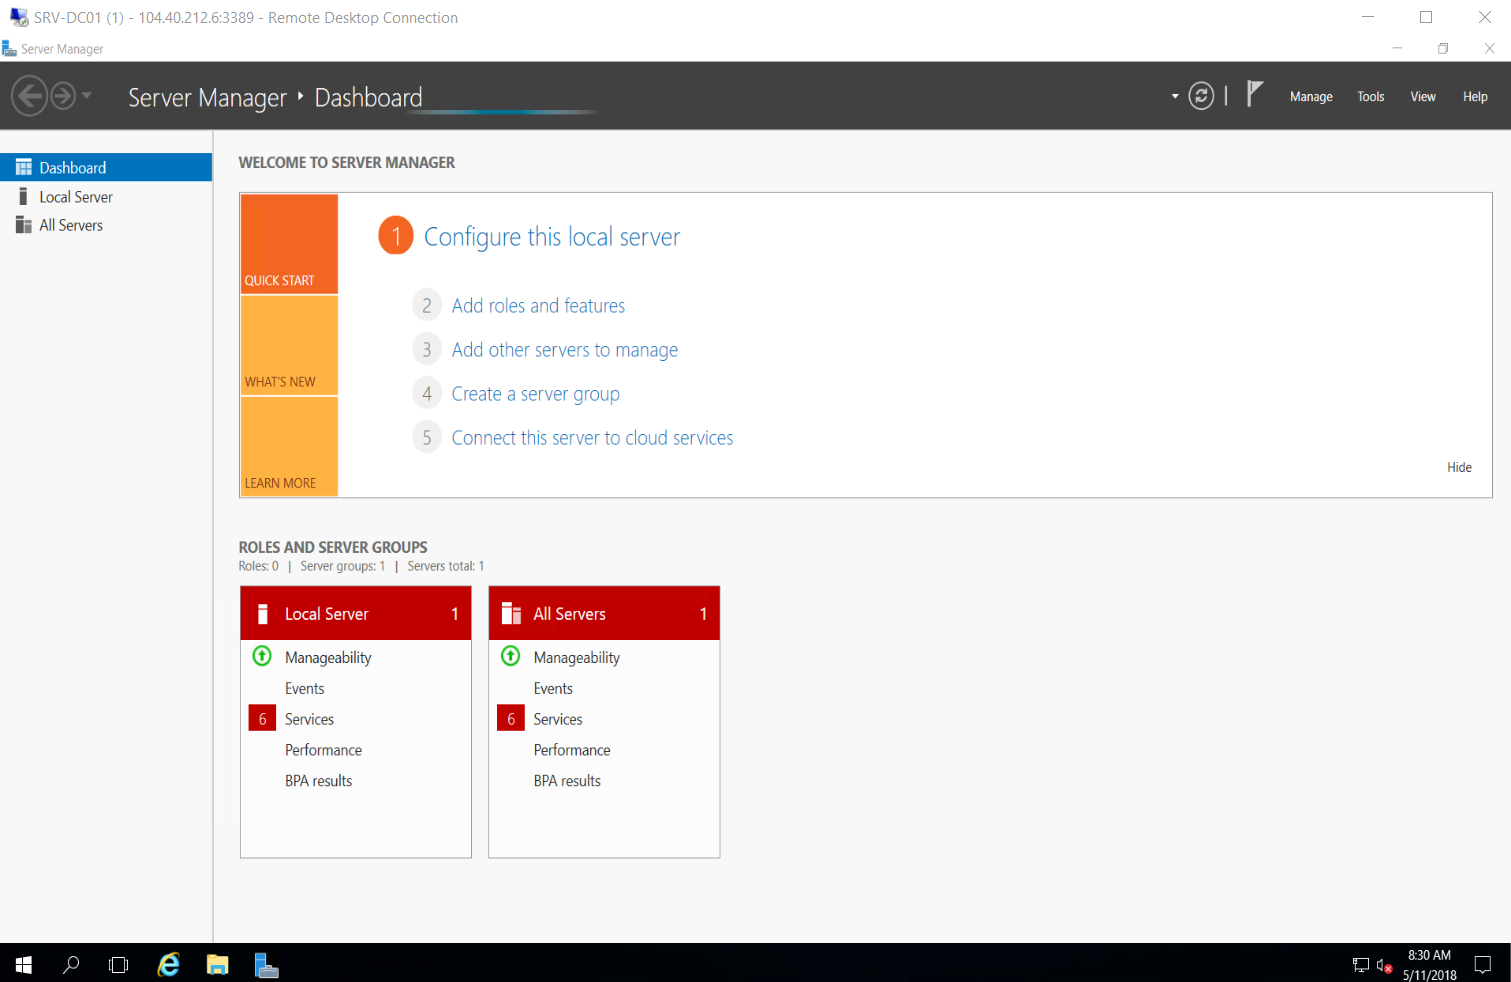
26. Log into your Domain Controller
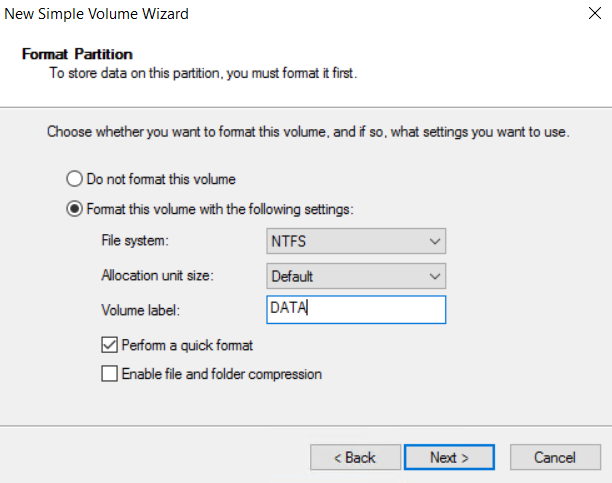
27. When you logged in, open Computer Management from Server Manager tools, and select Disk Management.
28. Bring the new data disk online and format the new disk as NTFS volume
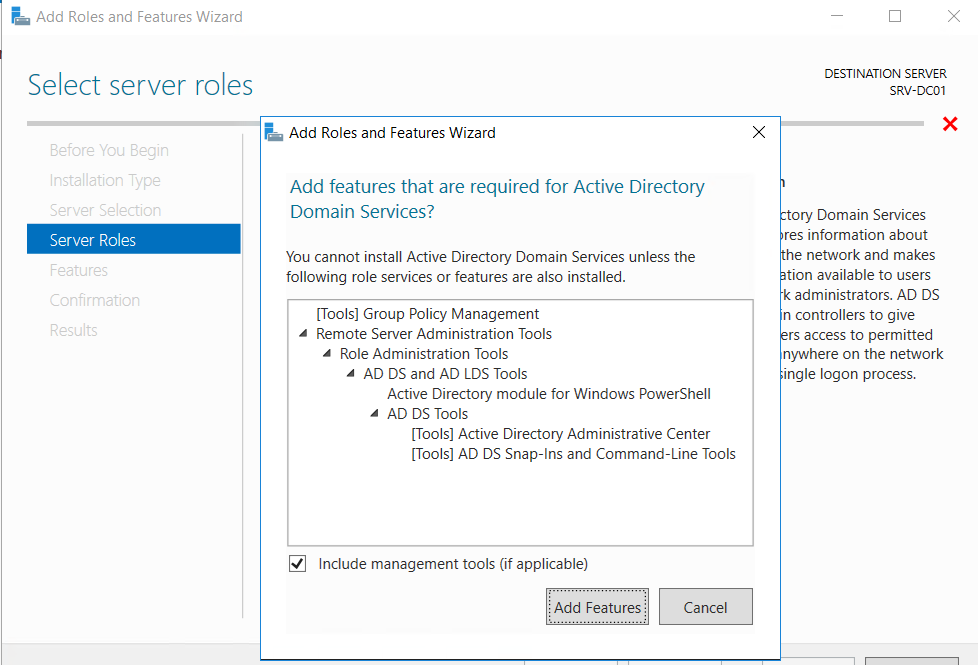
29. Add the Active Directory Domain Services (AD DS) role via Server Manager, and start the DC
promotion process
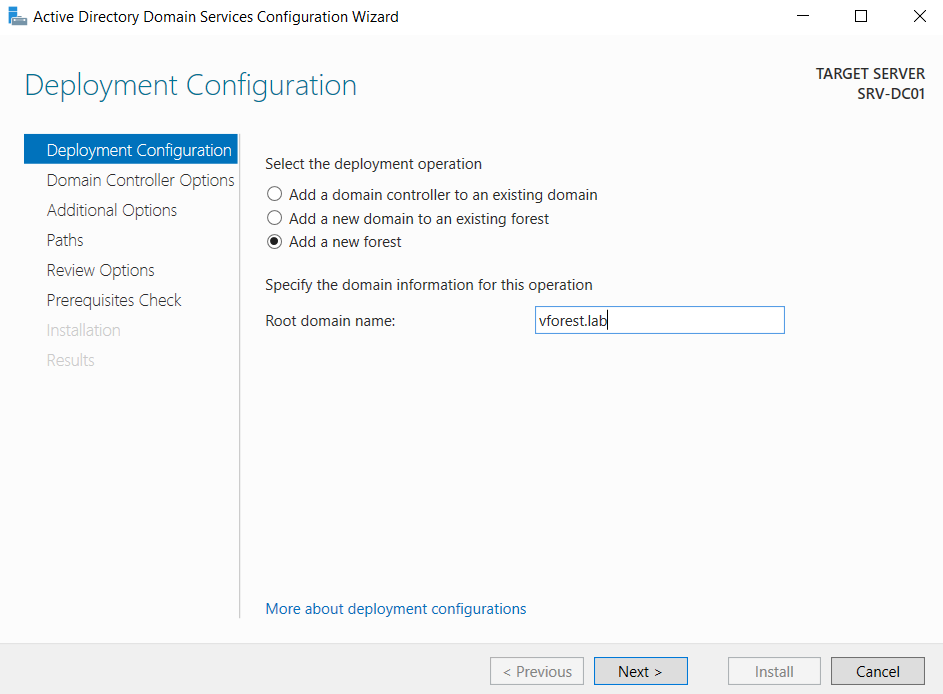
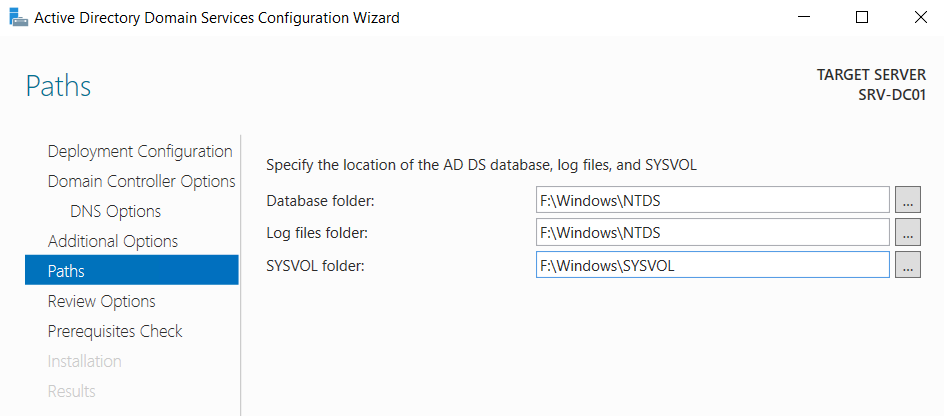
30. Remember to store the AD files on the data disk (F: in this case) instead of the %systemroot%
31. Add DNS Server and Active Directory Management tools
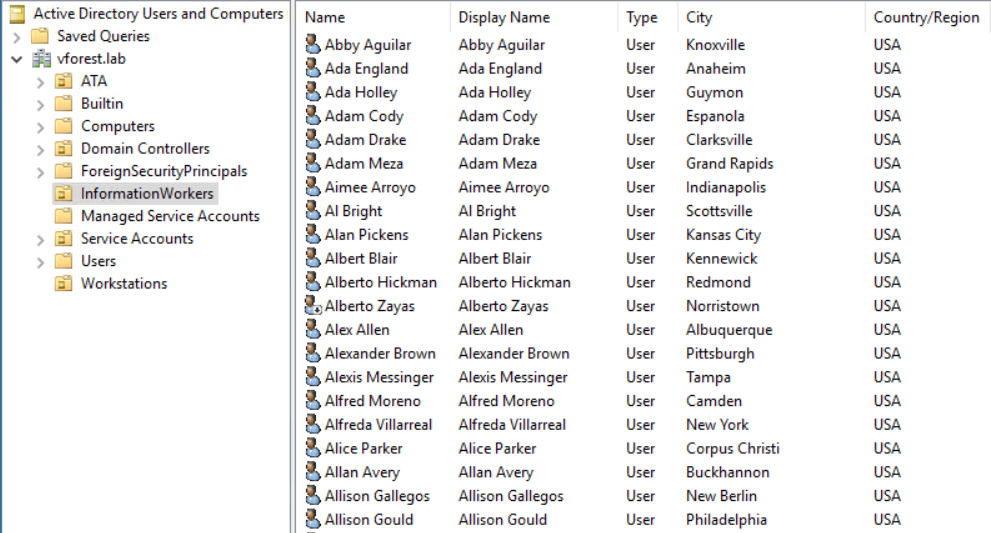
32. Now that you have an Active Directory Domain add some users
33. Pro-tip: To create "realistic" user accounts in your lab please see the instructions in
this post: https://www.darkoperator.com/blog/2016/7/30/creating-real-looking-user-accounts-in-ad-lab?rq=lab
Add additional hosts and join them to the domain
34. Create additional machines with the following Operating Systems:
-
-
-
- Windows 7 SP1 ENT – Windows workstation joined to Active Directory
- Windows 10 - Windows workstation joined to Active Directory
- Windows Server 2012 R2 - "Application" Server joined to Active
Directory - Kali Linux
-
-
Final Part
You did it!! You should have Active Directory domain with additional 3-4 hosts set up in Azure.