Deploying Nano Server using MDT
As you may be aware, the Nano Server installation option for Windows Server 2016 is unique – you don’t deploy it like you do with any other Windows OS. (See https://technet.microsoft.com/en-us/windows-server-docs/get-started/getting-started-with-nano-server for more details.) But that doesn’t mean you can’t use MDT to simplify some of the steps that are described at https://technet.microsoft.com/en-us/windows-server-docs/get-started/deploy-nano-server.
So where do you start? There are four steps:
- Set up MDT with updated files to deploy a Nano Server OS.
- Use the Nano Server Image Builder tool to create a Nano Server WIM that MDT can deploy.
- Create the task sequence in MDT to deploy.
- Deploy (using PXE, media, etc.).
Updating MDT
There are several files that are provided as part of this Nano Server solution, using the zip file nano-server-with-mdt-1-0:
- Microsoft.BDD.DJoin.exe, a 64-bit C++ executable that generates an offline join blob on the fly, which is inserted into the unattend.xml file that is being used to deploy Nano Server. This is the key piece of the puzzle with Nano Server – generating these blobs manually, one server at a time, would be rather tedious. This executable runs in Windows PE, impersonates the provided join account, and then uses the NetCreateProvisioningPackage API call to generate the same offline blob that you get from DJOIN.EXE (not surprising, since it uses similar APIs).
- LTIOfflineJoin.wsf, a very simple script that wraps around the Microsoft.BDD.DJoin.exe executable (primarily to capture the console output from that executable).
- ServerNano.xml, a task sequence template for doing bare metal Nano Server deployments (applying the WIM directly to the hard drive).
- ServerNanoVHD.xml, a task sequence template for doing bare metal Nano Server deployments using boot from VHD (dynamically building the VHD at deployment time).
- Unattend_x64.xml.10.0.ServerDatacenterNano and Unattend_x64.xml.10.0.ServerStandardNanoNano, two (identical) unattend.xml templates used with Nano Server (either the Standard or Datacenter SKUs).
To set this up in MDT, follow these steps:
- Download the nano-server-with-mdt-1-0 zip file and extract the contents.
- Copy the files in the extracted “Scripts” folder to the “Scripts” folder on your MDT deployment share. (If you have modified the default ZTIConfigure.xml file, make sure to integrate your changes into this modified file, or manually integrate the two changes in the included file in your copy. Without these changes, the computer name and domain join logic won’t work.)
- Copy the single Microsoft.BDD.DJoin.exe file in the extracted “Tools” folder to the “Tools\x64” folder on your MDT deployment share.
- Copy the files in the extracted “Templates” folder to the “C:\Program Files\Microsoft Deployment Toolkit\Templates” folder (or an alternate path if you installed MDT somewhere else).
The task sequences are fairly simple, since they only need to support bare metal deployments. The unattend.xml templates are also quite simple, since Nano Server doesn’t support nearly as many settings.
Note that this has only been tested with MDT build 8443; it may work with previous releases, but I haven’t explicitly tested it. Also, this is an LTI-only solution at this point (although you could probably use the included files to create a ConfigMgr task sequence if you tried hard enough – just remember that the Microsoft.BDD.DJoin.exe executable looks at LTI variables, not OSD variables, and those variables need to be set in the global task sequence environment, e.g. via CustomSettings.ini or “Set Task Sequence Variable” steps.)
Creating a Nano Server Image
Well, first you need an image to deploy – the Nano Server media doesn’t include a deployable WIM, so you have to create one. And sysprep isn’t an option either – all image creation steps are done offline. So here are the steps to follow:
- Get a copy of the Windows Server 2016 media (Standard or Datacenter editions, available on MSDN or VLSC).
- Download and install the Nano Server Image Builder tool, which will help create the needed WIM file for MDT to deploy.
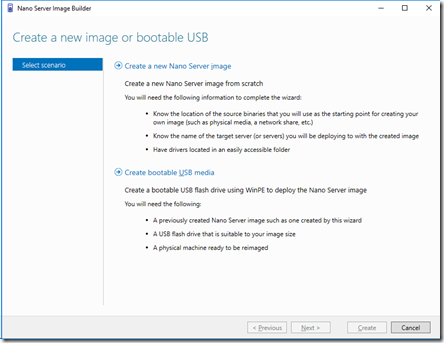
- Run the Nano Server Image Builder GUI wizard and choose “Create a new Nano Server image”:
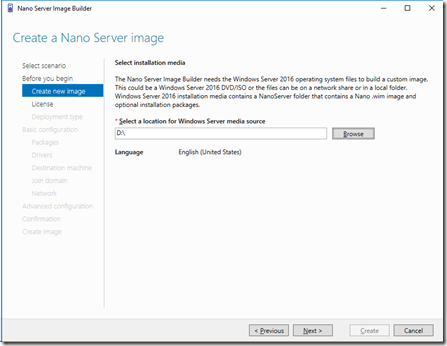
- Specify the location of the Windows Server media (the path should not include the NanoServer folder itself, just use D:\ if using a mounted ISO):
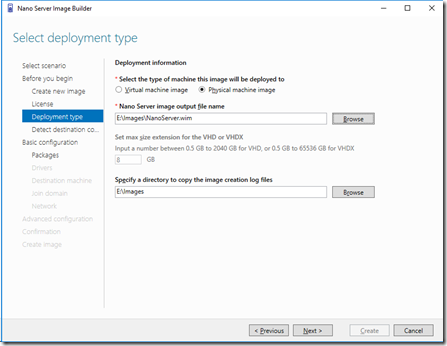
- Specify that you want to use a “Physical machine image” (because that lets you create a WIM file that MDT can deploy, instead of a VHD/VHDX that it can’t) and then specify a path to save the WIM file:
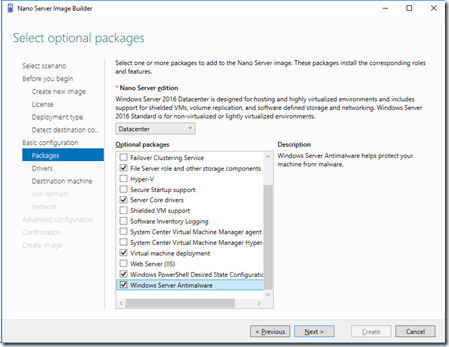
- Select the components that you want to include in the image. If you are going to use a physical machine, leave the “Server Core drivers” package selected; if you are going to use a VM, make sure to select the “Virtual machine deployment” component to get the Hyper-V drivers. Including “Windows PowerShell Desired State Configuration (DSC)” is useful too (as you do need some way to configure the OS after it is installed), and having some sort of anti-malware is recommended too so include “Windows Server Antimalware” for Defender. Beyond that, it depends on what you want the Nano Server to do. In my case, I’ll use it as a file server, so I’ve selected the role for that:
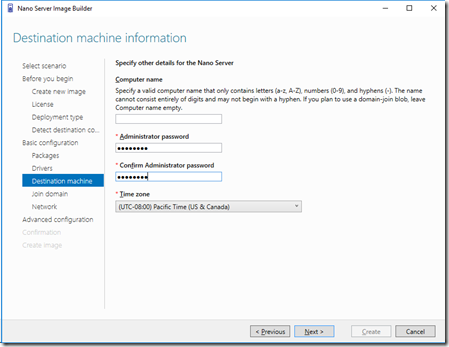
- Specify a local Administrator account password and timezone, but leave the computer name blank.
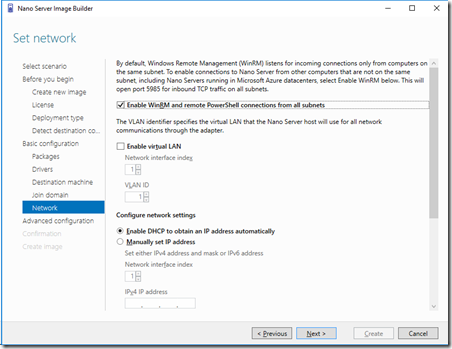
- Don’t enable the Join Domain option, we’ll let MDT handle that later. It is useful to enable WinRM and PowerShell remoting:
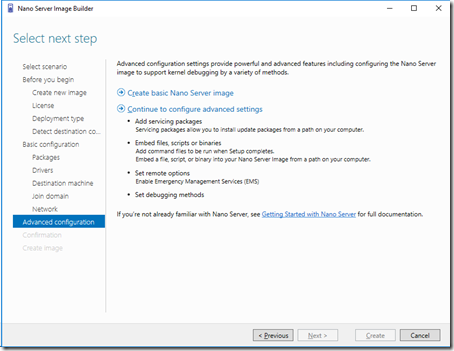
- You can specify advanced configuration options if you want (e.g. run a script after the installation completes), but we can skip that for this simple scenario and choose the “basic Nano Server image” option:
- Finally, click “Create” to generate the image. (Notice that it shows you the PowerShell command that the wizard generated.) The resulting WIM in my example case was 333MB.
Creating the Deployment Task Sequence
Now that we have the needed Nano Server WIM file, we shift over to MDT:
- Import the Nano Server WIM into an MDT deployment share, specifying a custom image file:
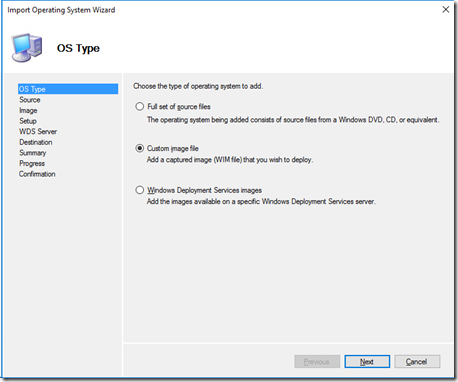
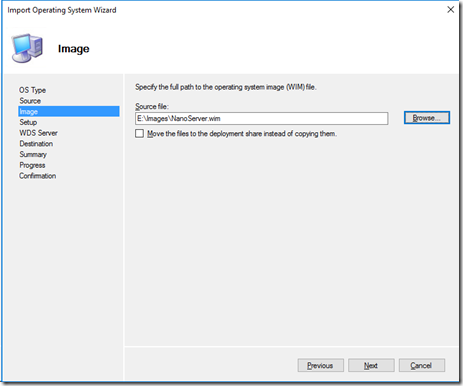
- Select the image you created in the previous activity (no setup files are needed):
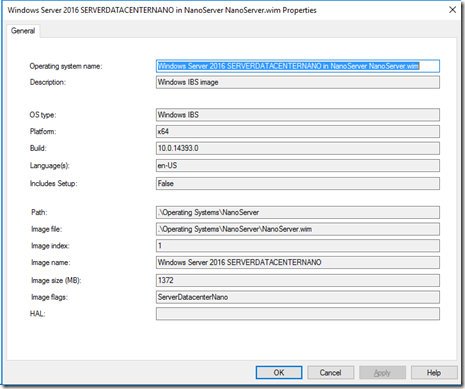
- See the resulting operating system entry (with the SKU being “ServerDatacenterNano”):
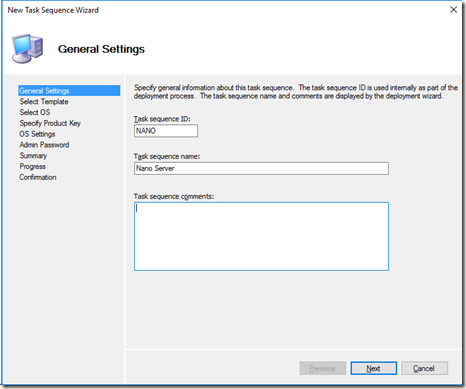
- Create a new task sequence with whatever name and ID you want:
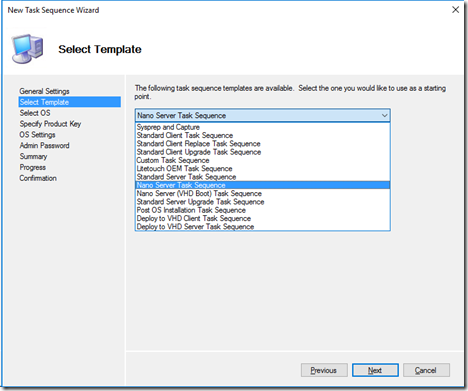
- Select either the “Nano Server Task Sequence” or “Nano Server (VHD Boot) Task Sequence” template (depending on whether you prefer a normal boot or boot from VHD server setup – the Nano Server team would recommend boot from VHD so that you could replace the OS at a later point in time):
- Select the Nano Server WIM that you imported previously:
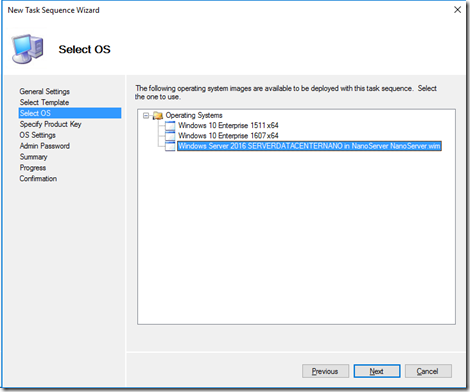
- Complete the new task sequence wizard however you want.
Deploying
With the task sequence created, deploying Nano Server using MDT is really no different than any other OS – almost. Because Nano Server does not contain the full set of Win32 APIs, the MDT task sequence engine doesn’t run in Nano Server. That means there’s no way to have the task sequence continue once the new Nano Server OS is installed, so the task sequence actually completes in Windows PE, before the OS boots for the first time. After you click “Finish” on the summary wizard screen, the computer will reboot into Nano Server, and quickly be ready to log on, where you can see the Nano Server Recovery Console.
To see what that whole process looks like, check out the video below:
This is an “almost” real-time video. I did remove one section that added six minutes to the overall deployment time (quadrupling the overall length). So what did that section do? It was the “Apply unattend.xml using DISM” portion of the “Install Operating System” step, which performs the offlineServicing entries from the unattend.xml. It took an extra six minutes because I had imported the latest Windows Server 2016 (Windows 10) servicing stack and cumulative update packages (KB3199986 and KB3213986) into MDT to test the patch injection process of the task sequence. While it worked fine (as long as the VM has enough memory allocated to it – since the injection happens in Windows PE and Windows PE isn’t using a pagefile, virtual memory can’t be used), it took a long time. As an alternative, you could inject these into the WIM using the Nano Server Image Builder Tool.
In a lot of cases, you can complete the configuration of the machine remotely (using management tools or PowerShell). If you want to automate that as part of the deployment process, you can, but that’s a scenario for you to explore yourself. Remember the advanced options mentioned above when creating the Nano Server WIM file? You could use those to inject a SetupComplete.cmd file (which runs in the LOCALSYSTEM context before the OS installation completes) to configure the new OS, maybe running a PowerShell DSC script to do that configuration. Or you could copy those files in place using a step in the task sequence (the reason why there is an empty “Post-Install” group – that’s where you would want to do the copies).
Summary
As always, these files are provided as-is, with no support offered by Microsoft Support. Feel free to e-mail me at mniehaus@microsoft.com if you have any questions or issues, or post comments to the blog. I’m looking forward to the first comment from someone saying they implemented this successfully and deploying their first Nano Server using MDT ![]()