How to build Server 2008 media that only contains Standard Edition
In order to make installation and distribution a simpler process, the Server 2008 DVD available for download contains all four versions (Web, Standard, Enterprise, and Datacenter) with both full and core installations available. Over the last two weeks I have received the same question from several Universities - is there any way to provide media that only contains Standard Edition? There are many educational institutions where a single entity on campus maintains licenses for many or all departments across campus and in order to prevent installation of the wrong version they would like to separate the installation media.
To resolve this issue, I'll demonstrate how to create a DVD that only contains Standard Edition. We will use tools from the Windows Automated Installation Kit. The same set of tools we used for Vista to build custom media. If there is someone on campus who is already familiar with the tools this should be a simple undertaking and would not require ongoing maintenance once complete. Download URL for WAIK below.
Prereq: WAIK.
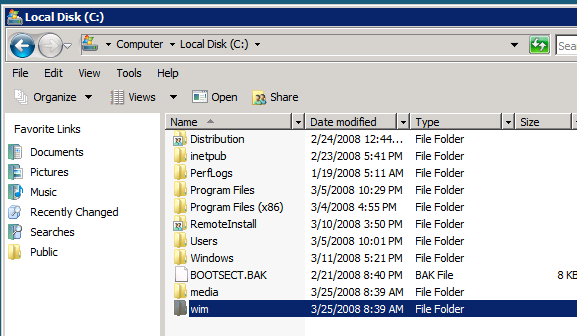
Start by creating two folders somewhere convenient. I am going to use the root of the system drive on my MDT server. Name the folders whatever you would like. You can delete both folders when we are done. I am going to use media and wim.
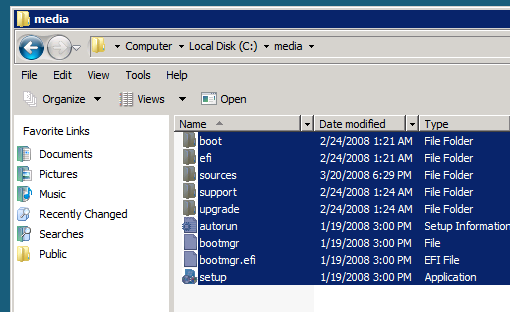
Copy the contents of your Server 2008 DVD to the first folder. You can include all contents from the DVD, or if you would like you can copy only setup.exe and the \Sources folder and all its contents.
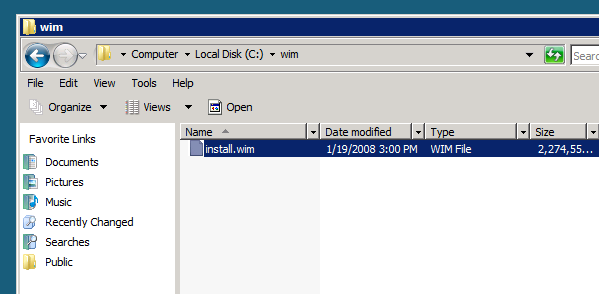
Next, open this new folder and then your new copy of the \Sources folder. Locate the install.wim file. Move this file to the second folder you created so we can work on it without the risk of disturbing other files.
We need to discover the index numbers for the images we are going to extract. We can do that by calling imagex.exe and the /info command line option.
C:\Program Files\Windows AIK\Tools\amd64>imagex.exe /info c:\wim\install.wim
ImageX Tool for Windows
Copyright (C) Microsoft Corp. 1981-2005. All rights reserved.WIM Information:
----------------
GUID: {10ac2e8d-9bdd-479e-85e9-742a4425d67f}
Image Count: 6
Compression: LZX
Part Number: 1/1
Attributes: 0xc
Integrity info
Relative path junctionAvailable Image Choices:
------------------------
<WIM>
<TOTALBYTES>2329127899</TOTALBYTES>
<IMAGE INDEX="1">
<NAME>Windows Longhorn SERVERSTANDARD</NAME>
<DESCRIPTION>Windows Longhorn SERVERSTANDARD</DESCRIPTION>
<FLAGS>SERVERSTANDARD</FLAGS>
From the output, we can see that Standard Edition, Full Install, is index 1. Let's start by extracting that image. Imagex.exe has a command line option for this operation, the /export string. To ensure the new image still works with setup.exe, we also need to issue the /flags option and give the image a name. Without the /flags option, setup.exe will not accept the new wim.
C:\Program Files\Windows AIK\Tools\amd64>imagex /export c:\wim\install.wim 1 c:\wim\export.wim /flags "Windows Server 2008 Standard Edition (Full Installation)"
ImageX Tool for Windows
Copyright (C) Microsoft Corp. 1981-2005. All rights reserved.Exporting: [c:\wim\install.wim, 1] ->
[c:\wim\export.wim]Progress: 100%
Successfully exported image #1.
We now have everything we need to build the new DVD image. First, rename the old wim file to install.bak, just to be sure it is still around in case something goes wrong and we need to come back to it. Next, rename the new wim file to install.wim. Copy the new file to \Sources in the first folder you created. If prompted, you will want to "copy and replace".

See new wim file in image below. Feel free to clean up the extra catalog files.

Now we call one of my favorite tools, oscdimg.exe. It is a command line tool to build a bootable ISO file for Windows media. To build the new media we just run oscdimg with the command line options to use the first folder and a location for the new ISO file.
C:\Program Files\Windows AIK\Tools\PETools>oscdimg -l"Server 2008 Standard Edition" -h -m -n -bc:\media\boot\etfsboot.com c:\media c:\wim\Standard.ISO
OSCDIMG 2.45 CD-ROM and DVD-ROM Premastering Utility
Copyright (C) Microsoft, 1993-2000. All rights reserved.
For Microsoft internal use only.Scanning source tree complete (796 files in 246 directories)
Computing directory information complete
Image file is 2337925120 bytes
Writing 796 files in 246 directories to c:\wim\Standard.ISO
100% complete
Final image file is 2337925120 bytes
WARNING: This image contains filenames and/or directory names that are
NOT COMPATIBLE with Windows NT 3.51. If compatibility with
Windows NT 3.51 is required, use the -nt switch rather than
the -n switch.Done.
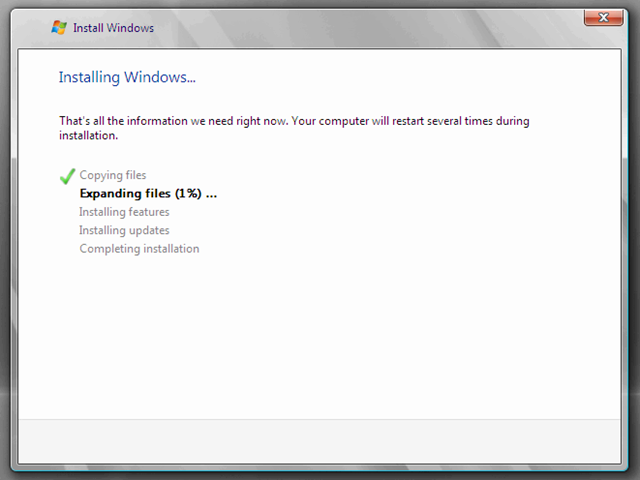
There you have it, a new ISO file with only Server 2008 Standard Edition. To test the media, I often map it to a virtual machine and do a test boot before I burn it off to a real disc (and risk a coaster). The screenshot below indicates that our results are success. Because there is only one image, you will not be prompted to select a version before installation begins.
You could take this one step further and also include the Standard Edition Server Core install. This is more complicated but I will give you all the steps necessary. The gist is to apply the Server Core image to a folder and then append it to your wim and set metadata before you run oscdimg. The command line strings are:
Apply to a folder
C:\Program Files\Windows AIK\Tools\amd64>imagex /apply c:\wim\install.wim 4 c:\wim\mount
ImageX Tool for Windows
Copyright (C) Microsoft Corp. 1981-2005. All rights reserved.Progress: 0%
[INFO] c:\wim\mount\$RECYCLE.BIN. [Restore Sec. Descriptor: (seq. 25) -> SACL is
going away (acecount==1)] (GLE = 0)[INFO] c:\wim\mount\Windows\System32\config\systemprofile\AppData\LocalLow. [Restore Sec. Descriptor: (seq. 25) -> SACL is going away (acecount==1)] (GLE = 0)
Progress: 1%
[INFO] c:\wim\mount\Windows\System32config\systemprofile\AppData\LocalLow\desktop.ini. [Restore Sec. Descriptor: (seq. 25) -> SACL is going away (acecount==1)] (GLE = 0)
Progress: 2%
Progress: 3%
Progress: 4%
Progress: 5%
(etc)Append to file
C:\Program Files\Windows AIK\Tools\amd64>imagex /append c:\wim\mount c:\wim\install.wim "Windows Longhorn SERVERSTANDARDCORE" /flags SERVERSTANDARD
ImageX Tool for Windows
Copyright (C) Microsoft Corp. 1981-2005. All rights reserved.Files/folders excluded from image capture by default:
\WINDOWS\CSC
\RECYCLER
\System Volume Information
\pagefile.sys
\hiberfil.sys
\$ntfs.logProgress: 100%
Successfully imaged c:\wim\mount\
Set metadata
C:\Program Files\Windows AIK\Tools\amd64>imagex /flags SERVERSTANDARD /info c:\wim\install.wim 2 "Windows Server 2008 Standard (Core Installation)" "This option installs a minimal installation of Windows Server without the standard Windowsuser interface, and with a subset of server roles that can be managed from a command prompt, reducing management requirements and attack surface."
ImageX Tool for Windows
Copyright (C) Microsoft Corp. 1981-2005. All rights reserved.Successfully set image name: [Windows Server 2008 Standard (Core Installation)]
Successfully set image description: [This option installs a minimal installation
of Windows Server without the standard Windows user interface, and with a subse
t of server roles that can be managed from a command prompt, reducing management
requirements and attack surface.]
Successfully set image flags: [SERVERSTANDARD]
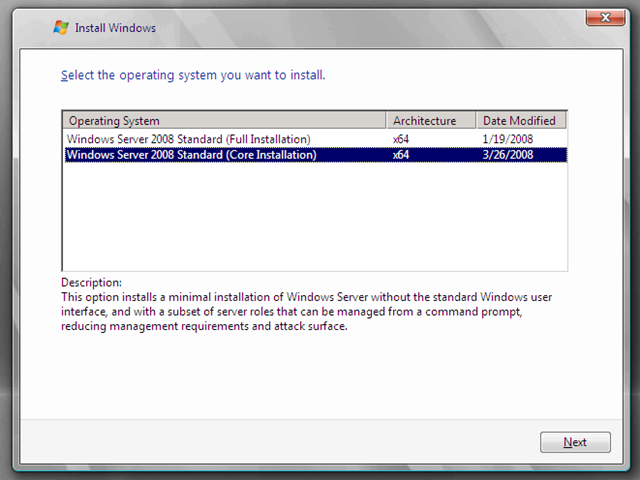
Once this is done, copy the WIM file to \Sources and run the same oscdimg command as before. You may want to give the ISO a different name if you are creating both with and without Core. See results in the screenshot below. You now have bootable installation media that contains Standard full and core, with no other versions.
If you would like to isolate other versions, such as Web, Enterprise, or Datacenter, the operation would be very much the same. You just need to find the index number using imagex.exe /info and export those wim files.