Revisiting How to Monitor Disk Usage with System Center Operations Manager
A while back, I posted a blog on how to create a performance collection probe to calculate disk usage and report on it. I presented a VBScript that retrieved the disk size and free disk space of a server/drive and calculated the disk usage from those values. In this post, I’ll expand on the areas of
- testing the script,
- mapping the script parameters, and
- generating the report using data collected by the probe.
I’ve also recreated the probe in an Operations Manager (OpsMgr) 2012 SP1 environment to verify functionality. The previous post was done in a 2007 R2 environment.
1. Testing the Script
If issues exist with your script, you will not know until the collection probe runs on an agent. If an issue exists, however, the agent will have errors or warnings logged in the local OpsMgr event log. I recommend testing your script outside of OpsMgr first.
Testing Outside OpsMgr
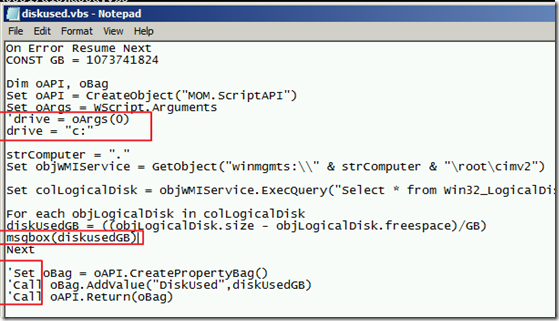
Here’s the same script tested outside of the OpsMgr probe with some modifications:
Note a couple of changes:
- I’ve commented the line “drive = oArgs(0) ”. Within the probe, this is the parameter for the drive name that OpsMgr will send to the script. To find the right one, I’ve literally used trial and error to find out which one works.
- The line has been replaced (for testing) by drive = “c:” . This is where you might want to try the various drives on a particular server to see what kind of results it creates.
- The command msgbox(diskusedGB) will output the result of the calculation in a message box.
- The last three lines have been commented; they are specific to OpsMgr, so they are not needed until we create the probe.
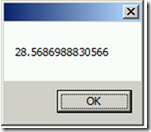
Once I run the script against a particular server/drive, I get the following output (from the msgbox function):
A value like this is what I would expect to be returned to OpsMgr and written to the data warehouse.
On Error Resume Next
The script doesn’t contain any logic to determine if an instance of logical disk should be skipped (e.g., a reserve partition). Therefore, if a server contains one or more instance of logical disk for which the script would fail, we need to account for it in the script, hence using On Error Resume Next.
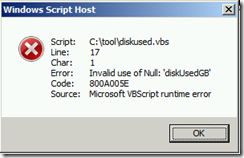
As an example, I’ve run the script, without On Error Resume Next, against an empty CD-ROM drive and received Error 800A005E (below).
If I run the script with On Error Resume Next, there’s no output error. Of course, CD-ROM is not an instance of a logical disk, but it illustrates the point of adding On Error Resume Next.
2. Mapping the Script Parameters
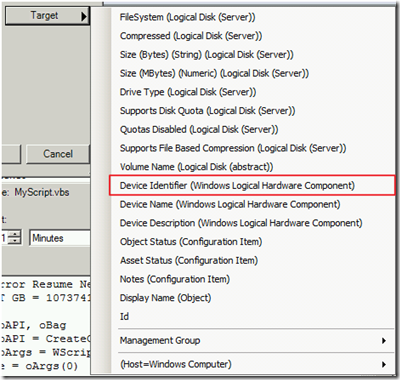
Since some time has passed since the original posting, I recreated the rule in an OpsMgr 2012 SP1 lab to see if there where any differences, especially with some of the properties for the logical disk class. I did notice that the parameter for the drive name is now called “Device Identifier”. When I first created the rule, it was listed as “Device ID”, which is what I have in the original post.
This parameter is the value that OpsMgr will send to the script (“oArgs”).
3. Generating the Report
Here’s one tip to find the rule you created. When you create a performance report and select the rules, you can display all the rules stored in a particular management pack. In my case, I’ve stored the rule in “MG1 – Custom Rules and Monitors”, so I’ve selected the Management Pack (MP) and searched for blank (which represents all).
- In the Operations Manager Console, under Reporting, select Microsoft Generic Report Library, Select Performance Detail.
- Under Objects, click on Change.
- In the Settings windows, select New Series, and then in the Series Details, click on Add Group and select the desired agent(s).
- Under the Rule option, click on Browse…
- Change the Management Pack Name to the one where you saved the collection rule. Click on Search (this will return all rules saved in the MP):
Final Thoughts
I hoped that the clarifications in this posting provide more help. Comments welcome.


