Moving the Exchange Transport Database to a Mount Point
This is my first blog post in quite some time. I have a number of PowerShell scripts and tools that I’ve developed over the past year which I’ve been meaning to share. Starting with this script, I’m going to start posting them on my personal GitHub repository, and blogging about them here on my TechNet blog.
DISCLAIMER
The process and script described in this post is not officially supported by Microsoft. I have tested the procedure to work with Exchange 2013 and 2016, and have afterwards tested upgrading to Exchange 2013 CU14 and Exchange 2016 CU3 after applying these changes. While this script should work without issue, I highly recommend testing it yourself before introducing into a production environment.
Overview
I recently came across an issue with one of my customers where the Operating System drive on their Exchange 2013 servers had too much load on it, in part because the Exchange Transport Database was located in the default location on the Operating System drive. This issue was identified by consistently high values for both read latency (Avg. Disk sec/read), as well as disk queueing (Avg. Disk Queue Length).
To try to reduce some of the load on the Operating System drive, we decided to move the Transport Database to a new, dedicated disk. After consulting TechNet, we came across the following article on how to accomplish this:
Change the location of the queue database
https://technet.microsoft.com/en-us/library/bb125177(v=exchg.150).aspx
While reviewing the instructions, we noticed the following disclaimer:
Any customized per-server settings you make in Exchange XML application configuration files, for example, web.config files on Client Access servers or the EdgeTransport.exe.config file on Mailbox servers, will be overwritten when you install an Exchange Cumulative Update (CU). Make sure that you save this information so you can easily re-configure your server after the install. You must re-configure these settings after you install an Exchange CU.
Essentially what this says is that any time a Cumulative Update is applied, you would lose the changes made in the Transport config file, and as such, would have to remember to update the Transport config.
As a way to avoid having to change the Transport Database path after each Cumulative Update, we came up with the idea of using a Mount Point, which would be located at the default Transport Database location of ‘C:\Program Files\Microsoft\Exchange Server\V15\TransportRoles\data\Queue’. That way we could move the Transport Database to a different disk, but as far as Exchange is concerned, it would still be at the default location. This would prevent us from having to do any changes to the Transport config file.
Automating Setup of the Transport Database Mount Point
Script Location: Add-TransportDatabaseMountPoint.ps1
After reviewing and testing the steps required to setup this Mount Point, I decided to write a PowerShell script to accomplish the task, as the customer in question had over 100 servers that needed to be modified.
The script takes the following actions:
-
Creates a new partition on a specified disk number.
Removes permissions that don't need to be on the Mount Point folder, or Mount Point itself.
Adds required permissions to the Mount Point folder and Mount Point. Specifically, it gives Full Control permissions to SYSTEM, NETWORK SERVICE, and Local Administrators.
Stops the Microsoft Exchange Transport service, and the Microsoft Exchange Health Manager service (to prevent it from starting the Transport service back up).
Moves any existing Transport database files to a temporary location.
Adds a Mount Point to the new partition.
Moves the existing Transport database files to the Mount Point.
Starts the Microsoft Exchange Transport service, and the Microsoft Exchange Health Manager service.
Pre-creates the ‘System Volume Information’ folder underneath the Mount Point if it doesn’t already exist.
Gives SYSTEM, NETWORK SERVICE, and BUILTIN\Administrators permissions to the System Volume Information folder underneath the Mount Point.
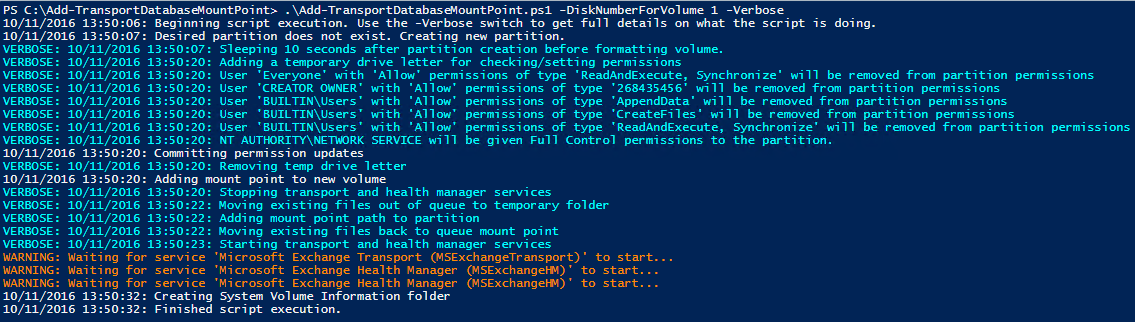
The script will only take action if required. If nothing has been configured for the Mount Point yet, the script output will look as follows:
If the script has already been successfully run, output will be minimal:

Lessons Learned
I hit a couple issues while trying to figure out how to correctly put the Transport Database within a Mount Point that are worth noting.
Lesson 1: Set permissions on the folder AND the Mount Point
The first issue that I encountered while trying to create this script was where to set appropriate permissions. By looking at the existing Queue folder, I knew that SYSTEM, NETWORK SERVICE, and BUILTIN\Administrators were supposed to have Full Control on the folder. In my first attempt, I added these permissions to the new Queue folder after a Mount Point was added. After doing so, the Transport Service failed to start. In research, I found that not only do you have to add permissions to the Mount Point folder, but you also have to add permissions to the volume itself.
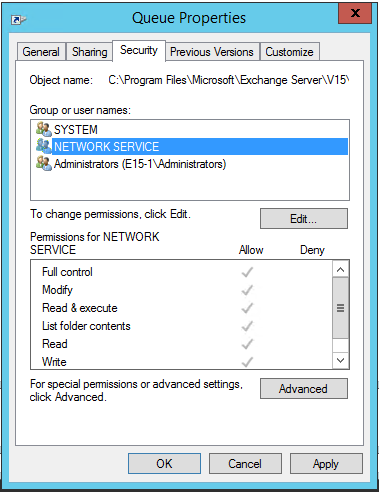
Below is what the Security looks like on the properties of the ‘C:\Program Files\Microsoft\Exchange Server\V15\TransportRoles\data\Queue’ folder after setting up the Mount Point:
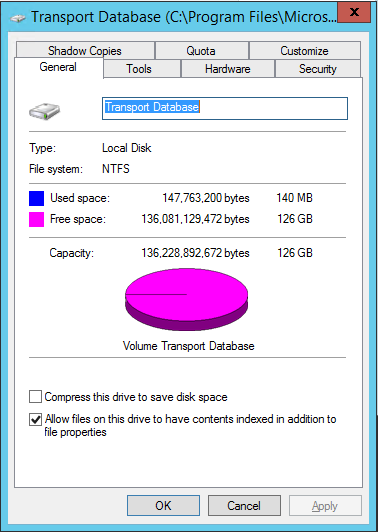
If you go to the General tab, you can click on Properties to get to properties of the Mount Point itself:

This will take you to the General properties of the Mount Point:
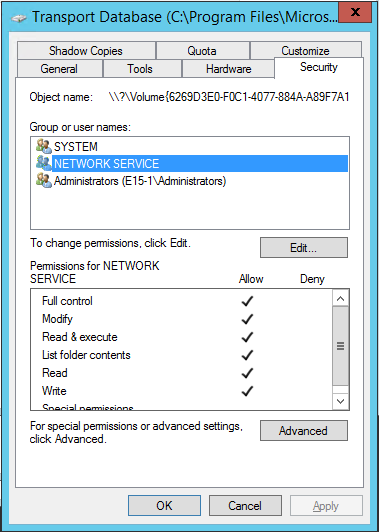
If you go to Security here, you can set permissions on the Mount Point itself:
Lesson 2: Cumulative Updates need permissions to the System Volume Information folder
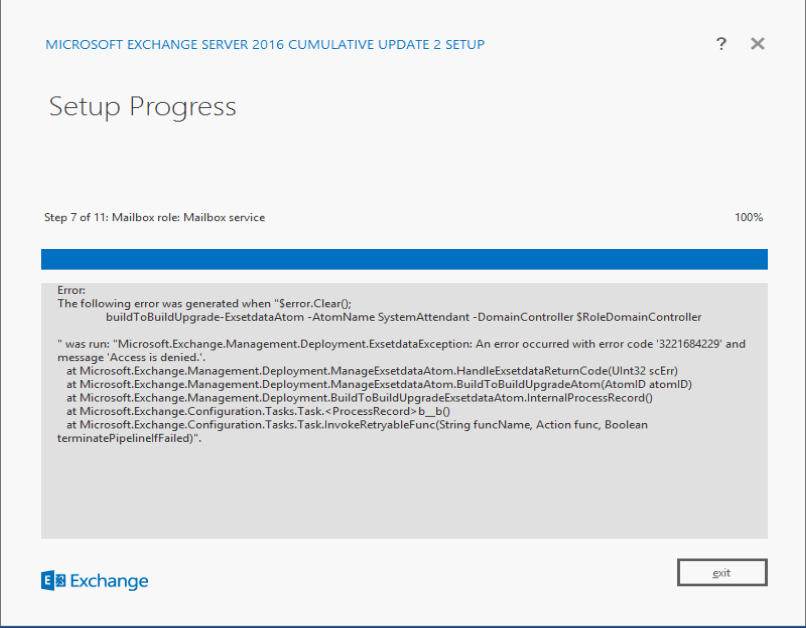
The other major issue I encountered was in regards to applying Cumulative Updates. When testing in my lab, I used the script to setup the new Mount Point, made sure the services started just fine, and then tried to do a Cumulative Update. I did this with both Exchange 2013 and 2016, and the CU’s for both succeeded. We then used this script to move the Transport database to a new location on an entire DAG in my customer’s environment. A week later, they tried to apply the latest Cumulative Update for Exchange 2016, which failed in the ‘Mailbox Role: Mailbox service’ step with error:
Microsoft.Exchange.Management.Deployment.ExsetdataException: An error occurred with error code '3221684229' and message 'Access is denied.'.
Here's a screenshot of the error within Setup:
After doing some research, I found that this could occur if the account running setup does not have permissions to the hidden ‘System Volume Information’ folder within the root of a volume, which only SYSTEM has access to by default. The reason my testing did not catch this is because this folder is not created until after a reboot. The script was adjusted to pre-create the folder, which will cause it to inherit the permissions that were already set on the Mount Point and volume. If the folder already exists, it will check that appropriate permissions are present.
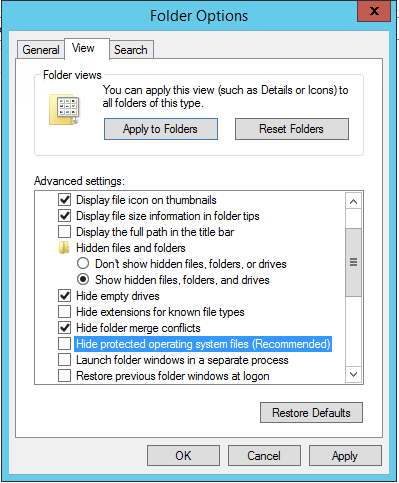
To check if the System Volume Information folder exists or has the right permissions, first go to Folder Options, and verify that 'Show hidden files, folders, and drives' is checked, and 'Hide protected operating system files' is unchecked.
After setting these Folder Options, you should see the System Volume Information folder in the Queue, as well as $RECYCLE.BIN.
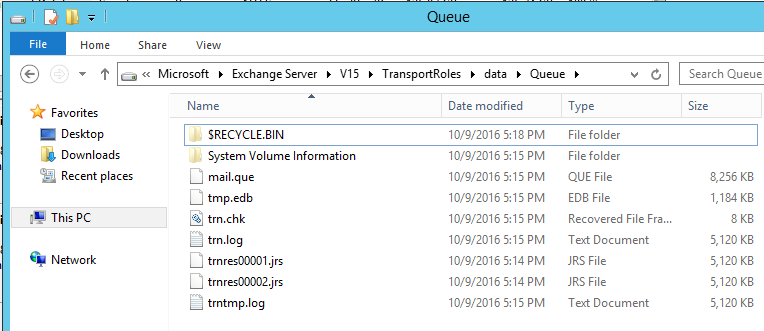
Go to properties of System Volume Information to set the appropriate security.
