Using a DSC Pull Server to Deploy the xExchange Module - Managing Exchange 2013 With DSC - Part 4
Managing Exchange 2013 With DSC
Part 1 - Introducing xExchange
Part 2 - The QuickStart Template
Part 3 - Automating Mount Point Setup and Maintenance for AutoReseed
Part 4 - Using a DSC Pull Server to Deploy the xExchange Module
Part 5 - Installing Exchange Using DSC
Using a DSC Pull Server to Deploy the xExchange Module
For this post, I’m going to cover how to deploy a configuration utilizing the xExchange module via a DSC pull server. The steps I will be covering are mostly based on the below article. I will just be expanding on concepts that I thought needed a little more explanation, and talking about portions that may be different when working with Exchange.
Windows PowerShell Desired State Configuration Pull Servers
https://technet.microsoft.com/en-us/library/dn249913.aspx
Test Servers
I will be referencing two different test servers in this blog post. I will show how to execute all the steps directly on the pull server, as I expect most people would rather configure their Exchange servers remotely from a central location than from multiple locations. The two test servers are:
DSCPULL-1: A Windows Server 2012 machine which will be setup as a DSC pull server
E15-1: An Exchange 2013 server
Note that most of the documentation on pull servers that I've found covers setting them up on Windows Server 2012 R2. I’m going to demonstrate setting one up on Windows Server 2012, as I hit some issues trying to get it to work that are worth sharing (these issues have been reported, and will be fixed soon).
Sample Scripts
The scripts that are used in the examples in this post are included in PullServerScripts.zip. I will be extracting the contents of the zip to C:\DSCScripts on my pull server, DSCPULL-1, but they could go in any location.
Pull Server Prerequisites
The following components will need to be installed or downloaded onto the DSC pull server:
Internet Information Services
Installing Pull Server Prerequisites
Windows Management Framework 4
Installing WMF 4 is pretty straightforward. All you need to do is download the package for the appropriate version of Windows, and double click it to start the installation.
Internet Information Services
The TechNet article on DSC pull servers does mention that IIS is a prerequisite, but doesn’t state specifically which components need to be installed. That being the case, I tried, and was successful, at just choosing the defaults options for IIS.
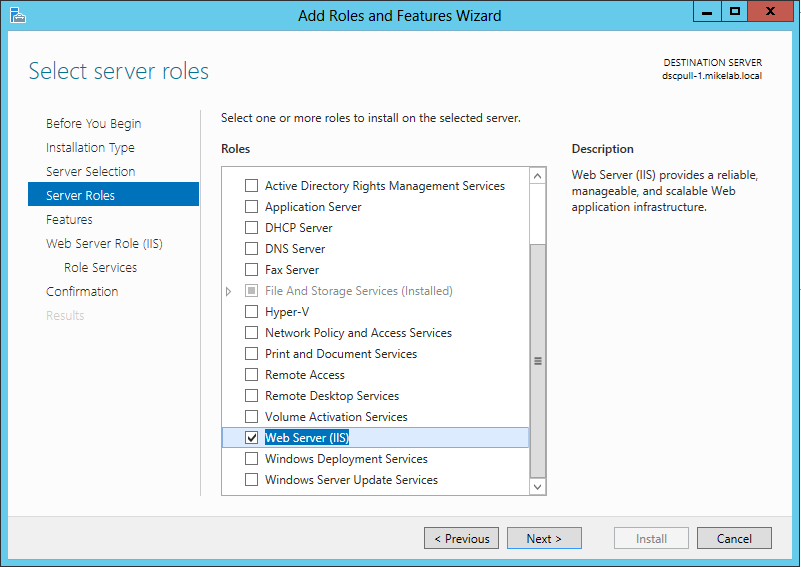
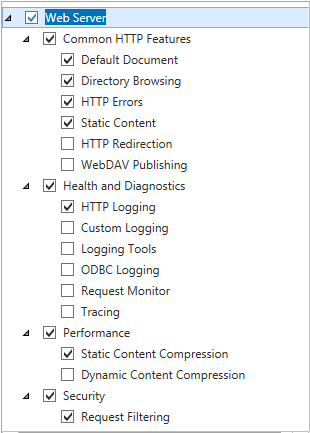
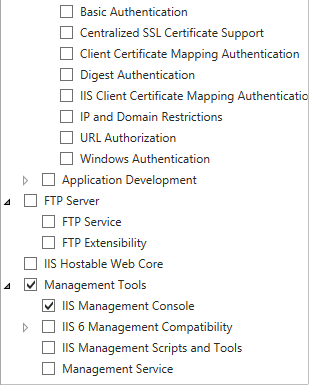
Using the Add Roles and Features Wizard, you first want to check the ‘Web Server (IIS)’ role:
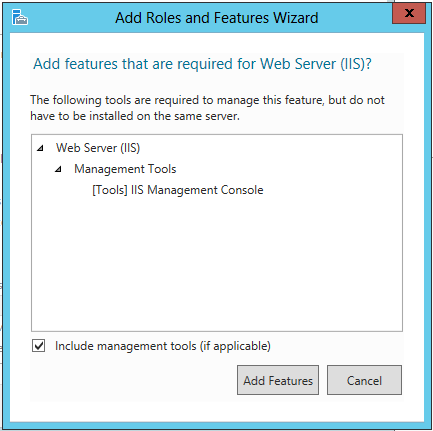
When prompted, choose that you want to include management tools:
You shouldn’t need to add any additional Role Services underneath Web Server. These are the default options that were selected for me:
xPSDesiredStateConfiguration
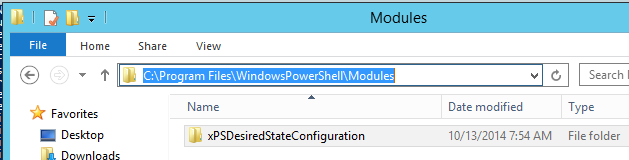
After extracting the zip file for xPSDesiredStateConfiguration, copy the xPSDesiredStateConfiguration folder to ‘C:\Program Files\WindowsPowerShell\Modules’:
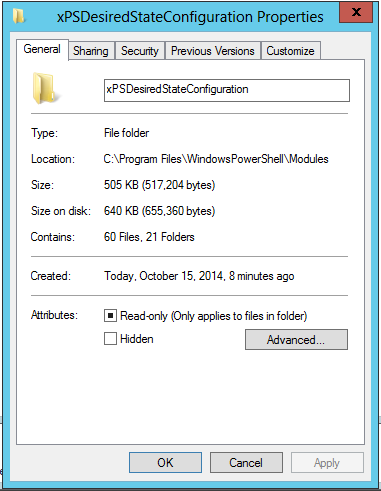
One thing worth mentioning is that for the copy of xPSDesiredStateConfiguration I downloaded (v3.0.2.0), all the folders and files were Read Only by default. If you plan on modifying any of the sample scripts, you may want to uncheck Read Only at the root folder:
xExchange (Optional)
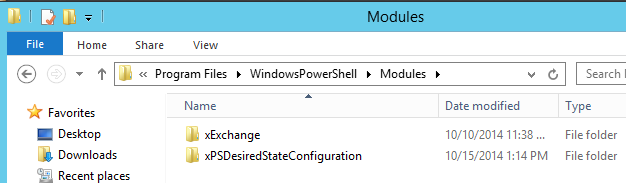
On my pull server, I chose to copy the extracted xExchange module to the ‘C:\Program Files\WindowsPowerShell\Modules’ directory as well. This isn’t a requirement, but will make it easier to write xExchange based configuration scripts directly on the pull server, as the Powershell ISE will be able to recognize the Exchange resources. After copying over the xExchange module, I now have two modules in the Modules directory:
Windows Update (Optional)
After installing all of the above features and components, I highly recommend running Windows Update to make sure the server is completely up to date.
Preparing a Certificate
Now that the pull server prerequisites have been installed, the next thing that needs to be done is to obtain a certificate. The certificate will be used for two things:
Securing communications between the DSC pull server and target computers
Encrypting credentials that will be passed to xExchange resources.
If you wanted, you could use two separate certificates for this, but I’m going to just use a single certificate for both.
Requesting the Certificate
There’s a ton of different ways out there to get a certificate, so I’m just going to cover an easy to use method which I already have setup in my lab. In the lab, I have one of my Domain Controllers configured with Active Directory Certificate Services, and installed as an Enterprise Root CA. With this setup, I can easily request a certicate using the Certificates snap-in in the mmc and sending the request directly to my CA.
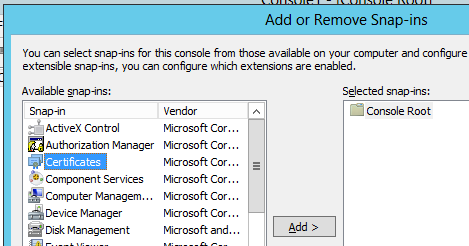
On DSCPULL-1, I’m going to open up mmc, go to 'Add/Remove Snap-in', and choose the Certificates snap-in:
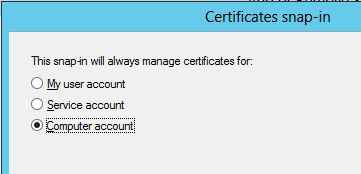
After hitting add, it asks what object the snap-in will manage certificates for. The certificate needs to be stored in the Personal store of the Local Computer, so I’m going to choose ‘Computer account’:
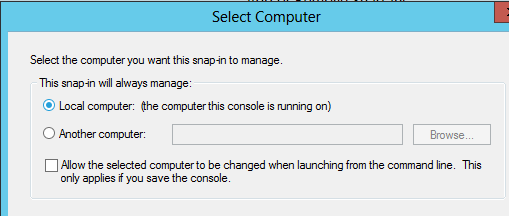
Next I'll choose ‘Local computer’:
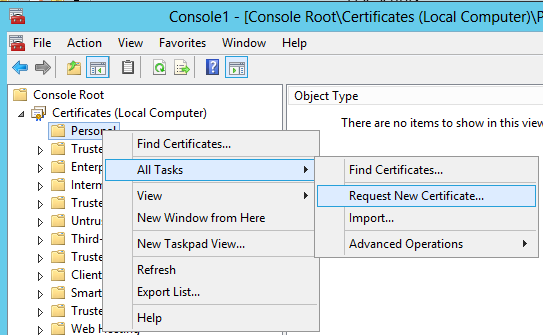
Once the snap-in is opened, the first thing I want to do is request a certificate. To do this, I will right click on the Personal store, choose ‘All Tasks’, and ‘Request New Certificate’:
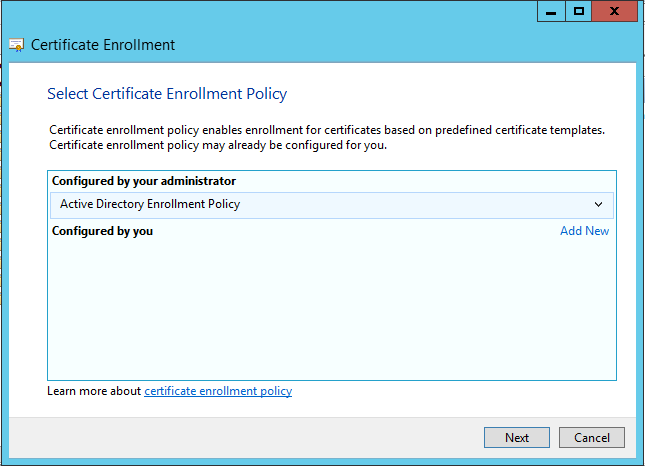
I only have a single Certificate Enrollment Policy, so I can hit Next again:
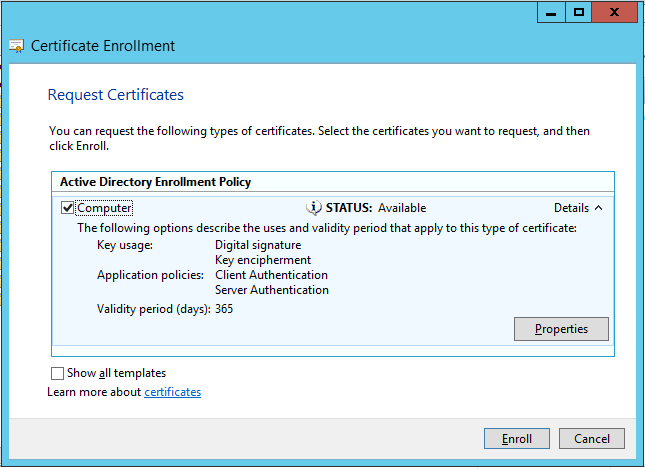
Now I need to choose the certificate type that I'd like to request. I’ve experimented with using both a Computer or a Workstation certificate for DSC, and both work. Since the Computer template is available with a default CA installation, I will choose Computer.
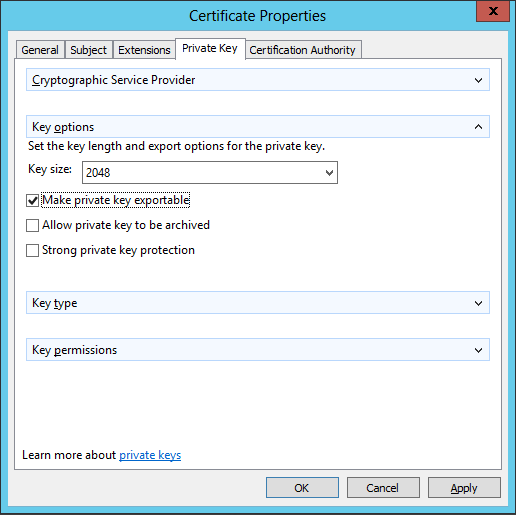
Before hitting Enroll, I need to expand Details, and go to Properties on the certificate so I can complete some extra fields:
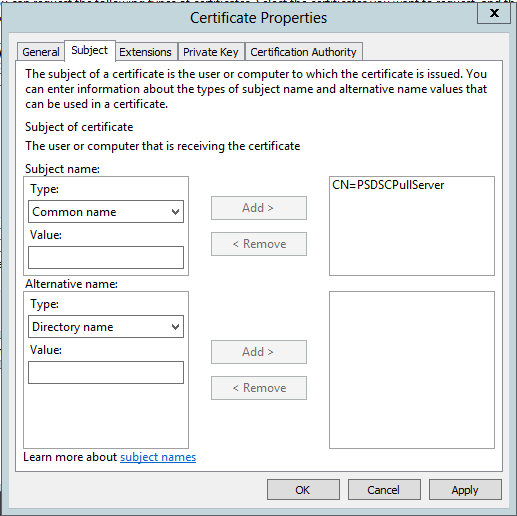
Within the certificate properties, the first thing I’m going to do is go to the Subject tab, and add in a Common name of PSDSCPullServer. This matches the EndpointName we will use later in Sample_xDscWebServices.ps1, the the script to setup IIS to host a DSC pull server:
On the Private Key tab, I’m going to check the box to make the private key exportable, as we’ll need to export a copy of the Private Key and import it in the Personal store of each target computer that will be configured.
After checking this box, I’m going to hit OK to close out the Properties, and then Enroll to request the certificate:
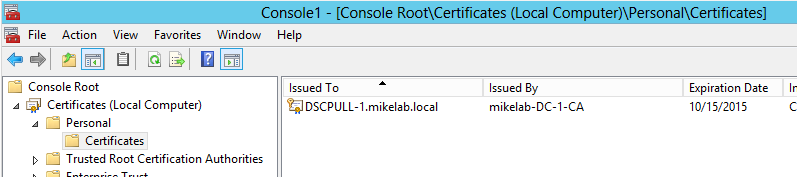
After hitting Enroll, I now see the requested certificate in the Personal store:
Exporting the Private and Public Key
Now I’m going to export the certificate twice, once with just the Public key, and once with the Private key. The Public key export will be used by the DSC pull server to encrypt credentials. The Private key will be imported in each target node, and will be used to decrypt credentials when configurations are applied.
Exporting the Private Key
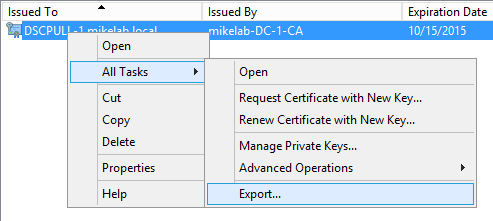
First I’m going to export the Private key. To do this, I right click on the certificate, go to All Tasks, and choose Export:
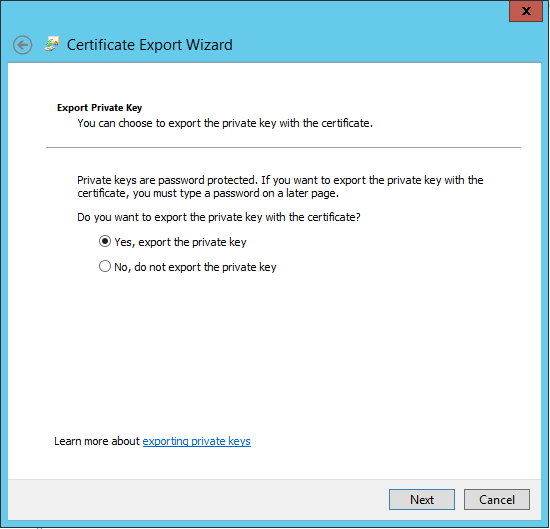
Next I'll choose 'Yes, export the private key':
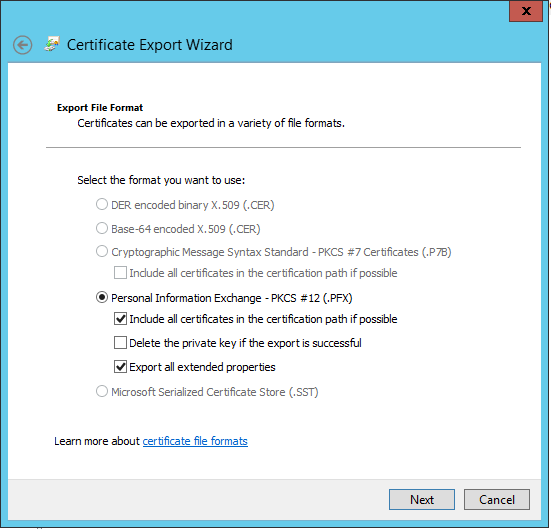
In the Export options, I’m going to choose to ‘Include all certificates in the certificate path if possible’, and ‘Export all extended properties’:
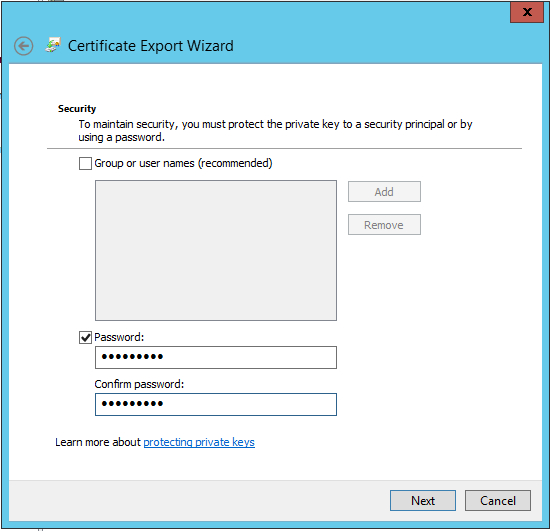
Since this is a Private key export, I have to specify a means to secure the export file. I’m going to use a Password:
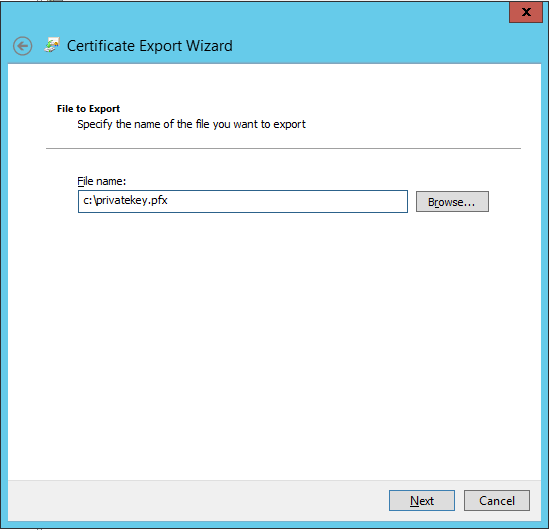
Now I’ll specify the name and location of the export file, c:\privatekey.pfx, and hit Next, then Finish:
Exporting the Public Key
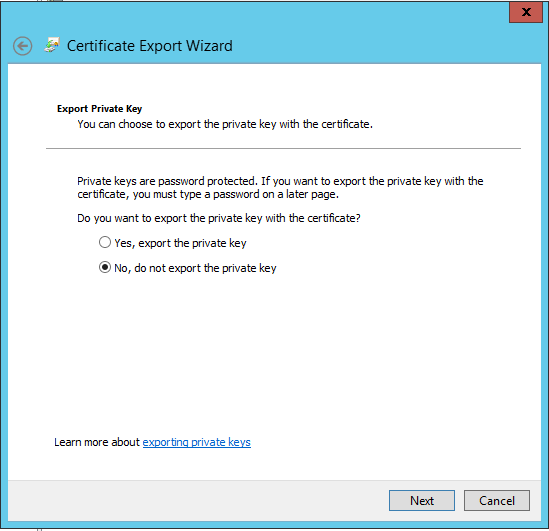
Now we need to export the Public key. The initial steps to perform the export are the same as exporting a Private key. When I get to this screen, I want to choose to 'not export the private key':
I’ll choose to DER encode the .CER file:
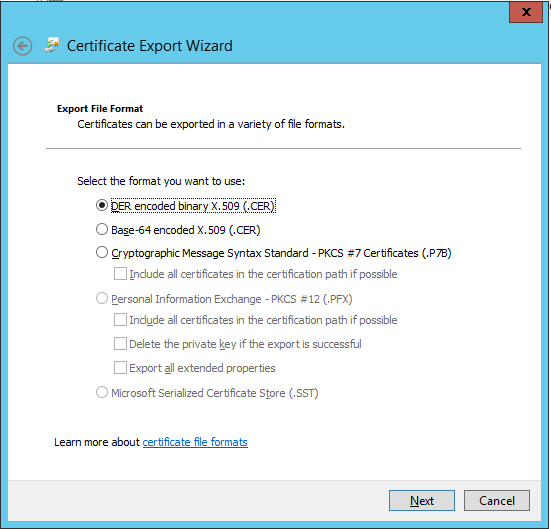
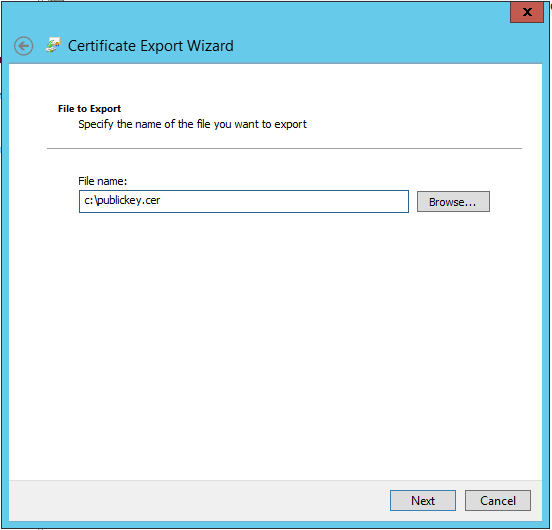
For the export location, I’m going to choose c:\publickey.cer, then hit Next and Finish:
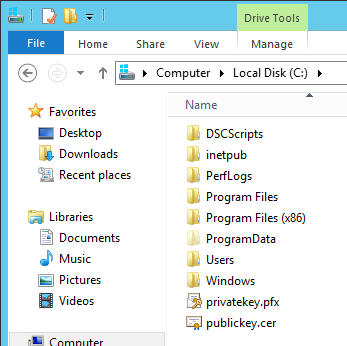
I now have two certificate exports:
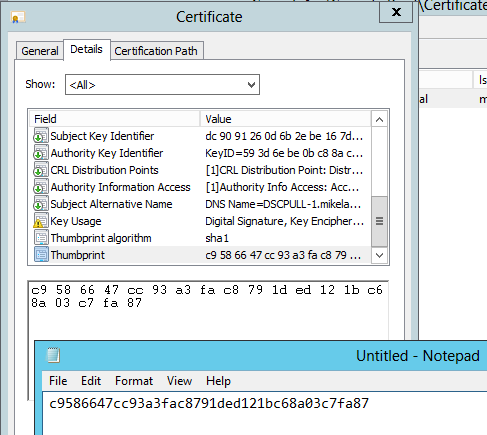
Making Note of the Certificate Thumbprint
The final thing I need to do within the Certificates snap-in is make note of the certificate’s thumbprint. To do this, I’m going to go to properties of the certificate. On the Details tab, scroll down to the Thumbprint property:
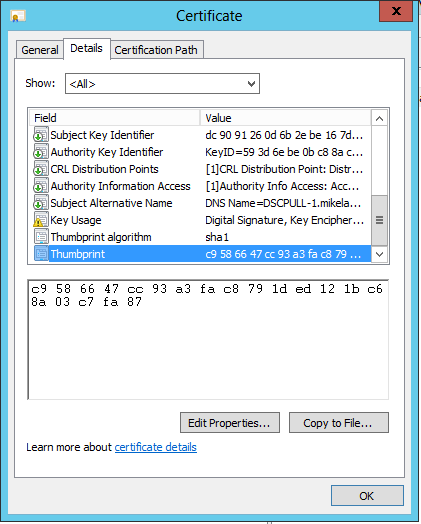
IMPORTANT: It is important to note that you probably don’t want to copy/paste the Thumbprint directly out of certificate properties. Doing so copies some additional Unicode characters which will break your DSC configuration scripts. Instead I recommend opening notepad separately and just manually typing in the Thumbprint as you see it. For more information, see the very end of this post.
Remotely Importing the Private Key on Target Computers
Now that I have a certificate, I need to import the private key on each target computer, which in this case is just E15-1. There are a variety of methods to do this, so I'm going to choose a method that allows me to initiate a remote import from a central location.
The following commands are included in the example script, RemotelyImportCert.ps1.What this script does is copy the private key export over to E15-1, then remotely execute Import-PfxCertificate on E15-1. The password being requested is the password that was specified during the private key export:
 copy c:\privatekey.pfx \\e15-1\c$
$password = Read-Host -AsSecureString
Invoke-Command -ComputerName e15-1  -ArgumentList $password -ScriptBlock `
    {Import-PfxCertificate -CertStoreLocation Cert:\LocalMachine\My -FilePath C:\privatekey.pfx -Password $args[0]}
Creating the Pull Server
Now that the I have all the prerequisites ready, it's time to setup the pull server. To do this I'm going to modify an example config script that ships with xPSDesiredStateConfiguration, Sample_xDscWebServices.ps1, which should be located in the module within the 'xPSDesiredStateConfiguration\Examples' folder. I'm going to copy the file to 'C:\DSCScripts' .
Sample_xDscWebServices.ps1 (Modified)
configuration Sample_xDscWebService
{
param
(
[string[]]$NodeName = 'localhost',
[ValidateNotNullOrEmpty()]
[string] $certificateThumbPrint
)
Import-DSCResource -ModuleName xPSDesiredStateConfiguration
Node $NodeName
{
WindowsFeature DSCServiceFeature
{
Ensure = "Present"
Name = "DSC-Service"
}
xDscWebService PSDSCPullServer
{
Ensure = "Present"
EndpointName = "PSDSCPullServer"
Port = 8080
PhysicalPath = "$env:SystemDrive\inetpub\wwwroot\PSDSCPullServer"
CertificateThumbPrint = $certificateThumbPrint
ModulePath = "$env:PROGRAMFILES\WindowsPowerShell\DscService\Modules"
ConfigurationPath = "$env:PROGRAMFILES\WindowsPowerShell\DscService\Configuration"
State = "Started"
DependsOn = "[WindowsFeature]DSCServiceFeature"
}
xDscWebService PSDSCComplianceServer
{
Ensure = "Present"
EndpointName = "PSDSCComplianceServer"
Port = 9080
PhysicalPath = "$env:SystemDrive\inetpub\wwwroot\PSDSCComplianceServer"
CertificateThumbPrint = "AllowUnencryptedTraffic"
State = "Started"
IsComplianceServer = $true
DependsOn = @("[WindowsFeature]DSCServiceFeature","[xDSCWebService]PSDSCPullServer")
}
}
}
Sample_xDscWebService -certificateThumbPrint c9586647cc93a3fac8791ded121bc68a03c7fa87
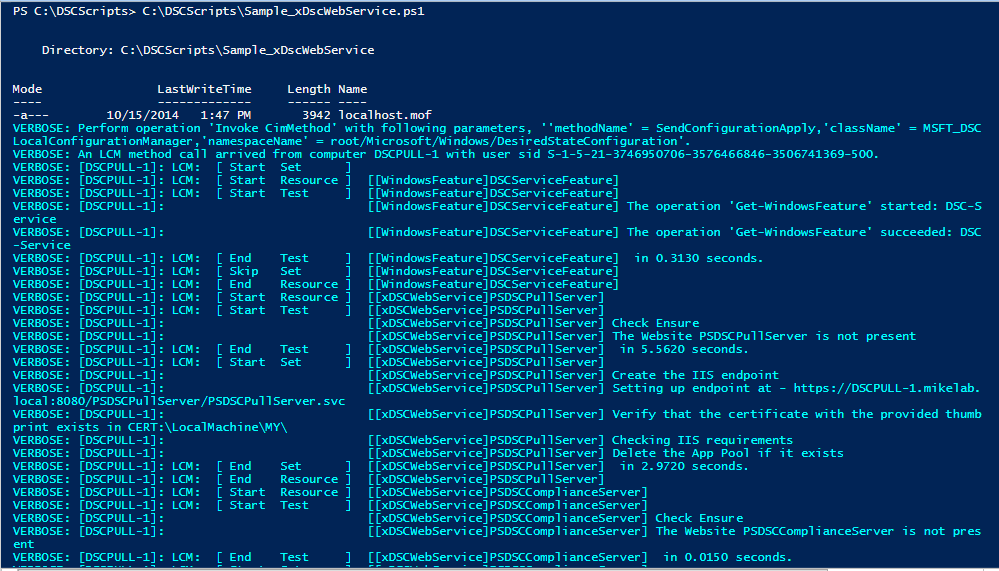
Start-DscConfiguration -Verbose -Wait -Path .\Sample_xDscWebService -ComputerName "localhost"
I only made two changes to Sample_xDscWebServices.ps1, which was adding the two lines at the end of the script:
The first line compiles the script, and passes in the thumbprint of the certificate that was created earlier
The second line executes the configuration, and configures IIS for use as a pull server
After successfully executing the script, I see the following output:

WINDOWS 2012 ONLY
EDIT (12/18/14) : This issue was resolved in version 3.0.3.0 of xPSDesiredStateConfiguration. If you run into this issue, make sure to download the latest version of the module.
Here's the one place that I had to diverge from the TechNet instructions to get the pull server to work with Windows 2012. Note that this issue has been reported as a bug, and should be fixed in the next release of xPSDesiredStateConfiguration. I found the solution to this by following this stackoverflow post.
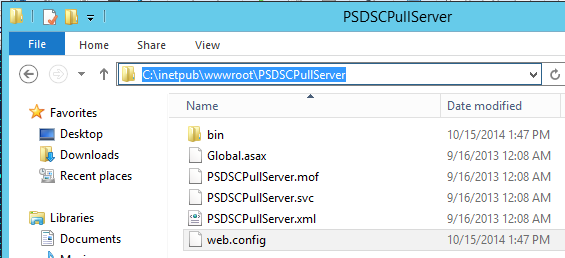
Essentially the problem is that the xDscWebService resource which is included in xPSDesiredStateConfiguration (v3.0.2.0) registers a database provider that is only available in Windows 2012 R2. To fix this, we need to edit the web.config file which is located in 'C:\inetpub\wwwroot\PSDSCPullServer' (the PhysicalPath property in Sample_xDscWebServices.ps1):
Open the web.config file in Notepad. Find the following lines:
<add key="dbprovider" value="ESENT" />
<add key="dbconnectionstr" value="C:\Program Files\WindowsPowerShell\DscService\Devices.edb" />
Replace them with:
<add key="dbprovider" value="System.Data.OleDb" />
<add key="dbconnectionstr" value="Provider=Microsoft.Jet.OLEDB.4.0;Data Source=C:\Program Files\WindowsPowerShell\DscService\Devices.mdb;"/>
Finally, you'll need to restart the server, or at a minimum restart IIS for the changes to take effect.
Preparing the xExchange Module for Deployment
Now I need to prepare the xExchange module for deployment to target nodes. Without doing this step, the target nodes will not have a local copy of xExchange to work with when they try to execute their configuration.
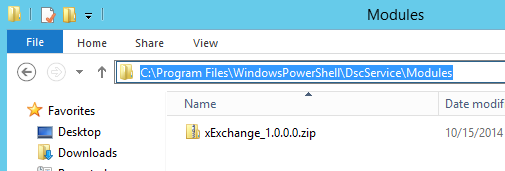
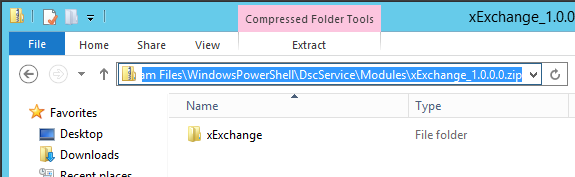
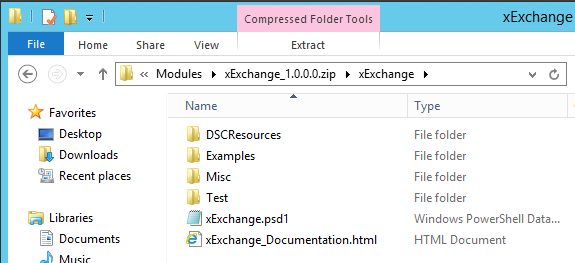
To set this up, I'm going to copy the downloaded xExchange module to the path specified in ModulePath in Sample_xDscWebServices.ps1. This is 'C:\Program Files\WindowsPowerShell\DscServices\Modules' . Instead of putting the extracted module in this folder though, we're going to drop the zip file exactly as it was downloaded from TechNet. Essentially it needs to be in the format MODULENAME_#.#.#.#.zip, where #.#.#.# is the module version.
Here's a couple screenshots that show what it should look like:
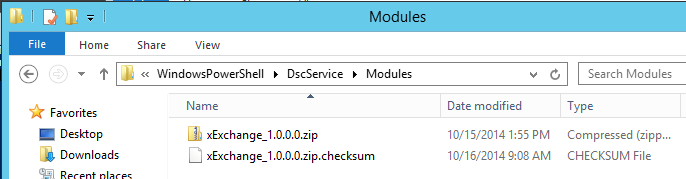
Now I need to generate a checksum file for all modules (which for me is just xExchange) in 'C:\Program Files\WindowsPowerShell\DscServices\Modules' . To do this, I'm going to run the following command:
 New-DscCheckSum -ConfigurationPath "C:\Program Files\WindowsPowerShell\DscServices\Modules" `
    -OutPath "C:\Program Files\WindowsPowerShell\DscServices\Modules" -Verbose -Force
After doing this, a checksum file shows up in the same Modules folder:
Preparing Configuration Scripts for Target Servers
Generating a Unique GUID for Each Target Server
Before we can setup a configuration script, we must first generate a unique GUID for each target server. This GUID will be used to name the target MOF file for each computer, and also when configuring the Local Configuration Manager on the target node to tell it which configuration to retrieve.
For every server that will be configured, we'll want to run the following command to generate a GUID:
[Guid]::NewGuid().ToString()
The output will look similar to the following. Make sure to save the GUID somewhere for later use.
3f5452c9-aa68-4494-b94d-70f4c92b28a7
Setting Up the Exchange Configuration Script
The next configuration script we need to setup is the script that will be used for configuring Exchange. For this, I am going to start with the QuickStartTemplate described in this post. The example is located in the xExchange\Examples\QuickStartTemplate folder of the xExchange module.
To avoid confusion, I'm going to copy the two template files to a new location, and rename them. The original files are QuickStartTemplate.ps1 and QuickStartTemplate-Config.psd1. I'm going to copy these to C:\DSCScripts, and rename them to ConfigureExchange.ps1 and ConfigureExchange-Config.psd1.
Renamed but otherwise unmodified, the two configuration files look as follows:
ConfigureExchange.ps1 (Unmodified)
 Configuration QuickStartTemplate
{
    param
    (
        [PSCredential]$ShellCreds
    )

    Import-DscResource -Module xExchange

    Node $AllNodes.NodeName
    {
        #Used when passing credentials securely. This configures the thumbprint of the
        #cert that will be used to decrypt the creds
        LocalConfigurationManager
        {
            CertificateId = $Node.Thumbprint
        }
    }
}

#Get credentials if they haven't already been passed
if ($ShellCreds -eq $null)
{
    $ShellCreds = Get-Credential -Message 'Enter credentials for establishing Remote Powershell sessions to Exchange'
}

###Compiles the example
QuickStartTemplate -ConfigurationData $PSScriptRoot\QuickStartTemplate-Config.psd1 -ShellCreds $ShellCreds
ConfigureExchange-Config.psd1 (Unmodified)
 @{
    AllNodes = @(
        #Settings under 'NodeName = *' apply to all nodes.
        @{
            NodeName        = '*'

            #CertificateFile and Thumbprint are used for securing credentials. See:
            #https://blogs.msdn.com/b/powershell/archive/2014/01/31/want-to-secure-credentials-in-windows-powershell-desired-state-configuration.aspx

            #The location on the compiling machine of the public key export of the certfificate which will be used to encrypt credentials
            CertificateFile = 'C:\publickey.cer'

            #Thumbprint of the certificate being used for encrypting credentials
            Thumbprint      = '39bef4b2e82599233154465323ebf96a12b60673'
        }

        #Individual target nodes are defined next
        @{
            NodeName = 'e15-1'
        }

        @{
            NodeName = 'e15-2'
        }
    );
}
Now I'll make the following modifications:
ConfigureExchange.ps1 (Modified)
 Configuration ConfigureExchange
{
    param
    (
        [PSCredential]$ShellCreds
    )

    Import-DscResource -Module xExchange

    Node $AllNodes.NodeName
    {
        xExchOutlookAnywhere OAVdir
        {
            Identity                           = "$($Node.NodeName)\Rpc (Default Web Site)"
            Credential                         = $ShellCreds
            ExternalClientAuthenticationMethod = 'Ntlm'
            ExternalClientsRequireSSL          = $true
            ExternalHostName                   = 'mail.mikelab.local'
            IISAuthenticationMethods           = 'Ntlm'
            InternalClientAuthenticationMethod = 'Ntlm'
            InternalClientsRequireSSL          = $true
            InternalHostName                   = 'mail-site1.mikelab.local'
            AllowServiceRestart                = $true
        }
    }
}

#Get credentials if they haven't already been passed
if ($ShellCreds -eq $null)
{
    $ShellCreds = Get-Credential -Message 'Enter credentials for establishing Remote Powershell sessions to Exchange'
}

###Compiles the example
ConfigureExchange -ConfigurationData $PSScriptRoot\ConfigureExchange-Config.psd1 -ShellCreds $ShellCreds
For ConfigureExchange.ps1, I made a few changes:
I replaced all instances of QuickStartTemplate with ConfigureExchange
I removed the LocalConfigurationManager section, as we will be configuring the LCM at a later point in a separate script
I added an xExchOutlookAnywhere resource (which I copied from the ConfigureVirtualDirectories example in xExchange)
ConfigureExchange-Config.psd1 (Modified)
 @{
    AllNodes = @(
        #Settings in this section will apply to all nodes.
        @{
            NodeName        = '*'

            #CertificateFile and Thumbprint are used for securing credentials. See:
            #https://blogs.msdn.com/b/powershell/archive/2014/01/31/want-to-secure-credentials-in-windows-powershell-desired-state-configuration.aspx

            #The location on the compiling machine of the public key export of the certfificate which will be used to encrypt credentials
            CertificateFile = 'C:\publickey.cer'

            #The thumbprint of the Encryption Certificate used to decrypt the credentials
            #on target node
            Thumbprint      = 'c9586647cc93a3fac8791ded121bc68a03c7fa87'
        }

        #Individual target nodes are defined next
        @{
            NodeName = 'e15-1'
            NodeGuid = '3f5452c9-aa68-4494-b94d-70f4c92b28a7'
        }
    );
}
Here are the changes made for ConfigureExchange-Config.psd1:
I removed node E15-2, as I am only configuring a single server in this example
I updated Thumbprint to contain the thumbprint of the certificate that was generated earlier
I added a NodeGuid property to E15-1's section, and specified the GUID that was generated for the server earlier
Compiling the Script, and Moving and Renaming the Target .MOF
The next step is to compile the script, move the target computer's .MOF to the proper location for pulling, and rename it using the GUID that was generated earlier.
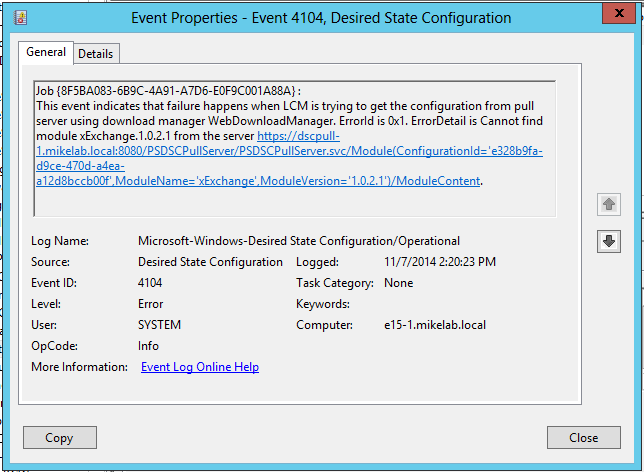
Note that the computer that is compiling the script MUST be compiling it with the same version of xExchange that was dropped into and checksummed in the 'C:\Program Files\WindowsPowerShell\DscServices\Modules' folder. If not, you may get a Desired State Configuration error with Event ID 4104 on the target machine when it tries to download the configuration. To look for this or any other DSC errors within Event Viewer on the target machine, go to 'Applications and Service Logs\Microsoft\Windows\Desired State Configuration' , then choose the Operational log.
In the below error, I had compiled the script using v1.0.2.1 of the xExchange module, but had zipped and checksummed v1.0.0.0 of the module in the DscServices\Modules folder.
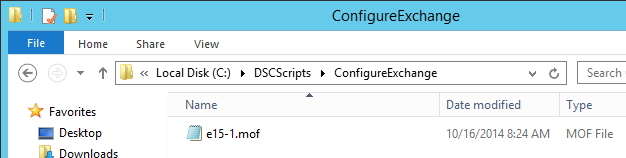
Compiling the Script
I can compile the script by running ConfigureExchange.ps1. Doing so, I get a file named e15-1.mof:
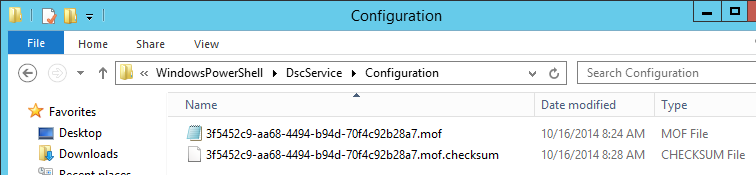
Renaming the .MOF
Now I'm going to rename e15-1.mof to 3f5452c9-aa68-4494-b94d-70f4c92b28a7.mof (the GUID generated for E15-1), and copy the file to 'C:\Program Files\WindowsPowerShell\DscService\Configuration' (the path specified in ConfigurationPath when the pull server was setup).
Checksumming the .MOF
Finally, I'm going to run New-DSCCheckSum to generate a checksum for all configurations in the Configuration folder:
 New-DscCheckSum -ConfigurationPath "C:\Program Files\WindowsPowerShell\DscServices\Configuration" `
    -OutPath "C:\Program Files\WindowsPowerShell\DscServices\Configuration" -Verbose -Force
At this point, the Configuration folder should look as follows:
Setting Up the 'Local Configuration Manager' Configuration Script
The last step in the process is to tell the target node to start pulling the configuration. To do this, we need to configure the Local Configuration Manager on the target node. To get started, I'm going to copy the SimpleMetaConfigurationForPull script which is included in this article. I'm going to save the contents into a new file, ConfigureTargetLCMs.ps1.
Unmodified, ConfigureTargetLCMs.ps1 looks as follows:
ConfigureTargetLCMs.ps1 (Unmodified)
 Configuration SimpleMetaConfigurationForPull
{
    LocalConfigurationManager
    {
        ConfigurationID = "1C707B86-EF8E-4C29-B7C1-34DA2190AE24";
        RefreshMode = "PULL";
        DownloadManagerName = "WebDownloadManager";
        RebootNodeIfNeeded = $true;
        RefreshFrequencyMins = 15;
        ConfigurationModeFrequencyMins = 30;
        ConfigurationMode = "ApplyAndAutoCorrect";
        DownloadManagerCustomData =
            @{ServerUrl = "https://PullServer:8080/PSDSCPullServer/PSDSCPullServer.svc";
              AllowUnsecureConnection = “TRUE”}
    }
}
SimpleMetaConfigurationForPull -Output "."
Now I'll make the following modifications:
ConfigureTargetLCMs.ps1 (Modified)
 Configuration ConfigureTargetLCMs
{
    Node $AllNodes.NodeName
    {
        LocalConfigurationManager
        {
            CertificateId                  = $Node.Thumbprint
            ConfigurationID                = $Node.NodeGuid;
            RefreshMode                    = "PULL";
            DownloadManagerName            = "WebDownloadManager";
            RebootNodeIfNeeded             = $true;
            RefreshFrequencyMins           = 15;
            ConfigurationModeFrequencyMins = 30;
            ConfigurationMode              = "ApplyAndAutoCorrect";
            DownloadManagerCustomData      = @{
                ServerUrl               = "https://dscpull-1.mikelab.local:8080/PSDSCPullServer.svc";
                AllowUnsecureConnection = “TRUE”}

            ### Note that the URL used to be configured differently, and contained an additional subfolder in the path
            ### prior to v3.0.3.4 of xPSDesiredStateConfiguration. This was the old style.
            #DownloadManagerCustomData      = @{
            #    ServerUrl               = "https://dscpull-1.mikelab.local:8080/PSDSCPullServer/PSDSCPullServer.svc";
            #    AllowUnsecureConnection = “TRUE”}
        }
    }
}

ConfigureTargetLCMs -ConfigurationData $PSScriptRoot\ConfigureExchange-Config.psd1
Here's the specific changes I made:
I renamed all instances of SimpleMetaConfigurationForPull to ConfigureTargetLCMs
Moved the LocalConfigurationManager section into a Node block, so that the script can be used for multiple nodes
Added a CertificateId property, and specify that it will use $Node.Thumbprint from ConfigureExchange-Config.psd1
Changed ConfigurationID to use $Node.NodeGuid from ConfigureExchange-Config.psd1
Changed the ServerUrl to use https, and also to include the FQDN of the pull server, dscpull-1
Updated the compile line to include a ConfigurationData file; the same ConfigureExchange-Config.psd1 file we created earlier
Removed the PSDSCPullServer subfolder from ServerUrl. Version 3.0.3.4 and higher of xPSDesiredStateConfiguration no longer setup the pull server with this subfolder.
Compiling, Executing and Verifying the 'Local Configuration Manager' Script
Now that everything is in place, all I have left to do is compile and execute the LCM configuration script, ConfigureTargetLCMs.ps1.
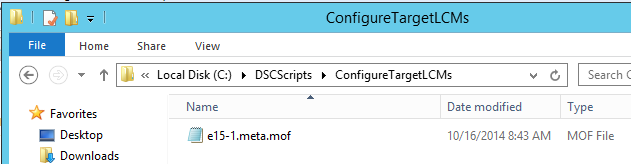
Compiling the Script
I can compile the script by just running it. Note that this time I get a .meta.mof file instead of a plain .mof file, as I am configuring the Local Configuration Manager:
Executing the Configuration
To execute the configuration, I'll run:
Set-DscLocalConfigurationManager -Path .\ConfigureTargetLCMs -Verbose
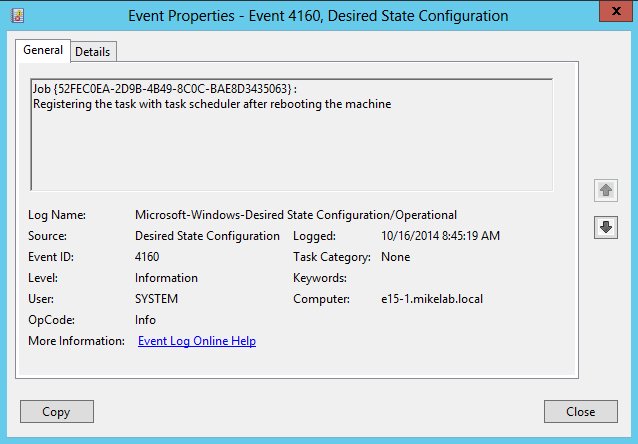
Verifying the Configuration
To confirm that the configuration was successful, I can look in the Event Viewer of the target computer. The following event, Desired Sate Configuration, Event ID 4160, indicates that the configuration was successful, and the machine will attempt to pull it's configuration after a reboot:
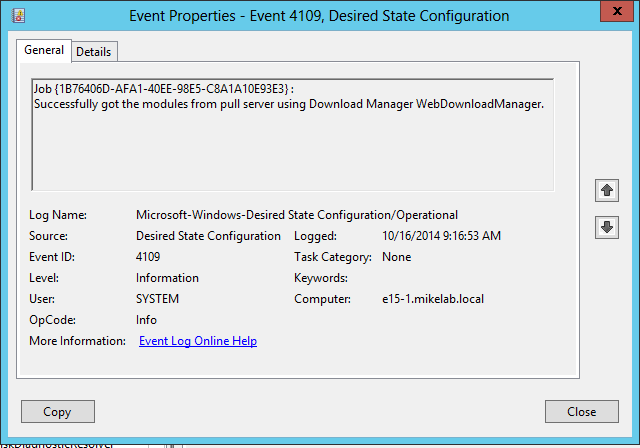
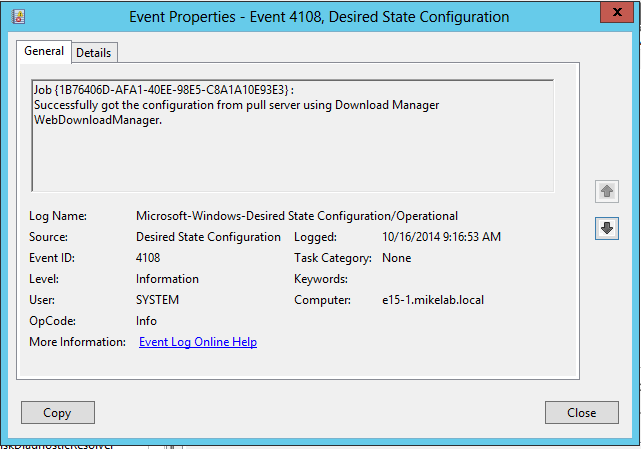
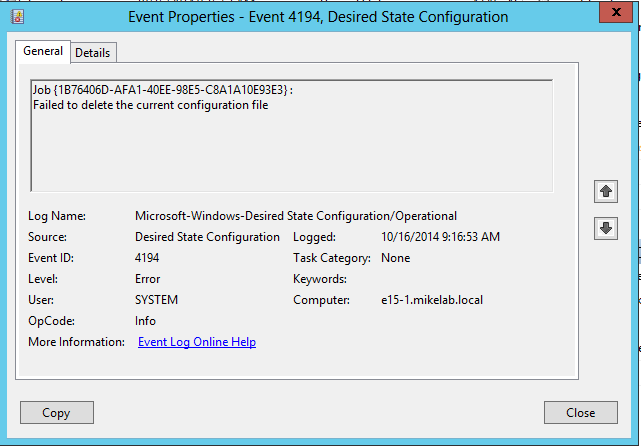
After the reboot, you can again go into the Event Viewer of the target computer to check if the configuation was pulled and applied. If everything runs successfully, you will just see a single error, a Desired State Configuration event, with Event ID 4194. This error is ignorable. DSC wants to delete the existing configuration for the computer, but since this is the first iteration, it has no configuration to delete:
In addition to 20 or 30 other Informational events, you will see events 4108 and 4109 indicating that required modules, and required configuration, was downloaded successfully from the pull server. If you don't see these, there will most likely be more than one Error or Warning in the recent Event Viewer.