Troubleshoot a Broken Azure VM using Nested Virtualization in Azure (ARM)
Please note that 3rd party virtualization software(s) for Windows 2016 Nested Virtualization feature is not supported. Only Hyper-V is currently supported.
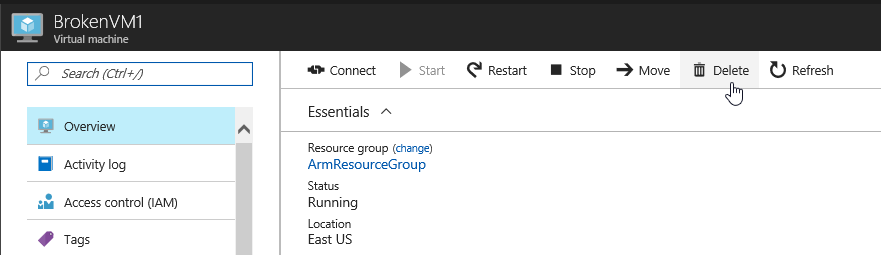
- Delete the Broken Virtual machine
- Create a new Recovery VM
- OS: Windows Server 2016 Datacenter
- Size: Any V3 series with at least 2 cores
- Same Location, Storage Account and Resource Group as the Broken VM
- Select to not use Managed Disks
- Once the Recovery VM is created select it in the Portal
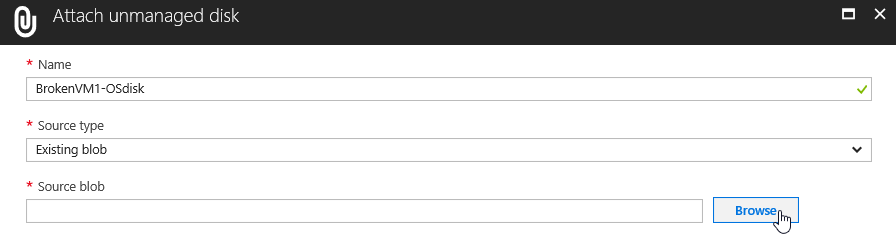
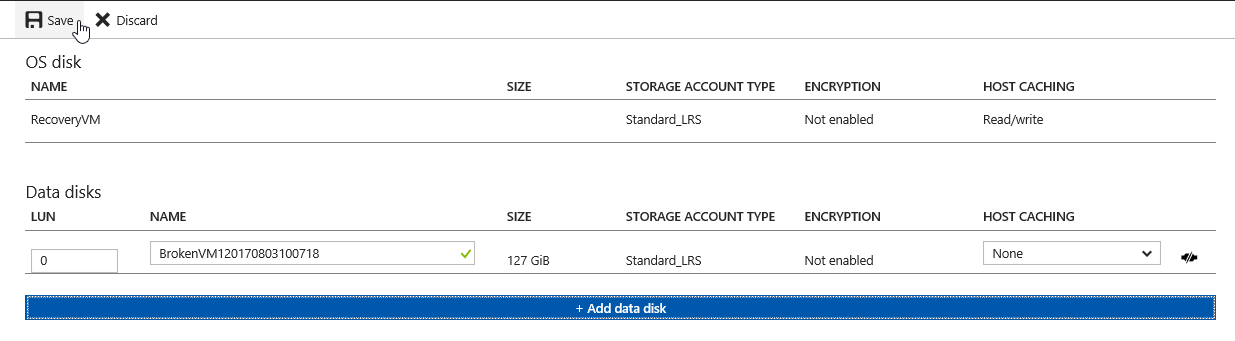
- Select Disks
- Add Data Disk
- Select Source Type Existing Blob
- Browse to the location of the Broken VMs VHD
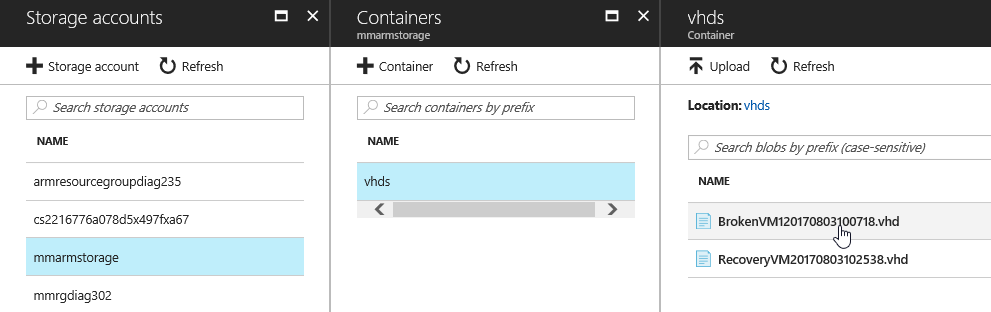
- Select the Broken VMs VHD and click OK
- Save the Changes
- Once the disk has successfully attached RDP to the Recovery VM
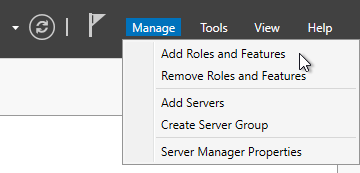
- In Server Manger select Manage -> Add Roles and Features
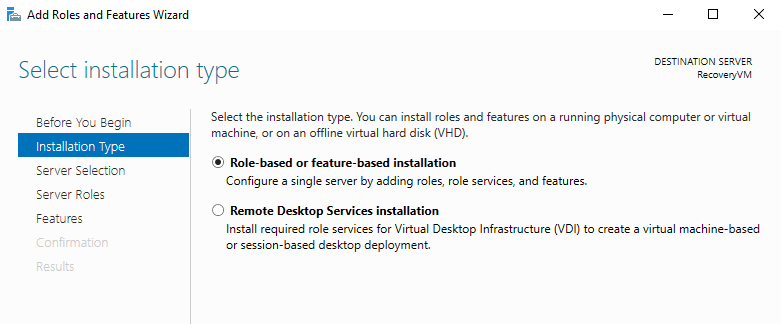
- For Installation Type select Role-based or feature-based installation
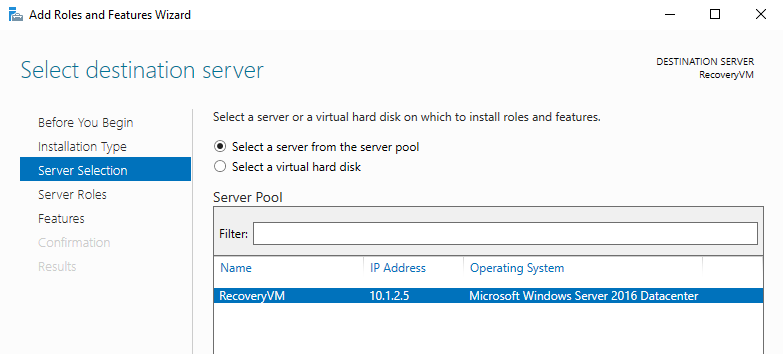
- Ensure the Recovery VM is selected
- Select the Hyper-V role
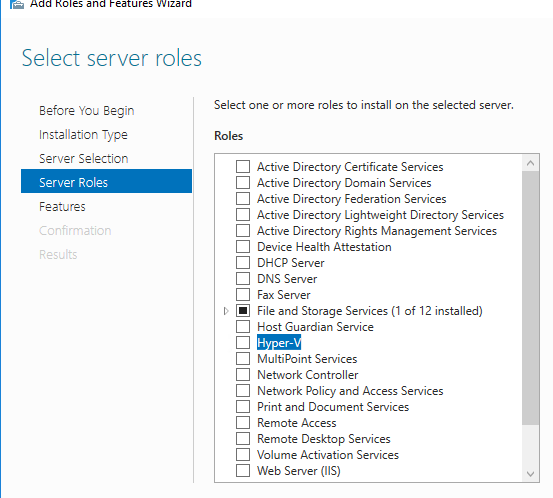
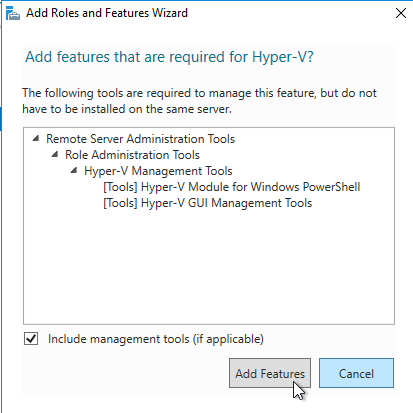
- Select Next on the Features Screen.
- If a Virtual Switch is available, select it and continue. Otherwise select Next and continue without a switch
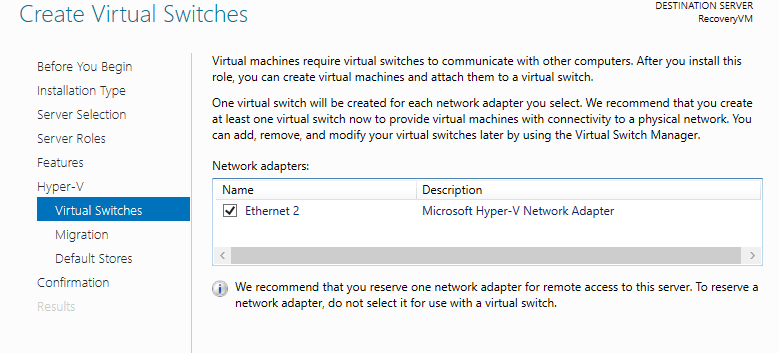
- If a Virtual Switch is available, select it and continue. Otherwise select Next and continue without a switch
- On the Migration Page select Next
- On the Default Stores Page select Next
- Check the box to restart the server automatically if required
- Select Install
- Allow the Server to install the Hyper-V role. This will take a few mins and the server will reboot automatically. You can monitor the reboot cycle using the Boot Diagnostics Tab in the Azure Portal
- Once the VM starts back up RDP back into it
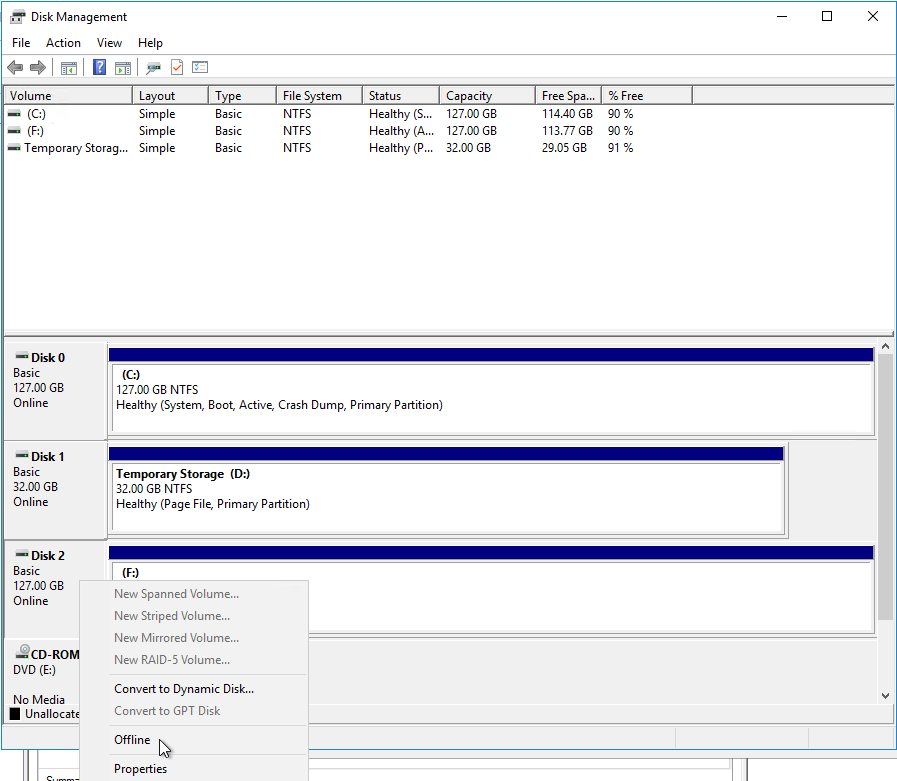
- Open Disk Management and ensure the VHD of the Broken VM is set to Offline
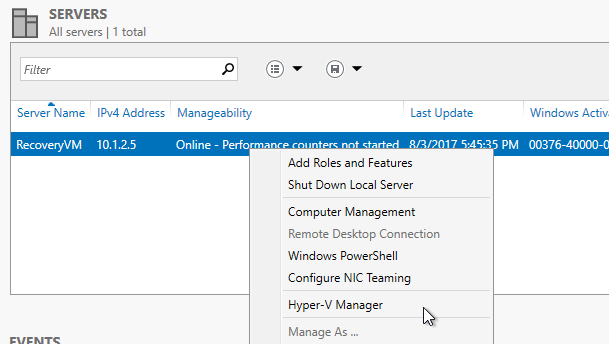
- In Server Manger select the Hyper-V role
- Right click on the server and select the Hyper-V Manger
- In the Hyper-V manager right click on the Recovery VM and select New -> Virtual Machine
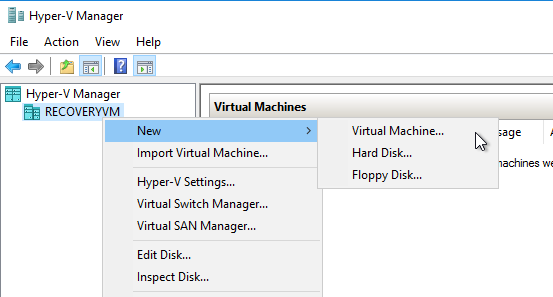
- Select Next
- Name the Virtual Machine and select Next
- Select Generation 1
- Leave the startup memory at 1024MB unless your VM requires more.
- If applicable select the Hyper-V Network Switch that was created. Else just move on to the next page
- Chose the option to Attach a Virtual Hard Disk Later
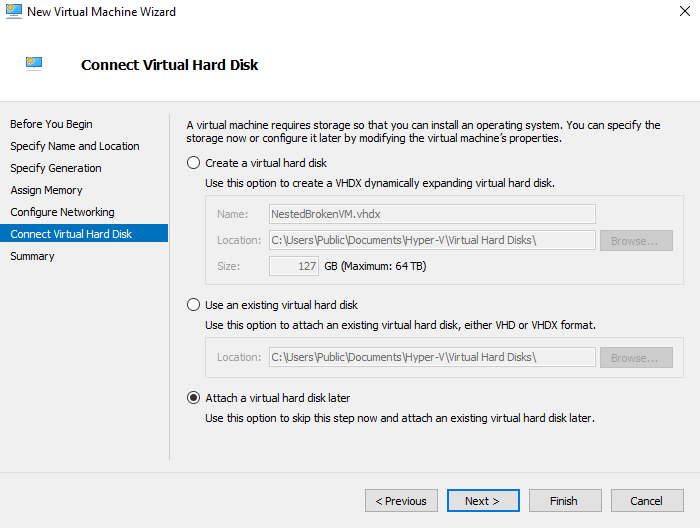
- Select Finish and the VM will be created
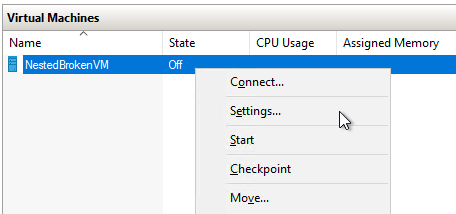
- Right click on the VM we just created and select Settings
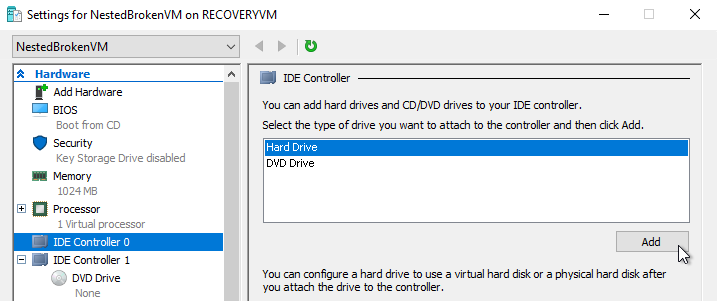
- Select IDE Controller 0
- Select Hard Drive and click Add
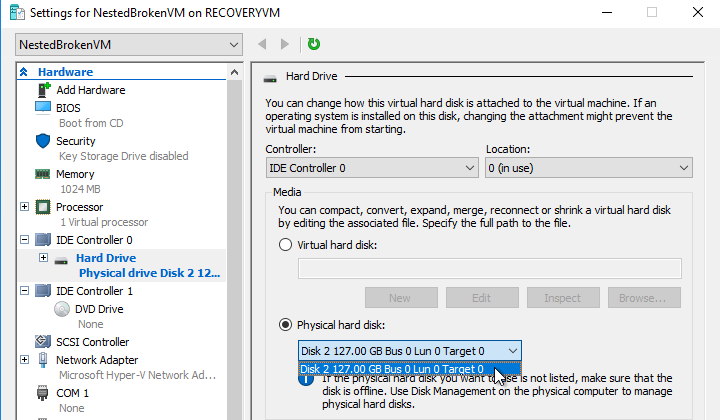
- Under Physical Hard Disk select the VHD of the broken VM we attached to the Recovery VM
- If you do not see any disks listed it is because the VHD attached to the Recovery VM is set to Online. Refer back to step 22
- If you do not see any disks listed it is because the VHD attached to the Recovery VM is set to Online. Refer back to step 22
- Select Apply and OK
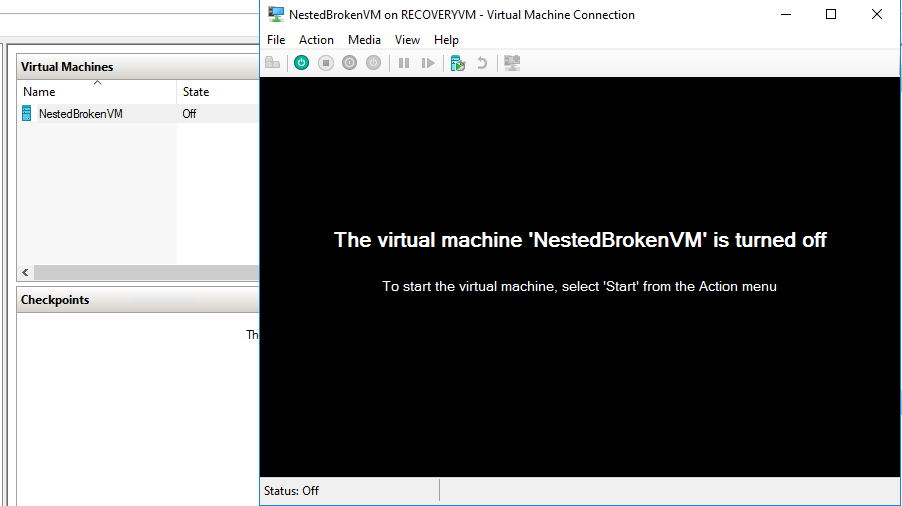
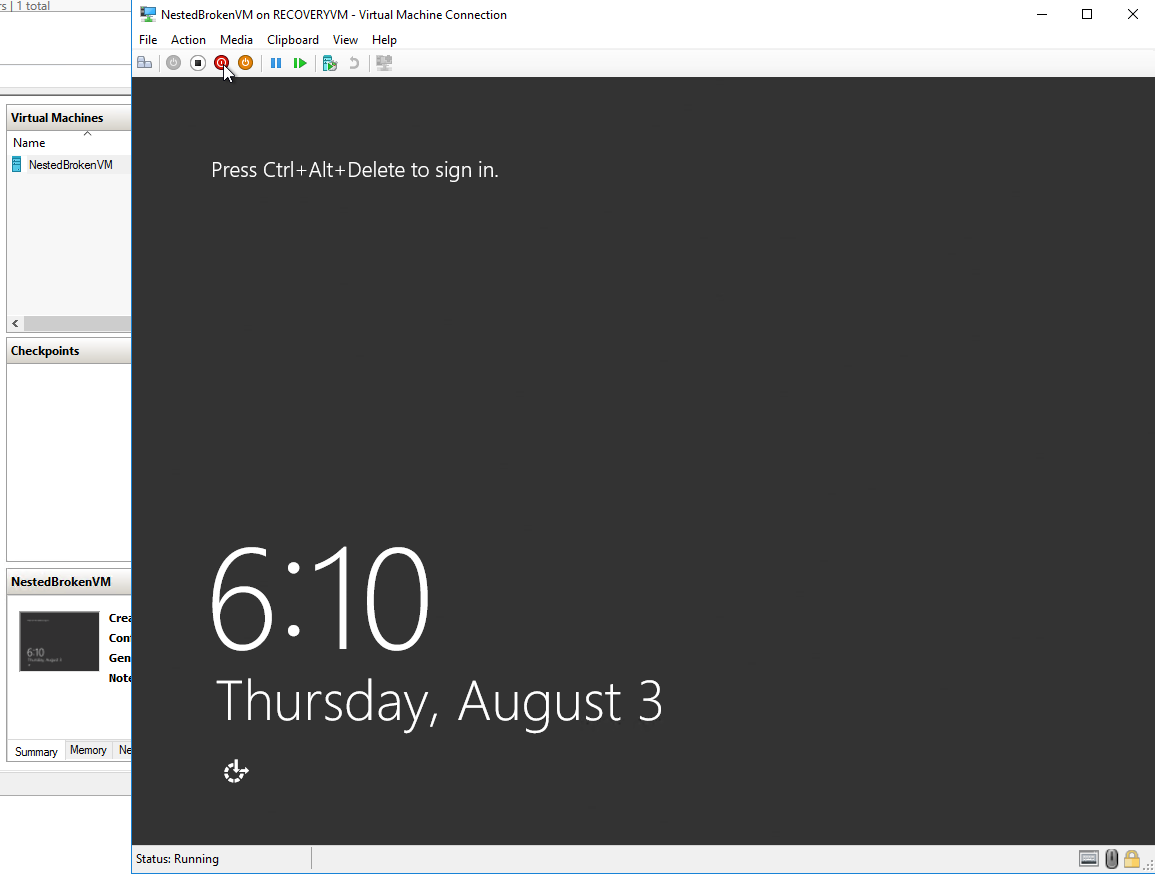
- Double Click on the VM and Start it
- Depending on your scenario, apply any troubleshooting/ mitigations steps now that you have console access
- Once you get the VM back online shutdown the VM in the Hyper-V manager
- Go back to the Azure Portal
- Select the Recovery VM
- Select Disks
- Select Edit and remove the now fixed VHD from the Recovery VM and save the changes

- Proceed to rebuild the now fixed VM. Refer to How to Rebuild an Azure VM from an Existing Disk OS disk