Linux Boot Error: Emergency Mode! (RDFE)
Reason for TSG: Boot diagnostics screen shows VM booting into Emergency Mode
Suggested Fix:
1) Before proceeding with Step 2 ensure you have an recovery VM located in the same Cloud Service, region and the same version (Or distribution) as the impacted VM. If you do not, create that new machine now.
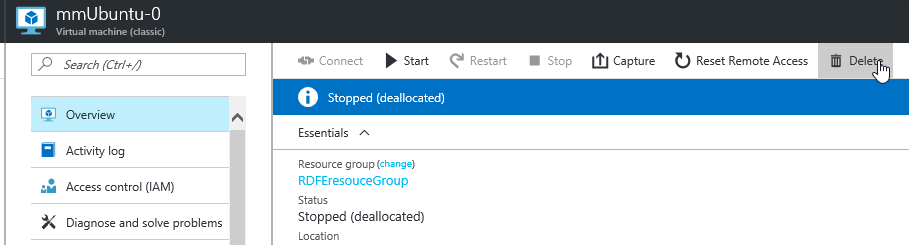
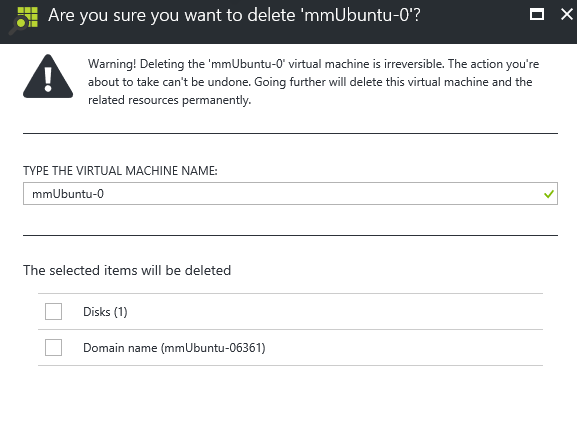
2) Once you have the recovery machine created proceed to delete the affected virtual machine from the Azure Portal. Ensure to opt to KEEP all attached disks
3) Once the machine is deleted wait about 3 mins for the disk lease to expire
4) Select the recovery VM you made and select Disks -> Attach Existing
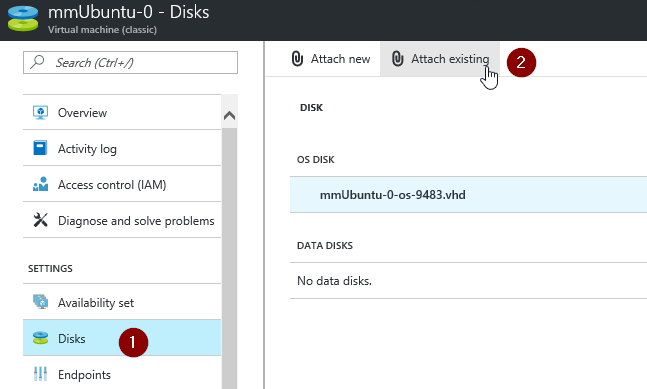
5) Navigate to the location of the VHD of the broken VM we just deleted. The path will be something like Storage Account Name -> vhds -> VHDname
6) Select the affected VHD and attach it to the troubleshooting VM.
7) Once the VHD is attached proceed to SSH to the recovery machine.
8) From now on lets refer machines using the following naming convention:
A = Original VM (Inaccessible VM)
B = New VM (New Troubleshooting VM)
9) Once you have connected to VM B locate the drive name to mount, each Linux distribution is slightly different.
For Ubuntu/debian:
grep SCSI /var/log/kern.logFor Centos/Suse/Oracle/Redhat:
grep SCSI /var/log/messages
10) Mount the attached disk onto mountpoint /rescue
df -h
mkdir /rescueFor Red Hat 7.2+
mount -o nouuid /dev/sdc2 /rescueFor CentOS 7.2+
mount -o nouuid /dev/sdc1 /rescueFor Debian 8.2+, Ubuntu 16.04+, SUSE 12 SP4+
mount /dev/sdc1 /rescue
11) Change into /etc directory where the original OS disk from resides
cd /rescue/etc/
cp fstab fstab_orig
12) Now that you have made a backup of you fstab you can proceed to make the changes you require using vi, nano or your favorite text editor, this may include commenting out entries by appending a # at the start of the line.
vi fstab
cd /
umount /rescue
13) Detach the disk from VM B via the Azure portal
14) Recreate the original VM A from the repaired VHD
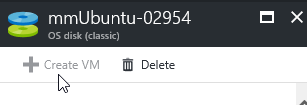
15) To do this navigate to OS Disks (Classic)
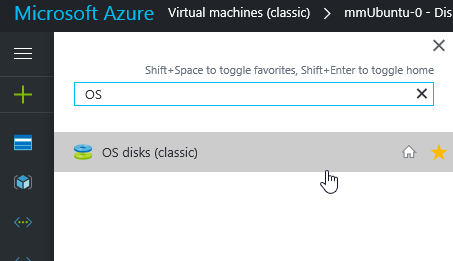
16) Select the now fixed VHD and select + Create VM
17) Recreate the VM putting it back into the original Cloud Service and using the same name
18) Once it finishes creating attempt to SSH to it