Using native PowerShell cmdlets with Hyper-V in Windows Server “8”
A couple of weeks ago I was asked to present new features of Windows Server “8” to a group of IT pro’s. Up to that time, I did not plan on doing any serious work prior to the availability of the beta. But the beta would not be available for demos so I had to work with the Developer Preview.
Last week I presented these new features in a demo session and selected the new Server Manager, Hyper-V Shared Nothing Live Migration, Hyper-V Live Storage Migration, Hyper-V Replica and the new native support for Hyper-V in PowerShell. I did show some other new features like Live Snapshot Merge but the main session focused on these topics.
As in any session, it always surprises me how very few people use command line tools for management. This was the case here as well. More specifically I asked who actively used PowerShell and maybe 10 hands showed.
So I started my PowerShell demo of Hyper-V cmdlets with the basics and went through some of the more common Hyper-V cmdlets you would likely use in day to day operations.
After my session, during the break, I spoke with many about the changes and PowerShell was brought up frequently. At least I learned that people were impressed with the ease with which you could create and modify virtual machines.
I played with the Hyper-V cmdlets basically only for this demo. I had not done so before because I wanted to wait for the beta. But playing with the cmdlets for a couple of days made me sort of switch from Hyper-V Manager to PowerShell for management and monitoring.
You have to use it to get familiar with PowerShell. I guess you first need to take some barriers of PowerShell unfamiliarity before you start appreciating its power. But after a couple of days you start getting things done much quicker than by using the GUI and doing a lot of mouse clicks.
Prior to Hyper-V PowerShell cmdlets you would use the GUI, WMI or a PowerShell wrapper (which does the WMI work for you) to manage Hyper-V. But with Windows Server “8” it all comes inbox and you don’t need to install anything to get started once the Hyper-V role has been enabled.
I searched a bit for Hyper-V cmdlets in Windows Server “8” on the Internet and did not find much I found educational. And because many of the attendees appreciated the demo I thought it was maybe helpful to show a bit of the cmdlets.
If you are not familiar with PowerShell, I suggest you search the Internet or buy one of the many great books on PowerShell. Although my examples are far from advanced or complex, you may not be able to understand. That said, I explicitly tried to keep things simple and declarative. To give an example, I don’t use the alias % in a statement with a ForEach-Object to make it more readable. And I use the parameters explicitly although you can often omit them in the cmdlet.
So here we go.
The PowerShell cmdlets are contained in the PowerShell Hyper-V module. Simply start PowerShell and type:
Get-Module
This is what I see on my Developer Preview host when I first start PowerShell and issue the above command.
Now type:
Get-VM
Get-VM displays information about the registered virtual machines on my host.
And again type:
Get-Module
Now you see that the Hyper-V module has been loaded. You don’t have to do this manually, you can just issue a cmdlet and the corresponding module will be loaded for you.
PowerShell cmdlets are constructed using Verb-Noun syntax. For example Get-VM, Get-Process, Get-Command, Get-Module. Using the Get-Command we can list everything we can do using Hyper-V cmdlets as follows:
Get-Command –Module Hyper-V –Verb *
This results in a list of all verbs available (and which are not all displayed in the screen shot above).
You can narrow-down the output by being more specific than just *.
Get-Command –Module Hyper-V –Verb Add
Now you see all verbs with the string Add in them.
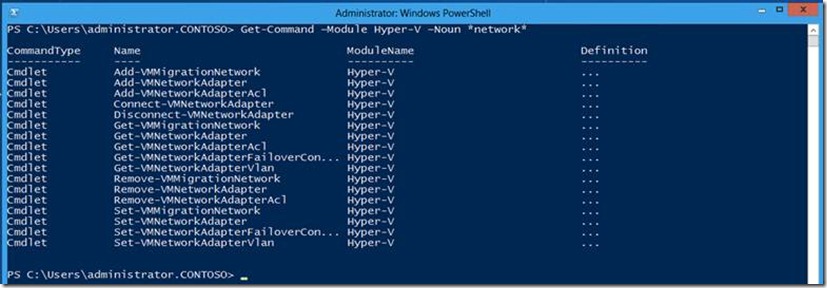
Of course you can also search for nouns. Let’s assume you want to know what cmdlets are available with the string network:
Get-Command –Module Hyper-V –Noun *network
If you typed network without the asterisk (*) you would not get anything. There is nothing that starts with network. The *network results in anything that ends with the string network.
Get-Command –Module Hyper-V –Noun *network*
I guess you get the point by now. Using the asterisk in front and back results in cmdlets listed with the string network anywhere.
So if you need to list all available Hyper-V cmdlets you can simply issue
Get-Command –Module Hyper-V.
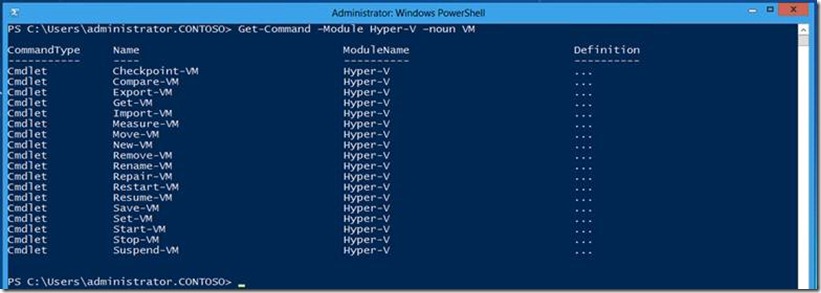
How would one create a virtual machine? Search for VM by typing:
Get-Command –Module Hyper-V –Noun VM
And it returns everything with the noun VM in it. And New-VM suggest the creation of a new virtual machine. Get the syntax of this cmdlet by using Get-Help <cmdlet> or <cmdlet> -?.
Get-Help New-VM
Or
New-VM -?
So obviously, New-VM provides us with three ways of creating a new virtual machine.
Before we look into the difference between the three, let’s just focus on the first.
The –Name parameter or switch can be omitted, it is placed in square brackets []. The same is true for MemoryStartupBytes. But if you want to specify a BootDevice or SwitchName you must provide these switches.
Now from the syntax it seems you don’t even need to provide a virtual machine name; because of [[-Name] <string>]. And this is true. If you were to type New-VM without anything else, Hyper-V creates a new virtual machine called ‘New Virtual Machine’.
The New-VM cmdlet creates a virtual machine with defaults when you omit the switches and values. The three cmdlet options offer a couple of variations when creating the virtual machine. Still focused at the first, let’s create a virtual machine vm1.
New-VM –Name vm1
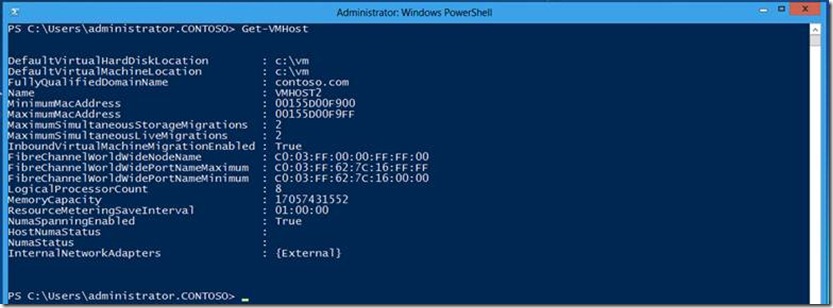
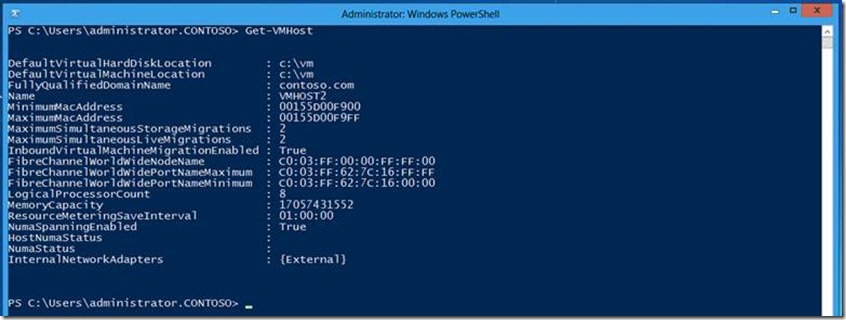
By default, the New-VM cmdlet returns a table view of some virtual machine properties. This vm, vm1, has been created using defaults. Its configuration has been created in the host’s DefaultVirtualMachineLocation. As a sidestep, you can see the Hyper-V Settings for the host by using Get-VMHost.
Get-VMHost
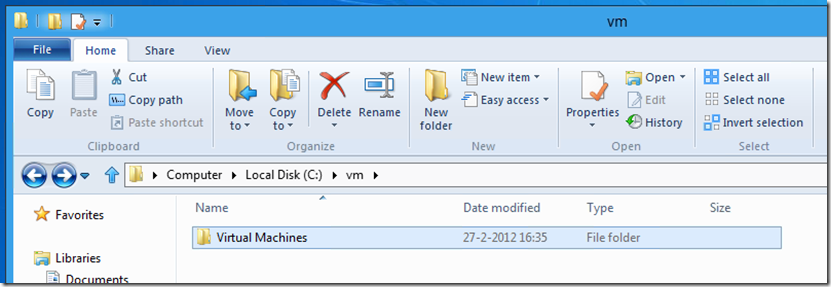
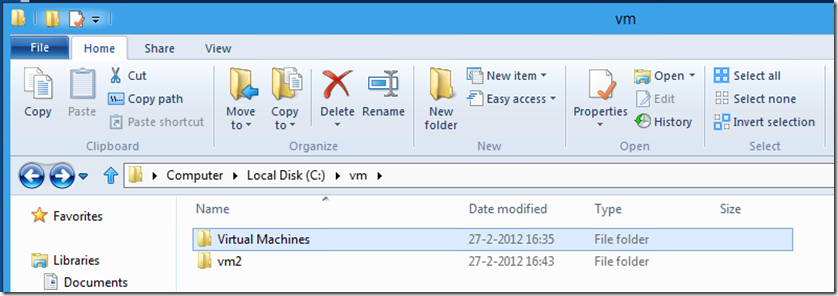
You can see that the DefaultVirtualMachineLocation points to c:\vm. This means that the virtual machine vm1 has been created using this default. As you know from using Hyper-V Manager, if you don’t specify a folder specifically, it puts the configuration in the Virtual Machines folder under c:\vm.
I always prefer to put everything of a virtual machine (disk, configuration, etc.) in its own folder with the same name. In that case, you must provide the Path switch when creating the vm.
New-VM –Name vm2 –Path c:\vm
Don’t use c:\vm\vm2 as the Path. This will result in c:\vm\vm2\vm2 for the folder of the virtual machine.
There were three syntaxes for the cmdlet of New-VM. Looking at the switches you can quickly see the difference. The second lets you create a virtual hard disk at the IDE controller. It must be a disk with VHDX extension.
New-VM –Name vm3 –NewVHDPath c:\vm\vm3\disk1.vhdx –NewVHDSize 50GB –Path c:\vm
The third syntax of New-VM is differs with respect to the virtual hard disk. Here you can specify a path to an existing virtual hard disk file.
At this point, I think you understand how to create a virtual machine using New-VM. Just try them out, it is all safe and you won’t destroy anything when making mistakes.
If you want to clean things up, use Remove-VM. This cmdlet only removes the virtual machine from Hyper-V management. It is similar to Unregister with Virtual Server so it only deregisters the virtual machine. If you want a Delete-VM, it does not exist. You will have to delete the folder or files yourself. But this too can be done from PowerShell. Assuming you have issued a command Remove-VM –Name vm1 you can now enter:
Remove-Item –Path c:\vm\vm1 -Recurse
When you have created a virtual machine you can get a listing of virtual machines on the host by issuing Get-VM. See the first screen shot above for an example of output. You can get information about a particular machine when you specify the virtual machine name.
Get-VM –Name vm1
This results in just an overview in table view. This output works well when listing many virtual machines. But if you want a summary of properties of this virtual machine, a list view may be better.
Get-VM –Name vm1 | Format-List
You know from the settings of a virtual machine in Hyper-V Manager that there are many more properties of a virtual machine. The virtual hard disks, memory, network adapters, etc. Get-VM does not output these properties but it does return them in the object.
This is the first time I mention the term object. Everything in PowerShell is object based. When you issue a cmdlet, you get an object in return. And the great thing about objects is that you can have other cmdlets use them.
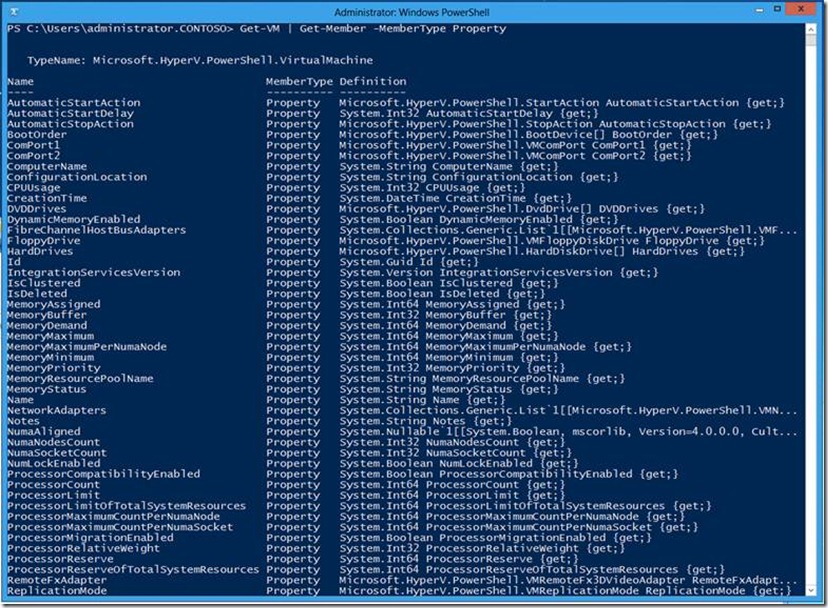
Get-VM returns a virtual machine object. And this object has a lot of properties. We can list all virtual machine properties as follows:
Get-VM | Get-Member –MemberType Property
This returns all properties any virtual machine object has. This means we can find out much more about vm1 when we ask for these properties in Format-List.
Format-List -?
Format-List has a –Property switch where you can specify one or more properties.
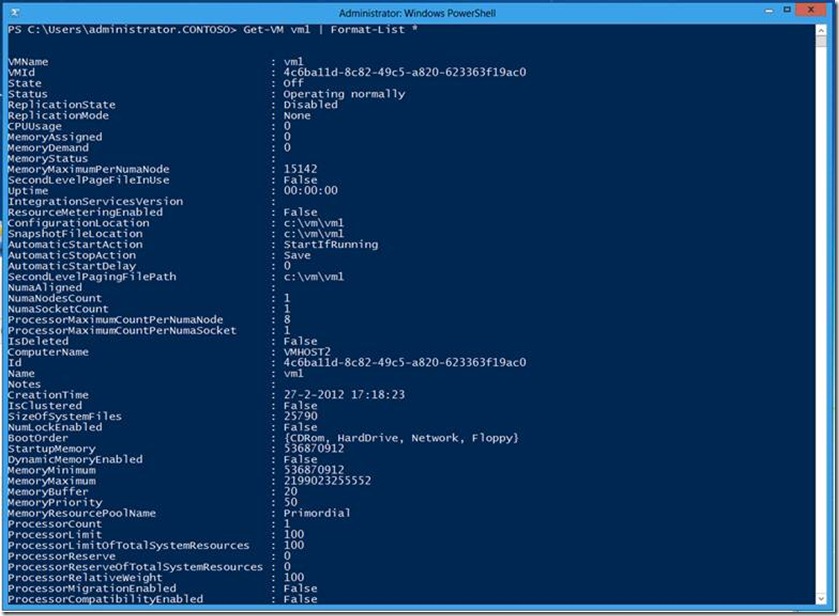
Let’s ask for everything first.
Get-VM –Name vm1 | Format-List *
One again, we get much more than we can fit on screen. But now you see there is actually much more to display when we ask for it. We can trim this down when asking for specific properties:
Get-VM –Name vm1 | Format-List Name, Sta*, Con*, Proc*
As you see, you can be specific or even use wildcards and Format-List displays the matching properties.
At this point, I guess you have some understanding of the cmdlets and how to use them. For the remainder of examples, I will omit the obvious switches for example like –Name for virtual machine name in New-VM.
You have seen how to retrieve virtual machine information, how to create a virtual machine, how to remove a virtual machine and how to view specific properties of a virtual machine.
Let’s look at what other things you will likely configure on the Hyper-V host.
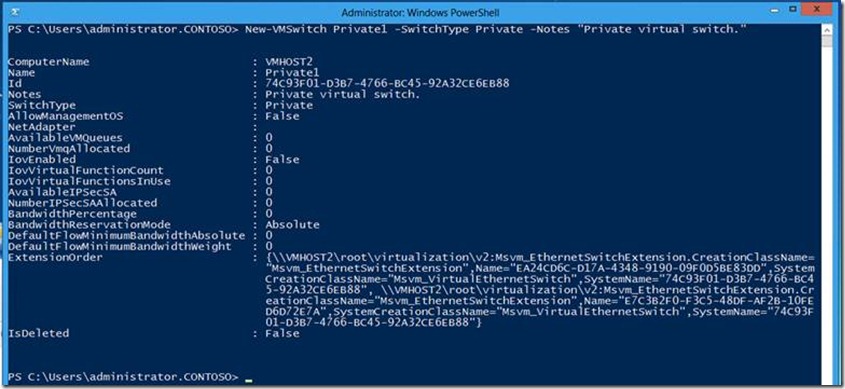
Create a private virtual switch named ‘Private1’. First look at New-VMSwitch.
New-VMSwitch -?
Create the switch:
New-VMSwitch Private1 –SwitchType Private –Notes “Private virtual switch”
That is all there is to creating a private virtual switch.
How about virtual hard disks? New-VM creates at most one virtual hard disk of type Dynamically Expanding attached to IDE, controller 0, slot 0. But you probably want to create Fixed Size disks and Differencing disks and attach them to any type of controller and location you wish.
Let’s first look at the cmdlet, New-VHD.
Following the Syntax, create a 50 GB disk, named Disk1, type Dynamic in VHD format.
New-VHD Disk1 50GB –VHDFormat VHD –VHDType Dynamic
A 16 Terabyte disk, Disk1, type Dynamic
New-VHD Disk1 16TB –VHDType Dynamic
The command did not specify a VHDFormat but it did specify 16 TB. This always implies VHDX because VHD supports a maximum of 2 TB.
A differencing disk, Disk2, pointing to a parent disk at c:\VirtualMachines\Win8Server\Virtual Hard Disks\Win8Server.vhdx.
New-VHD Disk2 -ParentPath 'C:\VirtualMachines\Win8Server\Virtual Hard Disks\Win8Server.vhdx –VHDType Differencing
I assume you are able to create a virtual machine, create a virtual hard disk and create a virtual switch. You can almost combine them all to create a script that does all the work in sequence. But how to add the virtual hard disk to the virtual machine? Easy, with Add-VMHardDiskDrive.
Add-VMHardDiskDrive vm1 IDE 0 0 –Path Disk1.vhdx
This command has no output so simply verify that it succeeded with Get-VM. How? By using Get-VMHardDiskDrive.
So now you can create a script to put it all together. For example:
New-VM vm1 –Path c:\vm –SwitchName External
New-VHD Disk1 50GB
Add-VMHardDiskDrive vm1 IDE 0 0 –Path Disk1.vhdx
This script has a lot of static strings or literals in it. If you were to put this into a PowerShell script, it would be nicer to provide the name for the virtual machine, disk size and switch name as arguments. This is for the reader to create or figure out. Or wait for another post with more advanced scripts.
The Hyper-V host has settings too. When configuring the host, you are used to open Hyper-V Manager and select Hyper-V Settings. But the host can be configured from PowerShell too. First list the properties of the host by using Get-VMHost.
You probably guessed, setting properties is done with Set-VMHost.
Set-VMHost -VirtualHardDiskPath c:\vm -VirtualMachinePath c:\vm
For now, I finish this post with steps on how to configure additional Hyper-V host settings. These are just the steps for my demo environment. I use two hosts, vmhost1 and vmhost2 joined to a contoso.com domain. I use subnets 192.168.0.0 and 10.0.0.0. I will go into more detail in another post.
Windows Server “8” offers Live Migration, Live Storage Migration and virtual machine replication. These can be set from PowerShell as follows:
#Configure the paths of the host and set UseAnyNetworkForMigration to false
Set-VMHost -VirtualHardDiskPath c:\vm -VirtualMachinePath c:\vm -UseAnyNetworkForMigration 0
#Enable virtual machine migration
Enable-VMMigration
#Add two subnets to the virtual machine migration settings
Add-VMMigrationNetwork -Subnet 192.168.0.0 -Priority 500
Add-VMMigrationNetwork -Subnet 10.0.0.0 -Priority 50
#Configure virtual machine replication using HTTP authentication
Set-VMReplicationServer -ReplicationEnabled 1 -AllowedAuthenticationType Integrated -ReplicationAllowedFromAnyServer 1 -DefaultStorageLocation c:\vm -Force
#Add authorization entry for host vmhost2.contoso.com
New-VMReplicationAuthorizationEntry -AllowedPrimaryServer vmhost2.contoso.com -ReplicaStorageLocation C:\VM


