Setting Up Windows Intune/ConfigMgr 2012 R2 with ADFS On-Prem and Azure Lab - Part 4
Setting Up Windows Intune/ConfigMgr 2012 R2 with ADFS On-Prem and Azure Lab - Part 4
Additional Links to Other Parts of the Blog Series.
Part 1 – Home Intranet Lab Setup
Part 2 – Create and Configure Azure Network and Provision Azure VM
Part 3 – Install ADFS On-Prem and Install ADFS WAP on Azure VM
Part 5 - Enrolling the Different Device Types in Intune (Windows Phone, Android, iOS) - Coming Soon!
Rounding 3rd and headed home on this one. Time to configure Intune and ConfigMgr 2012 R2 for mobile device management. Fair warning, this is a long blog part and it is quite involved. Strap in!
Part 4 – Configuring Intune and ConfigMgr 2012 R2
Step 1:
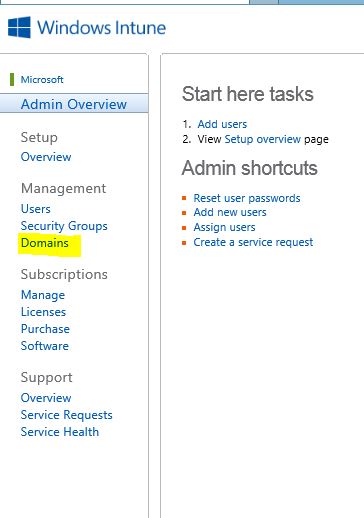
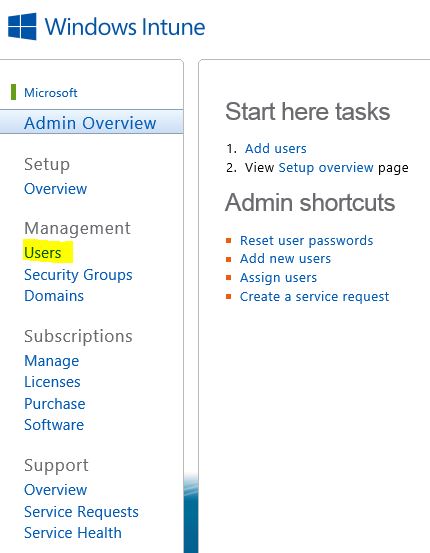
Log in to Intune by going to https://account.manage.microsoft.com. Enter the credentials you created when you setup your Intune account. You’ll be presented with the Admin Overview screen of the Intune portal. If you wish, you can click Setup > Overview to see the steps necessary to configure Intune. We’ve already setup the ADFS trust with Intune and we’ll execute Active Directory Synchronization in a bit.
Click on the Domains link in the left pane.
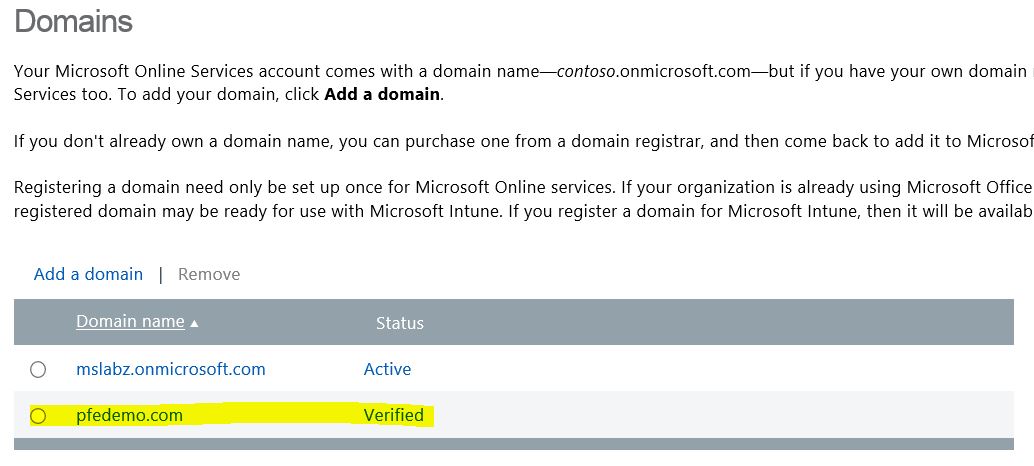
On the Domains screen, notice your public domain already shows up and has a status of “Verified”. This occurred as a result of executing the last section in Part 3.
Step 2 - Prepare for Windows Intune Configuration
IMPORTANT BEFORE MOVING ON: If you were able to get a registered Internet domain with the same name as your intranet lab domain, you do not need to provision any additional user accounts. If your registered Internet domain name is different from your intranet lab, as is/was mine, you will need to provision new user accounts with the new UPN you created that matches your Internet domain or change the domain affinity of existing accounts. These accounts will be used to enroll devices into Intune and to deploy applications to the user accounts of enrolled devices via ConfigMgr.
Create a group in AD called Intune Users and add the user accounts that will enroll devices into the group. NOTE: Again, the user accounts MUST have a domain affinity or UPN for the PUBLIC domain. For example, my user accounts in AD that enroll devices look like this – user@pfedemo.com. Later on in this blog, once we sync accounts, if your users show up with the @onmicrosoft.com suffix Intune, there will be errors and users will not be able to enroll devices.
Depending on your discovery needs, you may configure your discovery options differently, especially in a production environment. However, for this lab demonstration, configure the following discovery options:
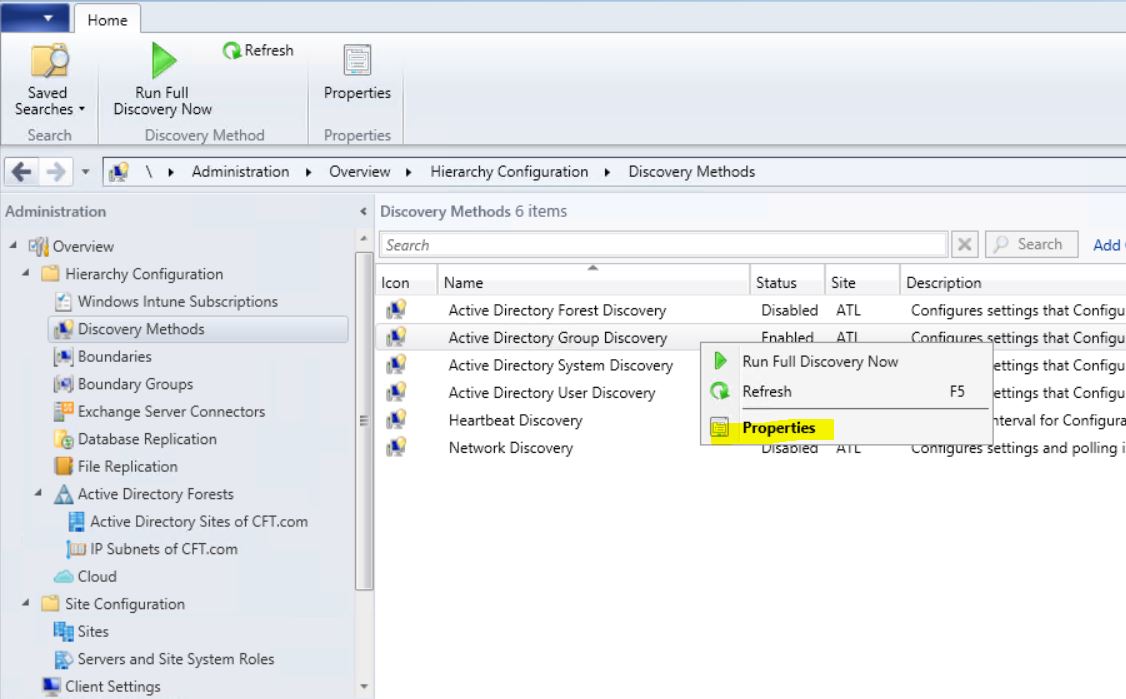
Open the ConfigMgr console and navigate to Adminstation > Hierarchy Configuration > Discovery Methods. Right-click on Active Directory Group Discovery and choose Properties.
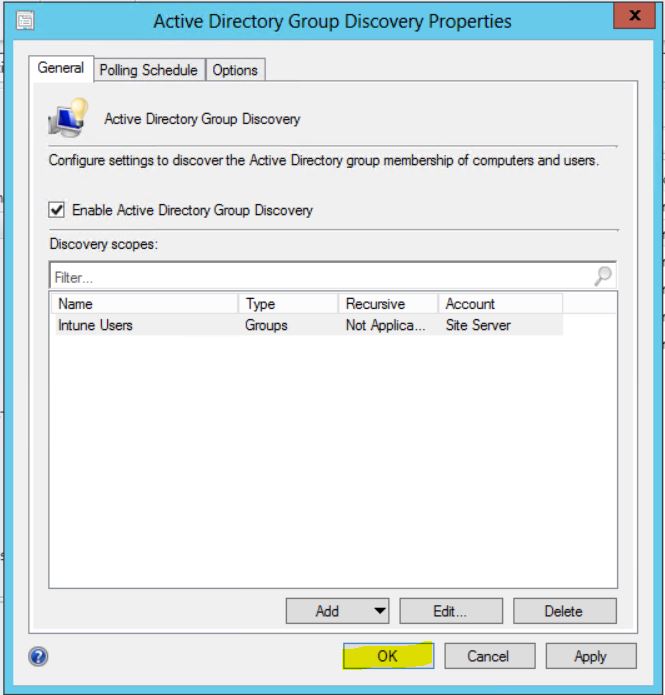
On the General tab of the AD System Group Discovery properties, check the box to Enable Active Directory Group Discovery. At the bottom of the tab, click Add and select Groups from the drop-down
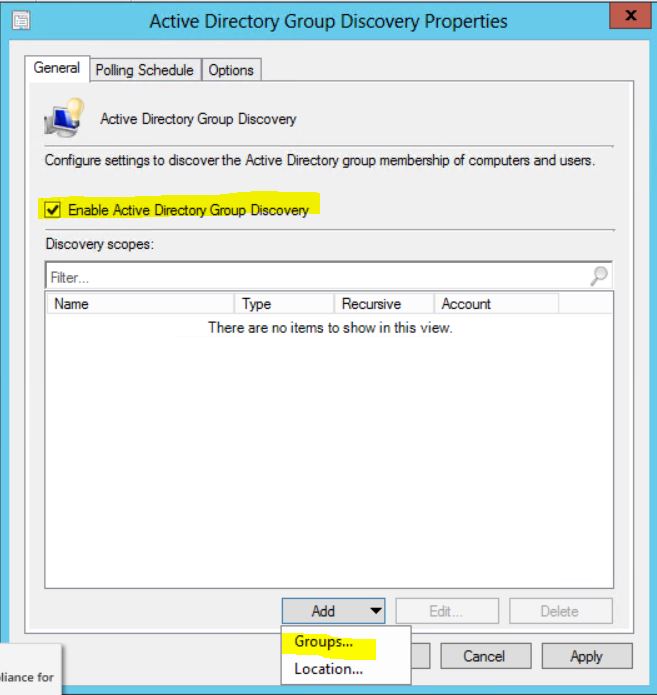
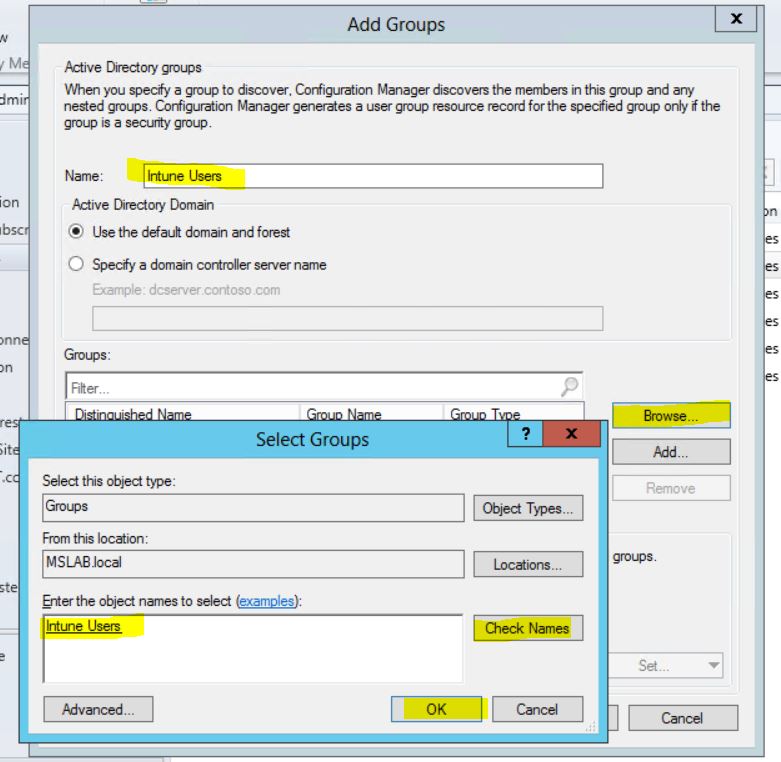
On the Add Groups window, in the Name field, type in Intune Users. In the Groups section, click the Browse button. The Select Groups window will appear. In the text area, type in Intune Users and click the Check Names button to resolve the group. Then click OK to close the window.
Back on the Add Groups screen, click OK.
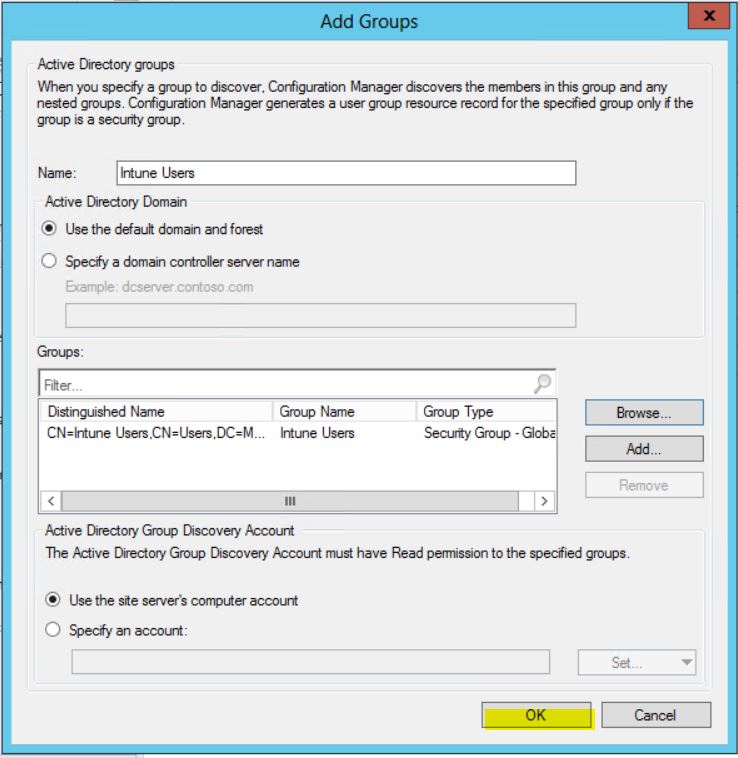
Back on the General tab of the AD Group Discover Properties windows, click OK.
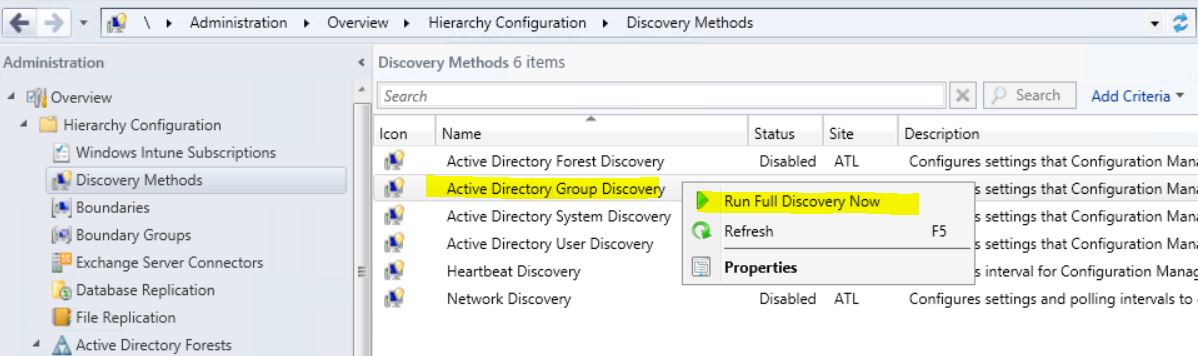
Back in the ConfigMgr console, still in the Discovery Methods node, right-click Active Directory Group Discovery and select Run Full Discovery Now from the context menu. When prompted to run discovery, click Yes.
Next, in the ConfigMgr console, still in the Discovery Methods node, right-click Active Directory User Discovery and select Properties from the context menu.

On the General tab of the AD User Discovery Properties window, check the box to Enable Active Directory User Discovery. Then, click the yellow star icon.
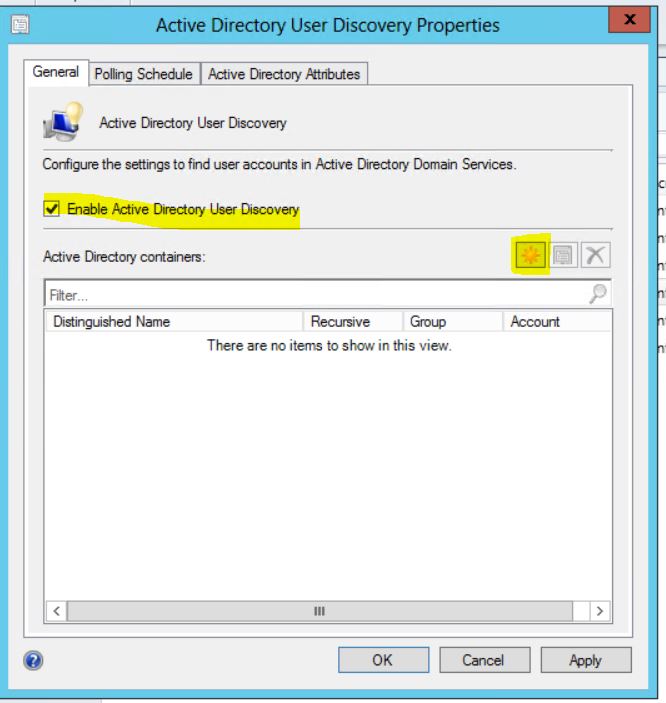
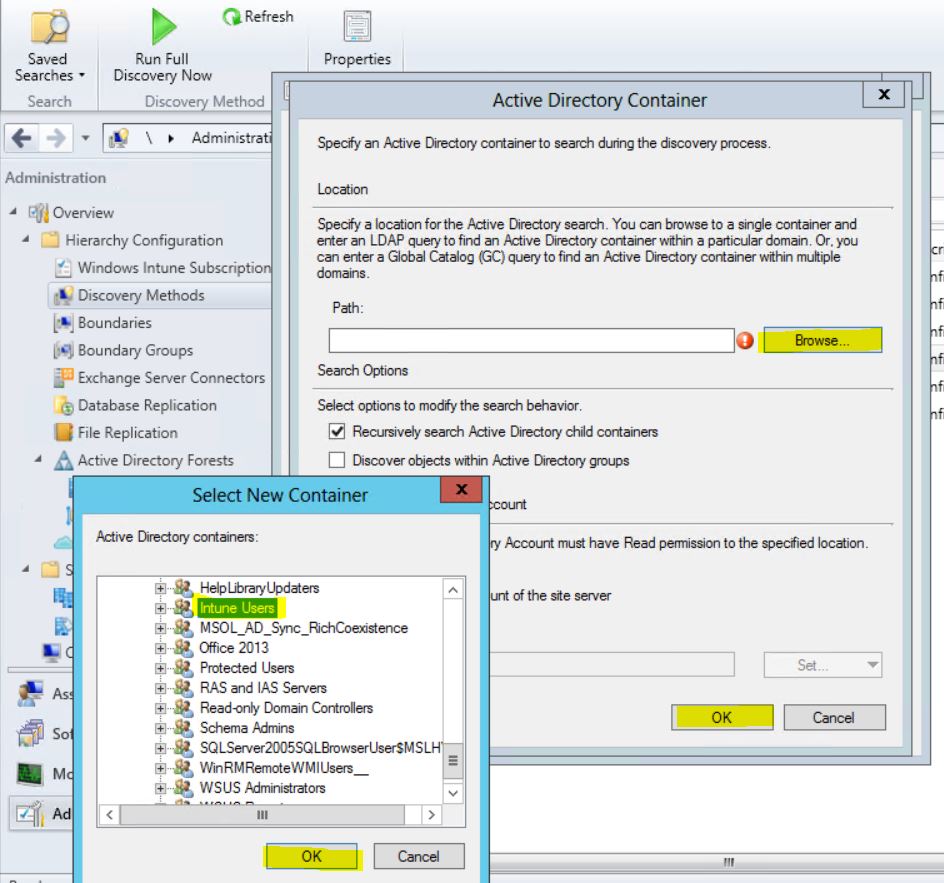
The Active Directory Container window will appear. In the Path field, click the Browse button. The Select New Container window will appear. Expand Users and select the Intune Users group and click OK. NOTE: As stated, your User Discovery needs may be different, especially in a production environment. Configure per requirements of your environment.
On the Active Directory Container window, click OK to close the window. Once back on the AD User Discovery Properties window, click OK.
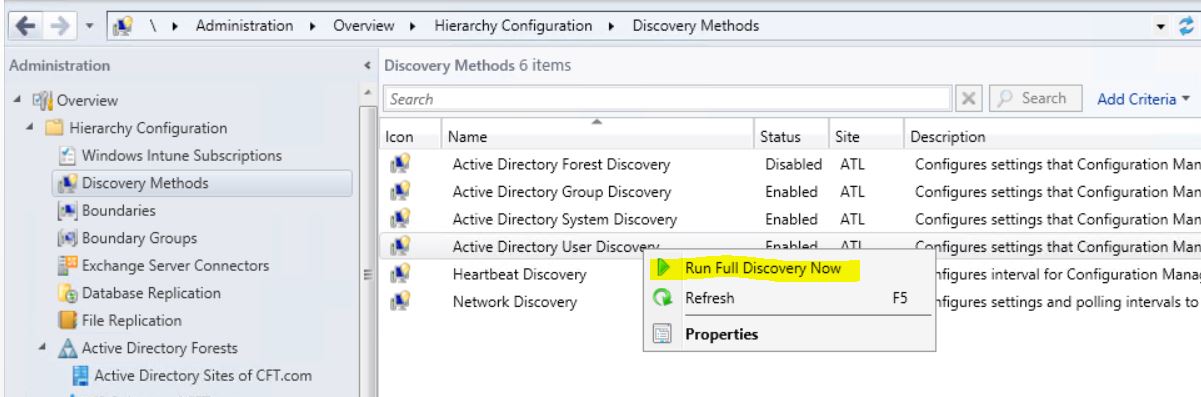
Back in the ConfigMgr console, still in the Discovery Methods node, right-click Active Directory User Discovery and select Run Full Discovery Now from the context menu. When prompted to run discovery, click Yes.
In the ConfigMgr console, select the Assets and Compliance workspace. Right-click User Collections and choose Create User Collection from the context menu.

The Create User Collection Wizard will appear. On the General screen, in the Name field, type in “Intune Users”. For the Limiting Collection, click the Browse button and choose All Users and User Groups. Click Next to continue.

On the Membership Rules screen, click the Add Rule button and choose Query Rule from the drop-down menu. The Query Rule Properties window will appear. In the Name field, type in Intune Users. Then click the Edit Query Statement button.
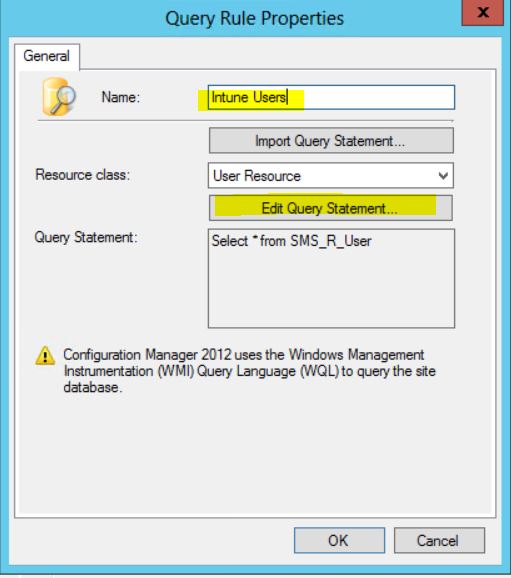
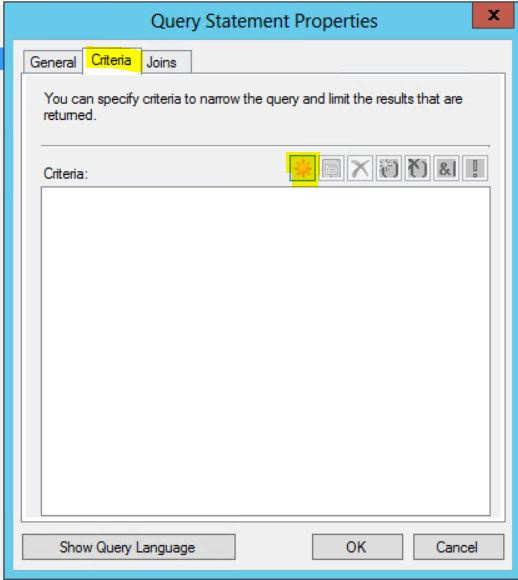
The Query Statement Properties window will appear. Select the Criteria tab and click the yellow star icon.
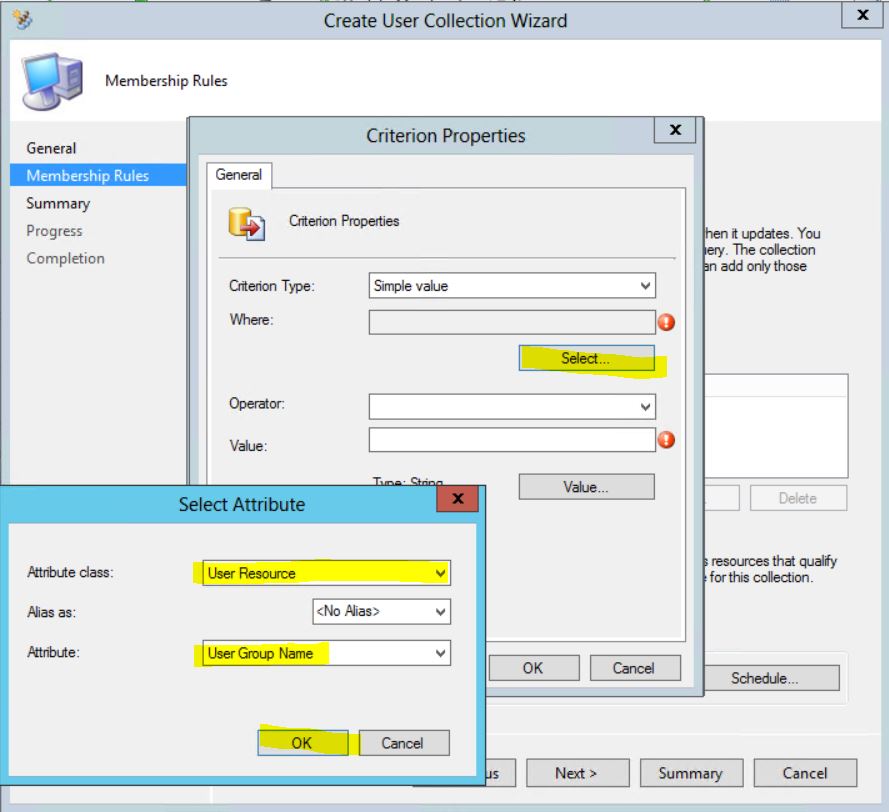
The Criterion Properties window will appear. Click the Select button. The Select Attribute window will appear. In the Attribute Class drop-down, select User Resource. In the Attribute drop-down, select User Group Name and click OK.
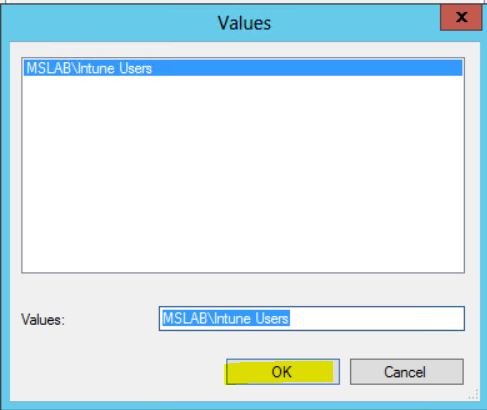
The Operator field will default to “Is equal to”. You may type in the Value for the User Group or you can click the Value button to choose from a list of values that exist in the database. For purposes of the demo, click the Value button. The Value window will appear. Choose the Intune Users collection and click OK.
Back on the Criterion Properties window, click OK to close. Back on the Query Properties window, click OK. Back on the Membership Rules screen of the Create User Collection Wizard, click Next. On the Summary screen, click Next. Finally, click Close to close the Create User Collection Wizard.
Step 3 - Configure the Intune subscription in Configuration Manager and install the Intune Connector role.
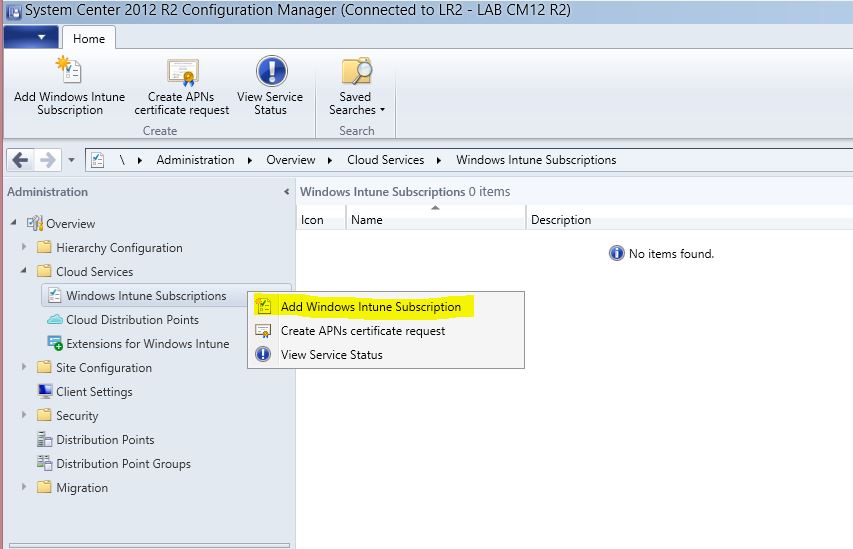
Open the ConfigMgr console and navigate to Adminstation > Cloud Services. Select Windows Intune Subscriptions.

Right-click Windows Intune Subscriptions and choose Add Windows Intune Subscription from the context menu.
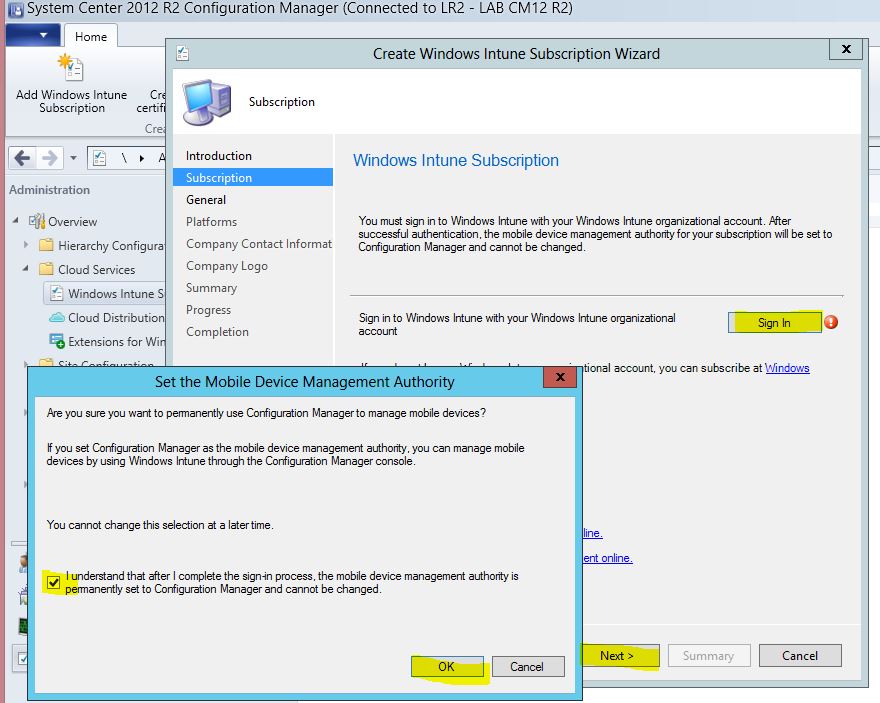
The Create Windows Intune Subscription Wizard will appear. On the Introduction screen, click Next. On the Subscription screen, click the Sign In button. Another window will appear. Check the checkbox stating you understand the mobile device management authority is permanently set to ConfigMgr and cannot be changed and Click OK. Then click Next to continue.
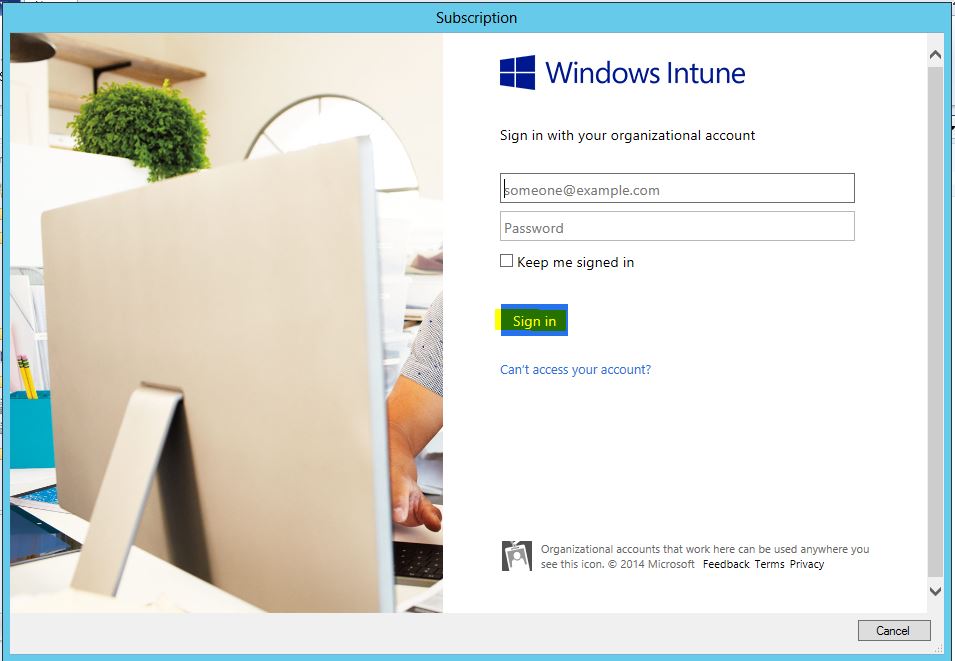
The Windows Intune login screen will appear. Sign into Windows Intune with your credentials and click Sign in. NOTE: This will be your Intune tenant user login.
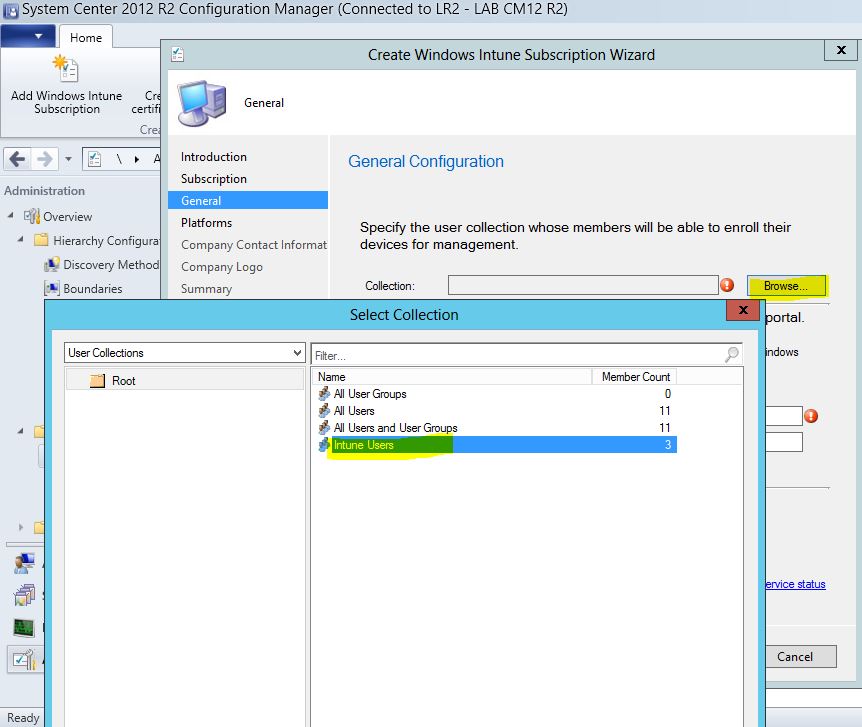
Once authenticated, the Windows Intune Sign In page will close. Back on the Subscription screen, click Next. On the General screen, in the Collection field, click Browse. On the Select Collection window, choose Intune Users and click OK.
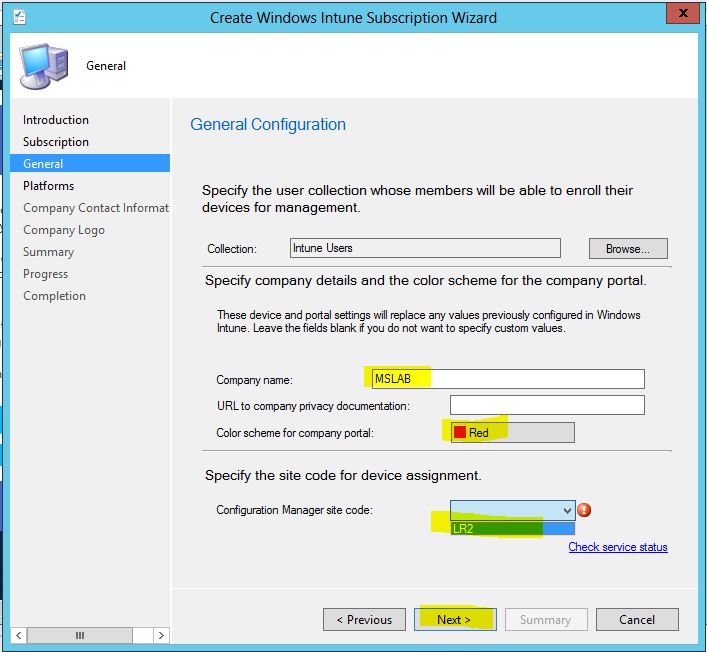
Back on the General screen, fill in the other fields as desired for Company Name, choose a color scheme for the Company Portal and select your site code. Click Next to continue
On the Platforms screen, just click Next. NOTE: We’ll configure these later. For now, we are just getting Intune configured and the Connector role installed so we can sync users to Intune.
On the Company Contact Information screen, fill out the fields as desired with information about your organization. Click Next to continue.
On the Company Logo screen, you can apply a logo to your company portal app. Configure the options as desired and click Next to continue.
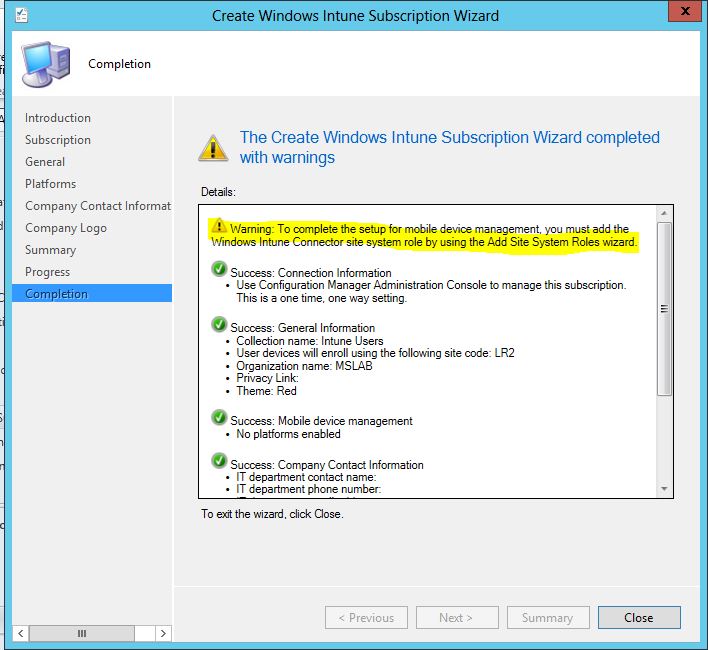
On the Summary screen, click Next. Once on the Completion screen, click Close to close the wizard. NOTE: Notice the screen tells you that in order to complete the configuration you must install the Connector role.
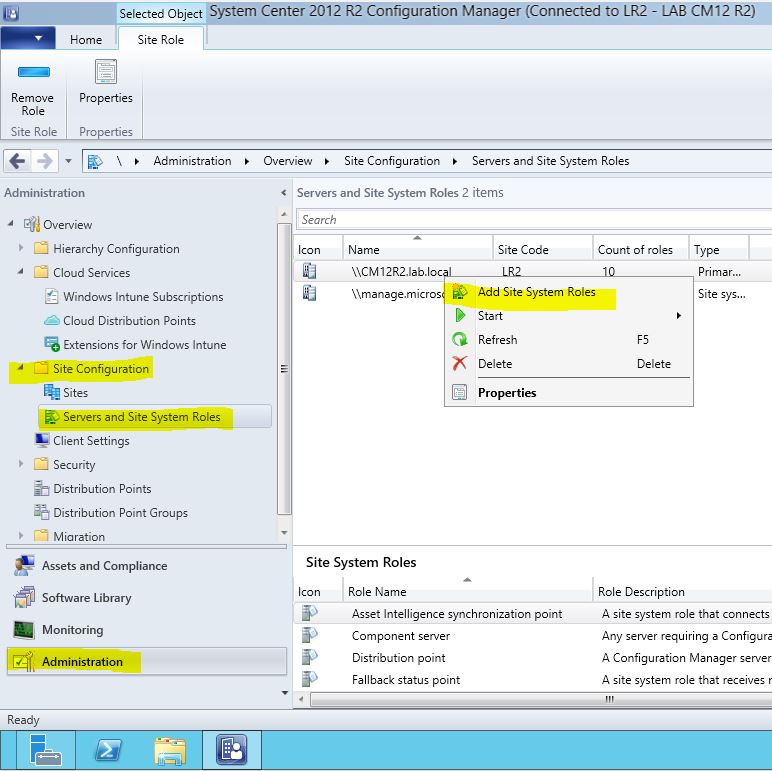
To install the Intune Connector role, in the ConfigMgr console, select the Administration workspace. Then select the Site Configuration > Servers and Site System Roles node. In the right-pane, right-click the primary site server and select Add Site System Roles from the context menu. NOTE: Notice you’ll see a server called “manage.microsoft.com”. This is the cloud distribution point that is provisioned for your Intune configuration.
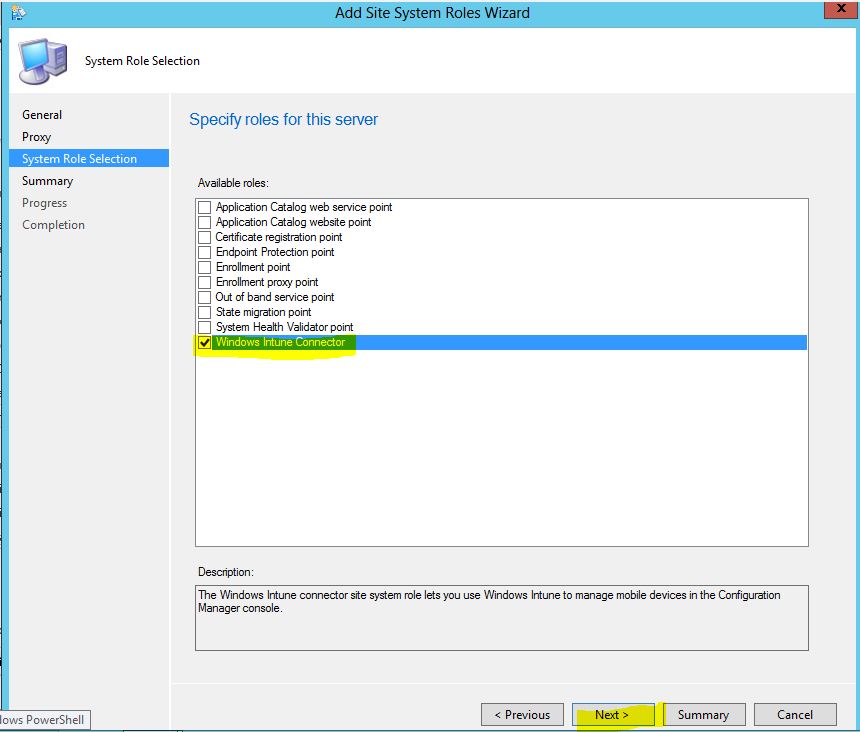
The Add Site System Role wizard will appear. On the General screen, click Next (unless you have a need to specify an account to install roles). On the Proxy screen, click Next (unless you have a need to specify a proxy). On the System Role Selection screen, check the Windows Intune Connector checkbox and click Next.
On the Summary screen, click Next. On the Completion screen, click Close to close the wizard. At this point, ConfigMgr will install the Connector role and install the components necessary that will sync data up and down to manage enrolled devices in Intune via ConfigMgr and the Connector.
Step 4 - Configure Active Directory Synchronization to Sync Users to Intune
Next, we need to setup our on-prem Active Directory synchronization to sync users to Intune so we can enable them to enroll their devices in Intune
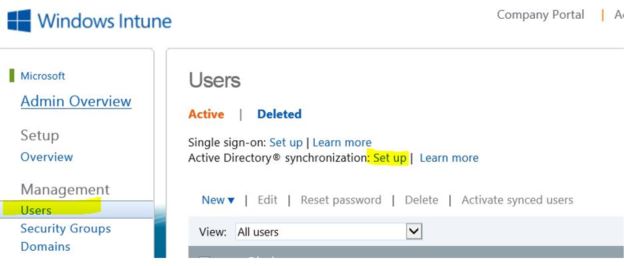
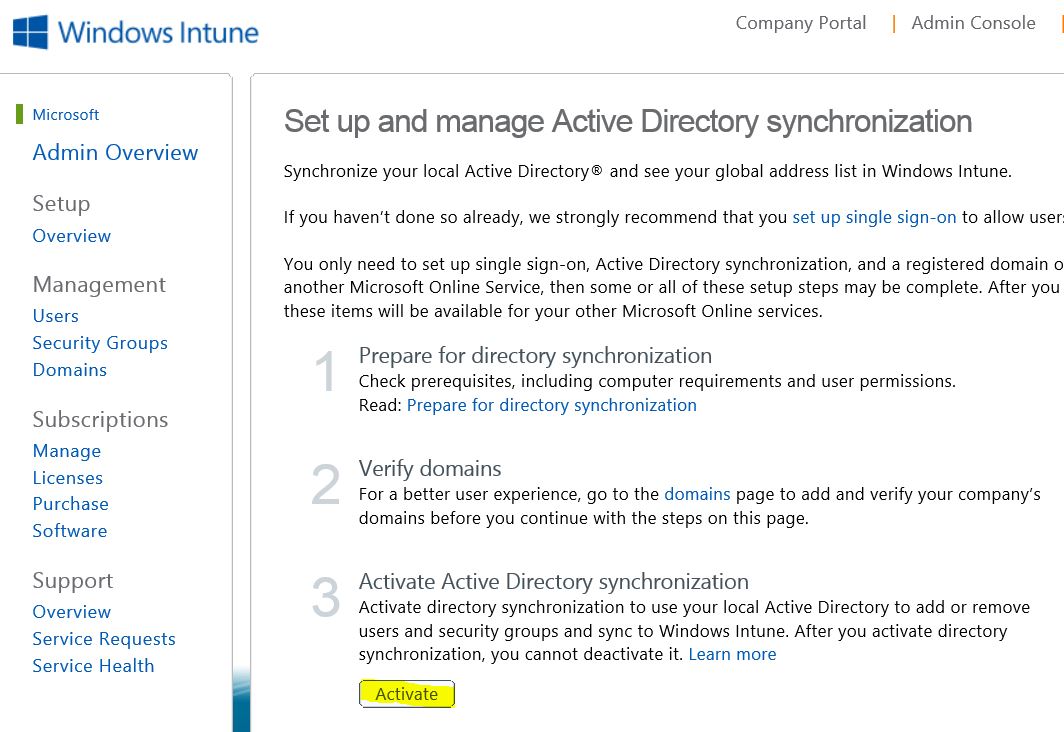
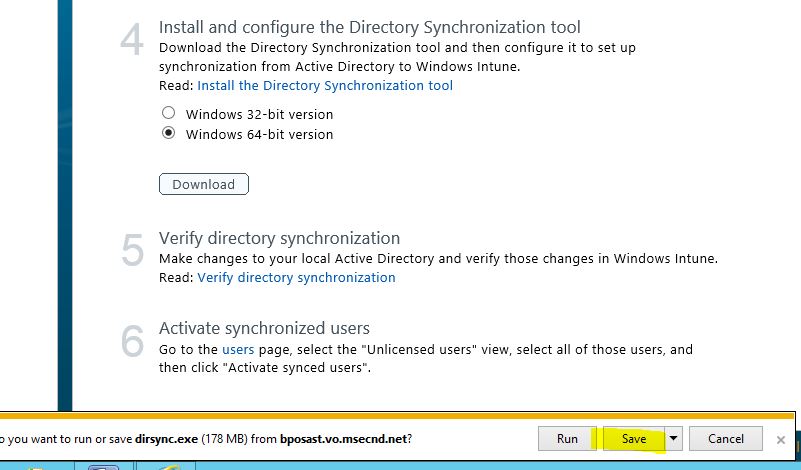
Log in to Intune by going to https://account.manage.microsoft.com. Enter the credentials you created when you setup your Intune account. You’ll be presented with the Admin Overview screen of the Intune portal. In the left pane, in the Management section, click Users. In the middle pane, you’ll see “Active Directory synchronization”. Click the link titled “Set up”
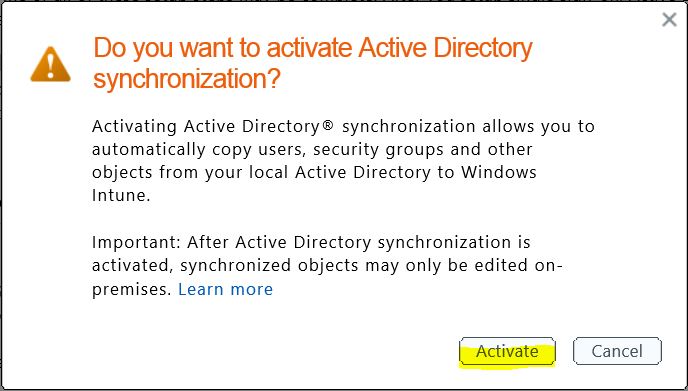
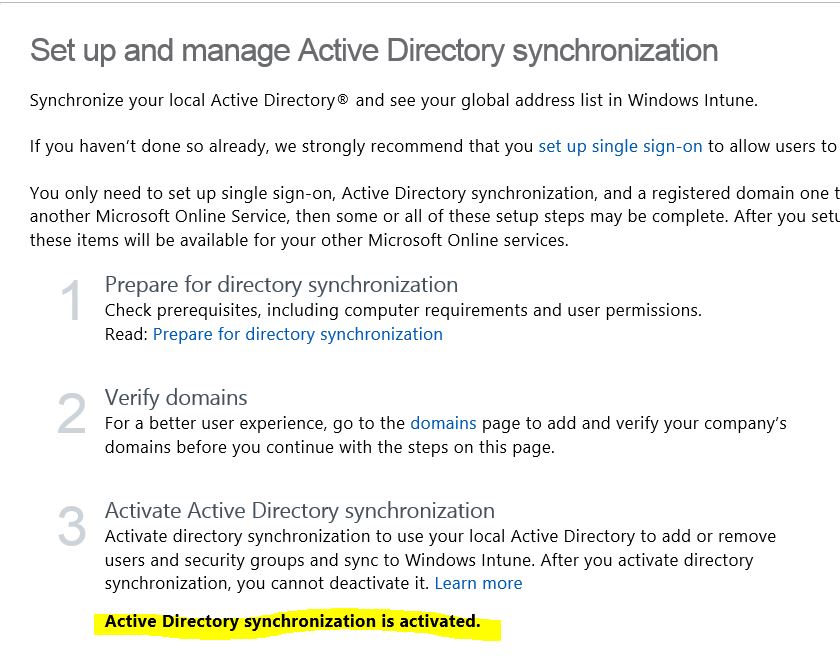
A webpage will be displayed with some steps to follow. We’ve actually already done Step 1 and Step 2 the other steps we’ve executed as part of this series. In Step 3, click the Activate button. You’ll get a prompt asking you to confirm if you want to Activate Active Directory Synchronization. Click Activate on the prompt. The webpage will then update and say that AD Sync has been activated.
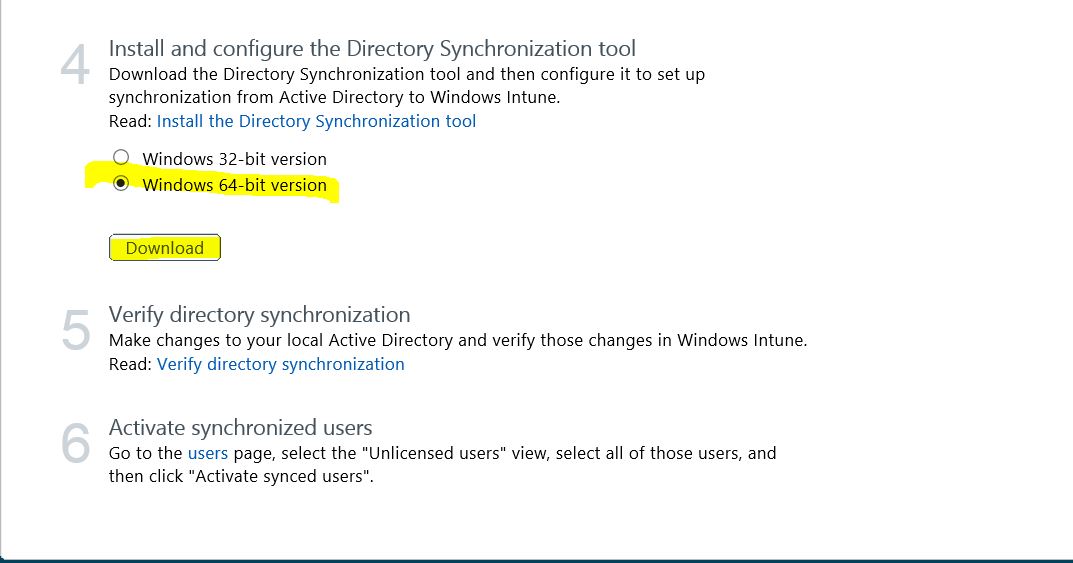
In Step 4 on the webpage, select the Windows 64-bit version radio button and click the Download button. NOTE: You may consider doing this step on your domain controller in your lab or whatever machine you want to leverage to do the directory sync (dirsync) with Azure. When prompted to download dirsync.exe, click Save.
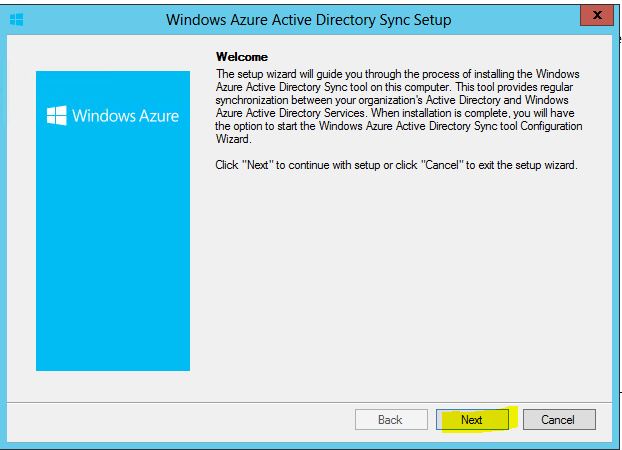
On the lab machine (in my lab, domain controller), that will run dirsync.exe, navigate to the download location and double-click on dirsync.exe to install. The Windows Azure Active Directory Sync Setup will appear. On the Welcome screen, click Next.
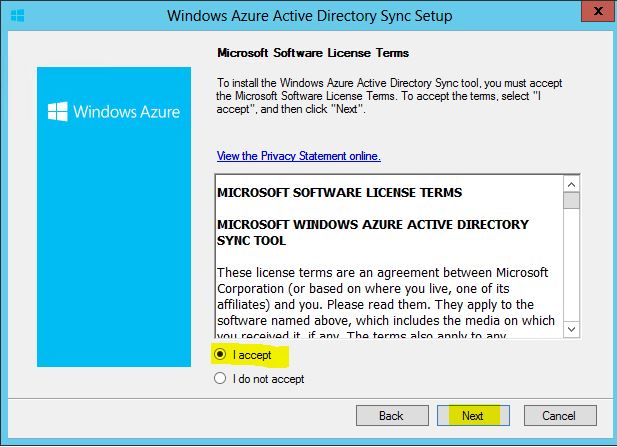
On the Software License Terms screen, select the “I agree” radio button and click Next
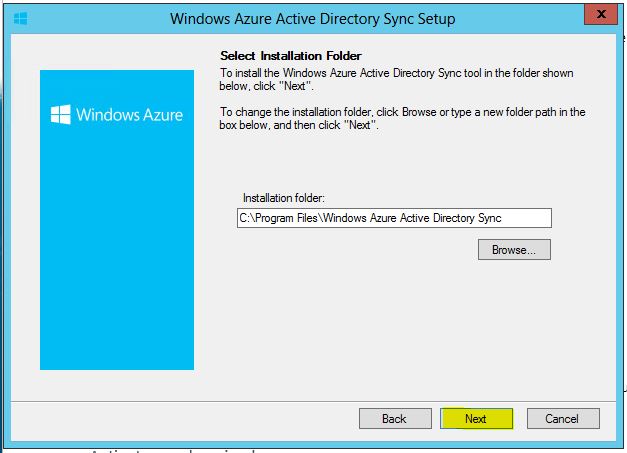
On the Select Installation Folder screen, accept the default location or choose a new location to install DirSync. Click Next to continue.
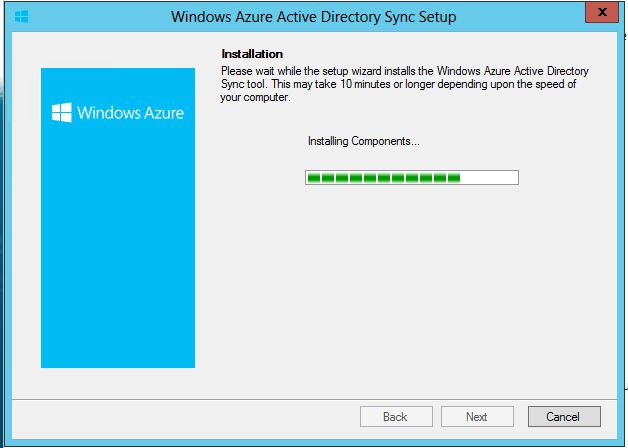
DirSync will install. The install could take a bit of time as the blurb in the window indicates. When the installation completes, click Next.

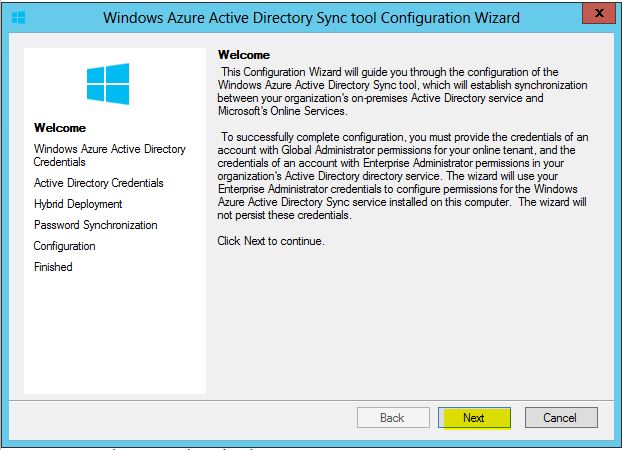
On the Finished screen, click Finish. Now, the DirSync Configuration Wizard window will appear. On the Welcome screen, click Next.
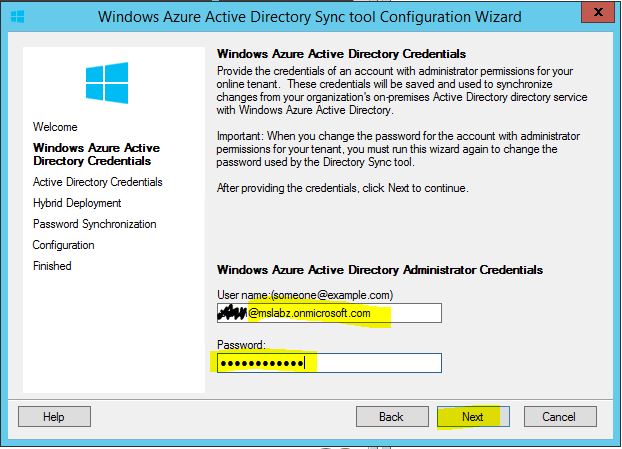
On the Windows Azure Active Directory Credentials screen, in the User Name field, type in your online tenant ID for Windows Intune. In the Password field, type in the password associated with the account and click Next.
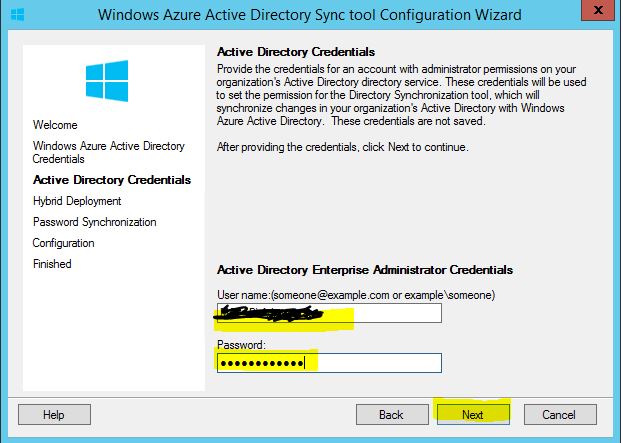
On the Active Directory Credentials screen, in the User Name field, type in your Active Directory Enterprise Administrator credentials. NOTE: I used my domain admin account. In the Password field, type in the password associated with the account and click Next to continue.
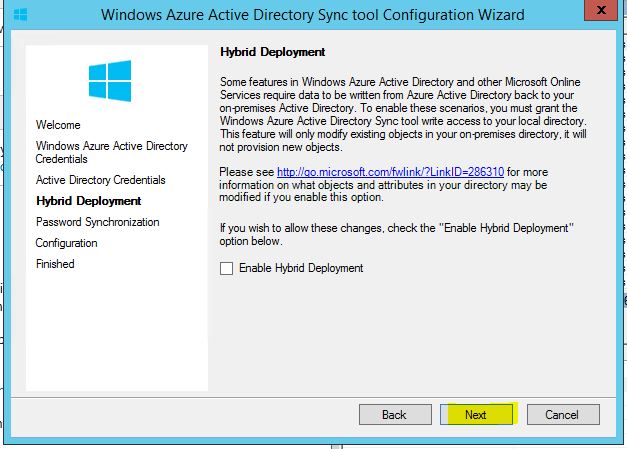
On the Hybrid Deployment screen, it is not required to Enable Hybrid Deployment. Click Next to continue.
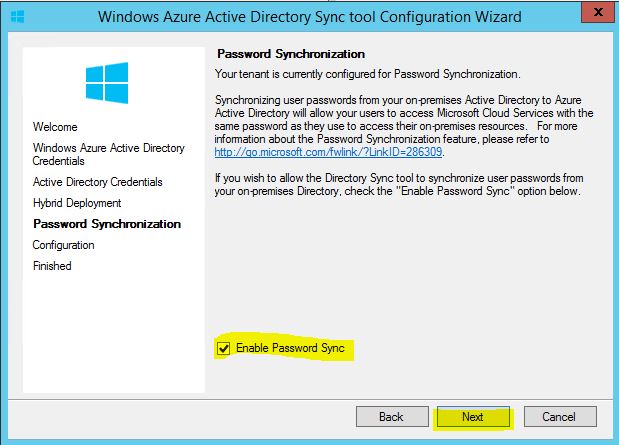
On the Password Sync screen, ensure the Enable Password Sync checkbox is checked and click Next.
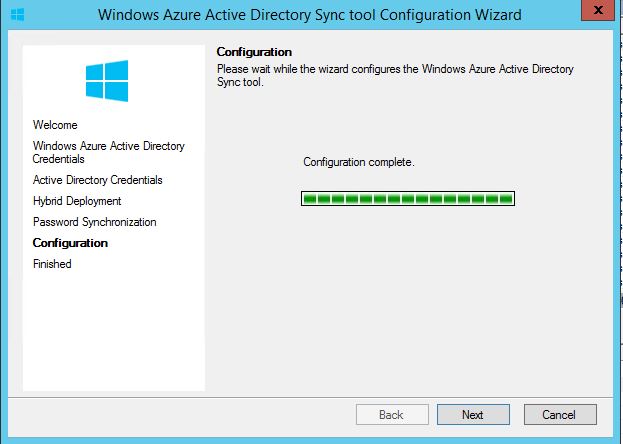
On the Configuration screen, the DirSync tool will prepare itself to sync with Azure. NOTE: DO NOT CLICK NEXT. Continue following the steps and we’ll come back to this in a minute.
Open up Windows Explorer and navigate to the following location C:\Program Files\Windows Azure Active Directory Sync\SYNCBUS\Synchronization Service\UIShell. NOTE: If you installed DirSync in a different location, navigate to that location. Within this folder, there is an EXE file name “miisclient.exe”. Open the EXE file by double-clicking. The Synchronization Service Manager will open. This tool is used to validate the DirSync to Azure. Or you can use this tool manually to kick a manual sync rather than waiting 3 hours for users to sync to Intune automatically. NOTE: Consider creating a shortcut to avoid having to navigate back to this location for future use.
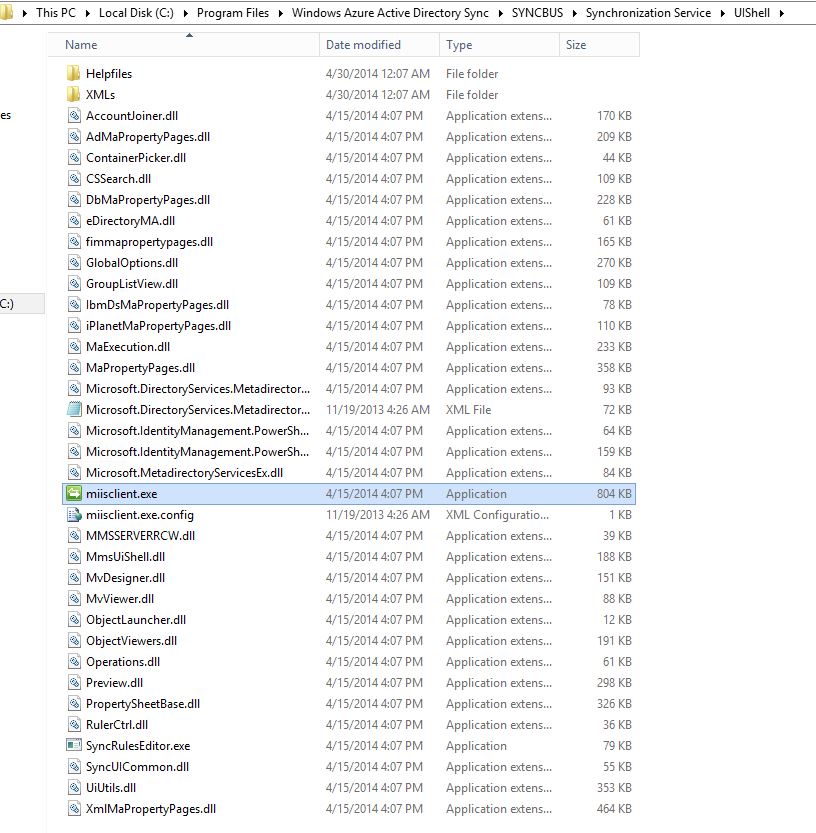
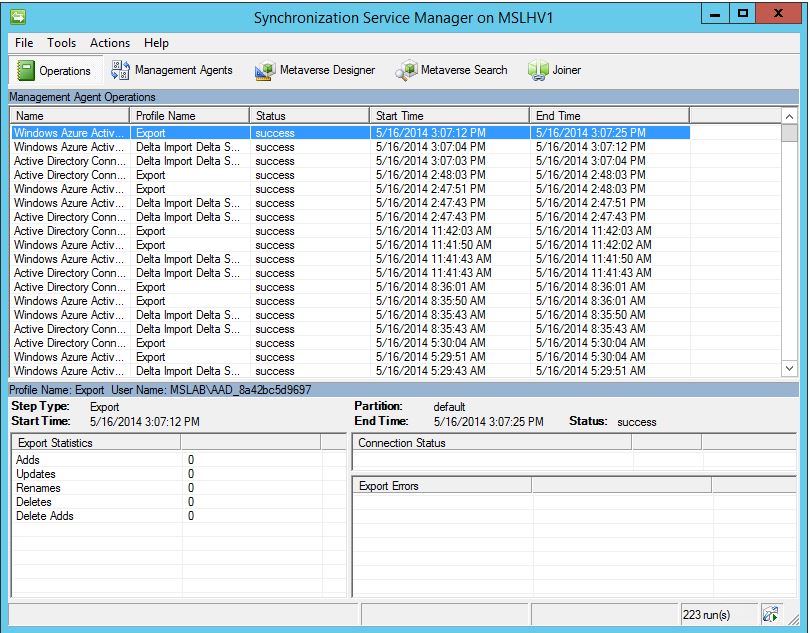
NOTE: The first time you open this, you will not see any data. It will not look like the screenshot above.
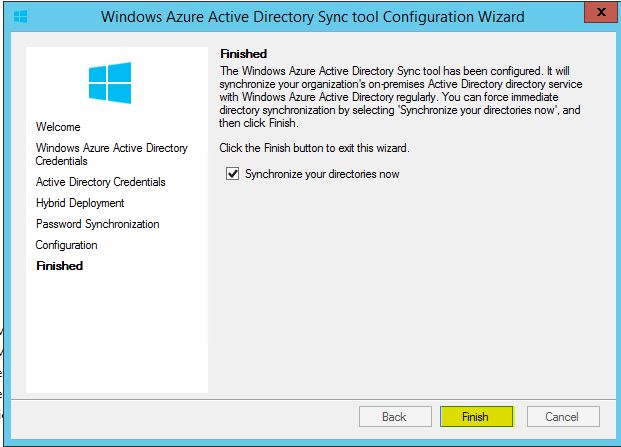
Now, return to the DirSync Configuration Wizard window, on the Configuration screen, and click Next to continue.
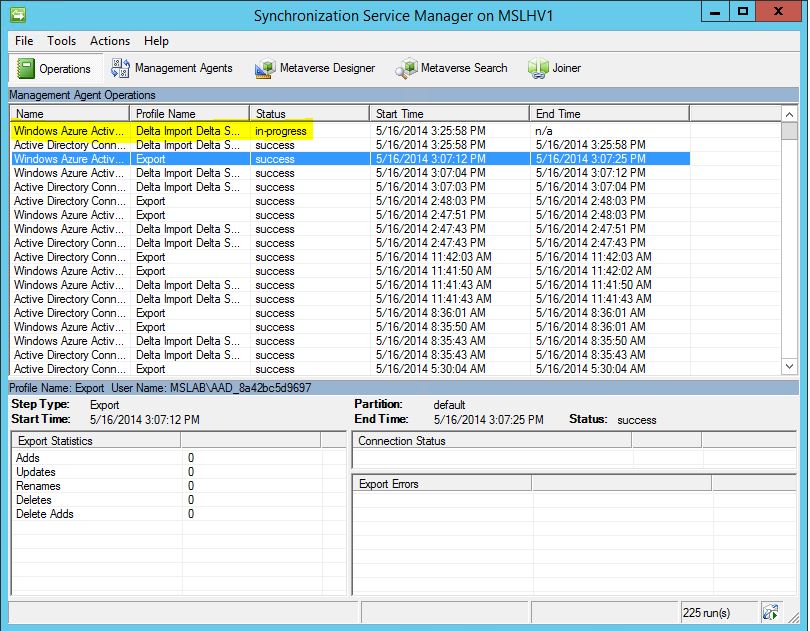
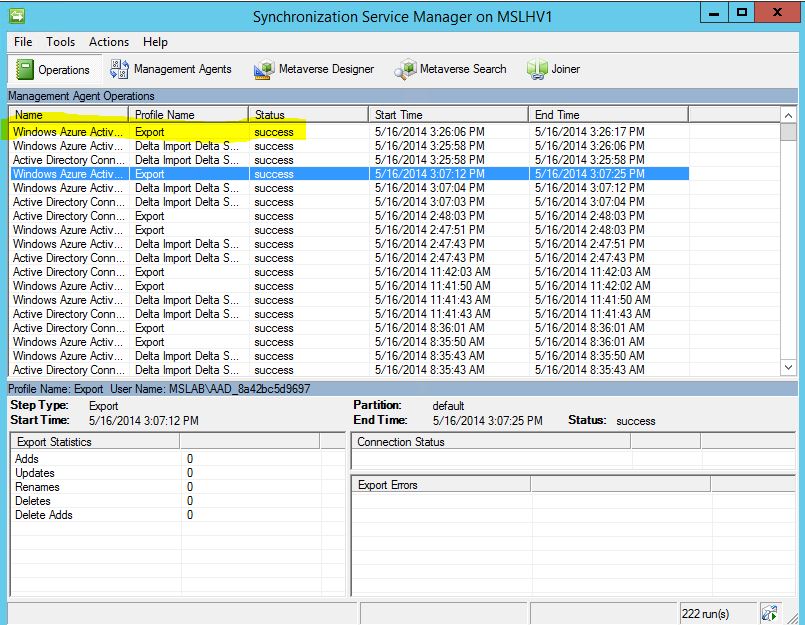
On the Finished screen, click Finish to start the DirSync. After clicking Finish, bring up the Synchronization Service Manager window and validate that the DirSync was successful. Synchronization Service Manager will show success of the DirSync similar to the screenshot below.
NOTE: Now that you have configured DirSync, it will run every 3 hours to attempt to sync any new information from your On-Prem environment to Azure and Intune.
Step 5 - Enable Users in Intune to Enroll Devices
NOTE: This step is not required if you plan on leveraging the WorkPlace Join feature for Windows 8.1 devices such as Surface Pro 3.
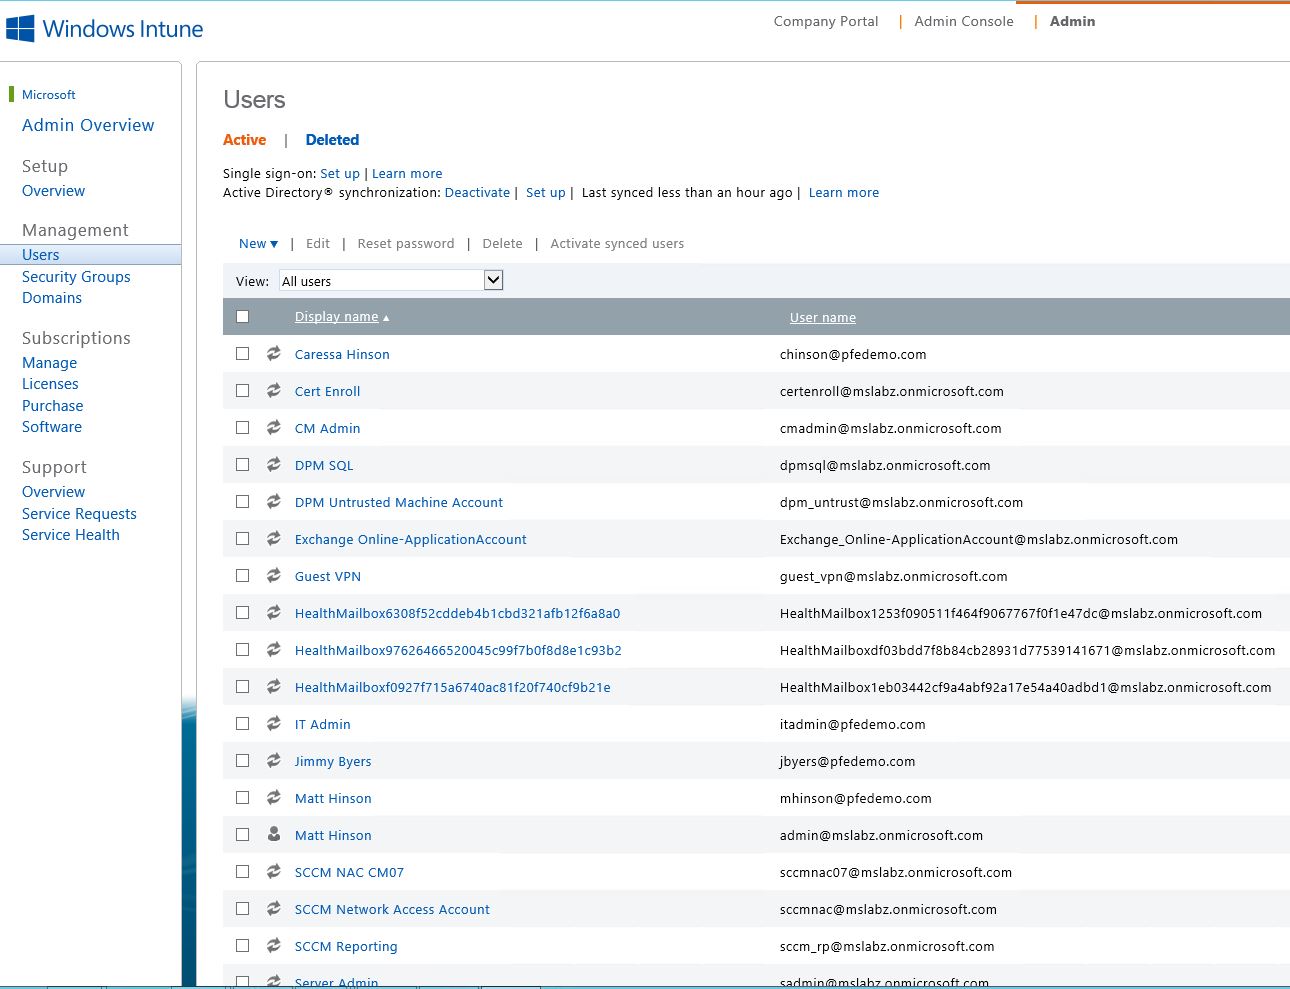
Close Synchronization Service Manager and return to https://account.manage.microsoft.com. Enter the credentials you created when you setup your Intune account if necessary. In the left pane, under the Management section, click the Users link.
On the Users page, you should see that your On-Prem users have now been sync to Azure and are available to activate as Intune Users. Notice I have both users for @pfedemo.com and @mslabz.onmicrosoft.com. Recall at the beginning of the blog that if you only see users with @onmicrosoft.com, then you did not provision user accounts with a UPN of the public domain you purchased. If this is the case, you MUST go back and provision these accounts and sync them with Intune properly before enabling them to enroll devices.
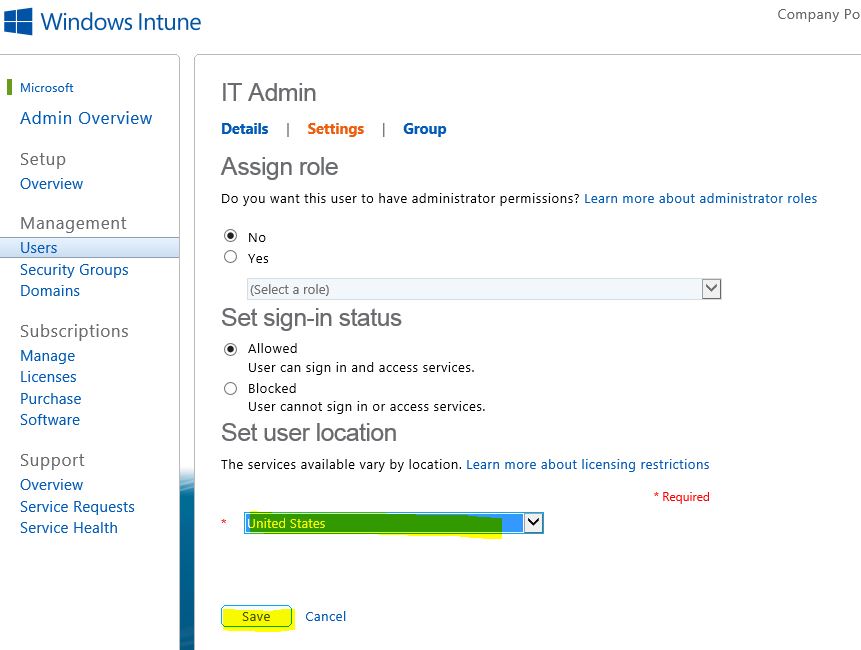
To provision an account to be able to enroll devices in Intune, find the account in the list and check the box out beside it. NOTE: Only select the user accounts that show as accounts with the UPN of the public domain you purchased. Then, click the Edit link.
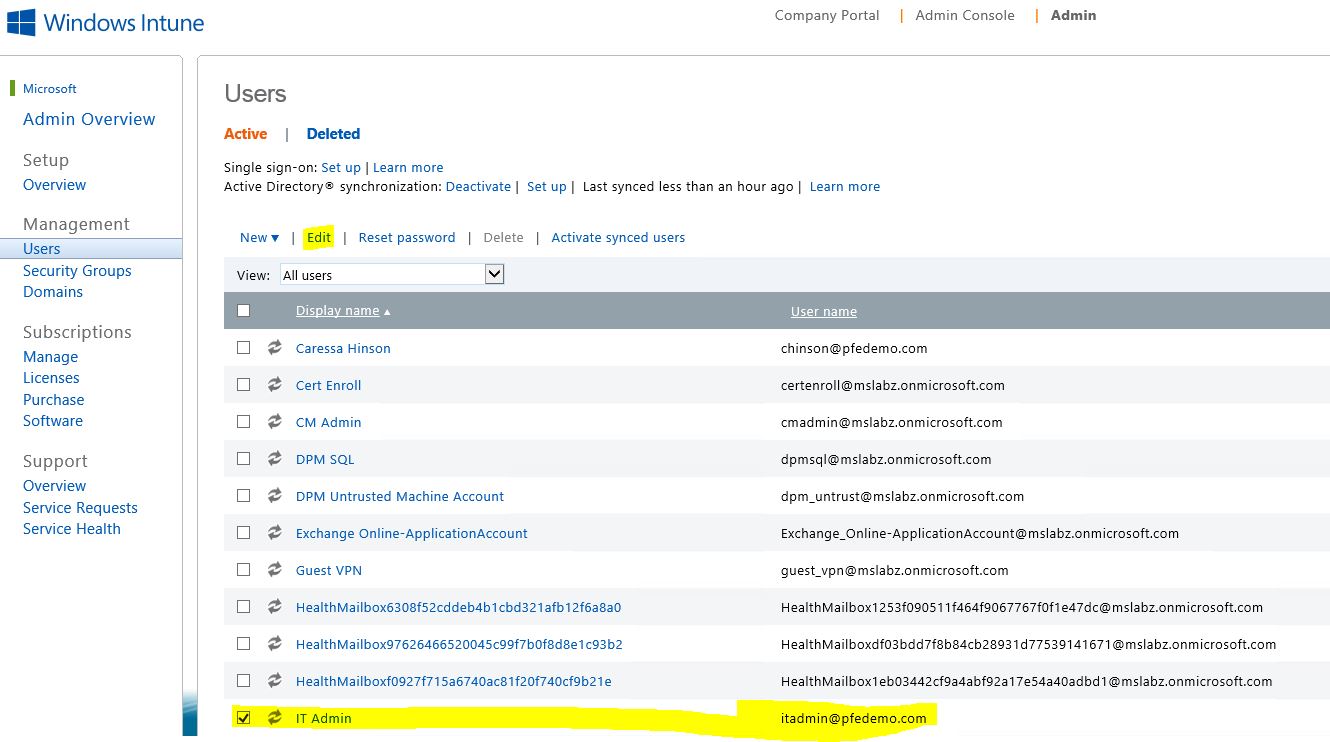
On the User page displayed, check the Windows Intune checkbox and click Save.
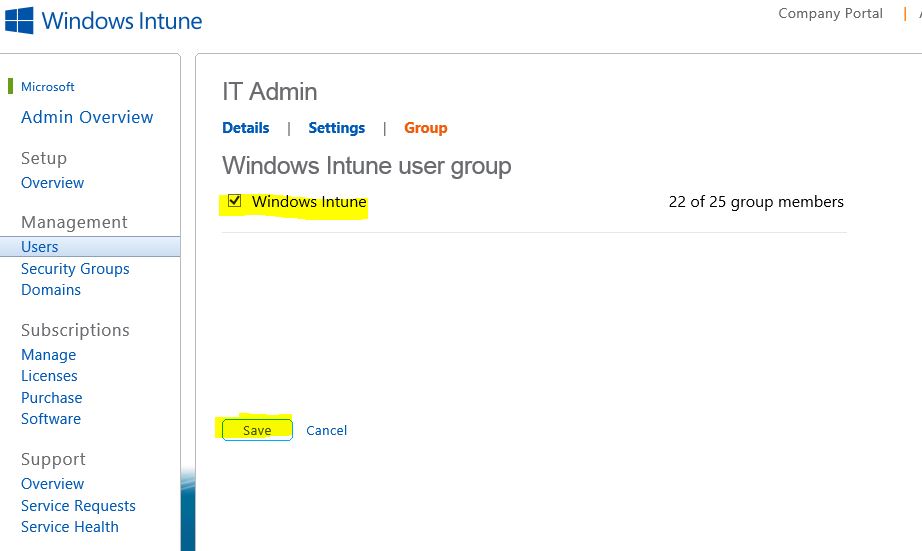
On the next page that is displayed, select a user location from the drop-down menu and click Save.
So, we’ve done a lot, are we done yet? Not quite. We have just a little bit more to do before users can start enrolling devices. Now, we need to configure our Intune subscription in ConfigMgr for the different devices we want to enroll and manage. And that is coming up in the next part in this series! To be continued...