Enabling the Microsoft Monitoring Agent in Windows JSON Templates
Remember the good old days when operating systems came on floppy disks and a cheese fondue was the height of culinary sophistication. These days, there is no need to worry about the dog eating disk 65 of 132 when a couple of clicks of a mouse can deploy complex infrastructure quickly to a repeatable standard while you much on cheese on toast with a splash of Worcester sauce.
So the challenge for me was to deploy a Windows Virtual Machine into Azure and as part of that deployment, enable the Microsoft Monitoring Agent to connect into the Operations Management Suite. And I wanted to use the new Resource Manager functionality rather than the classic service management model - more on the differences here.
You’ll need to have Visual Studio 2013 or 2015 and along with Azure PowerShell, Microsoft Azure Authoring Tools and Microsoft Azure Tools for Visual Studio (version 2.8 at the time of writing).
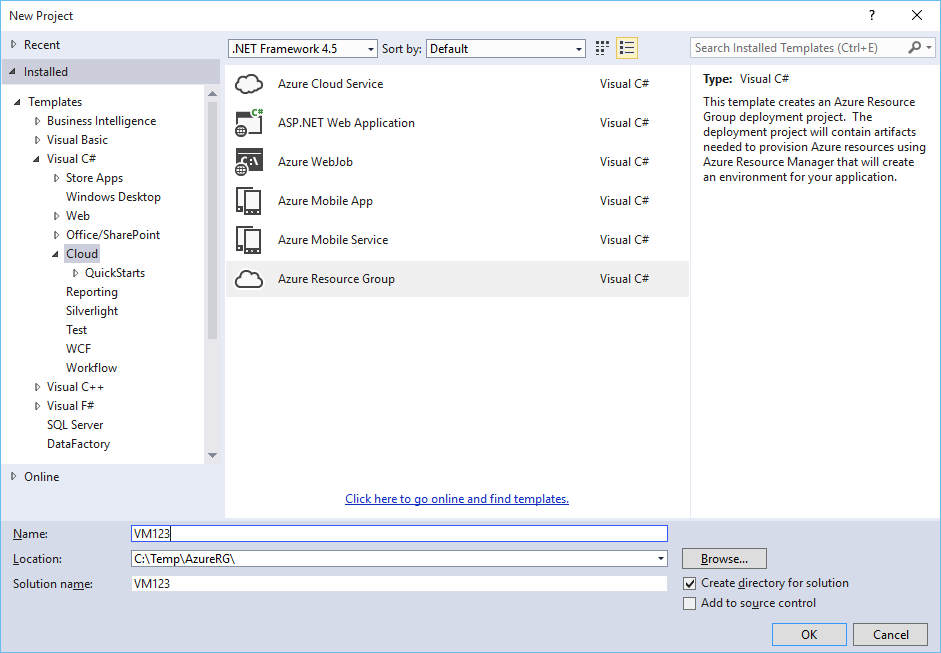
The create a new project and choose Azure Resource Group
I’ll keep it simple and choose Windows Virtual Machine
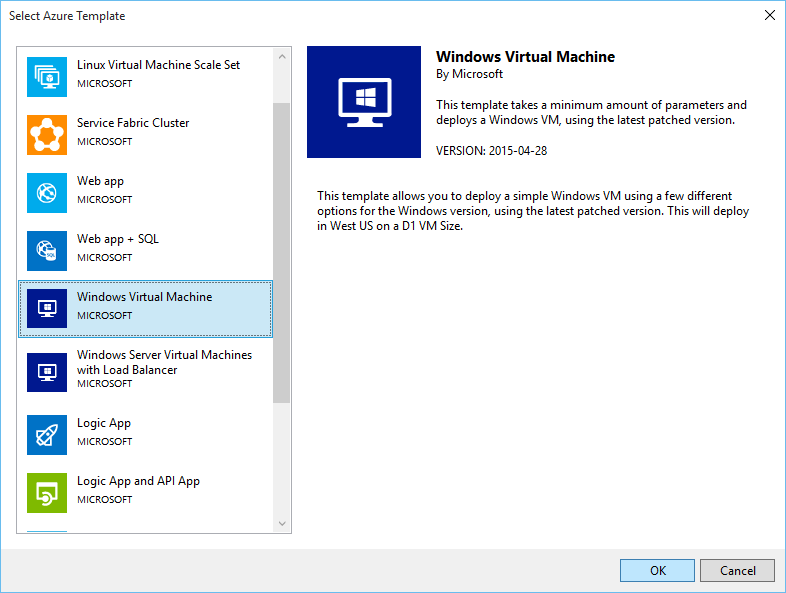
If you have never used this before, I’ll run through a quick example.
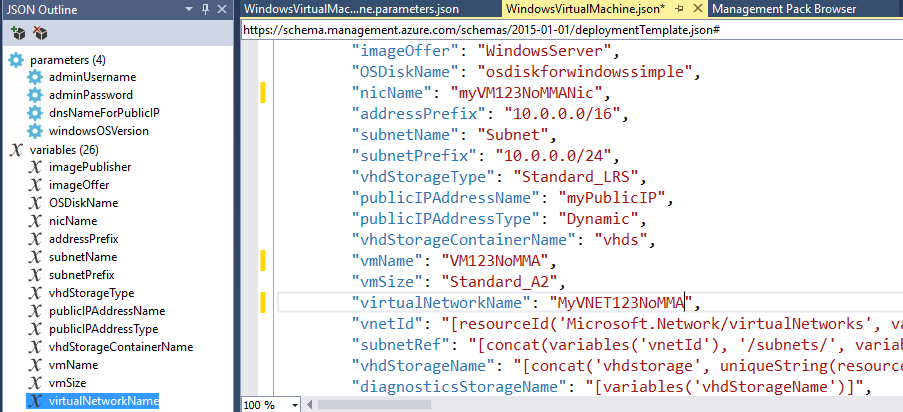
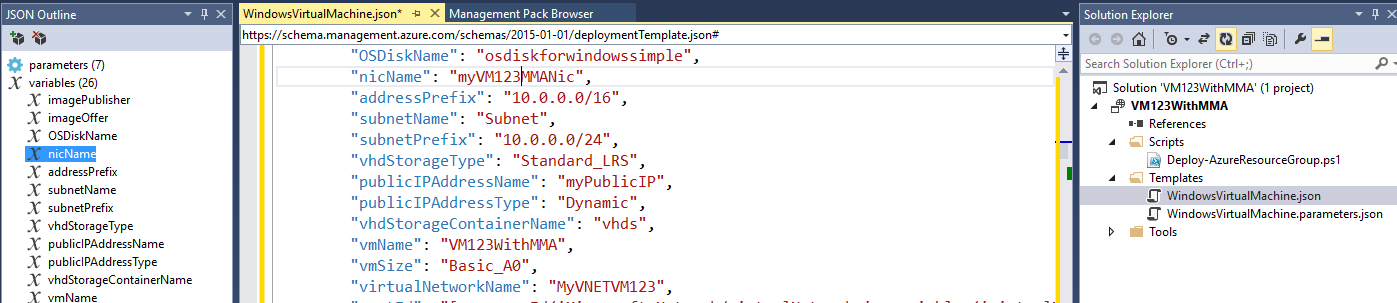
If you take a look at the left hand side of the Visual Studio, then you’ll see four parameters (which we’ll fill in when we deploy the virtual machine and then a list of variables where we can set the vmName, size etc.
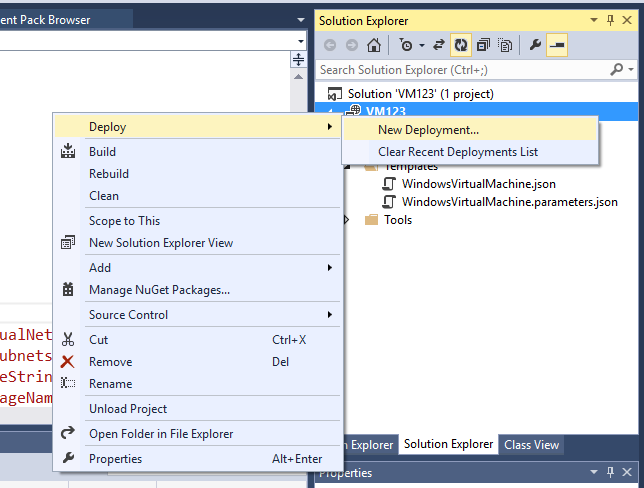
Then we need to right click on the project and create a new deployment.
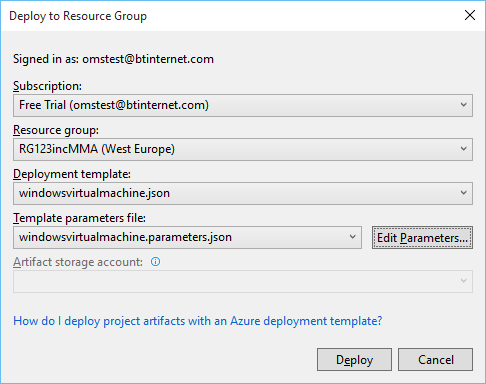
I’ve created a new Resource Group as below:
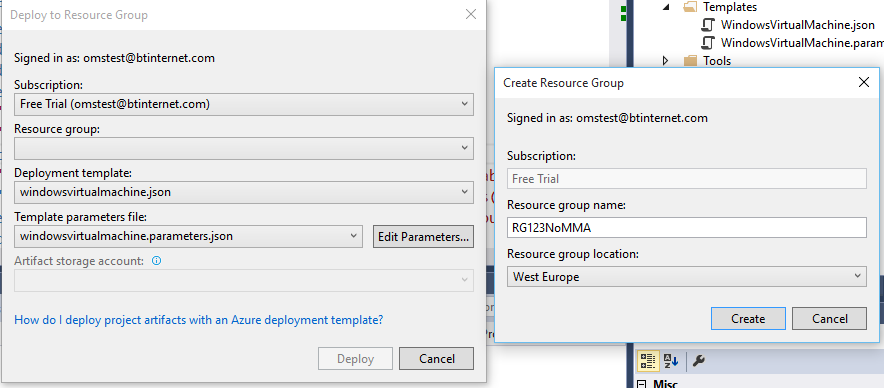
Then I need to click Edit Parameters to provide the parameter information
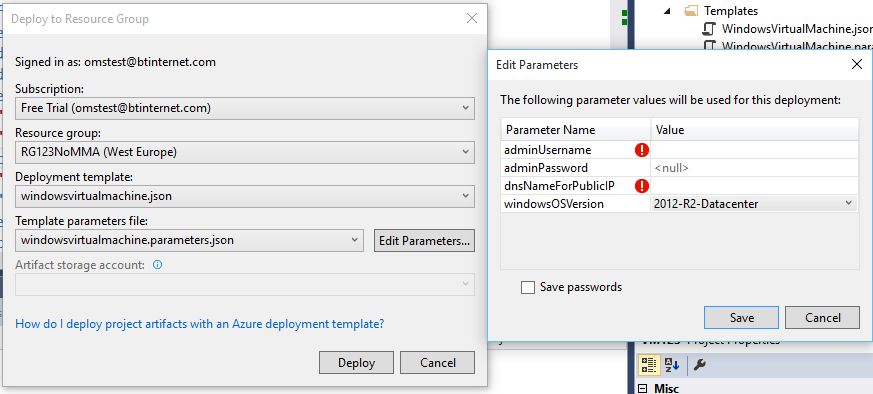
Once that is done, click deploy … and we’ll soon have ourselves a windows virtual machine as part of a resource group

But, we don’t have the Microsoft Monitoring Agent installed. We can’t (as of November 2015) enable the Microsoft Monitoring Agent in the Azure Preview Console for Resource Manager Virtual Machines which leaves us the options of retrospectively scripting a solution or, even better, enabling the Microsoft Monitoring Agent as part of the json template.
I’ve taken my inspiration from here but I couldn’t get this to work due to issues with the formatting and the location parameter
In the parameters section we need to add the following (which will allow us to state the name of the extension we are installing and the workspace id and key):
"vmExtensionMonitoringAgent": {
"type": "string",
"metadata": {
"description": "Monitoring Agent extension name"
}
},
"monitoringAgentWorkspaceID": {
"type": "string",
"metadata": {
"description": "Monitoring Agent Workspace ID extension name"
}
},
"monitoringAgentWorkspaceKey": {
"type": "securestring",
"metadata": {
"description": "Monitoring Agent Workspace Key extension name"
}
}
Then we need to add the following resources
{
"apiVersion": "2015-06-15",
"type": "Microsoft.Compute/virtualMachines/extensions",
"name": "[concat(variables('vmName'),'/', parameters('vmExtensionMonitoringAgent'))]",
"location": "[resourceGroup().location]",
"dependsOn": [
"[concat('Microsoft.Compute/virtualMachines/', variables('vmName'))]"
],
"properties": {
"publisher": "Microsoft.EnterpriseCloud.Monitoring",
"type": "MicrosoftMonitoringAgent",
"typeHandlerVersion": "1.0",
"settings": {
"workspaceId": "[parameters('monitoringAgentWorkspaceID')]"
},
"protectedSettings": {
"workspaceKey": "[parameters('monitoringAgentWorkspaceKey')]"
}
}
}
Or copy and paste the following to replace the existing code.
I have then updated the vmname and some other naming details.
I can now deploy the template, creating a new resource group – RG123WithMMA
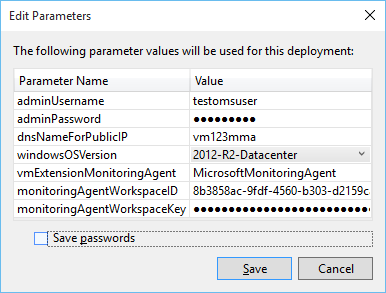
And now when I click on Edit Parameters, I can fill in my OMS details:
And then save and deploy.
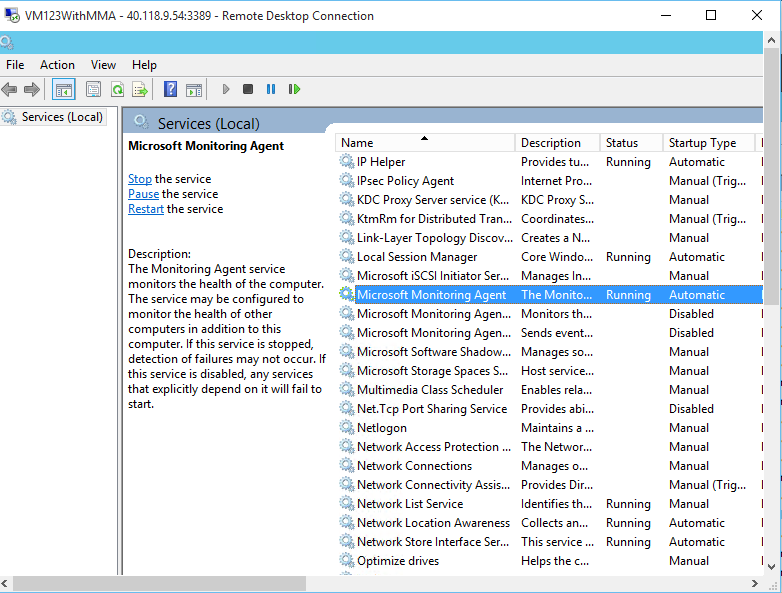
And when the virtual machine is deployed, you have the Microsoft Monitoring Agent installed and the virtual machine appearing in the OMS workspace.