Deploying Hyper-V Integration Services to VMs using Config Manager and DISM
Hi, my name is Leigh Simmonds and I'm part of the UK PFE System Center team working on Private Cloud projects covering technologies such as Hyper-V, SCVMM and Configuration Manager. Hyper-V Integration Services often need to be updated when a major update such as a Service Pack is applied at the Host level. This can be tricky in some environments, especially those that have complex infrastructures or are not yet using SCVMM. This blog post shows you how to update the Integration Services on your VMs using Config Manager and DISM. If you're using SCVMM, you can do this from the console, you can also update Integration Services by mounting the vmguest.iso on the individual VM, which can be useful in certain situations but isn't practical if you have more than a handful of VMs.
The Integration Services for VMM do not come in a nice little MSI file that we can push out to VMs as we would for any other app we wish to install (unless you are deploying WinXP or Server 2003 onto your VMs, as there is an MSI based version for XP/Server 2003, but I'm sure you've long since upgraded all your servers to Server 2012 and you've just finished your Windows 8 deployment so that's not going to be any use to you is it... ) as the Integration Services are deployed using a .cab file. We can however, apply a cab file to an operational OS using DISM.exe.
While I was testing this I came across a minor issue that will no doubt stump a few people, I was able to resolve it with a little help from my colleague Saud Al Mishari (Thanks Saud!). When you run DISM within the context of a Config Manager Package, if you try to call DISM directly by using this string, it fails:
Dism.exe /online /Add-package /packagepath:.\Windows6.x-HyperVIntegrationServices-x64.cab /quiet /norestart
It fails because Windows redirects the call to use the 32bit version of DISM, which is not going to work when you are deploying a 64bit version of the Integration Services and you’ll end up with an error that looks a bit like this:
“An attempt was made to load a program with an incorrect format”
To resolve this, you can force Windows to run the 64bit version of DISM (overriding the Windows File System Redirection) using the sysnative function within your path to DISM. Below is the command line I used to deploy the 64 bit version of the Integration Services to a Windows 2008 R2 VM via Config Manager:
%windir%\sysnative\dism.exe /online /Add-package /packagepath:.\Windows6.x-HyperVIntegrationServices-x64.cab /quiet /norestart
So now that you have your command line, all you need to do is create a Config Manager Package and associated Program, use the appropriate .cab file (see below) as the package source, update your DPs and you're good to go. Bear in mind that a reboot will be required so you should look to deploy the package in conjunction with a Maintenance Window or whenever you schedule in your VM reboots.
Identify the Integration Services version
Before you can start deploying using DISM, you'll need to ensure you use the correct version of the Integration Services for each Operating System version you have deployed to your VMs. To identify the versions, you can look in the Registry of the Hyper-V Host itself.
HKEY_LOCAL_MACHINE\SOFTWARE\Microsoft\WindowsNT\CurrentVersion\Virtualization\GuestInstaller\Version
The image below shows the version of the Integration Services for SCVMM 2012 SP1 with Update Rollup 2. Notice also that each version has a different installation package, it’s very important that you select the correct package for the appropriate OS. There are two separate install packages for the Microsoft-Hyper-V-Guest-Installer-Win6x-Package, one for Server 2008 and another for Server 2012. 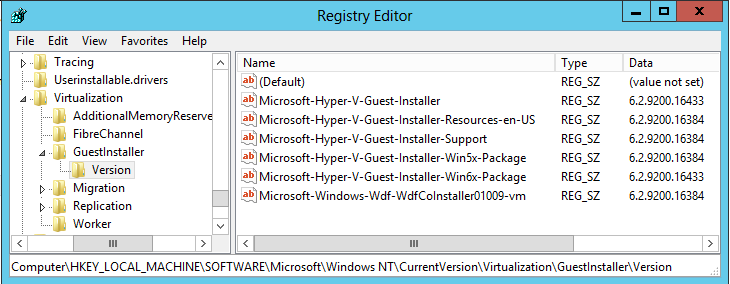
Microsoft-Hyper-V-Guest-Installer-Win5x-Package - Windows XP and Server 2003 should be at 6.2.9200.16384
Microsoft-Hyper-V-Guest-Installer-Win6x-Package - Windows 7/8 and Server 2008/2012 should be at 6.2.9200.16433
NB: Notice also that each version has a different installation package – Clearly it’s very important that you select the correct package for the appropriate OS
Locating the Integration Services install packages
The Hyper-V Integration Services installation packages are stored in a file called vmguest.iso which can be located on any Hyper-V Host in the C:\Windows\System32 directory. If you mount the iso you will see the files listed in the image below:
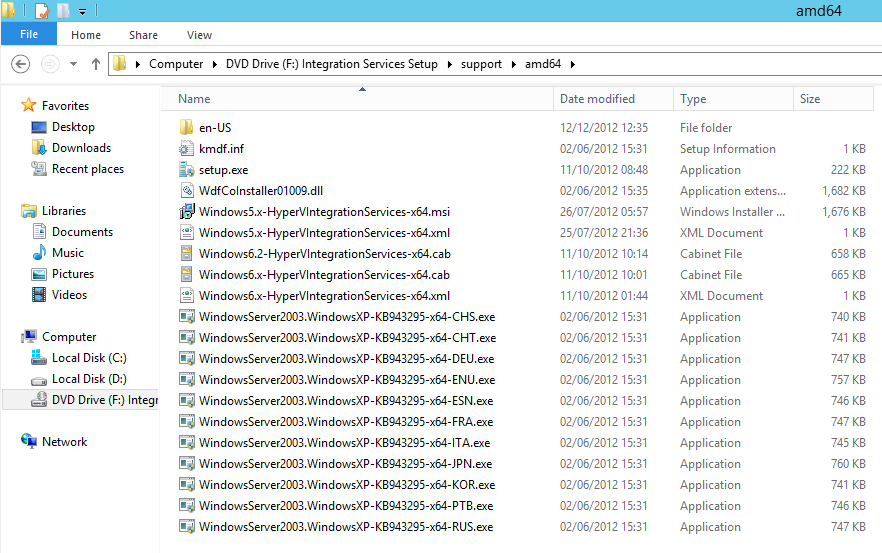
Use the following packages for the listed Operating Systems:
Windows5.xHyperVIntegrationServices-x64.cab forWindows XP and Server 2003
Windows6.xHyperVIntegrationServices-x64.cab for Windows 7, Windows Server 2008 and Server 2008 R2
Windows6.2HyperVIntegrationServices-x64.cab for Windows 8 and Server 2012
You can also see that there is an MSI install file for Server 2003 and Windows XP that can be used.
So now that you know which version of the package to use and the command line required to successfully install the updates, you can go ahead and create a package in Configuration Manager and deploy the Integration Services to multiple VMs.
I hope you find this Blog useful. If time permits, I'm hoping to create a few more Blogs on the topic of Integration Services so keep an eye on the Blog Page...
Leigh