Service Manager Dashboards in Power View - Part 1
This blog will walk through how to setup Power View for a Service Manager test environment.
We'll first look at setting up a SharePoint VM for Power View, then hooking it up and using all the Service Manager good stuff. My other blog at https://blogs.technet.com/b/manageabilityguys/archive/2013/08/13/service-manager-dashboards-in-power-view-part-2.aspx walks through configuring a dashboard, once Power View is setup.
If you already have Power View available on SharePoint, you can skip this and go straight to my blog at https://blogs.technet.com/b/manageabilityguys/archive/2013/08/13/service-manager-dashboards-in-power-view-part-2.aspx.
Configuring SharePoint 2013 for Power View
These steps are aimed at folks who are not SharePoint experts. If you're already familiar with SharePoint, you'll just need to ensure that you've got the ability to use Power View, and you have at least SQL Server 2012 SP1 CU4 installed. In this post, we're going to setup a test machine with all the features installed on a single VM.
This setup guide is for testing & demo purposes only – in your production environment, SharePoint should be designed appropriately, as per its documentation. Do not use this guide for production!!!!
If you want to deploy this to an existing SharePoint farm, I'd suggest you go to the real documentation at https://technet.microsoft.com/en-us/library/jj218795.aspx. That link is what has been used to write this setup guide.
Step 1 – Setup a VM
- Setup a new machine running Windows Server 2012
- Get it fully up to date with all the Windows Updates
- Join to your lab domain
Step 2 – Install SQL 2012 SP1
These steps assume you've got a Service Account to use here. For your lab, a domain account which is a local admin rights will suffice. It'll also need rights to the SCSM OLAP cubes. Review the SQL Server 2012 documentation for more detailed service account information.
- Mount the SQL Server 2012 SP1 media on your server. Make sure you've got the slipstreamed SP1 media.
- Start setup.exe
- Launch a new stand-alone installation of SQL Server
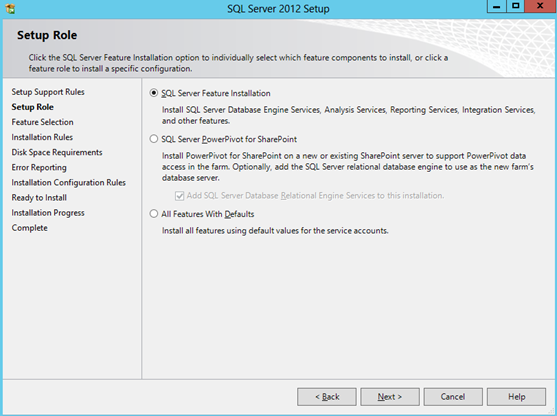
- Go through setup until you get to "Setup Role".
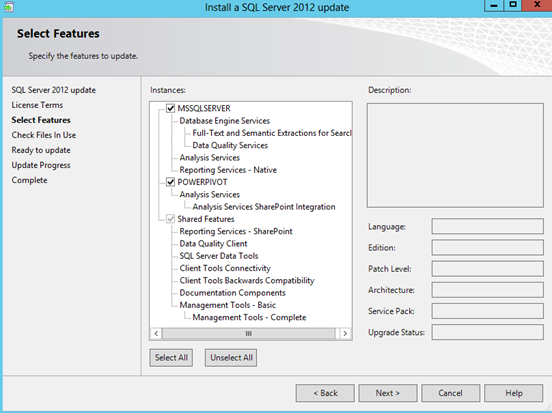
- Select "SQL Server Feature Installation":
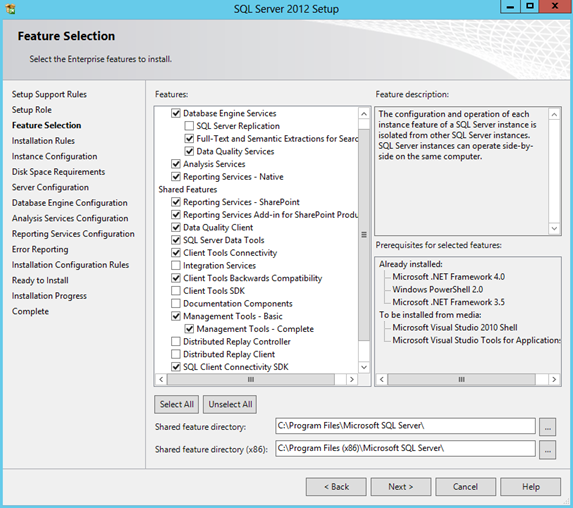
- Select the features as per the picture:
Continue through setup, setting your accounts appropriately & leaving default settings.
At "Analysis Services Configuration", select "Multidimensional and data mining mode"
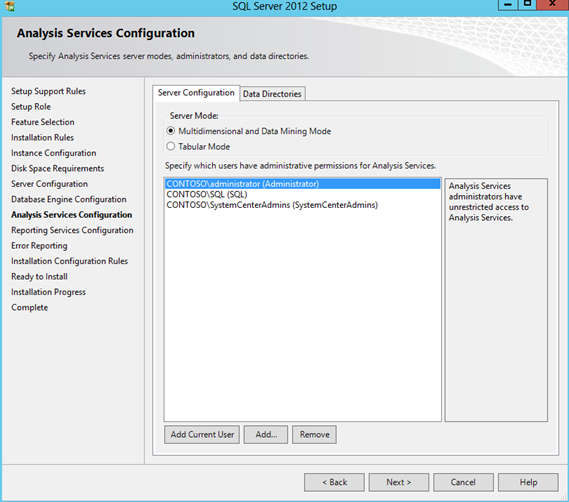
- Leave everything else at default, continuing through the wizard & complete to setup.
Step 3 – Enable SQL Agent
- Open Services (Administrative Tools > Services)
- Find "SQL Server Agent (MSSQLSERVER)"
- Right click > Properties
- Set the service to Automatic
- Start the Service
Step 4 – Install SharePoint 2013 Prerequisites
- Mount the SharePoint 2013 install media on your VM
- From the splash screen, run "Install software prerequisites"
- It might need a couple of restarts whilst going through. Make sure it finishes successfully.
Step 5 – Issue a Certificate
Ideally, we want to run the SharePoint site over SSL. If you have a CA online in your domain, you can follow these steps, if not, you can run the site under HTTP. I strongly recommend you do this, otherwise SharePoint will display warnings regarding account usage.
- Open IIS
- From the Server, select "Server Certificates"
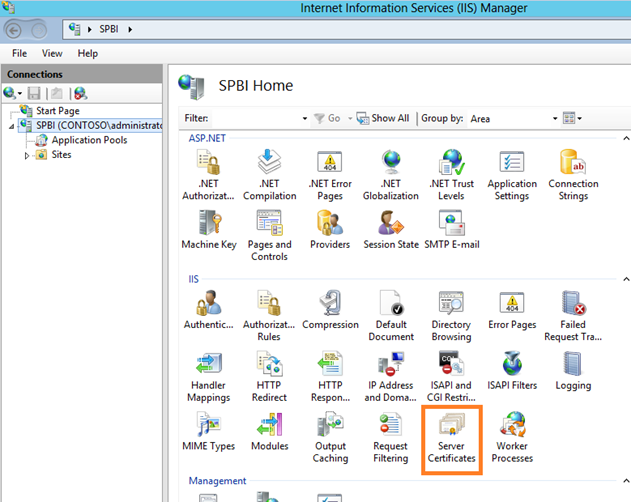
- Click "Create Domain Certificate"
- Fill the wizard, specifying the Common Name & Friendly Name as your computer name.
Step 6 – Install SharePoint 2013
Run the SharePoint 2013 Installer
During setup, select Server Type "Complete – Use for production environments"
Let the install complete
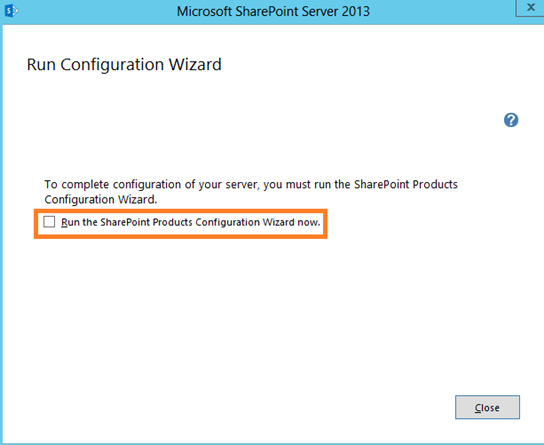
Once complete, un-tick "Run the SharePoint Products Configuration Wizard now"
Step 7 – Install SQL Server PowerPivot for SharePoint
Mount the SQL Server 2012 SP1 install media again
Run setup for "New SQL Server stand-alone installation…"
For Installation Type, select "Perform a new installation of SQL Server 2012"
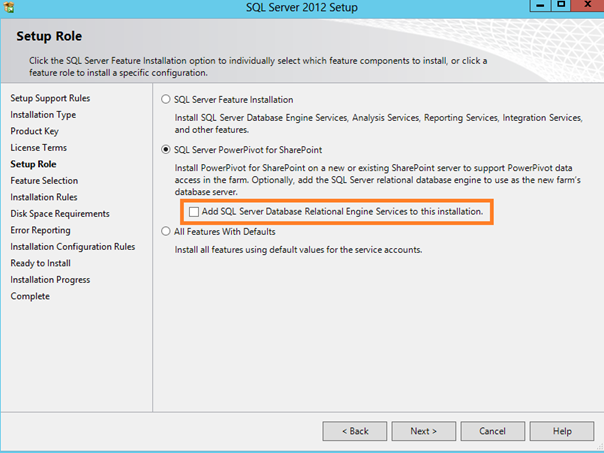
Select "SQL Server PowerPivot for SharePoint"
Un-tick "Add SQL Server Database Relational Engine Services to this installation"
- Complete the wizard, leaving all settings at default. You'll just need to add in your service account.
Step 8 – Run PowerPivot for SharePoint 2013 Configuration
- From your start menu, launch "PowerPivot for SharePoint 2012 Configuration"
- Click OK in the "PowerPivot configuration Tool" window
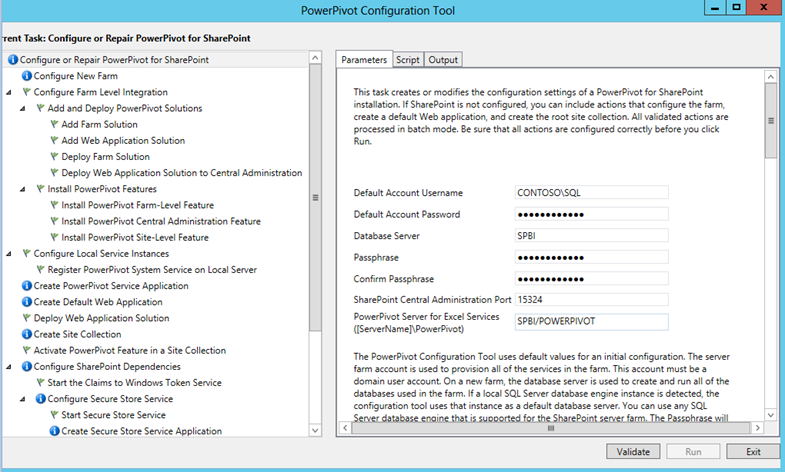
- Once loaded, complete the information on the right (as pictured below)
- For the PowerPivot Server for Excel, it's the role installed in step 6. If you used the default settings, it's computername\POWERPIVOT:
- For example purposes, my computer name is SPBI and my Service Account is CONTOSO\SQL
- Once filled, click Validate. If this returns successful, click Run.
- Give this a while to complete running.
Step 9 – Upgrade SQL Server to latest Cumulative Update
- Download the most recent Cumulative Update for your SQL Server
- At the time of writing, this was CU5 for SQL Server 2012 SP1 from https://support.microsoft.com/kb/2861107.
- Install Cumulative Update on the VM. Make sure you update all features:
- A restart may be required
Step 10 – Configure SharePoint Administration Services
- From the start menu, open "SharePoint 2013 Central Administration"
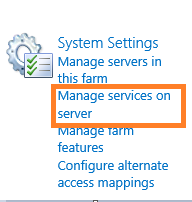
- Click "Manage Services on server"

- Click 'Start' for "Business Data Connectivity Service"
- Click 'Start' for "PerformancePoint Service"
Step 11 – Configure the SharePoint site
- Go to the SharePoint site (not Central Administration)
- This should be at https://computername/ E.g. mine is https://spbi/
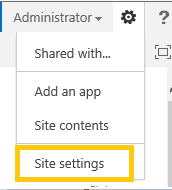
From your site, click the cog in the top right > Site Settings
- Under the header 'Site Collection Administration' click "Site Collection Features"
- Click the "Activate" Button for the following features (some may already be Active):
- PerformancePoint Services Site Collection Features
- Power View Integration Feature
- PowerPivot Feature Integration for Site Collection
- SharePoint Server Enterprise Site Collection features
Click back on the cog in the top right > Site Settings
- Under 'Site Actions' click "Manage site features"
- Click the "Activate" Button for the following features:
- BICenter Data Connections Feature
- PerformancePoint Services Site Features
- SharePoint Enterprise Site features
Step 12 – Enable SQL Reporting in SharePoint
- From the Start Screen launch "SharePoint 2013 Management Shell"
- Run the following 2 commands. Don't worry, they don't return any output if run successfully:
- Install-SPRSService
- Install-SPRSServiceProxy

We now need to enable these services via SharePoint Central Admin
- From the start menu, open "SharePoint 2013 Central Administration"
- Click "Manage Services on server"
- Click 'Start' for "SQL Server Reporting Services Service"
Next, go back to the Central Administration home page
- Under heading 'Application Management', click "Manage service applications"
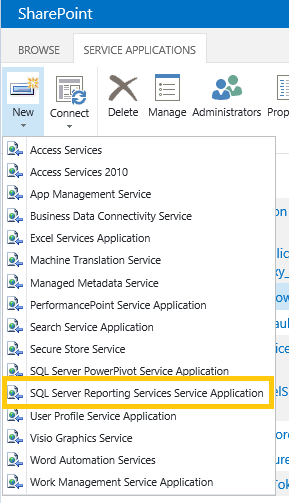
- Click the down arrow under 'New'
- Click "SQL Server Reporting Services Service Application"
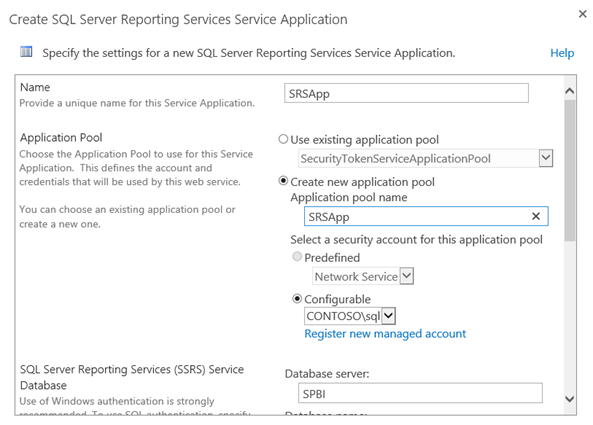
- In the open window, enter a Name and Application Pool Name. In this example, I entered SRSApp for both:
- Scroll down and next to 'Web Application Association' tick your SharePoint site:

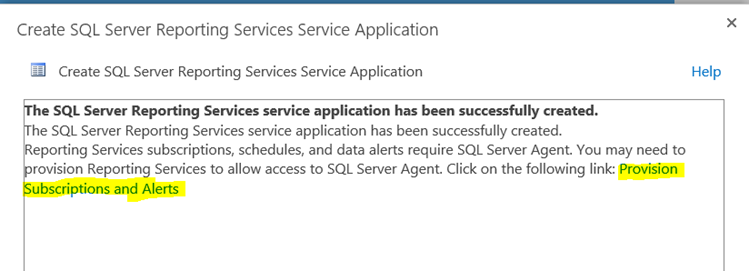
- Click OK & wait for this to complete
- Once complete, click the link "Provision Subscriptions and Alerts"
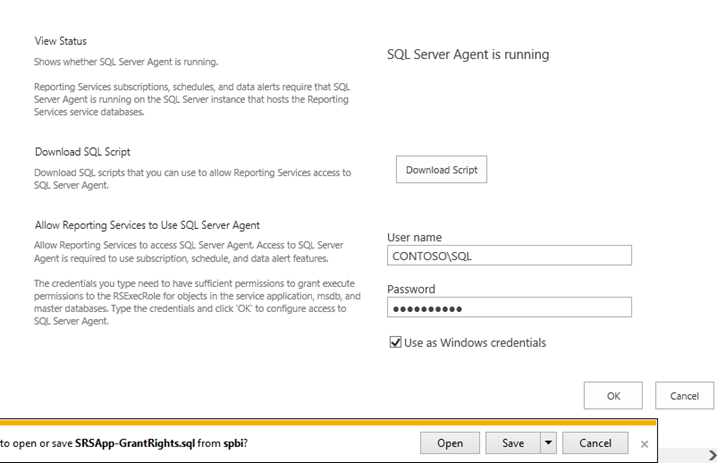
- Make sure the SQL Server Agent is running (see previous steps if not)
- Click the 'Download Script' button & save the SRSApp-Grantrights.sql file
- Enter your Service account & tick 'Use as Windows credentials'
- Click OK to complete
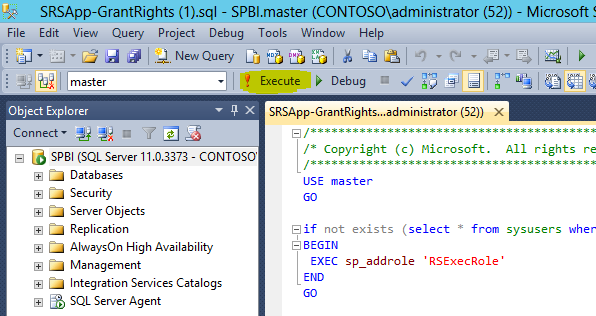
Step 13 – Run SQL Script to grant rights
- Double click the .SQL file you downloaded in the previous step
- This will open SQL Management Studio
- Click 'Execute'
- This should output 'Command(s) completed successfully'
Step 14 – Enable SSL on your site
- From the start screen, open SharePoint 2013 Central Administration
- Under 'Application Management' click "Manage web applications"
- Click on "SharePoint – 80"
- From the top, click "Extend"
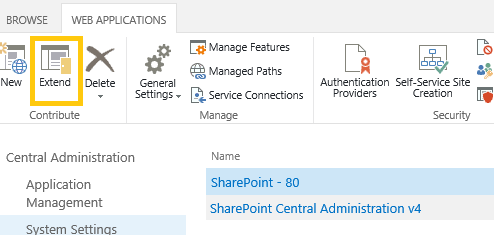
- Make a note of the port number which the site will be on. E.g. 44619
- Under 'Use Secure Sockets Layer (SSL)' select Yes
- Click OK to complete
Next, we need to bind that new extension site to the correct certificate:
- Open up IIS & locate the new site, with the port you noted above:
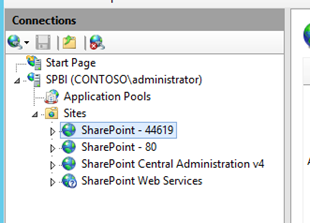
- Right click the site > Edit Bindings
- Click on the https line & click edit
- From the 'SSL Certificate' drop-down, select the certificate you made earlier
- Click OK & close IIS
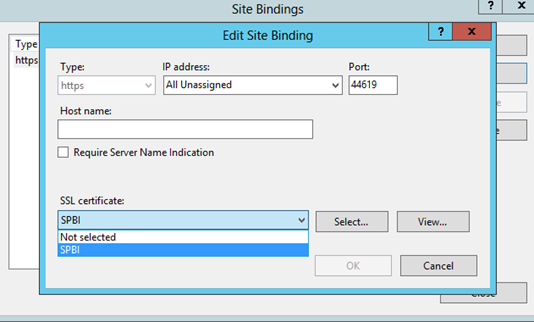
- You should now be able to access your site via HTTPS, using the port above. E.g. HTTPS://COMPUTERNAME:PORTNUMBER/ for example, mine is HTTPS://SPBI:44619/
Step 15 – Enable Power view in your Library
- Go to your SharePoint site using the HTTPS link
- Click 'Documents' on the left side
- Click the Library tab at the top of the page, then select "Library Settings"

- Click "Advanced Settings"
- Change 'Allow management of content types?' to Yes
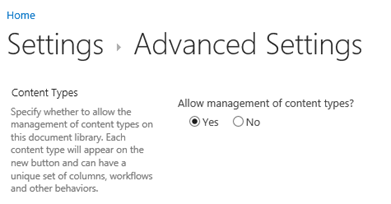
- Click OK.
- Now under 'Content Types', click "Add from existing site content types"
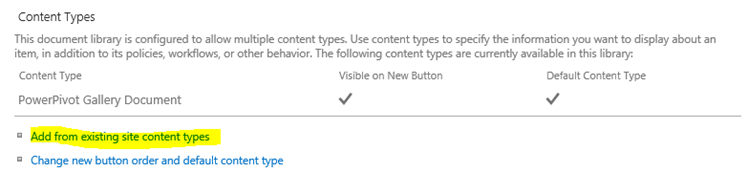
- From the list box, select "Report Data Source" and click 'Add >'
- Also select "BI Semantic Model Connection' and click 'Add >'
- Click OK
Step 16 – Add your Service Manager DW data source
- Go back to the homepage of your SharePoint site
- Click on Documents on the left side
- From the ribbon at the top, click FILES
- Click the down arrow under 'New Document'
- Click "Report Data Source"

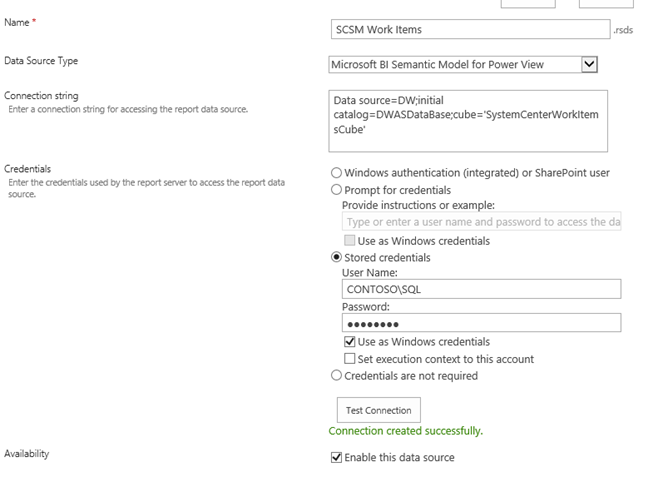
- In the Data Source Properties Page, fill the following:
- Name – I've named mine: SCSM Work Items
- Data Source Type: Microsoft BI Semantic Model for Power View
- Connection String. I've included an example below. You'll have to update this to point at the Server hosting your OLAP Cubes for Service Manager (here, mine is called DW). You'll also have to alter it, if you have given your OLAP Cube DB a different name from default (DWASDataBase)
- Data source=DW;initial catalog=DWASDataBase;cube='SystemCenterWorkItemsCube'
- For Credentials, I've used 'Stored Credentials' & specified my Service Account, which I know has permissions on the OLAP cube.
- Tick 'Use as Windows credentials'
- Click 'Test Connection' & Click OK
Step 17 – Creating a Power View Report!
- On your SharePoint site, go to Documents
- Your Report Data Source should be listed
- Click the ellipsis "…" next to the data source
- Click the ellipsis next to 'FOLLOW' in the pop-up
- Click "Create Power View Report"
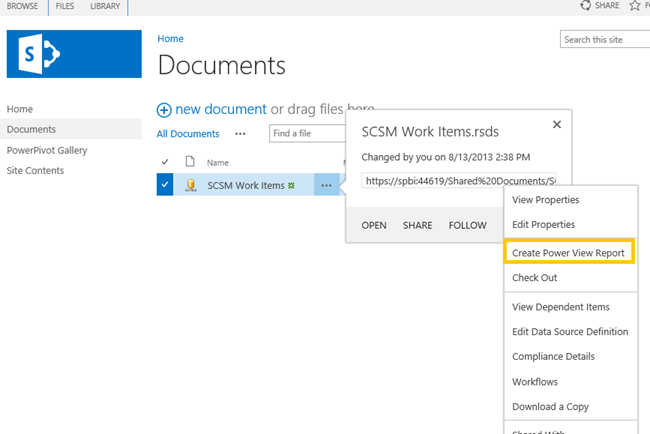
- This will now load up the Power View editor in Internet Explorer
- My other blog post talks through building the dashboard!
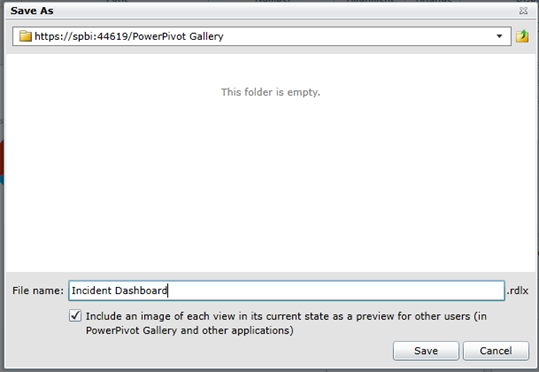
- Once you've built your dashboard, click the Save icon in the top Left
- In the 'Save As' Window, use the browser to locate your PowerPivot Gallery
- Name your report & click Save
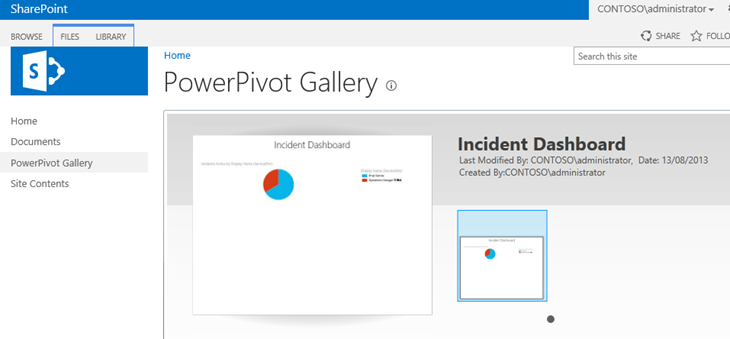
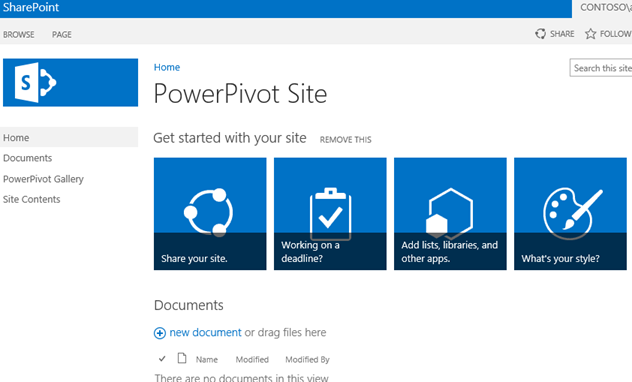
Now, go back to your SharePoint site
Click on 'PowerPivot Gallery' on the left
You can now see your dashboards listed as a beautiful SharePoint gallery!