Excel Add-in for Azure ML
This blog post is authored by Ted Way, Program Manager in the Information Management & Machine Learning group at Microsoft.
Today we are making available a free Excel add-in that you can use with web services published from Azure Machine Learning. You can use this add-in for request/response predictions or batch predictions, work in Windows or the browser, share workbooks with your co-workers, and call multiple web services all within a single spreadsheet.
Get started by clicking here for the sample Excel workbook or downloading the add-in directly from the Office Store. You may use the add-in directly in the browser using Excel Online or opening the file in Excel 2013 or later on Windows. Copy the file to your own OneDrive account if you want to edit it.
This workbook contains sample tweets from the Sentiment140 data set (although “I love machine learning!!!” was added by me). You could copy and paste in tweets about yourself, a topic you’re interested in, or any other text (not just tweets) you want. A web service that predicts sentiment has already been added to the workbook.
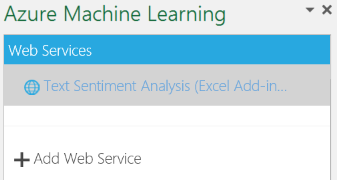
In Excel Online, click “Start” to enable the add-in. Click on the “Text Sentiment Analysis (Excel Add-in) [Score]” web service.
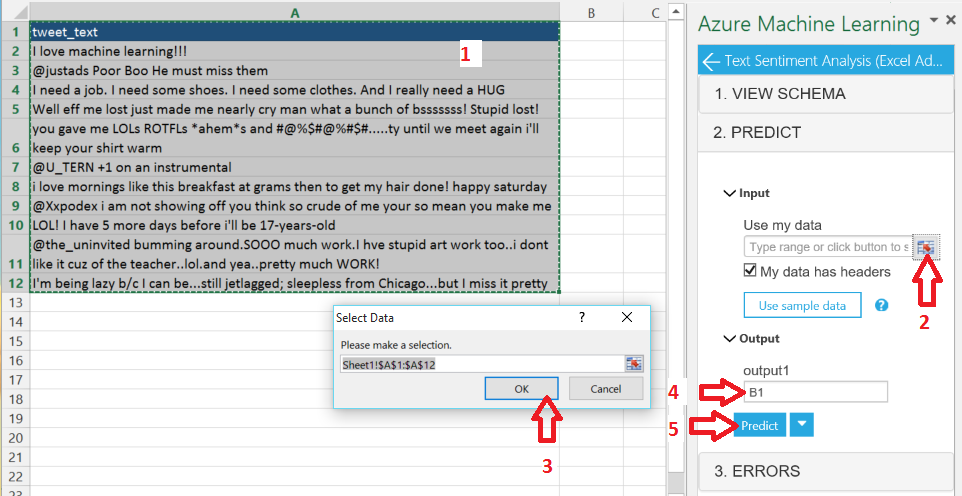
To see the sentiment of these sample tweets:
Highlight cells A1 to A12
Click the range selector button (the selection Sheet1!$A$1:$A:$12 should automatically be populated)
Click OK in the Select Data dialog box
Type “B1” in the output1 text box
Click the Predict button
This web service takes some time to process the text, so please be patient and wait for a minute. When it’s done, you should see the sentiment predictions and scores in columns B and C.
Adding Your Own Web Service
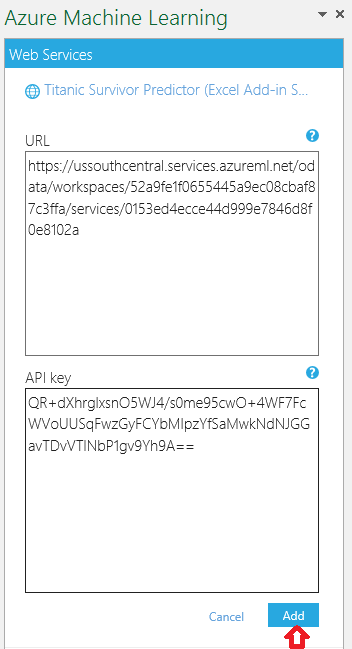
If you have your own Azure ML web service, you can easily add it with the URL and API key (found on the web service dashboard). This help article has more details. Select the web service and click “Insert sample data.” Now you can add in your data and select the first cell where you want your output to be. Click “Predict” and you should see your results. Multiple web services can be added to the workbook.
Batch Execution
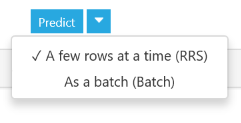
If you want to try your batch execution web service before running it in production, you can do that in Excel. Perform the same steps as above, except click the dropdown arrow next to the Predict button and select “As a batch (Batch).” Use our free default storage and click “Predict (as batch)” or uncheck the box and add your own Azure storage account.
Your data will need to be in Excel and the output will be in Excel, but the end-to-end flow will be validated. We will add support for other storage options in the future.
Sharing Your Workbook
You are now ready to create Excel workbooks that have your web services included in them. When you add a web service, it is saved in the Excel file. Anybody with the Excel file will have access to the web service. This makes it easy for you to send anybody the file so that they can use web services you’ve created.
Why This Matters
Excel users are great at hindsight: doing descriptive analytics and perhaps diagnostic analytics to understand what happened, and why it happened. Machine learning applied correctly enables them to gain insight by doing predictive analytics (what will happen), which ultimately leads to foresight with prescriptive analytics[1]. This is the power of Excel and Azure Machine Learning together.
For more details, check out our help article, ask your question below, or start a conversation on the Azure ML forum.
Ted Way
@tedwinway
[1] Credit goes to Gartner for this framework