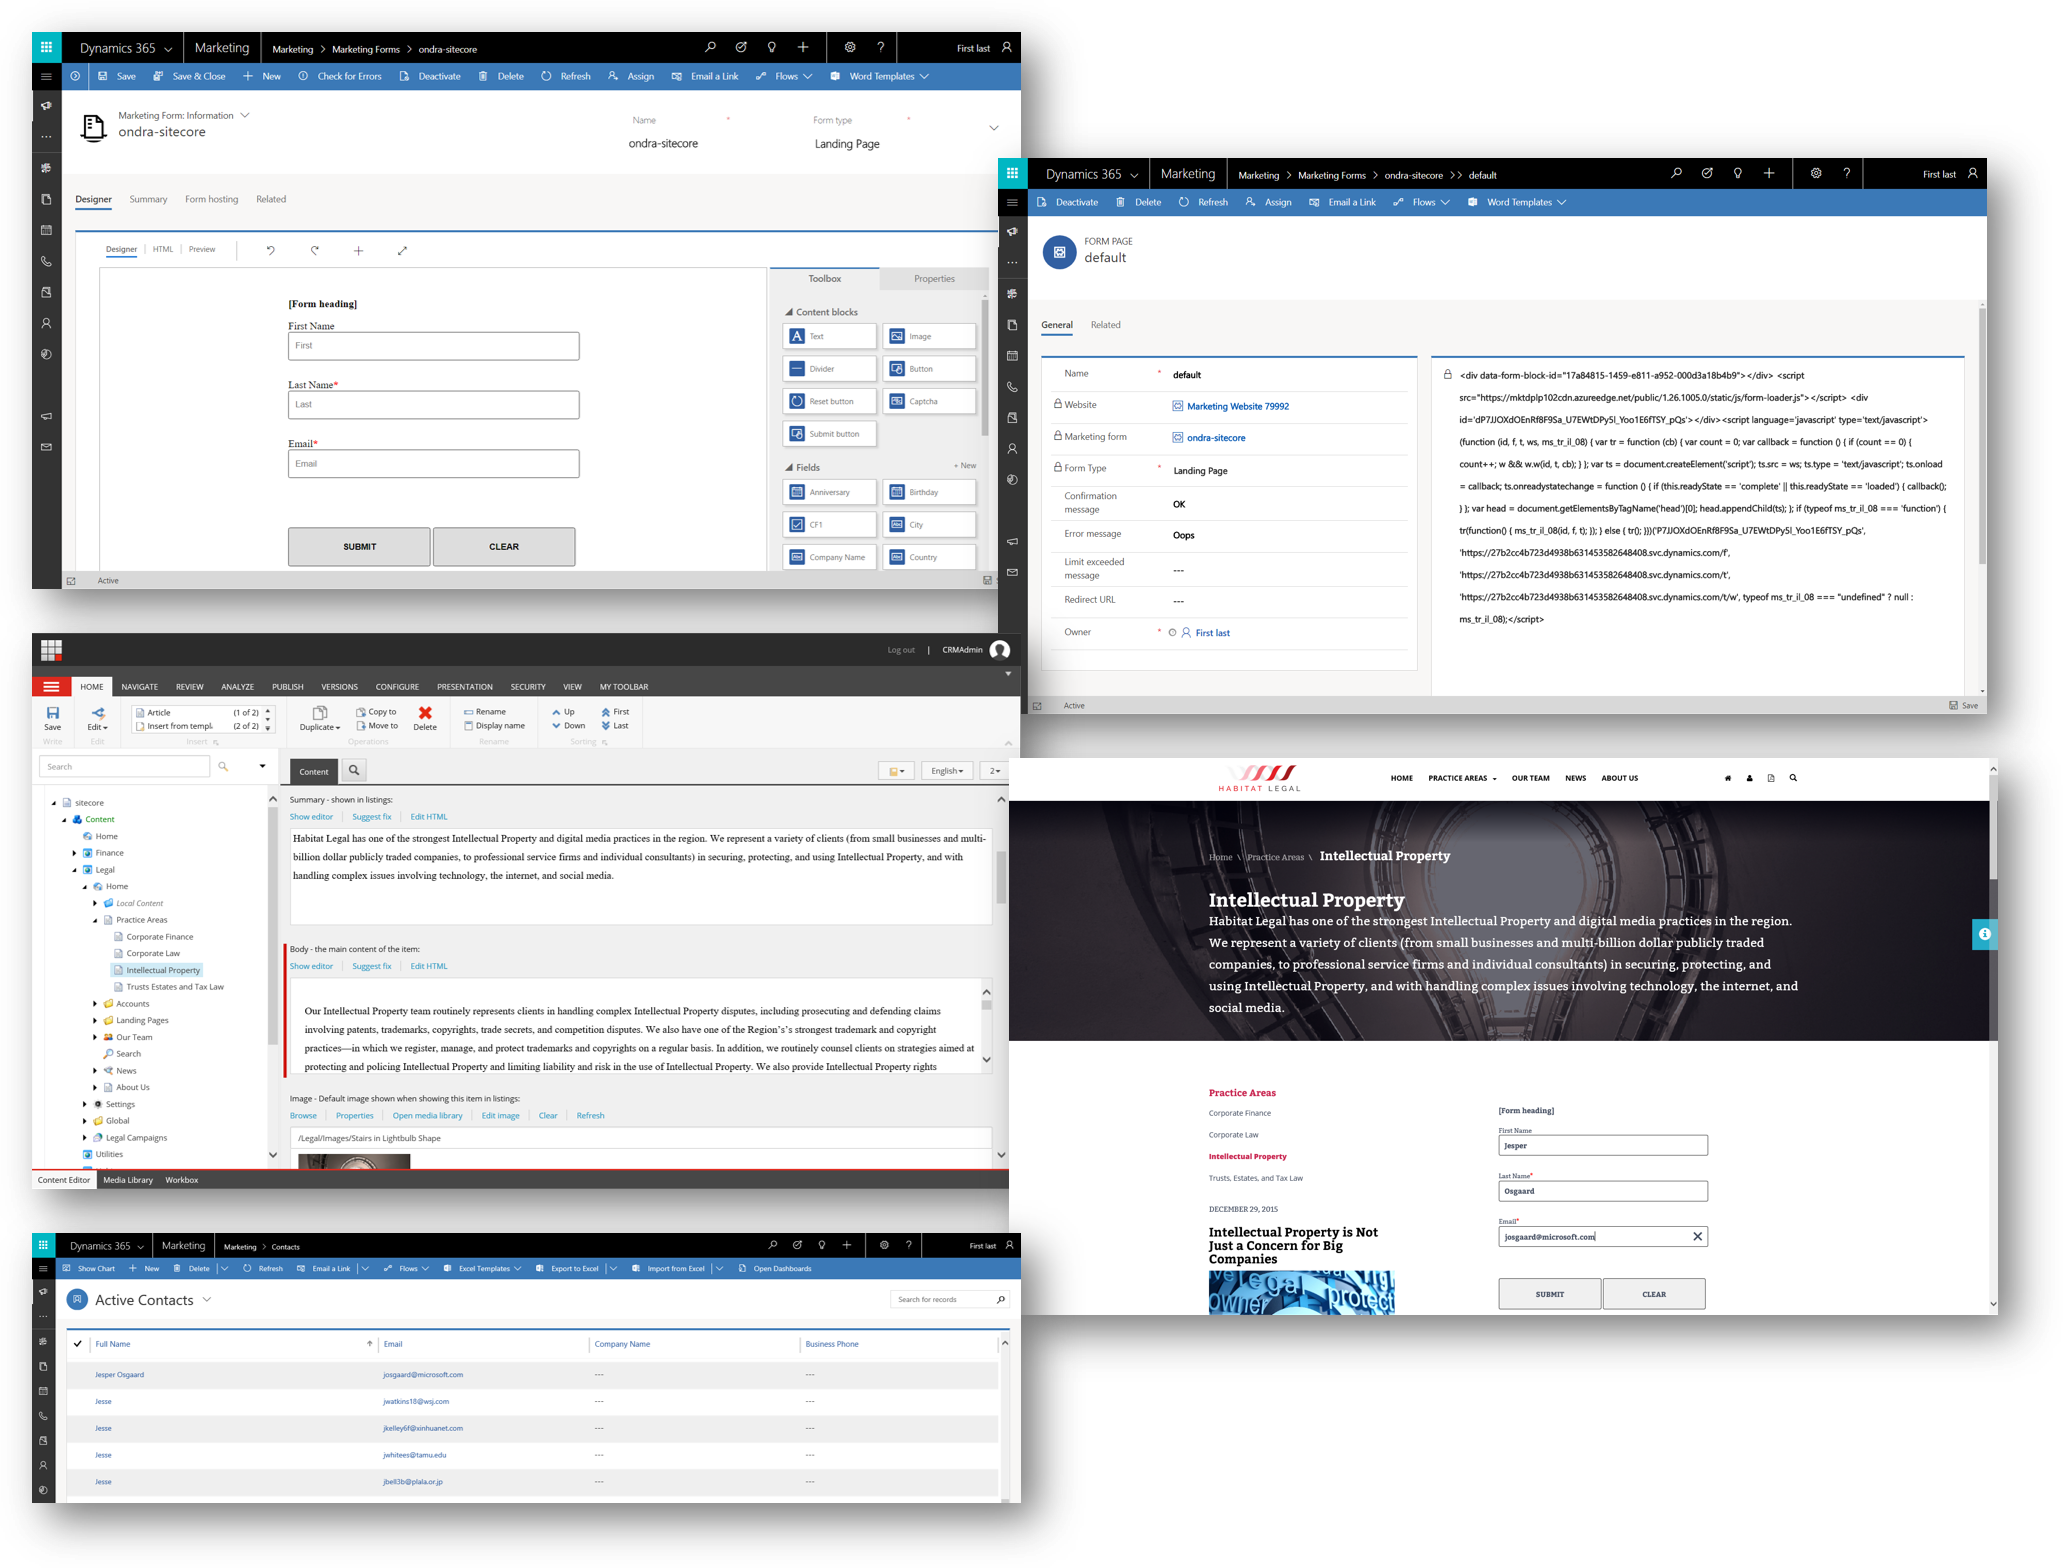
How to embed Dynamics 365 for Marketing Forms on your own website
Dynamics 365 for Marketing provides a complete solution for designing, publishing and hosting your Marketing Pages
Out of the Box Dynamics 365 for Marketing Marketing Pages and Marketing Forms are hosted on your CRM Portal included with the Dynamics 365 for Marketing app, but you can also embed your Dynamics 365 for Marketing Forms on your own website using your usual web publishing tools.
Dynamics 365 for Marketing Forms that you publish this way will generate Contacts and/or Leads in your Dynamics 365 database when submitted just as if they were hosted on the included CRM Portal.
Steps to take
- Build a form
- Generate and copy the embed code for the form
- Embed code snippet in website
Create a form
In Dynamics 365 for Marketing, navigate to Internet Marketing -> Marketing Forms
Create a new form and add the required fields to it as usual, give it a name (1), and Save it (2)
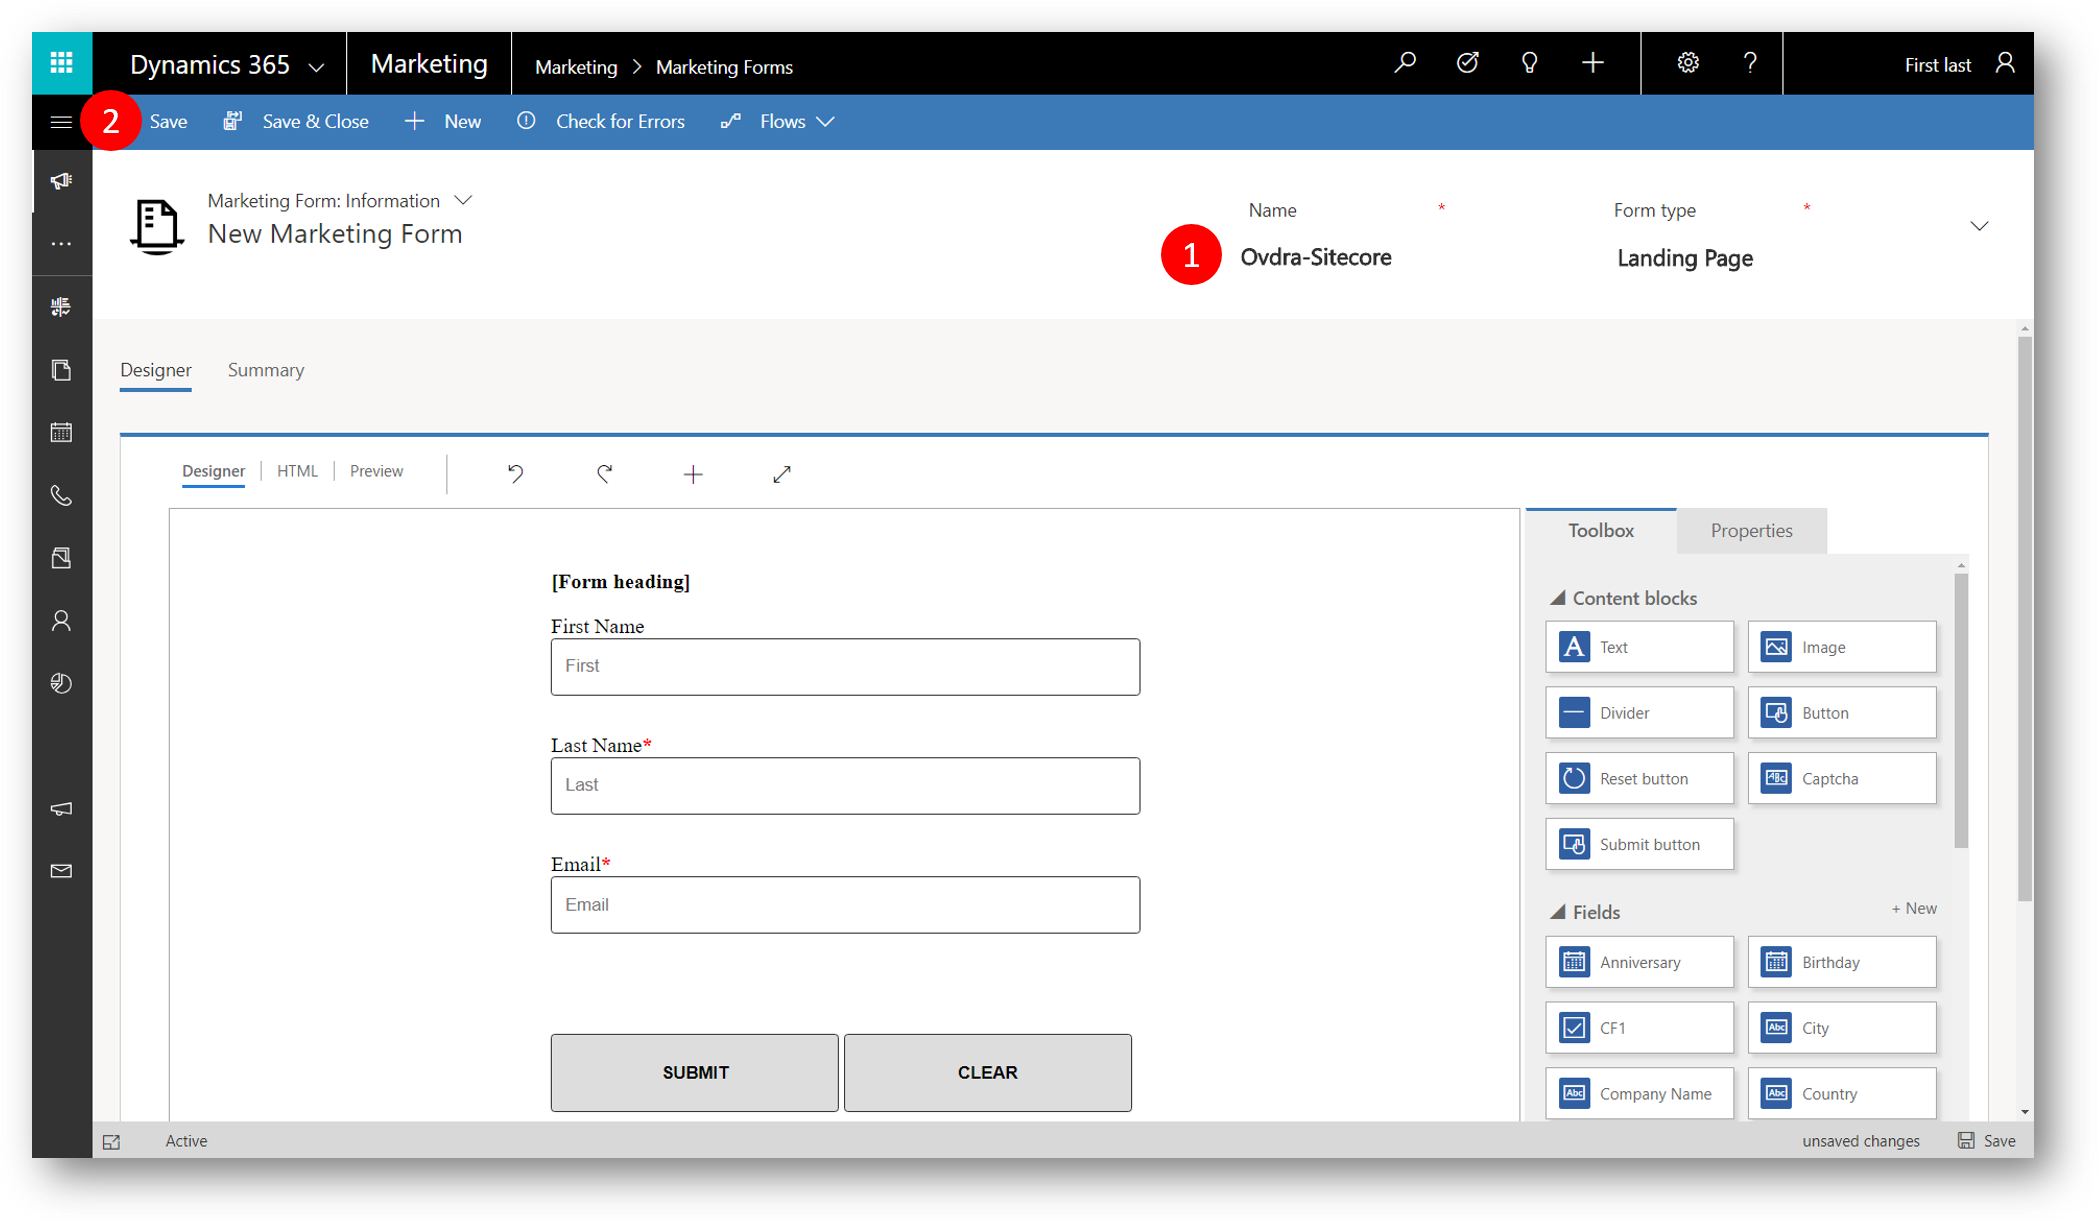
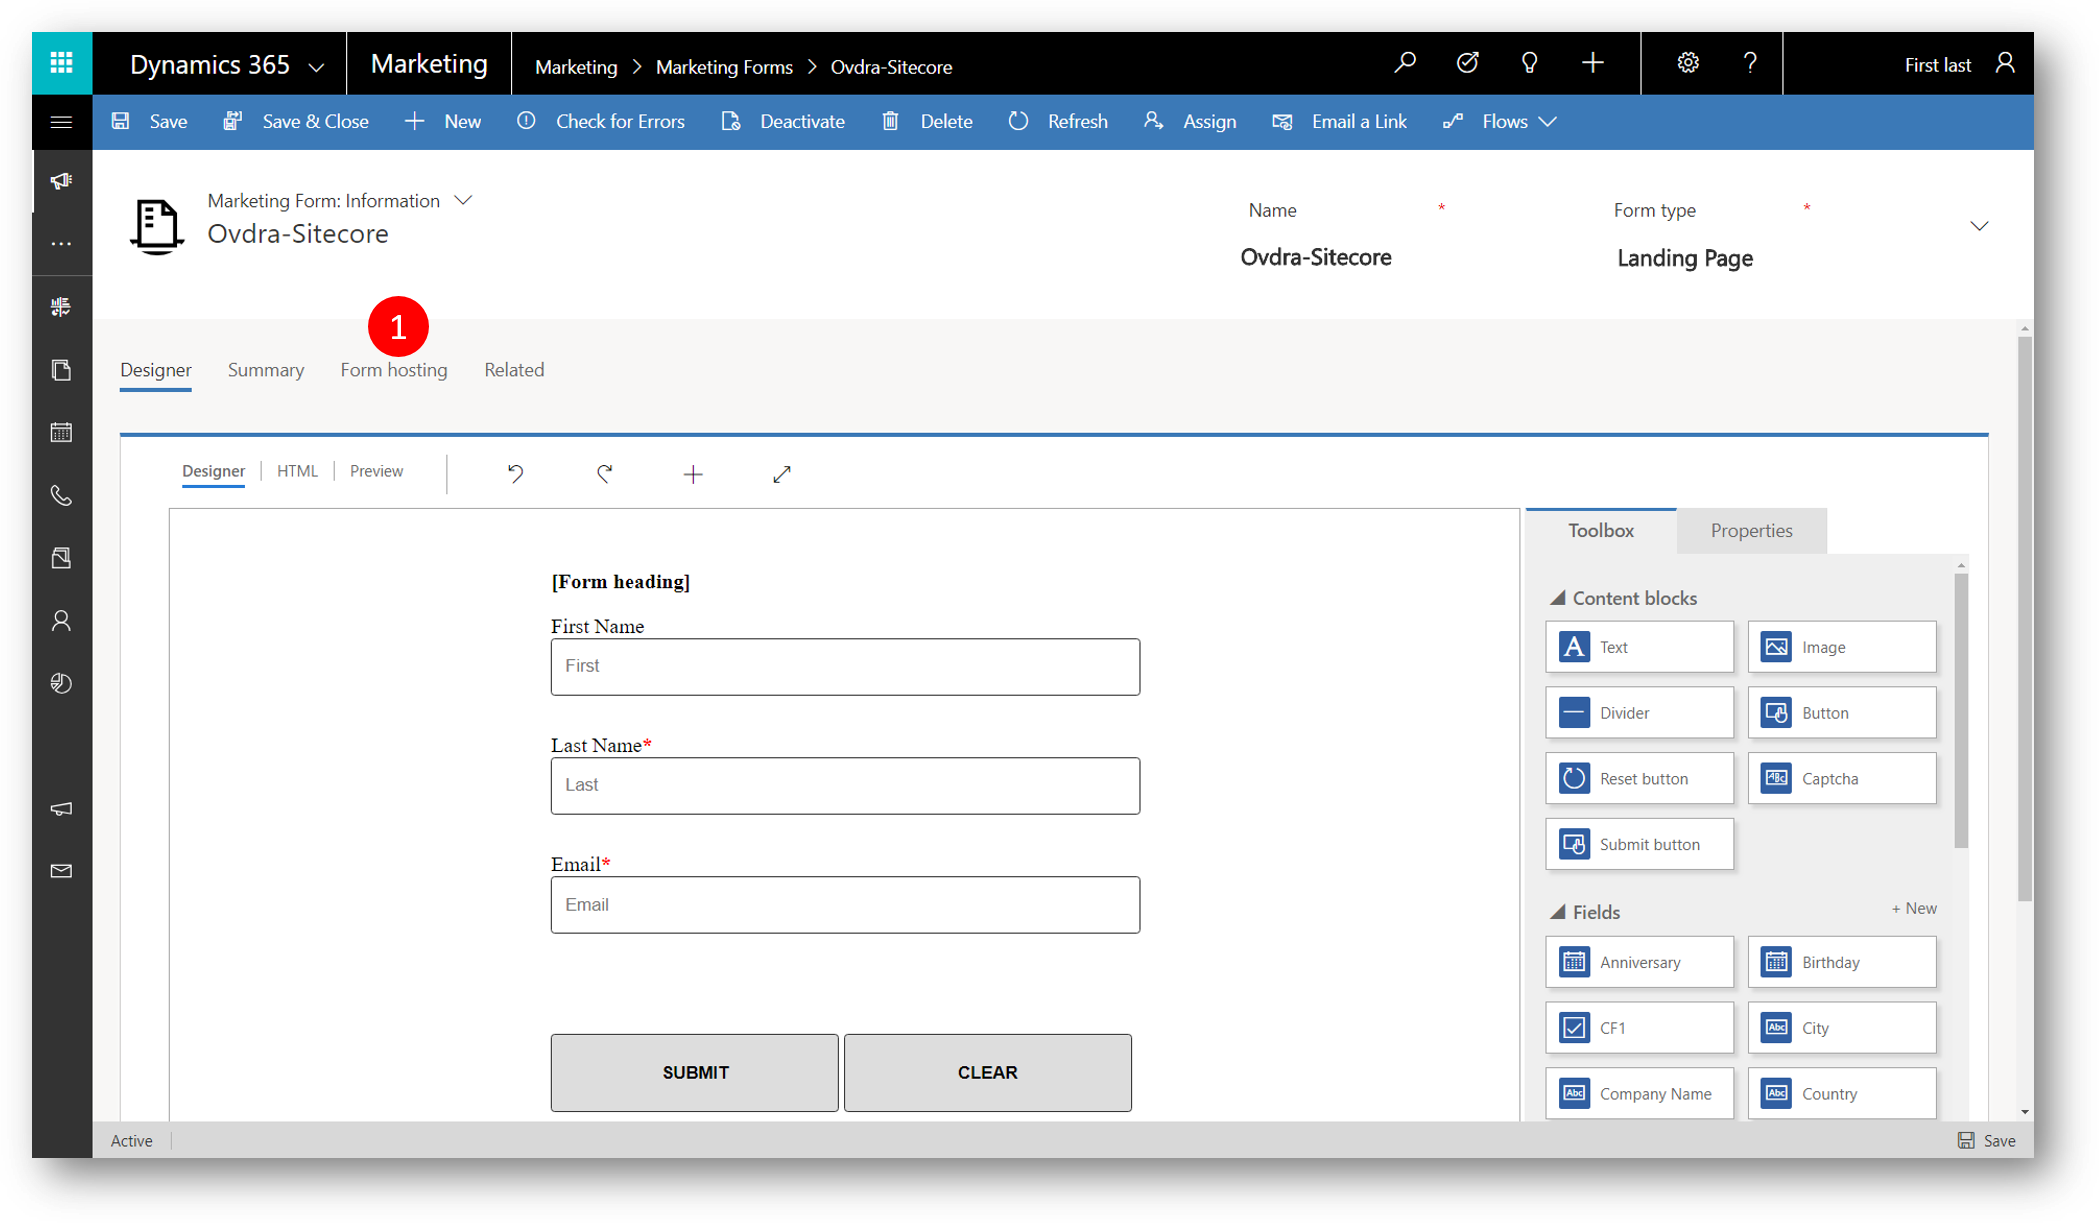
After the form is saved we have a new tab, Form hosting.
Generate and copy the embed code for the form
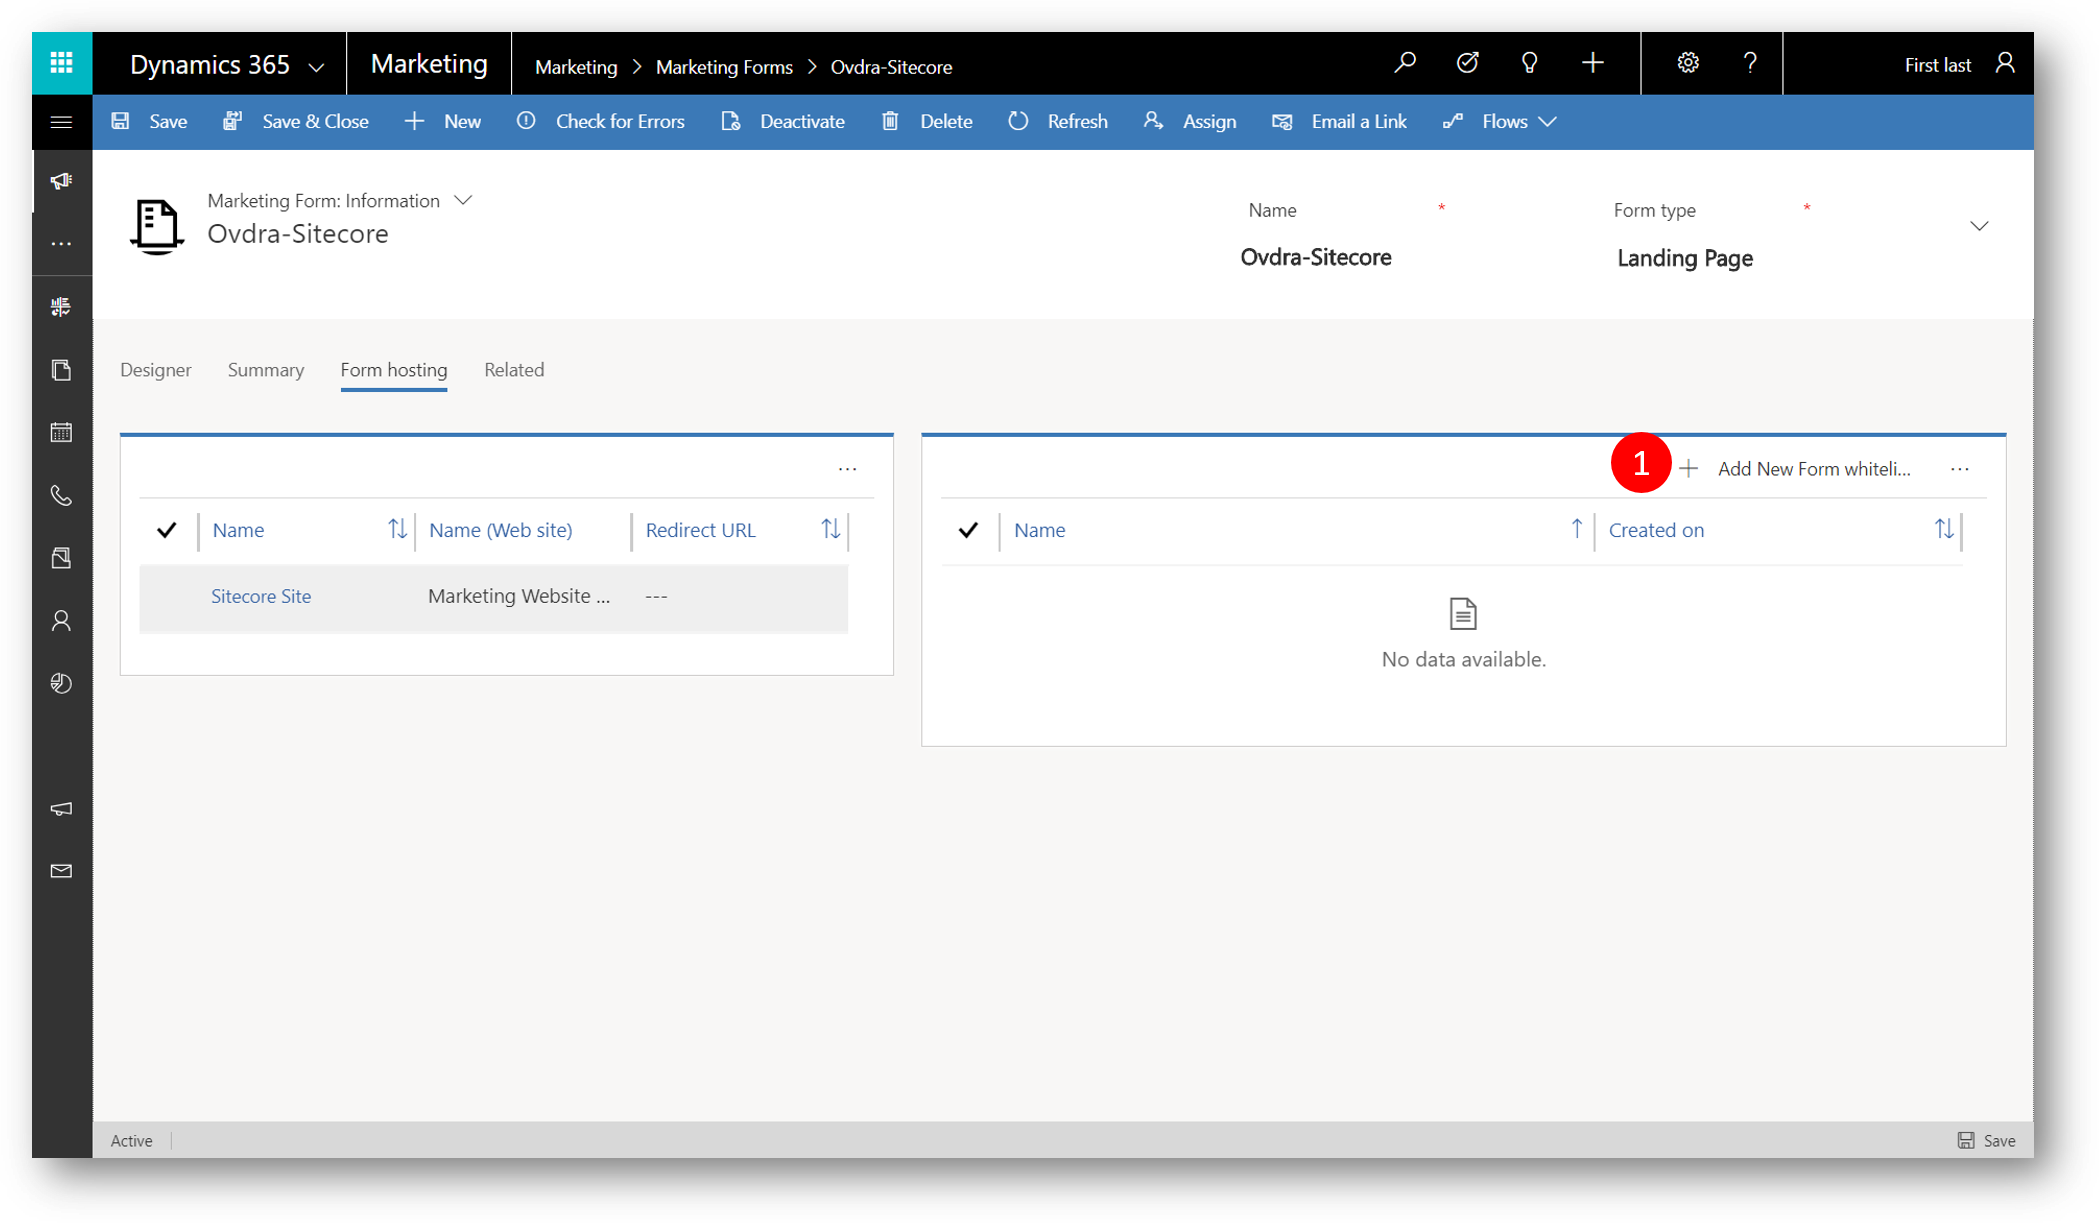
Navigate to the Form hosting tab (1)
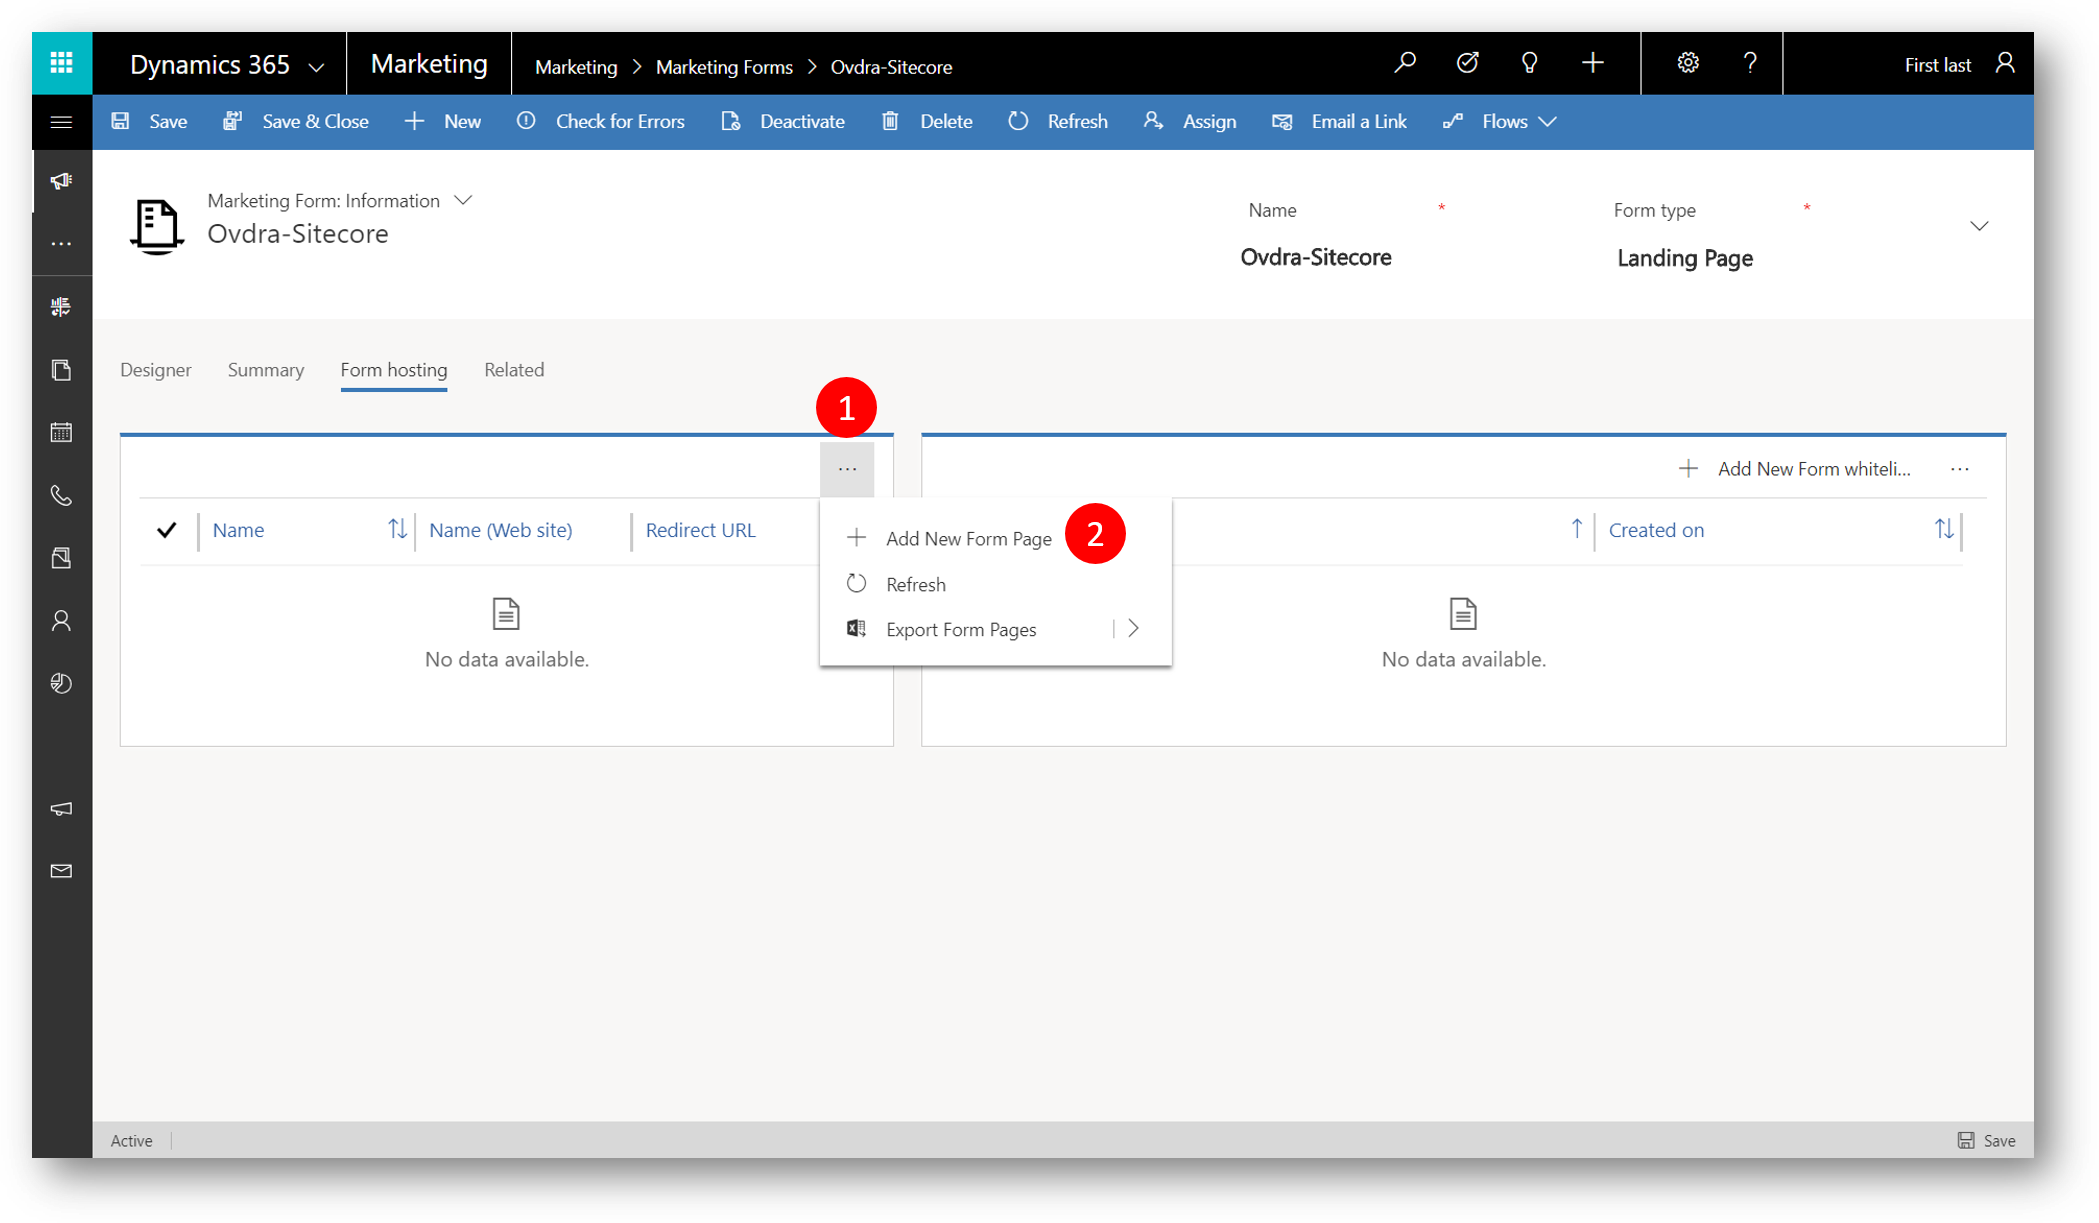
On the Form hosting tab you'll find two grids. The left grid is for adding form pages. A form page is virtual page where you can make a few extra configuration settings for forms that will be embedded externally. For this example we'll simply create a page, and name it.
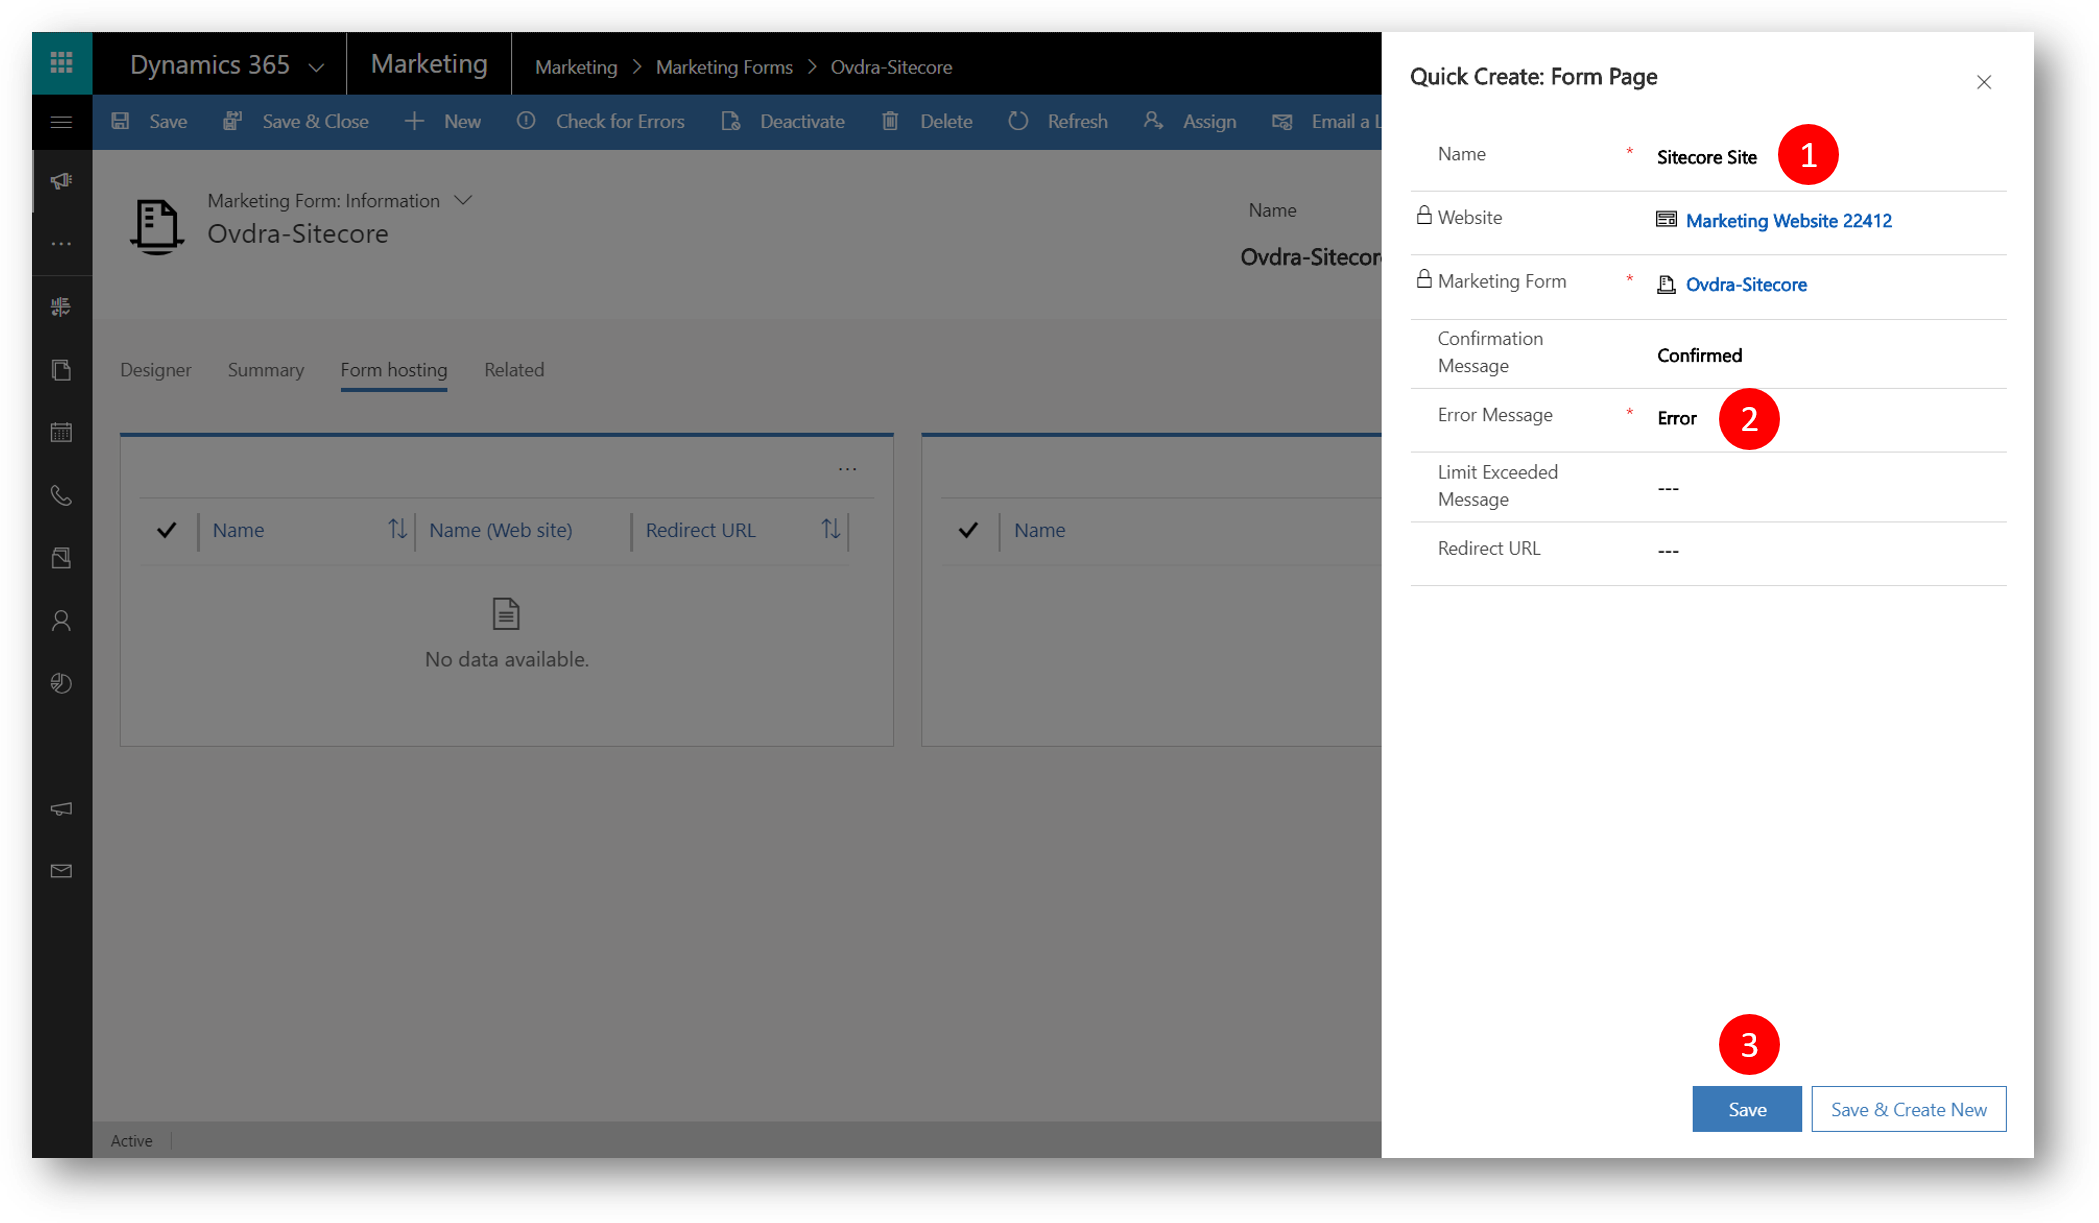
In the left grid on the Form hosting tab, click the More ( … ) menu (1) and then click + Add New Form Page (2) to open the Quick Create: Form Page pane
On the Quick Create: Form Page task pane type a (any) Name, eg "Sitecore Site", type a required Error Message (2), and then click Save (3) to return to the Form hosting tab
In the right grid on the Form hosting tab, click the + Add New Form whitelist rule (1) to open the Quick Create: Form whitelist rule pane
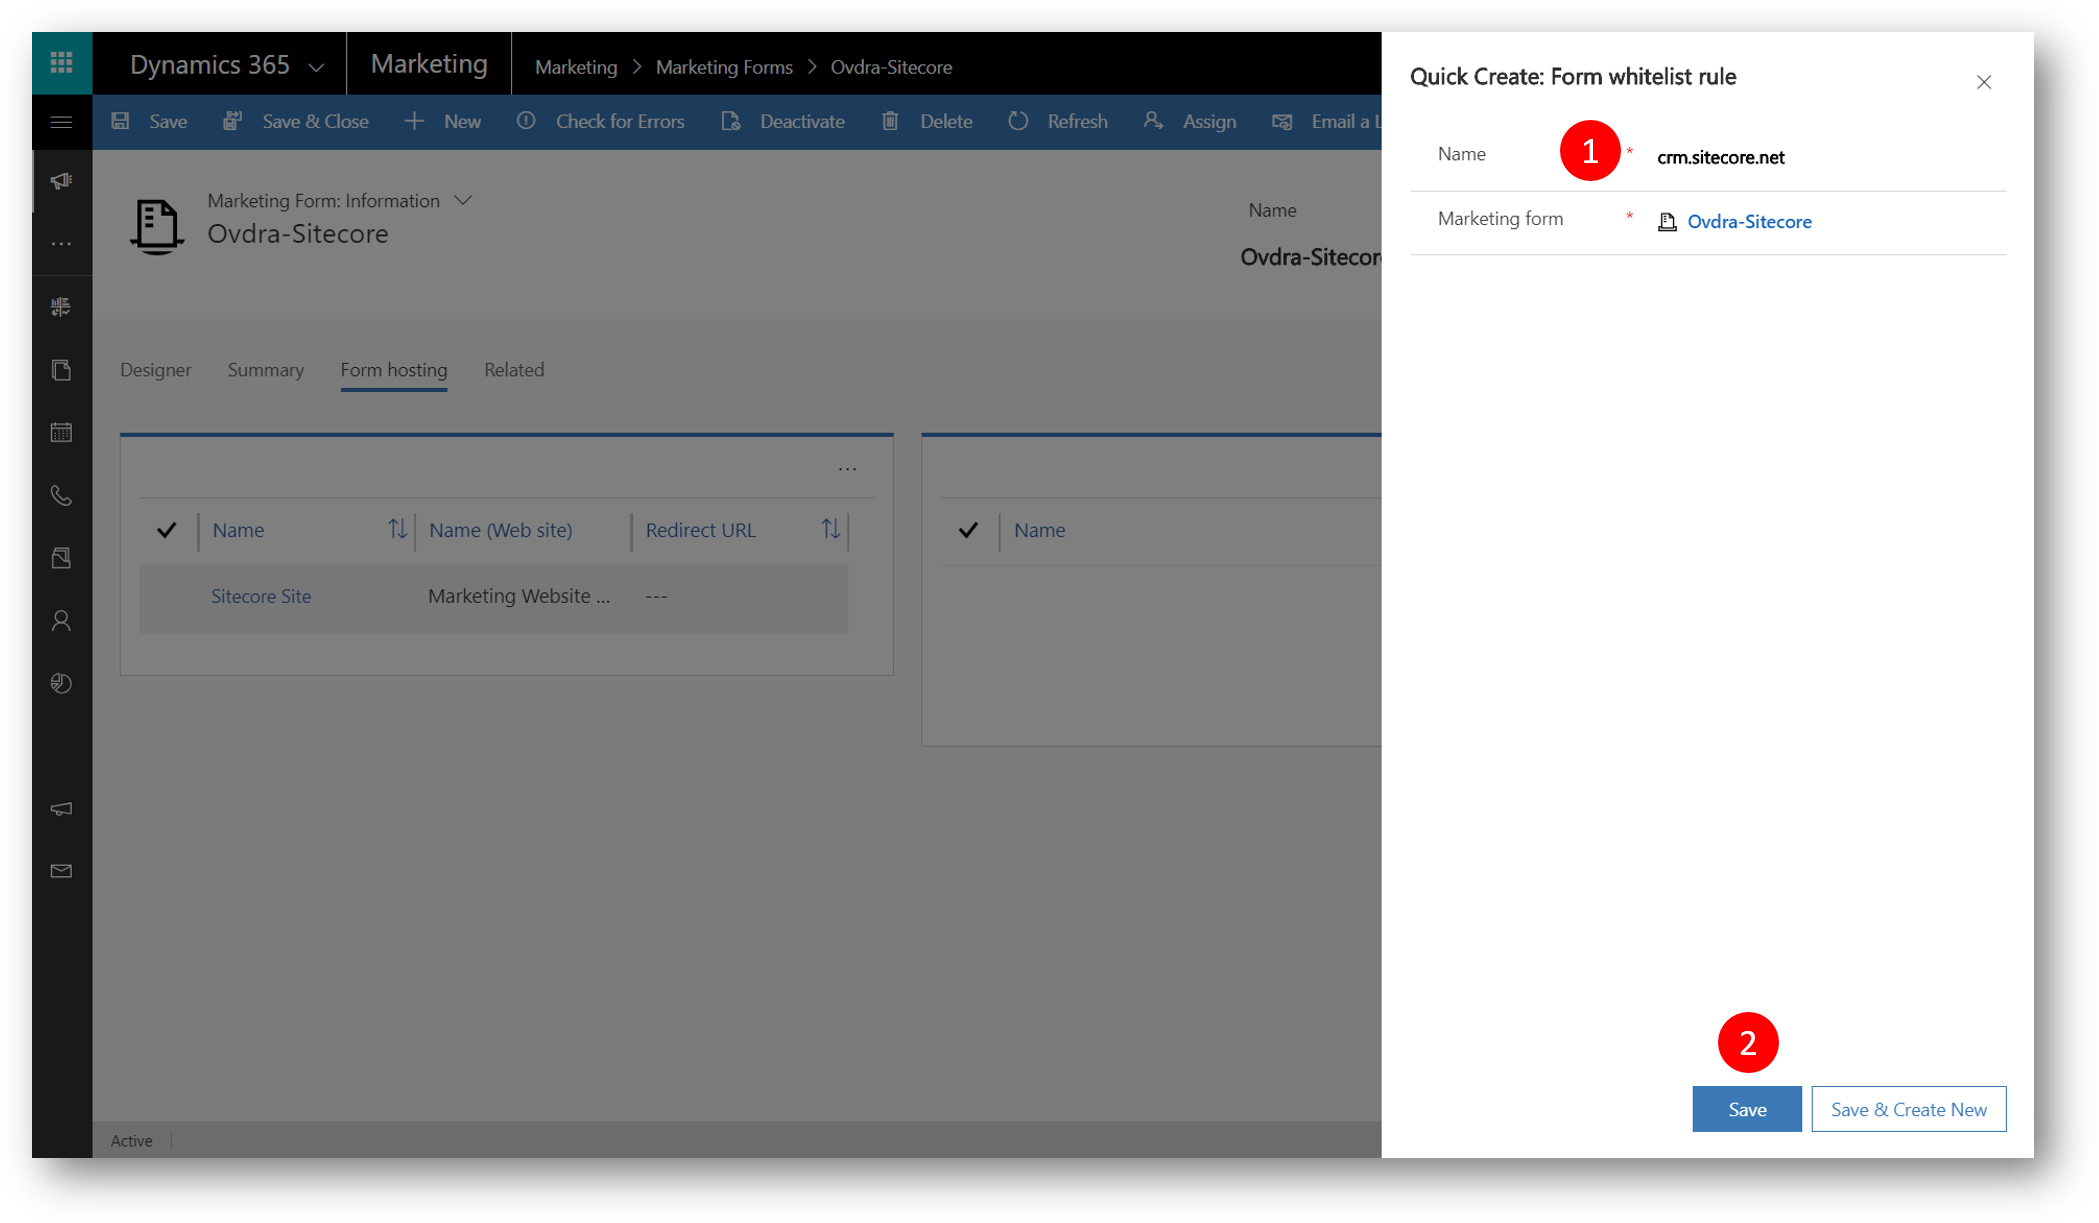
In the Quick Create: Form whitelist rule pane, in the Name field (1), type the domain name of the website where you will host the form, and then click Save (2) to return to the Form hosting tab
Note: You can whitelist as many domains as you want, but your form will only work on those domains that you whitelist.
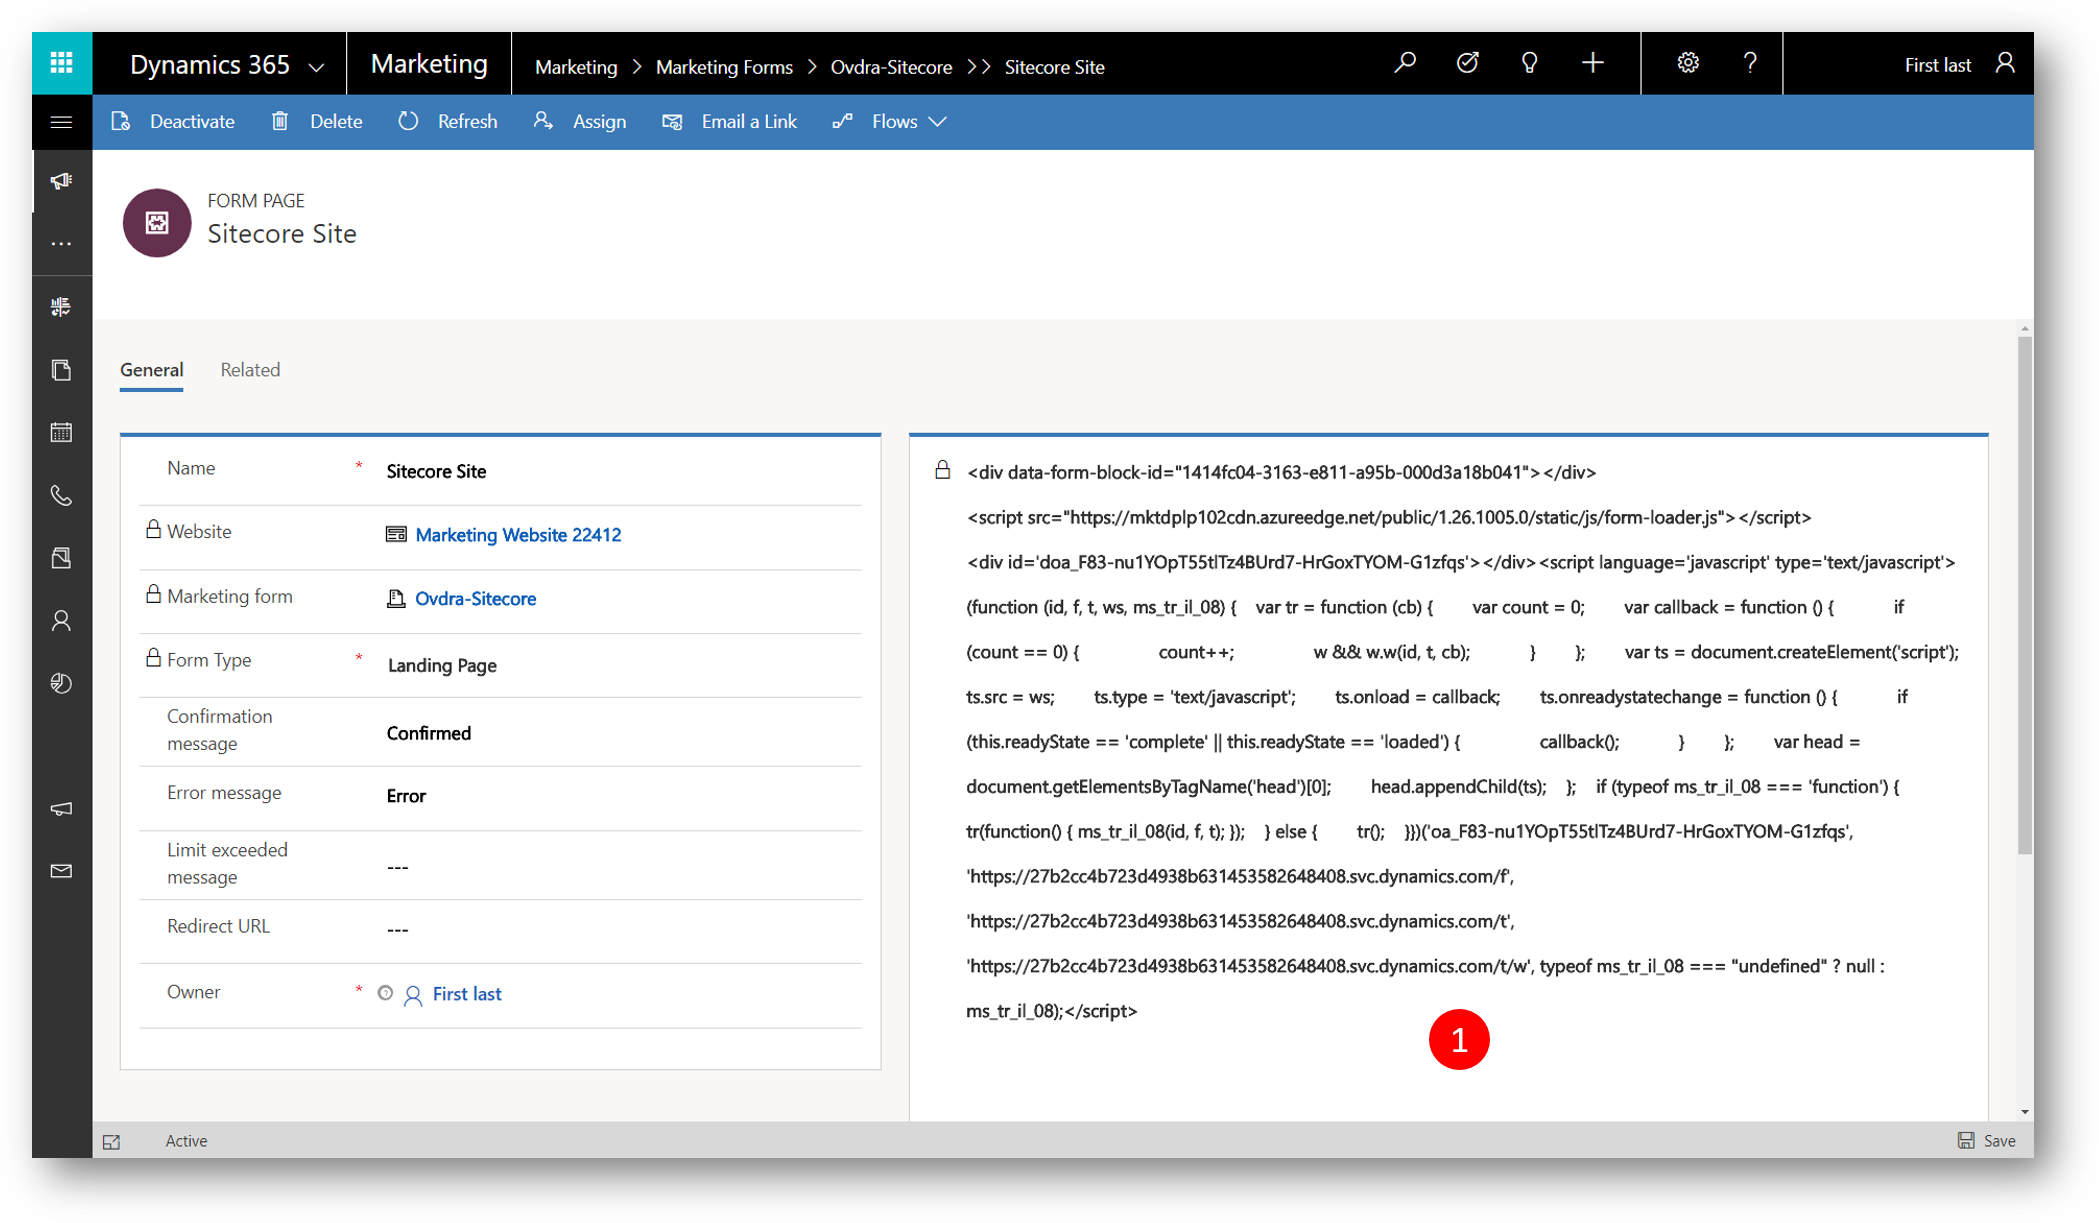
Back on the Form hosting tab, click the form page name in the left grid (1) to open its settings and view the embed code
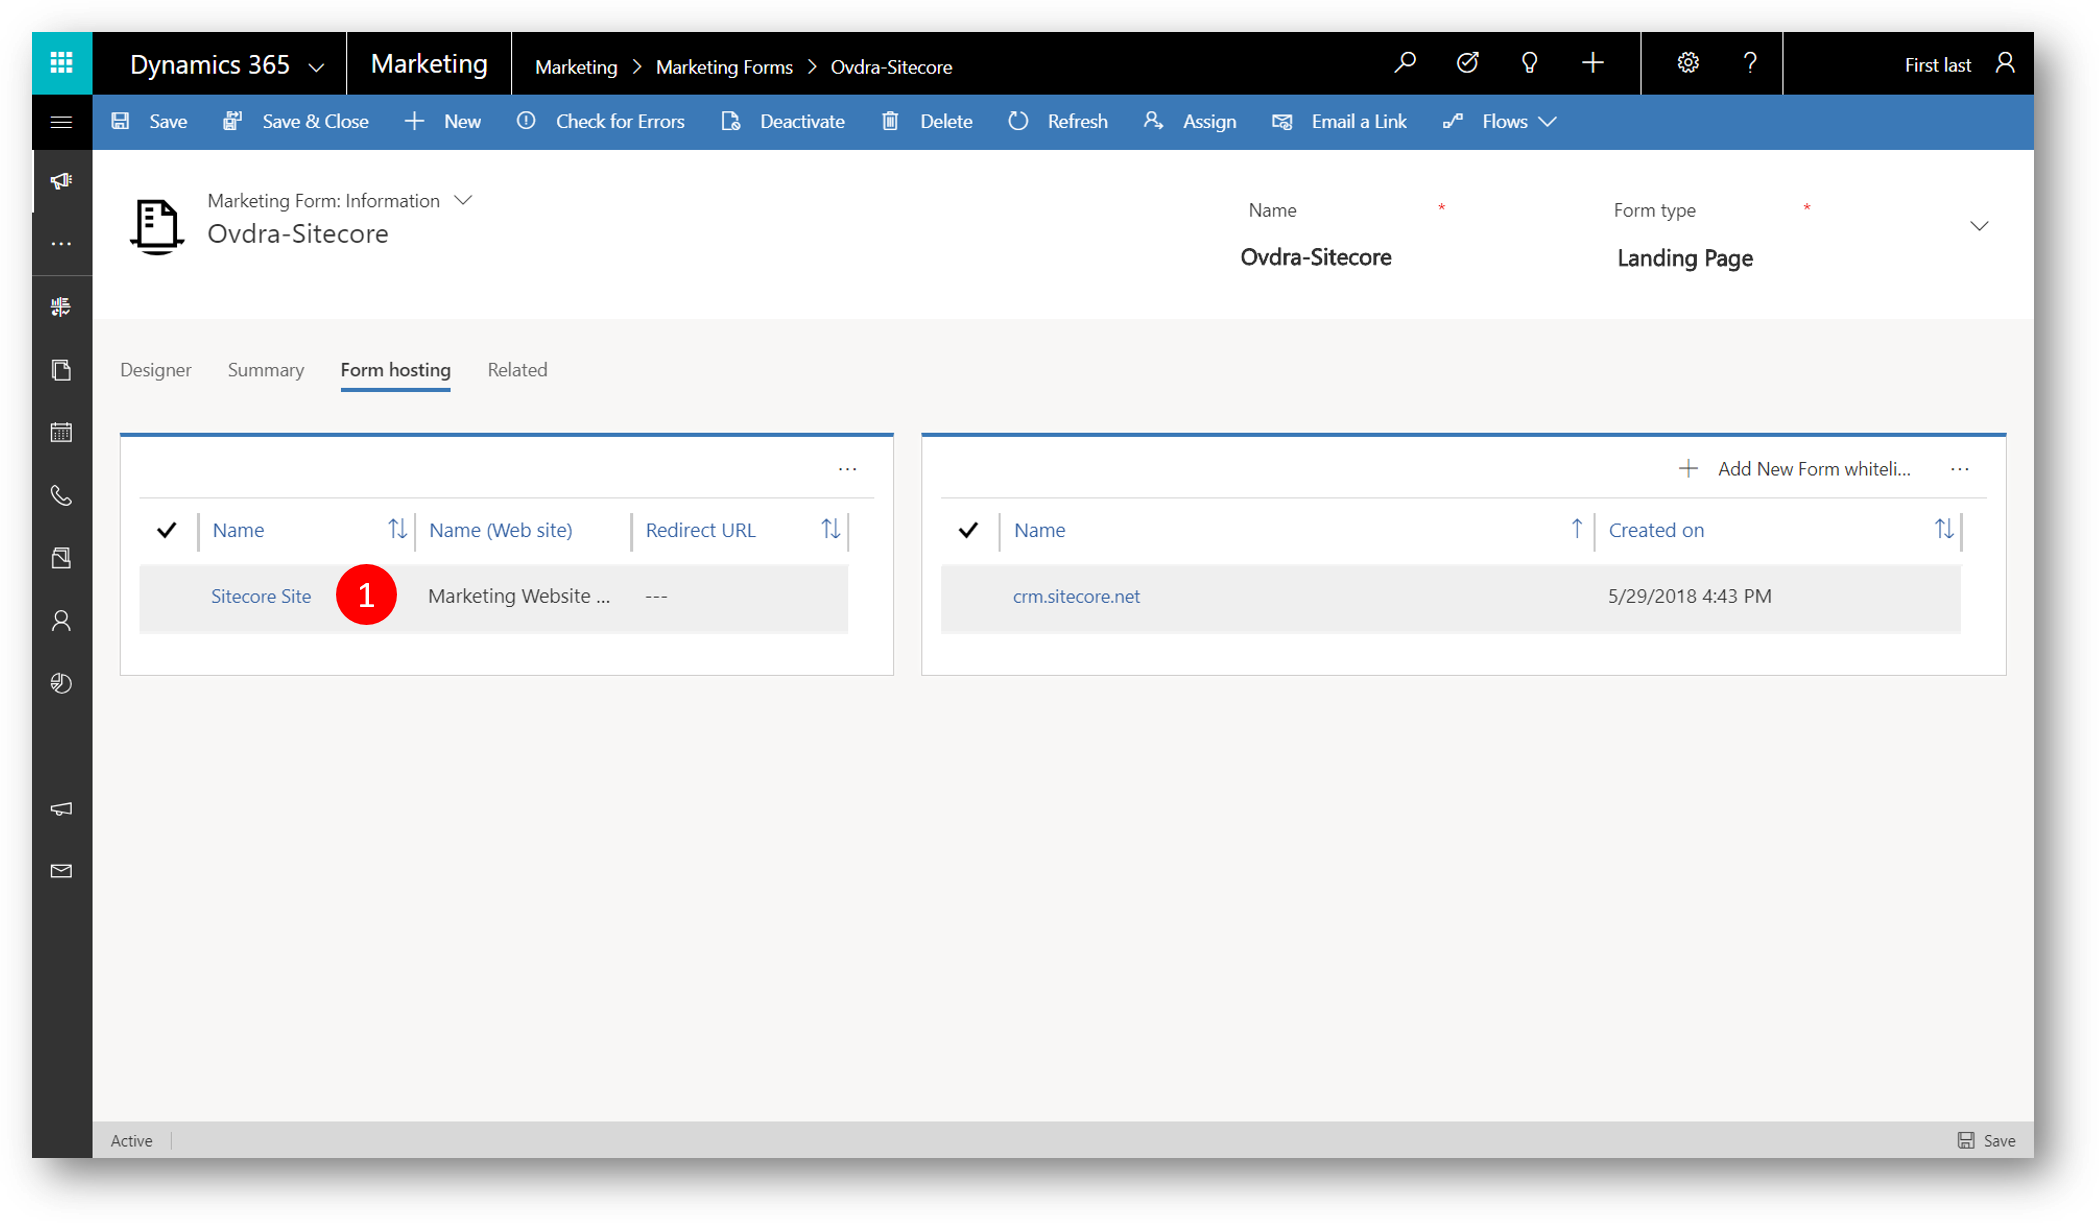
Select and copy the code (1)
Embed code snippet in website
Depending on what type of web server and CMS system you are using, you may need to adjust the code (for example, by escaping some special characters), or adjust your system settings to allow scripts such as this one to be pasted in.
In this example we'll embed the code in a Sitecore page. Before we do that we'll have to do a couple of edits:
- Edit the sitecore.xml file not to remove scripts
- Edit the embed code not to escape characters
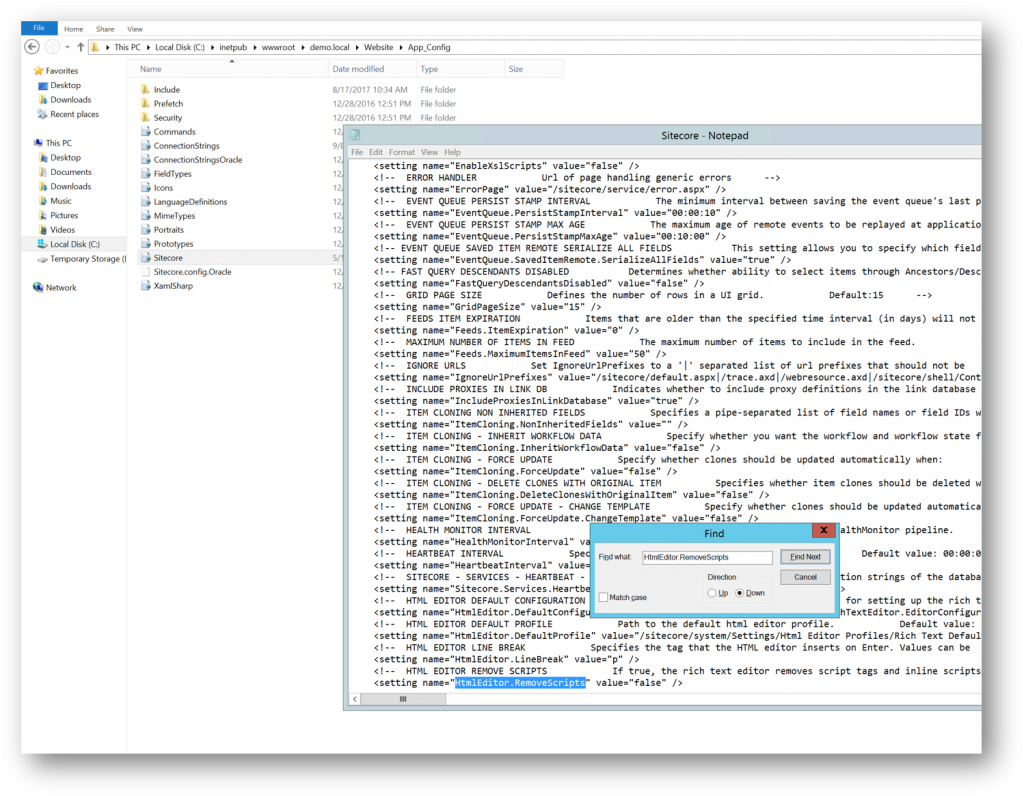
Edit the sitecore.xml file not to remove scripts
- Access the Sitecore Server
- Go to folder where the sitecore web is deployed
- Go to /AppConfiguration folder
- Edit Sitecore.xml
- Locate the "HtmlEditor.RemoveScripts" entry, and change from False to True

Edit the embed code not to escape characters
Sitecore still escapes (&) characters so there is a need to do one change in our script
In the script change w && w.w(id, t, cb); to if (w) { w.w(id, t, cb); }
Add the Embed code to Page
With the above edits we can embed the code in a page of our choice.
Open the Sitecore admin interface and navigate to the Content Editor 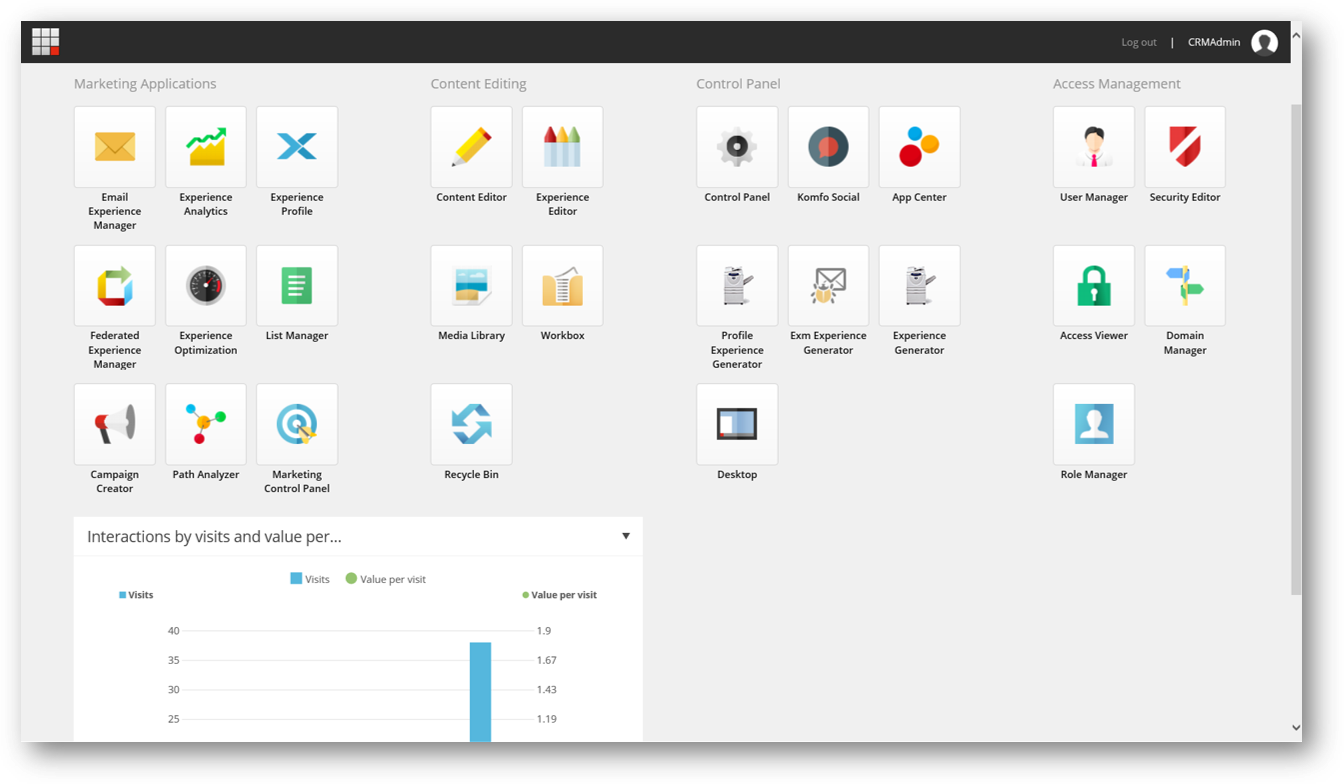
Navigate to the page where the form code is to be embedded, open the body content part and add the code at the top
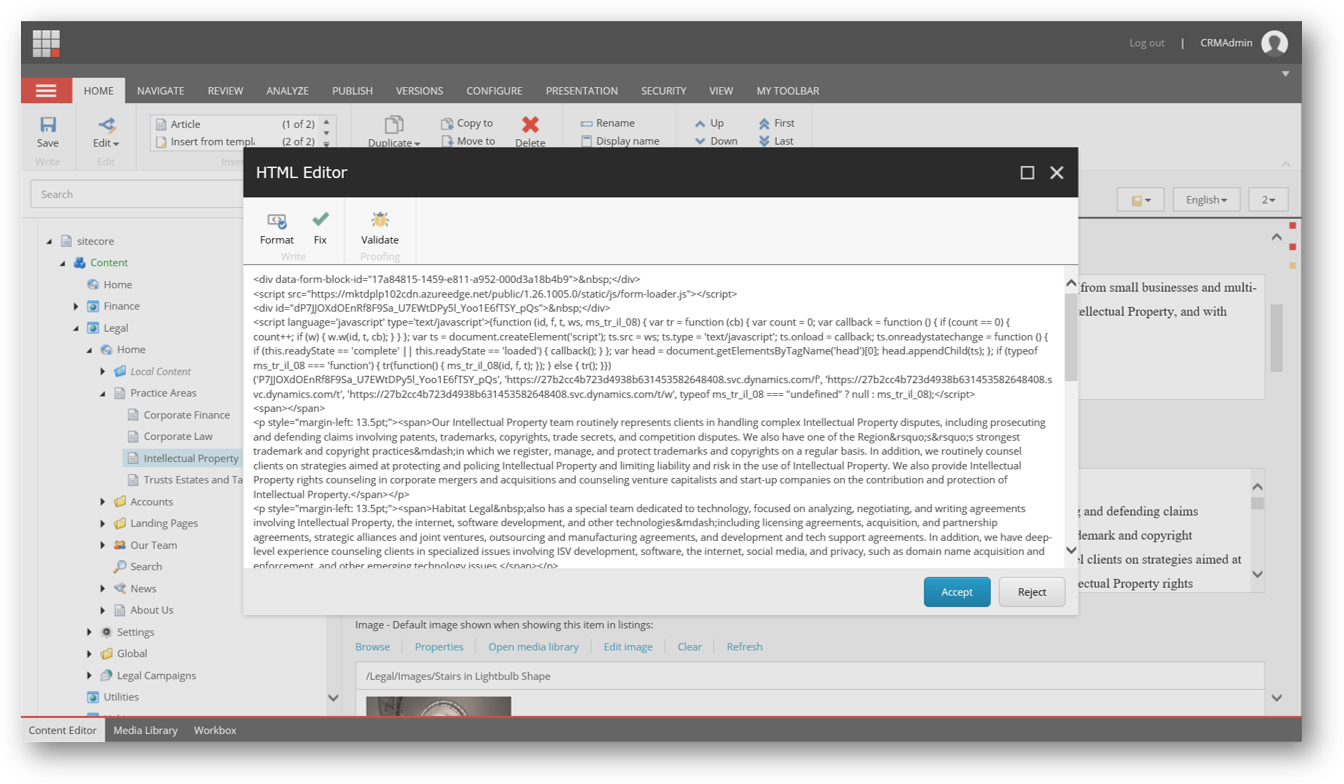
Save and publish, and verify the form is present on the page
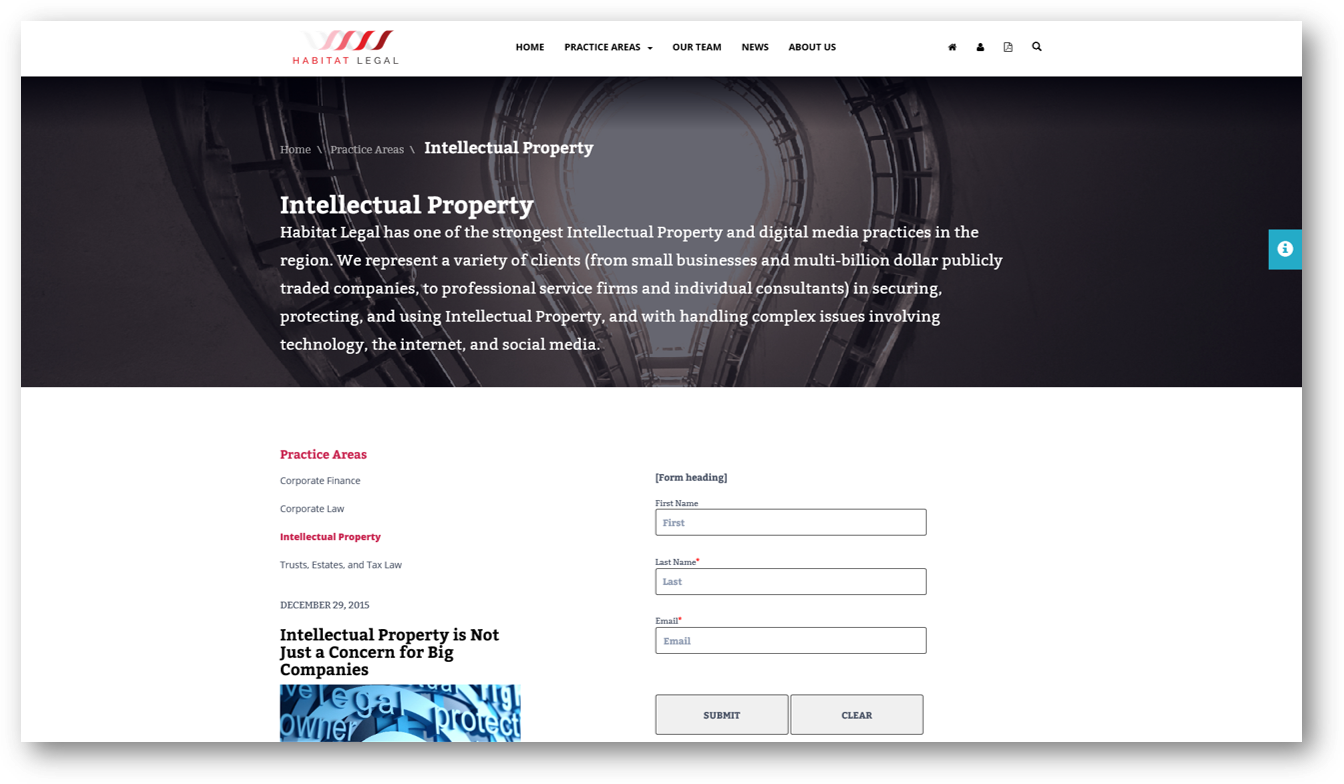
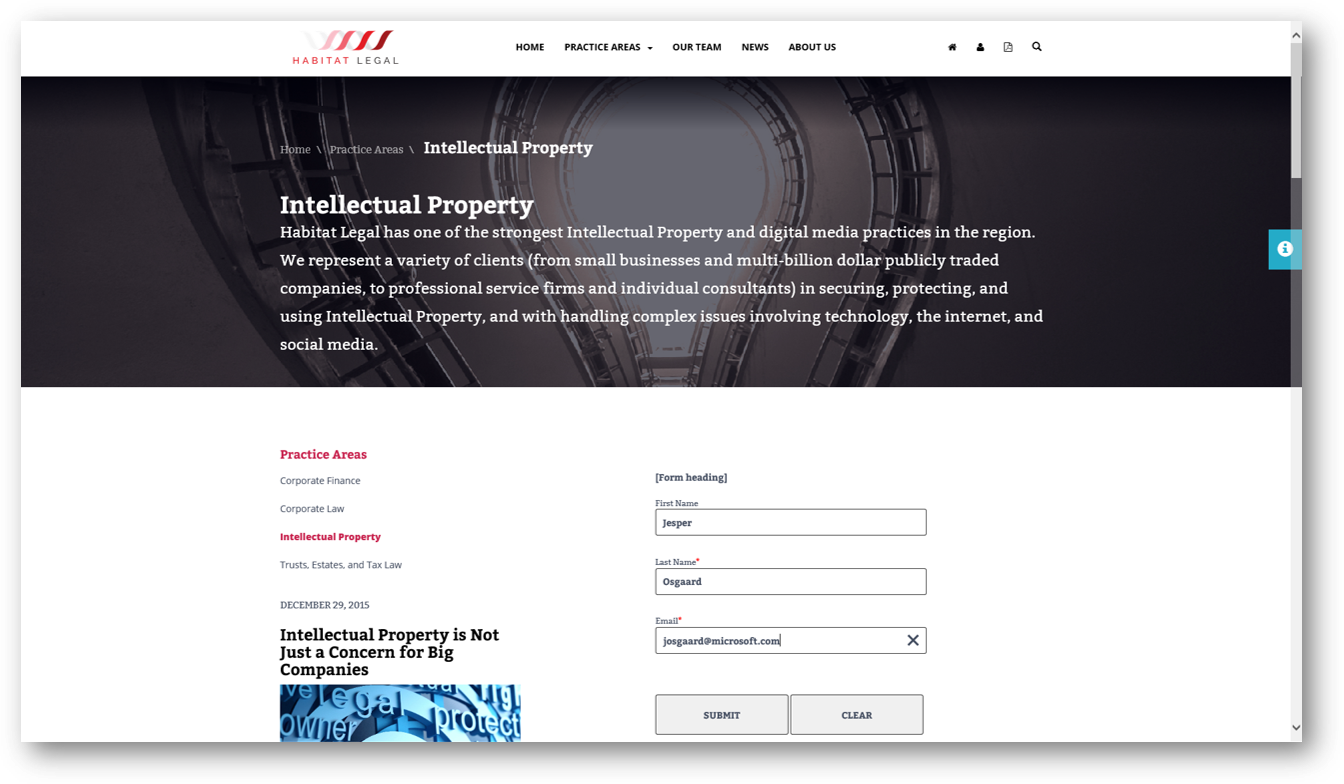
Test
To test we'll access the page, fill out the form, navigate back to Dynamics 365 for Marketing and verify that a new contact and/or lead is created
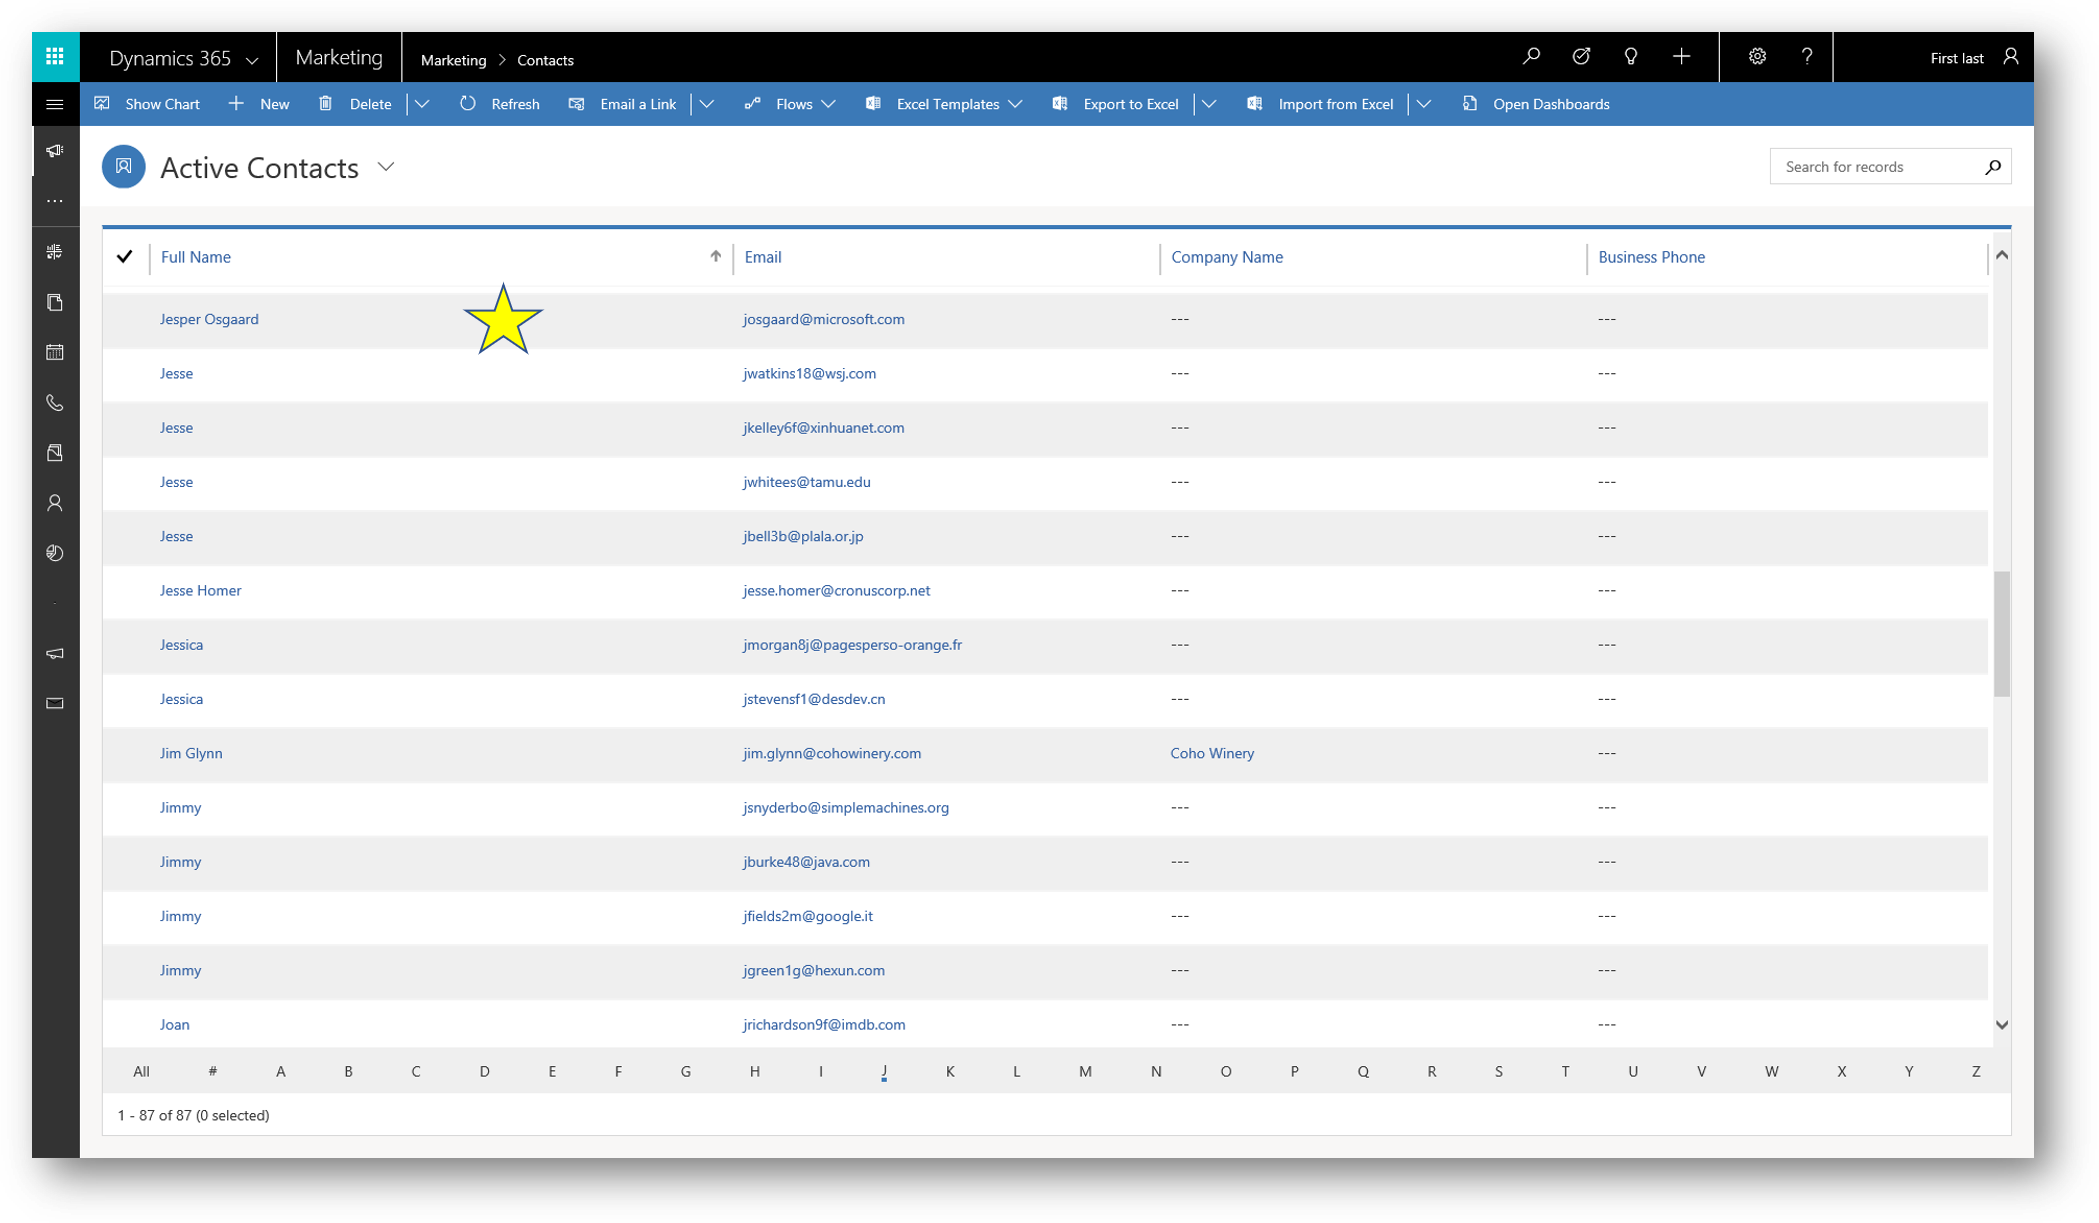
So, with this example you can now build a form, generate and copy the embed code for the form, and embed the code snippet in your website to generate contacts and/or leads
See also
- More Dynamics 365 for Marketing blog posts - link