Lead Scoring in Dynamics 365 for Marketing
Microsoft Dynamics 365 for Marketing is designed to help you nurture more sales-ready leads, align sales and marketing and make smarter decisions. Most importantly, Dynamics 365 for Marketing works together with Dynamics 365 for Sales on the same platform which aligns teams with common data, connected processes and Office 365 collaboration tools.
Automatic lead generation and scoring
A big part of marketing has to do with finding new leads, qualifying them, and then sending sales-ready leads to salespeople.
To help you identify the hottest leads, Dynamics 365 for Marketing can score each one based on criteria that includes each lead's demographic details and interaction record.
A lead who meets your target demographic profile and has interacted with your marketing materials (for example, by opening emails, registering for downloads, browsing your website, or attending an event) will probably get a high score, provided you've set up your scoring model correctly.
TIP
You can create any number of lead-scoring models, with each lead being scored according to each model. That means that if you have several models, each lead will also have several scores. A lead becomes sales-ready only after all models produce a sales-ready score for that lead
x
This blog post is a continuation of four previous blog posts on Dynamics 365 for Marketing
- How to Create a Dynamics 365 for Marketing Trial - link
- Try Dynamics 365 for Marketing - link
- How to Create Landing Pages in the new Dynamics 365 for Marketing - link
- Interactive Customer Journeys in Dynamics 365 for Marketing - link
Create a lead scoring model
Step 1: Go to Lead Management and click Lead Scoring Models to open the list My Lead Scoring Models 
Step 2: On the command bar, click New to open the New Lead Scoring Model canvas, with the Design tab shown
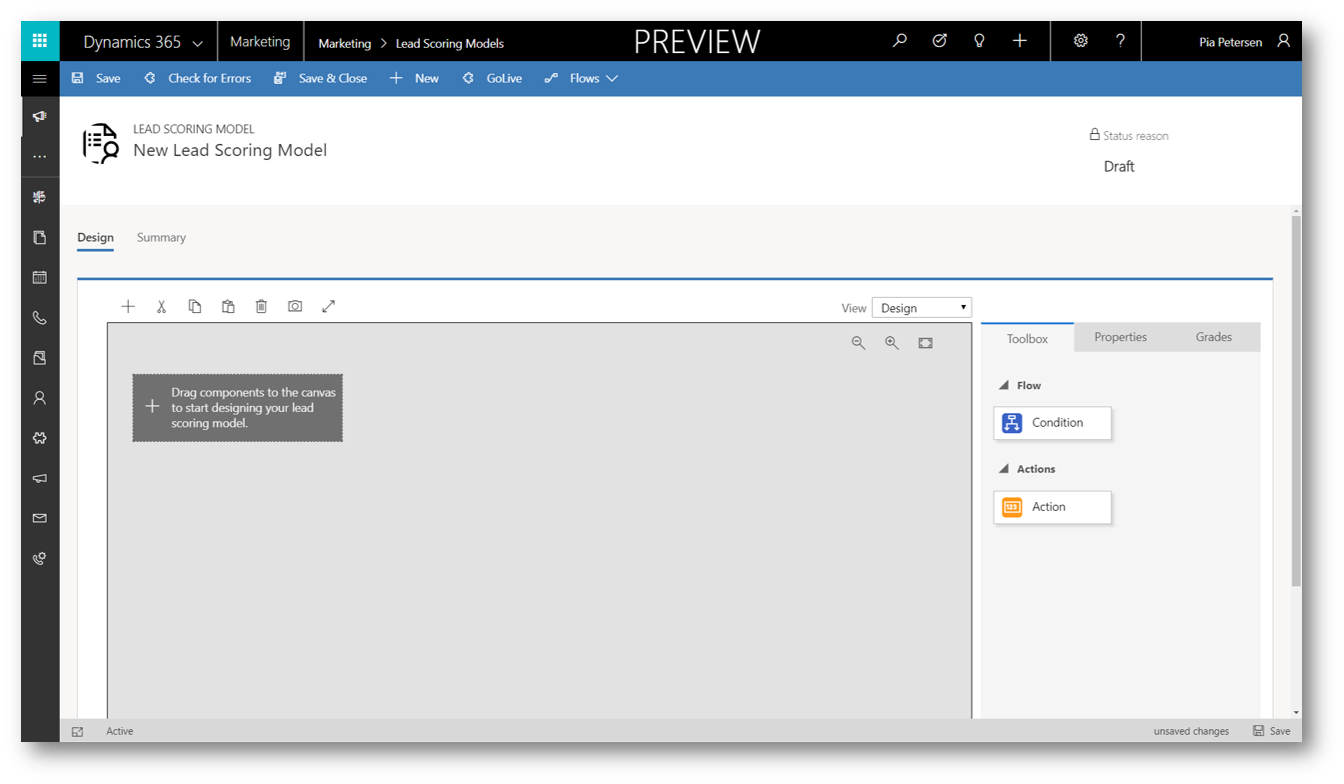
This designer is similar to other designers in Dynamics 365 for Marketing. You use it to build scoring models by creating a collection of condition/action tile pairs, where the Condition tile establishes a condition (such as email opened) and the Action tile establishes how the score should change when the condition is met (such as, add 50 points).
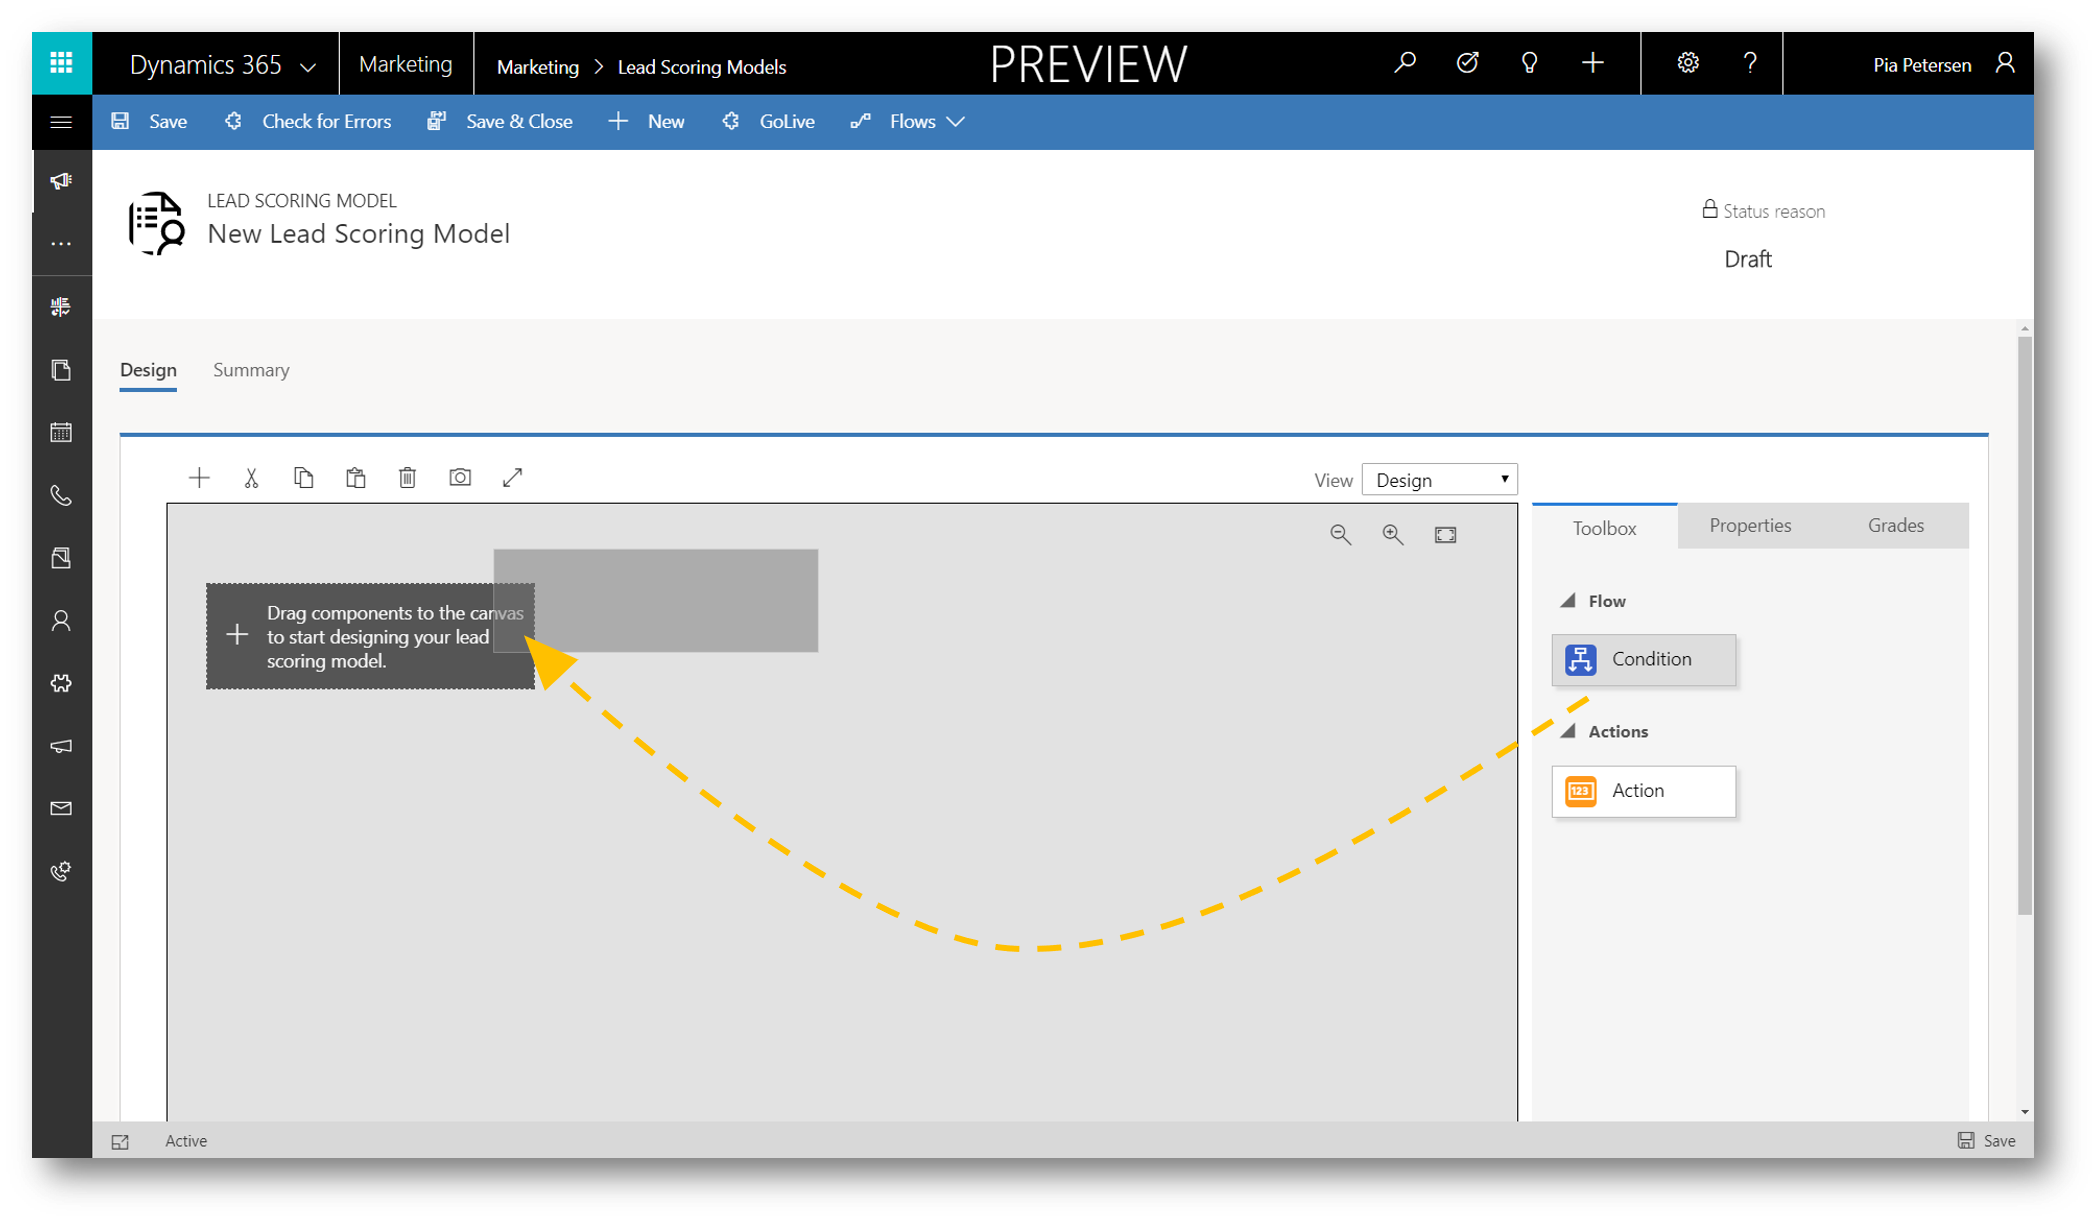
Step 3: Drag a Condition tile from the Toolbox tab to the first position on the canvas
When we drop the tile, it stays selected and the Properties tab opens to show its settings. In this case, the only setting is a Display Name for the tile. We're going to begin with a condition that looks at the city where a lead works 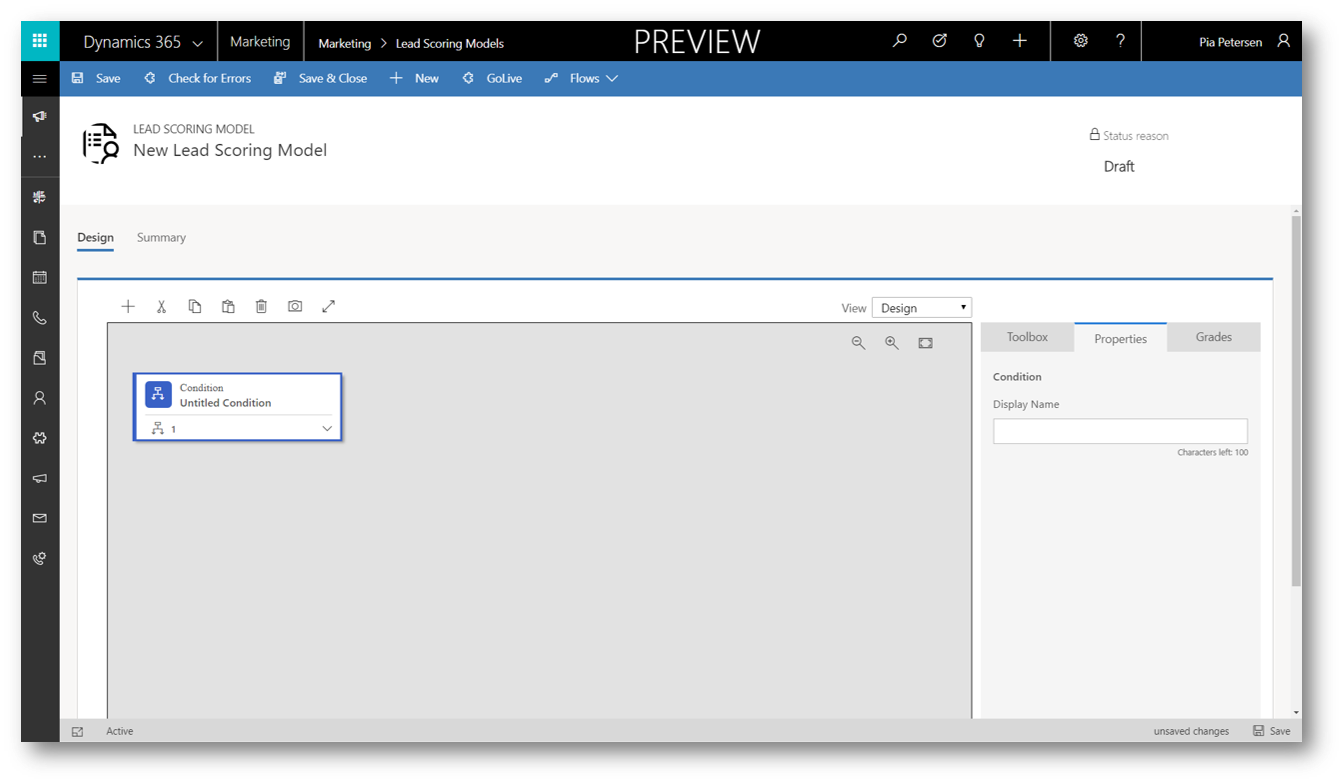
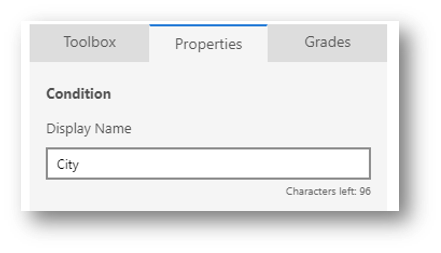
Step 4: Set the Display Name to “City”
Step 5: Expand the new Condition tile by choosing the expansion button in its lower-right corner
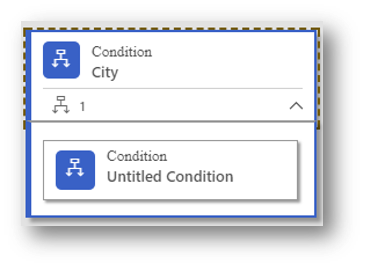
Here we can see that our new Condition tile already has a child Condition tile. The parent Condition tile simply establishes a name for the stack, whereas the child establishes a logical condition. If the child condition resolves to true, the lead score will be updated as specified in the Action tile that follows (we'll add that in the next steps).
Step 6: Select the child Condition tile, open the Properties tab, and then enter a Display Name for the tile.
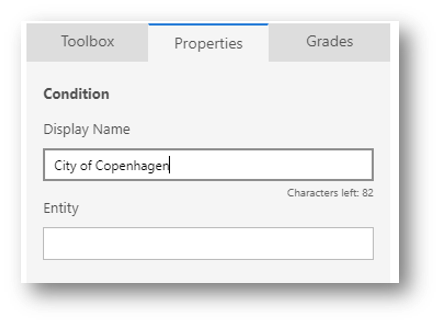
In this model we will increase the score for leads from who enter a work address city as Copenhagen
Step 7: Set Display Name to “City of Copenhagen”
TIP
You can add more child conditions by dragging more Condition tiles onto the same parent. If you do this, all child conditions are combined with an AND operator, which means that all of them must evaluate to true for the following Action to be applied.
x
Step 8: Click (place cursor) in the Entity field to see a drop-down of scorable entities
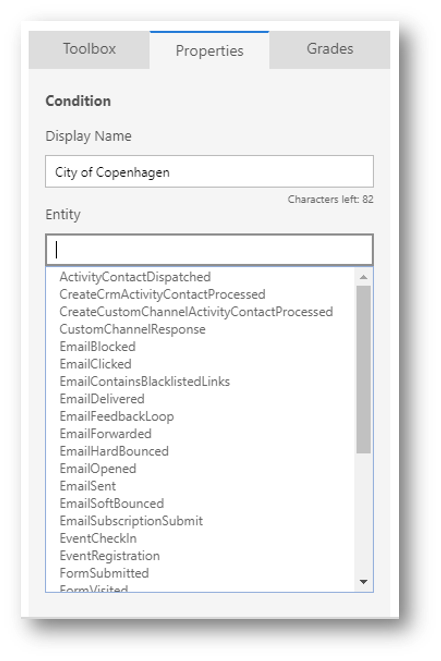
Dynamics 365 for Marketing fetches a list of scorable entities (which can take a few seconds) and displays them as a drop-down list. The list includes all relevant entities that can be related to a lead record, plus the lead entity itself.
We are looking for the name of the city where the lead works, which is recorded on the lead itself
Step 9: In the drop-down choose the Lead entity
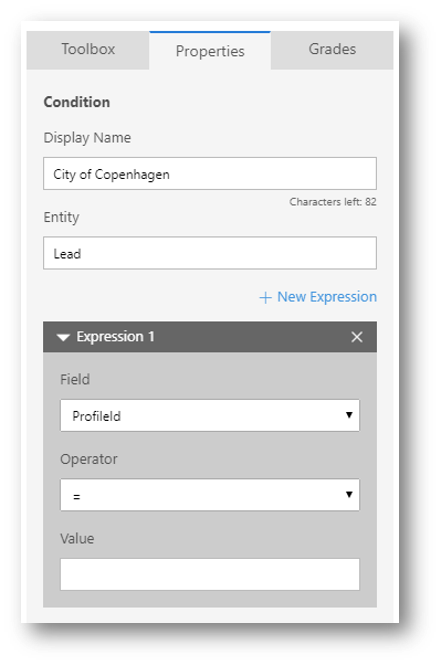
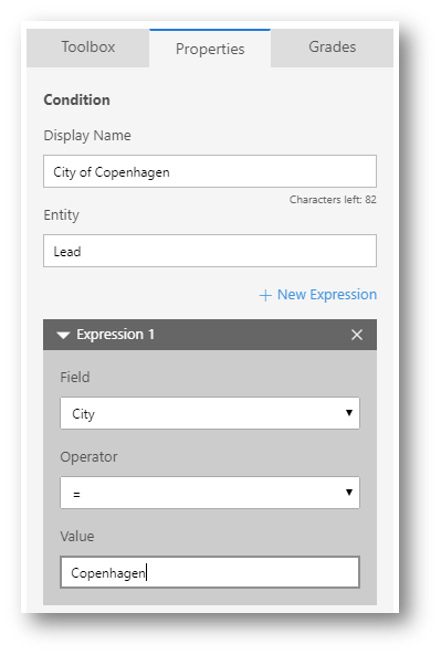
After we've chosen our entity, an Expression box is added that provides choices appropriate for that entity.
Step 10: Use the Field, Operator, and Value fields here to establish an expression that evaluates to true where City = Copenhagen
- Field = “City”
- Operator = “=”
- Value = “Copenhagen”
TIP
You can add more expressions here by choosing + New Expression.
x
Step 11: Drag an Action tile from the Toolbox tab to the space immediately to the right of the Condition tile you just set up
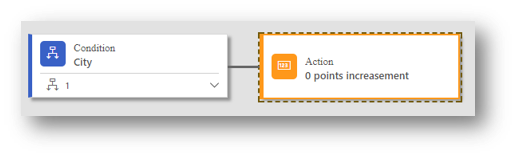
When you drop the Action tile, it stays selected and the Properties tab opens to show its settings. 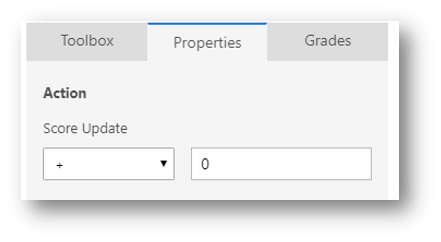
This is where you set how a lead's score is changed when the Condition resolves to true (if the Lead has city = Copenhagen)
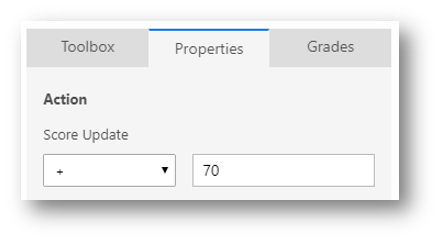
Step 12: Set Score Update to +70.
The rule will now give 70 points to any lead with city = Copenhagen.
Notice the tile updates 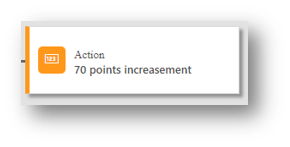
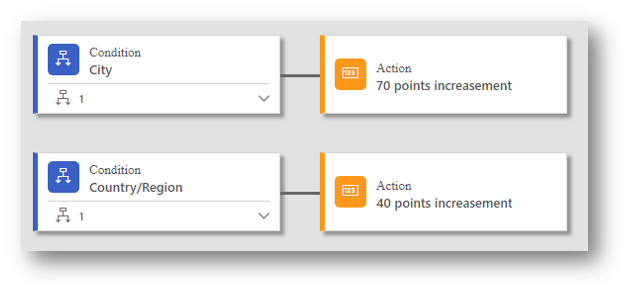
Step 13: Repeat the process to
- Add a new rule below the first one
- Set it to give +40 points to leads living in Denmark (check the Leads entity where Country/Region = Denmark).
TIP
When your model includes several rules, like this one does, each rule can affect the lead score independently.
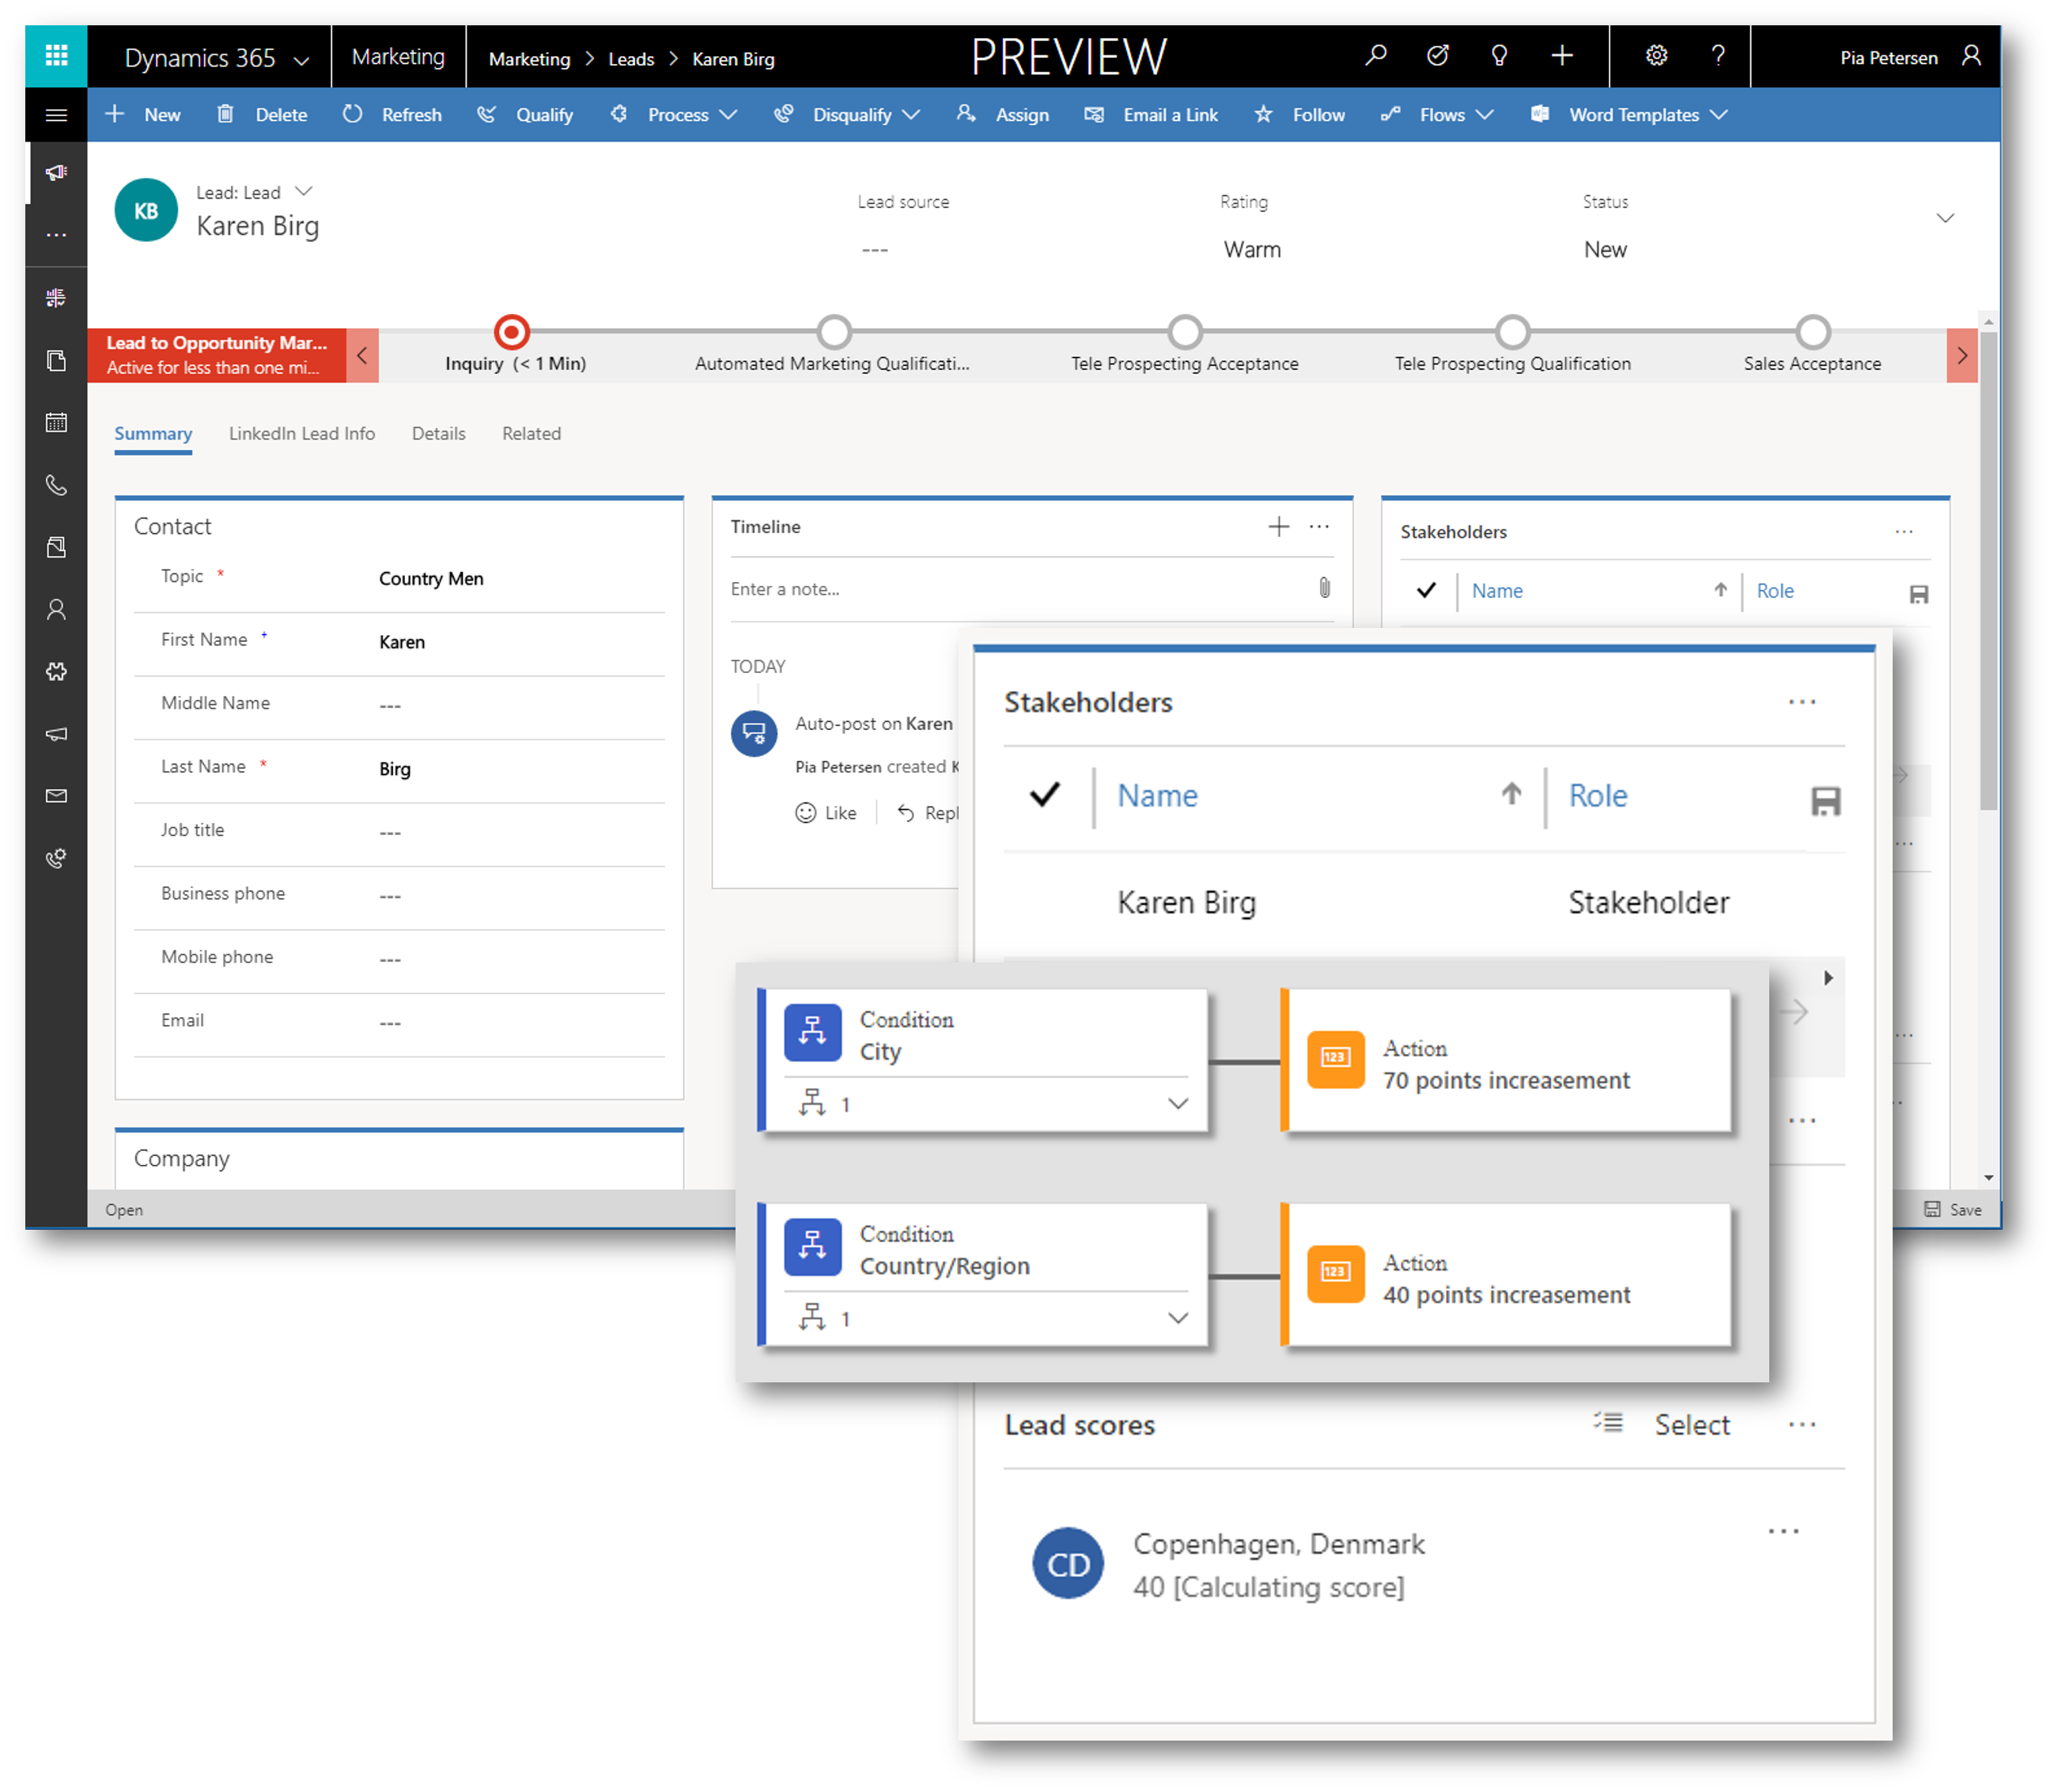
For example, the model you built so far will increase a lead score by 110 points for leads who live in Copenhagen, Denmark.
Likewise, leads from Aarhus, Denmark will get +40 points and leads from Copenhagen, Texas will get +70 points.
Set Sales Ready Score
You can use Grades to establish a schedule of grades associated with each of several score ranges, but the most important setting here is the Sales Ready Score.
When a lead reaches this score, the system will consider it sales-ready (marketing-qualified) and therefore ready to be forwarded to a salesperson for further attention.
Step 1: Open the Grades tab in the rightmost column
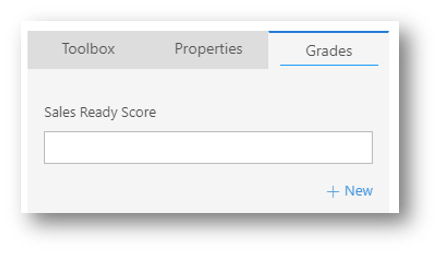
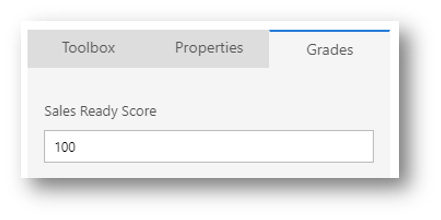
Let's suppose that any lead located in Copenhagen, Denmark is sales-ready (score 70+40=110, remember), so we will set the Sales Ready Score to 100
Step 2: Set the Sales Ready Score = 100
TIP
You can add any number of additional grades to help classify a lead according to its score (such as 0-25=Cold, 26-60=Warm, 61-100=Hot). Choose + New on the Grades tab to add and define each required grade.
Go Live with Lead Scoring Model
Like customer journeys, landing pages, and email messages, our lead scoring model must be published (go live) to come into effect
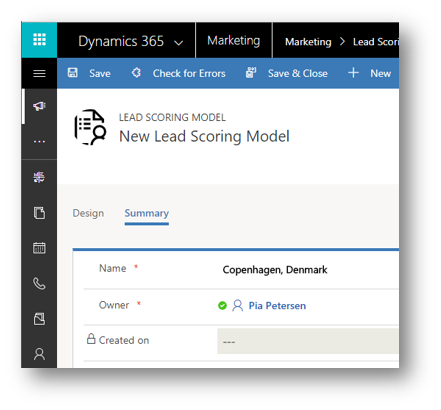
Step 1: Go to the Summary tab and give your rule a Name (such as "Copenhagen, Denmark")
Step 2: On the command bar, click Save to save the model
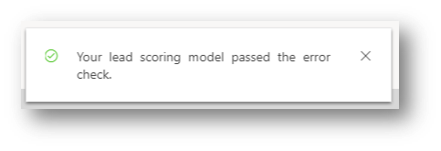
Step 3: On the command bar, click Check for Errors, and then read the results and fix any problems reported.
Step 4: On the command bar, click Go Live to publish the model.
Dynamics 365 for Marketing runs a final error check, and then updates the Status Reason to Going Live. It might take a few minutes for the process to be completed, at which time the Status Reason will change to Live. 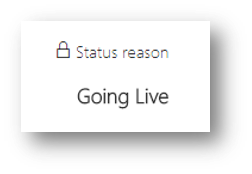
Test the Lead Scoring Model
To test the lead scoring model, including the Sales Ready Score, lets create a lead with some of the qualifying metadata.
Step 1: Go to Lead Management and click Leads to open the list My Open Leads
Step 2: On the command bar, select + New to open the New Lead form
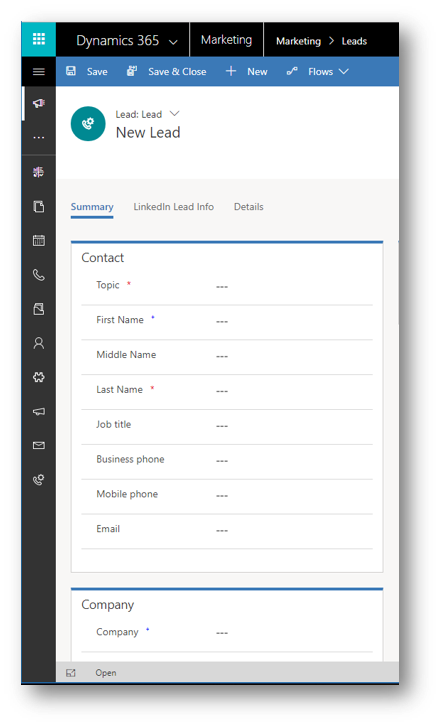
Step 3: In the Contact section, fill out the Topic, First Name, and Last Name fields. The values aren't important for this example, type anything that comes into mind.
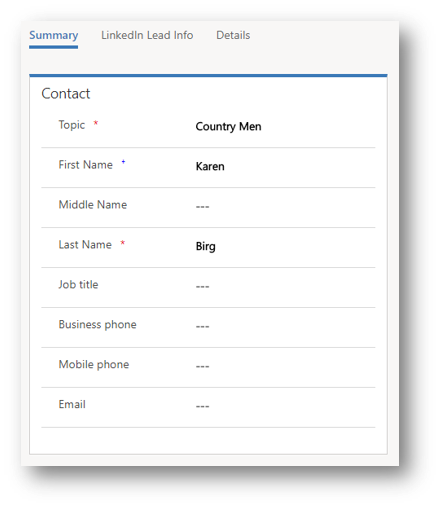
Step 4: In the Company section, set the City to "Copenhagen" and the Country/Region to "Denmark"
Step 5: On the command bar, click Save to save the lead
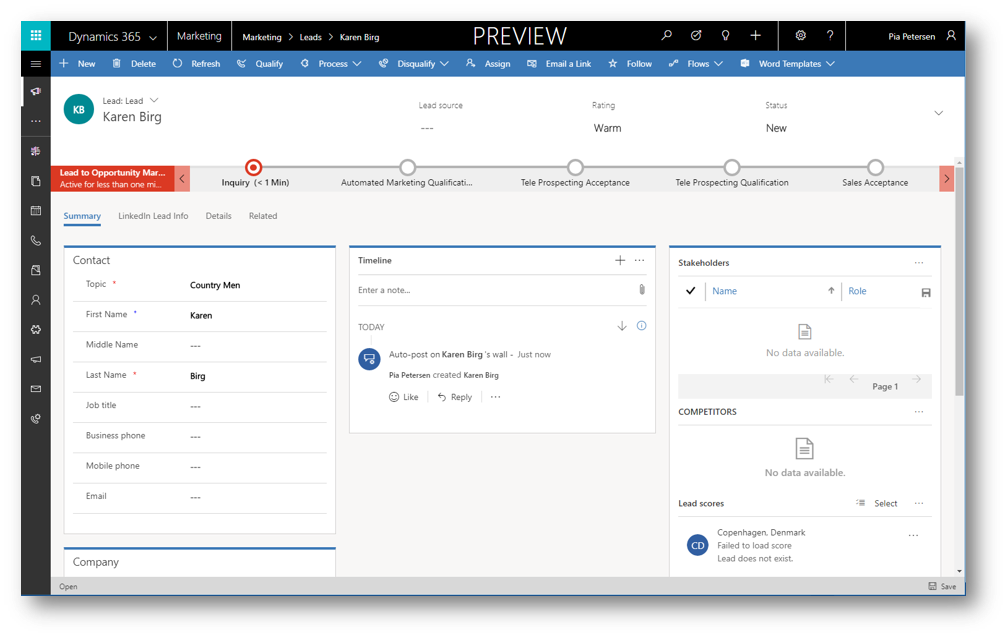
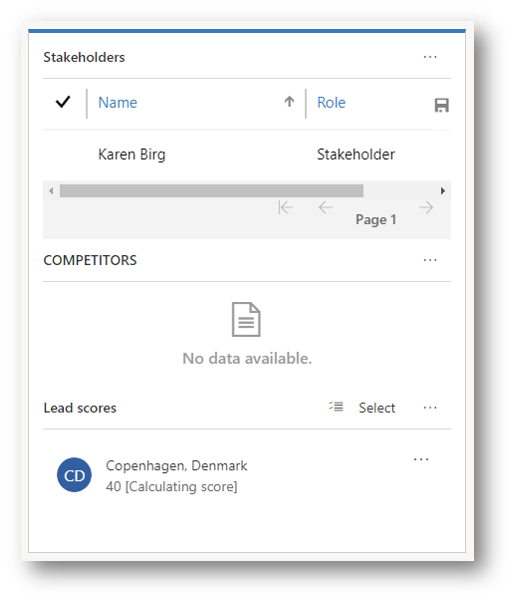
When the lead is saved, the lead form is refreshed with a business process flow (BPF) control at the top of the form and several new sections, including Stakeholders
Step 6: Click the Inquiry stage of the business process flow to open the form with steps in that stage
Step 7: In the Existing Contact? lookup select an existing contact (choose any contact you can find—the one you choose isn't important for this example)
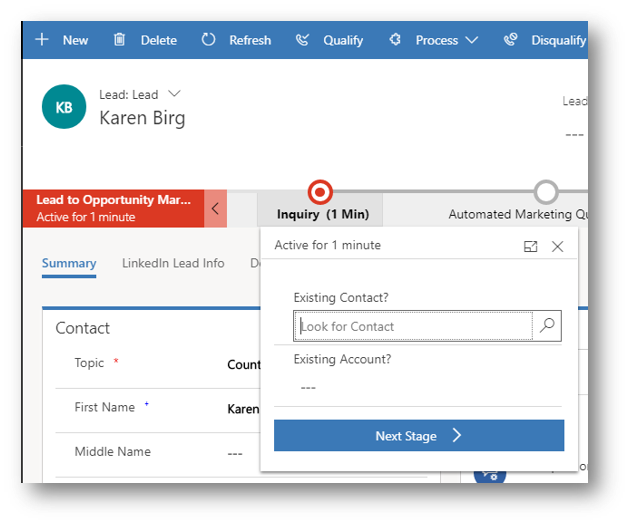
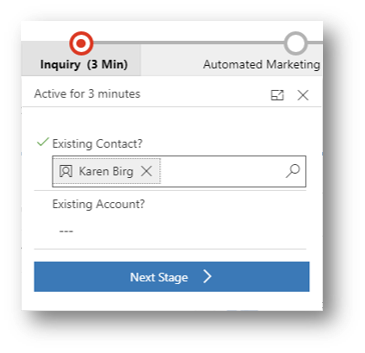
Step 8: Save the lead.
The associated contact is now listed in the Stakeholders section for the lead 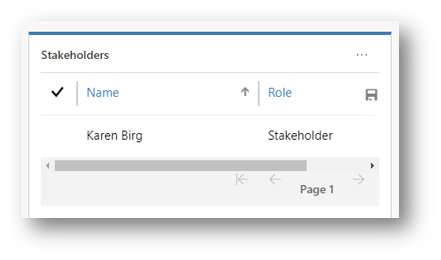
IMPORTANT
Automatic lead scoring only works for leads that are associated with a contact. Scoring will fail for leads that don't have a contact associated with them (as you can see in step 6 above, if you look in the lower right of the form).
Also, segments in Dynamics 365 for Marketing can only include contacts, not leads, which means that you can only address marketing emails to contacts.
Landing pages in Dynamics 365 for Marketing will typically either create a lead/contact pair when you create a new contact, or associate new leads with existing contacts when they're available. But when you create a lead manually, as we did here, you must also associate it with a contact manually to enable lead scoring.
x
Look for the Lead scores section near the lower-right corner of the form. Each lead scoring model is listed here, including our new one, "Copenhagen, Denmark"
It might take a few minutes for the score to be calculated, but when it is, you will see a score of 110 points for that model.
With lead scoring we are now able to identify the hottest leads and subsequently process them as per our business processes - assign them to sales people, convert them to opportunities, create tasks based off of them and so on.
Enjoy.
Note
This blog post is part of a five posts series to help you get started with Dynamics 365 for Marketing
- How to Create a Dynamics 365 for Marketing Trial (1/5) - link
- Try Dynamics 365 for Marketing (2/5) - link
- How to Create Landing Pages in the new Dynamics 365 for Marketing (3/5) - link
- Interactive Customer Journeys in Dynamics 365 for Marketing (4/5) - link
- Lead Scoring in Dynamics 365 for Marketing (5/5) - link
See Also
- Score and manage leads - link