Interactive Customer Journeys in Dynamics 365 for Marketing
Microsoft Dynamics 365 for Marketing is designed to help you nurture more sales-ready leads, align sales and marketing and make smarter decisions. Most importantly, Dynamics 365 for Marketing works together with Dynamics 365 for Sales on the same platform which aligns teams with common data, connected processes and Office 365 collaboration tools.
This blog post is a continuation of three previous blog posts on Dynamics 365 for Marketing
- How to Create a Dynamics 365 for Marketing Trial - link
- Try Dynamics 365 for Marketing - link
- How to Create Landing Pages in the new Dynamics 365 for Marketing - link
Example
If you been following along in the above mentioned blog posts, you've already created a simple customer journey, which simply sends an email message to all contacts in a segment.
Now we'll go a bit deeper into customer journeys to see how to add interactive features and decision points by including multiple emails, landing pages, and triggers in the design.
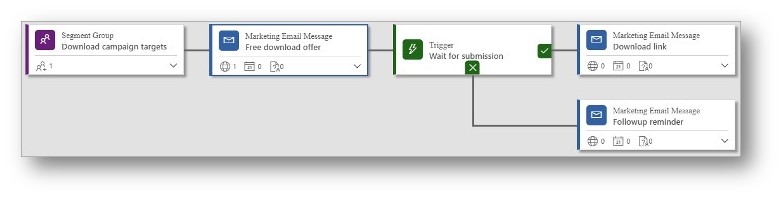
- The journey starts with an email and a trigger, and then branches after the trigger.
- The initial email is will invite recipients to pick up a free download from your website
- The top branch handles the ‘positive’ outcome that the recipients responds to the invitation – goes to a marketing page and requests a download link. In that case we will send them a download link message
- The bottom branch handles the ’negative’ outcome (no response for a few days). In that case we will send a A follow-up message
- The followup message will be sent if a contact does not submit the form after a few days
First email - invite recipients to pick up a free download from your website
-
-
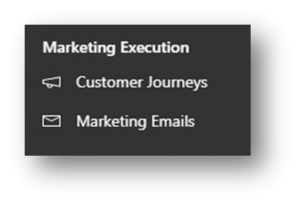
- Go to Marketing Execution and then click Marketing Emails to create a new email message (refer to this blog post for more: "Try Dynamics 365 for Marketing" - link)
x
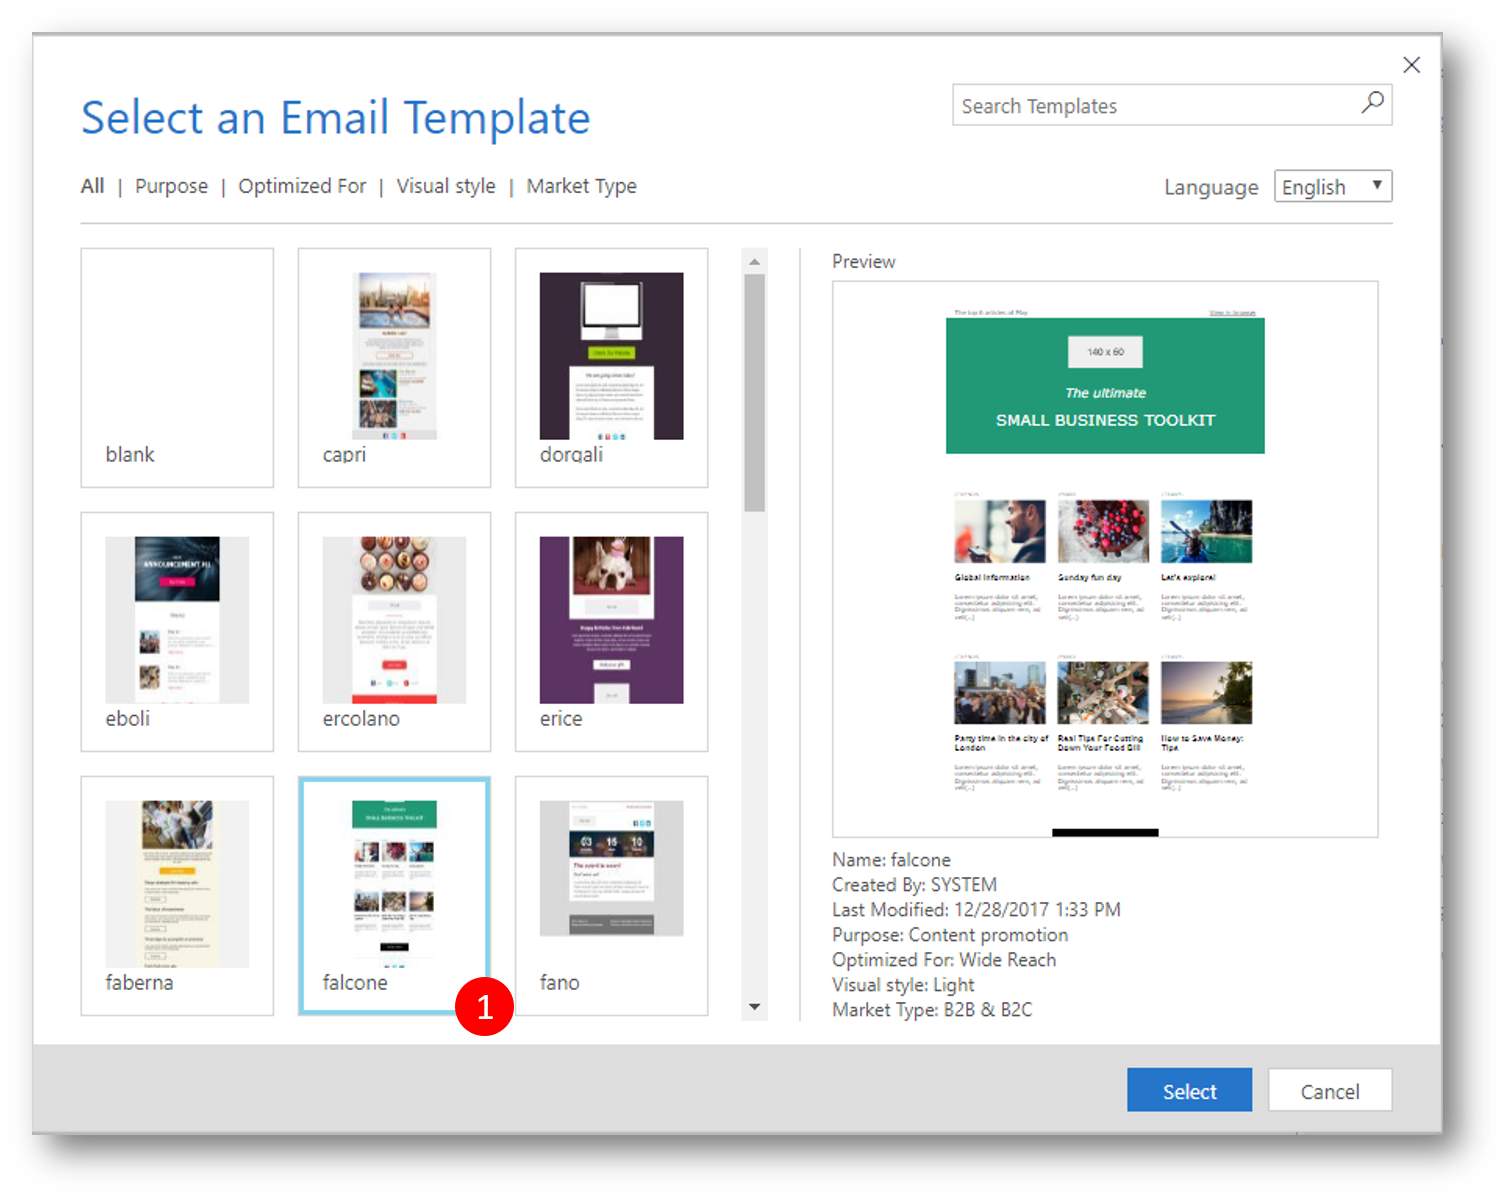
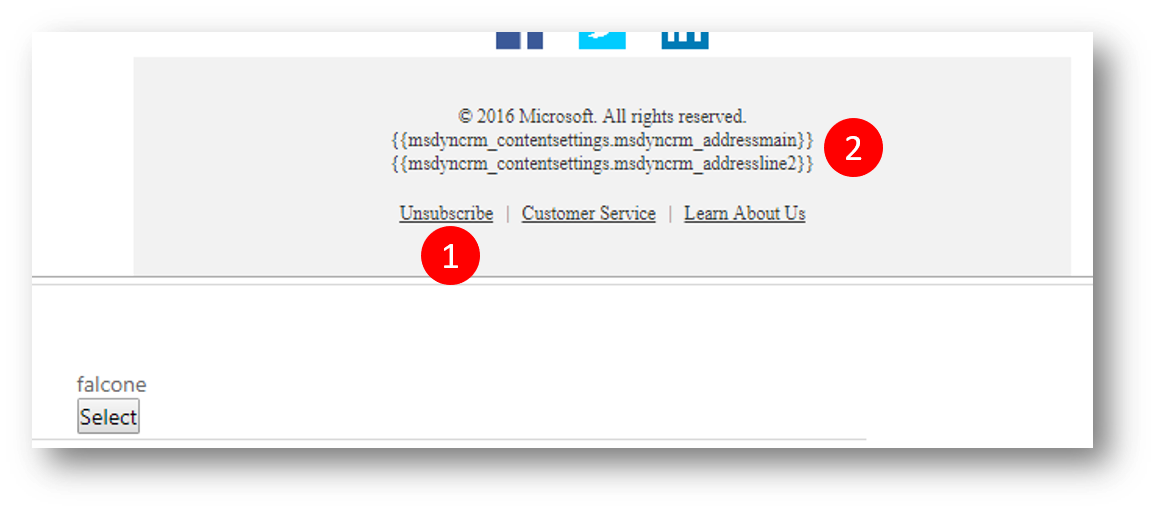
- In this example we will start with a non-blank email template, eg. the “falcone” template

This template not only have sample content, graphics, and column layouts, but also include all mandatory elements such as the subscription center link (1) and physical address (2) so you dont have to add those manually
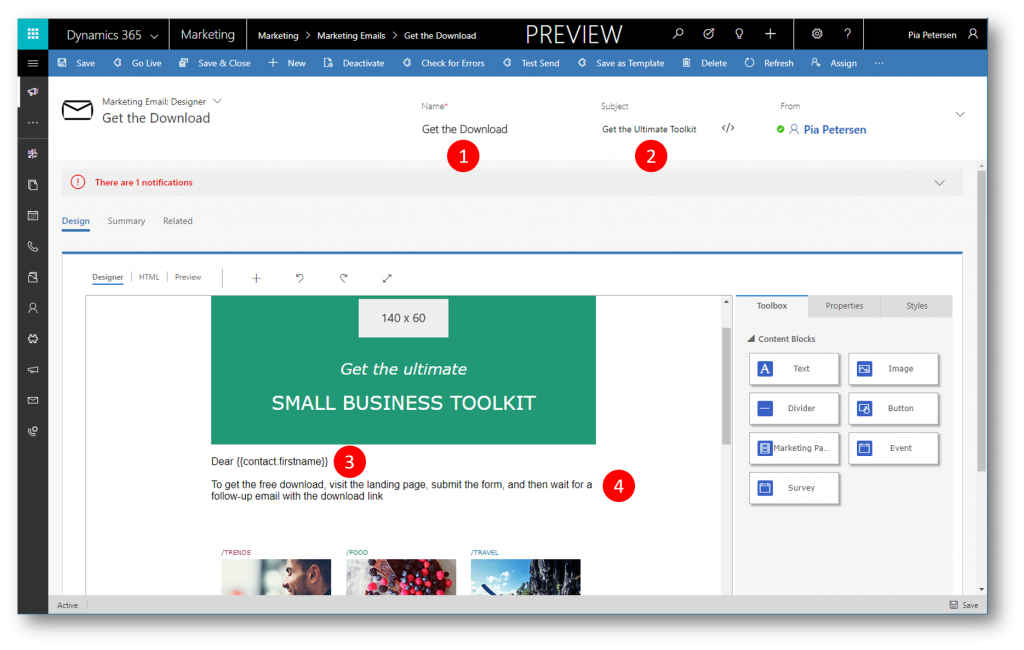
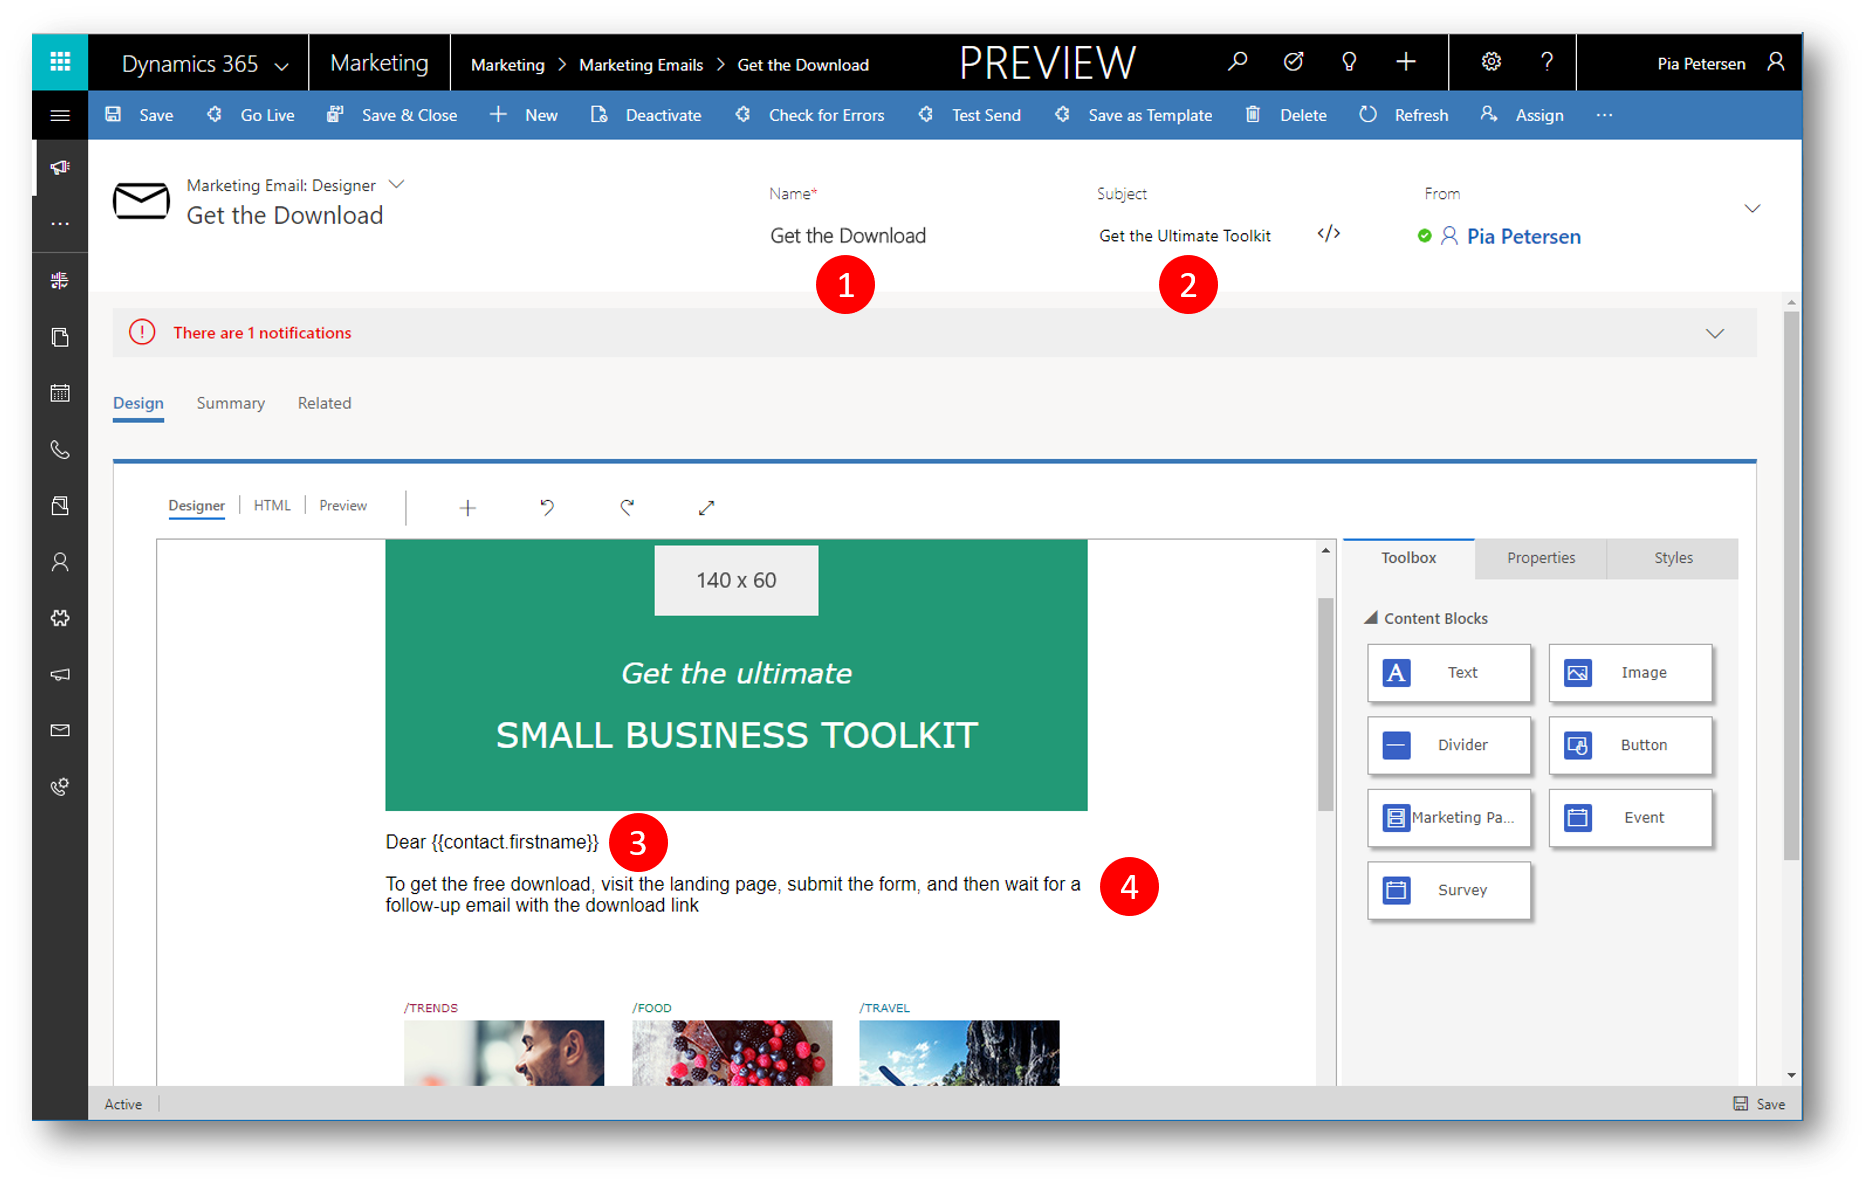
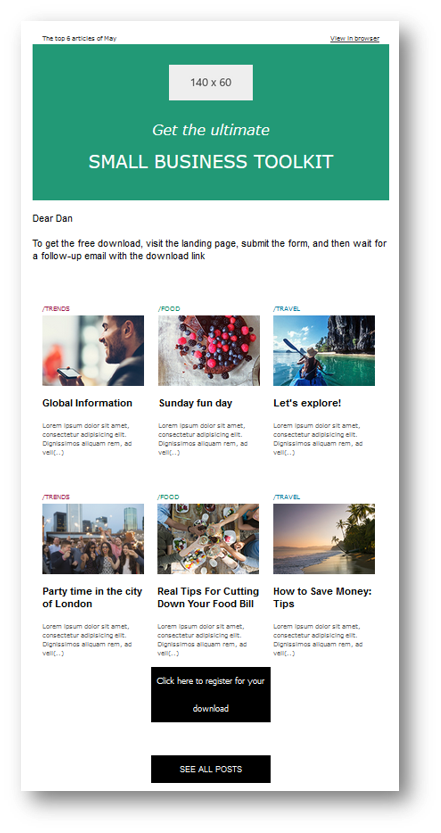
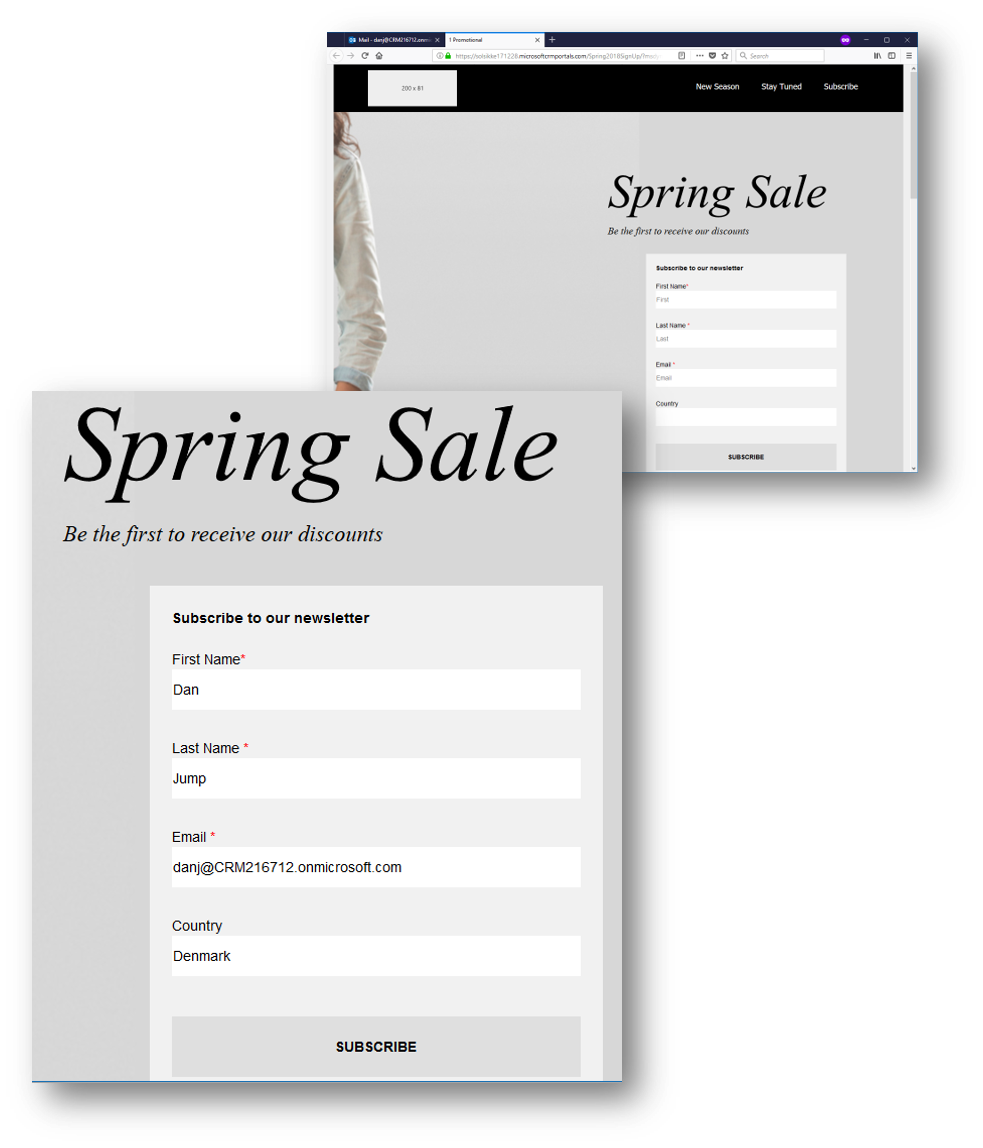
This (first message of your journey) message will invite recipients to pick up a free download from your website. To get the free download, they'll need to visit the landing page, submit a form, and then wait for a follow-up email that contains the download link
x - Fill in required and optional information
- Type a Name for the email
- Type a Subject for the email
- Add a dynamics placeholder for the contacts first name (optional)
- Add a body text with instructions to download (optional)
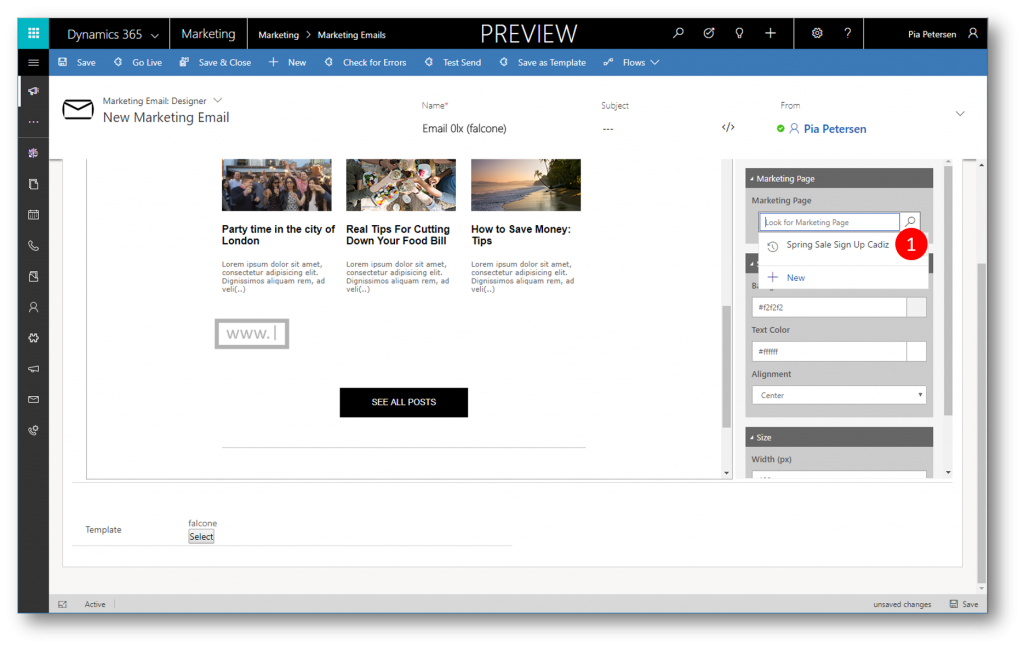
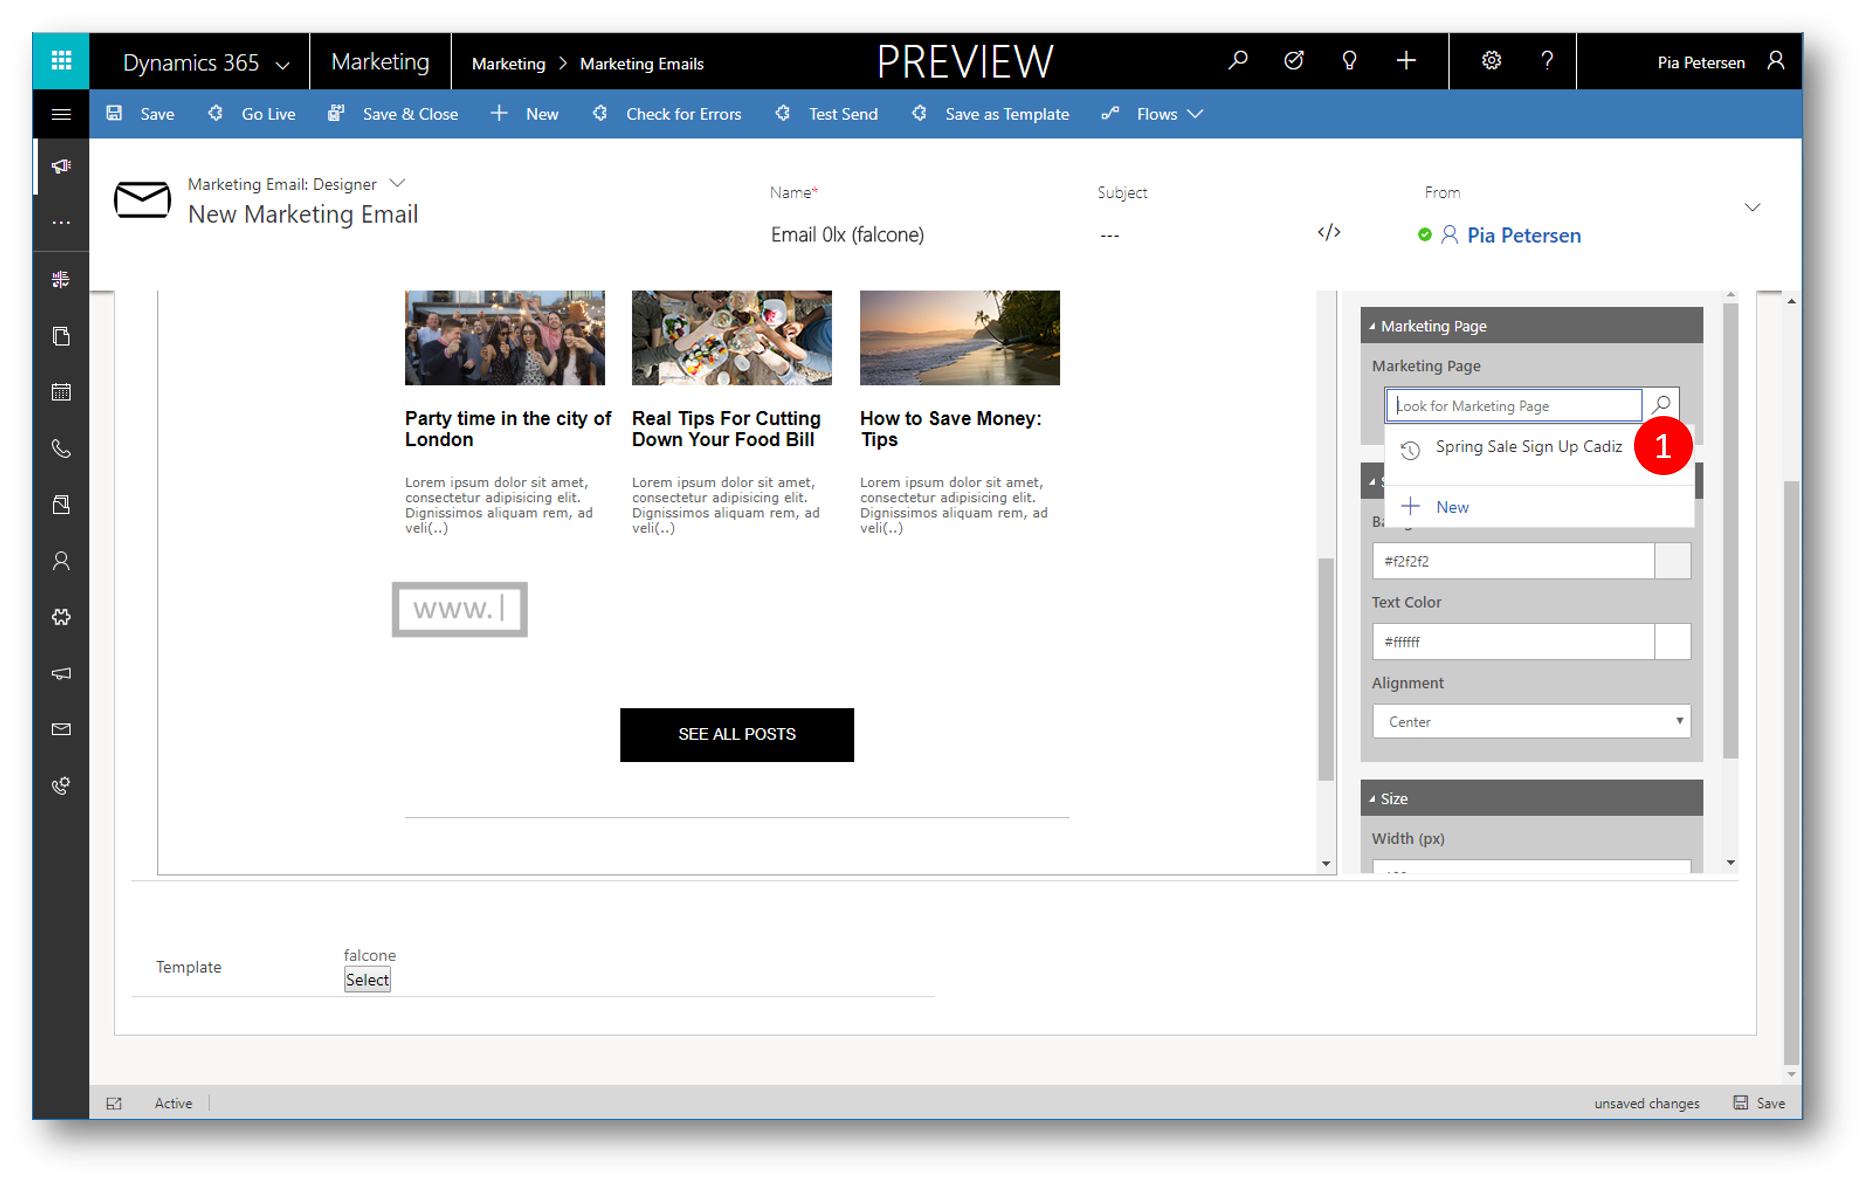
- With your new email message still open, drag a Marketing Page block from the Toolbox onto the design canvas
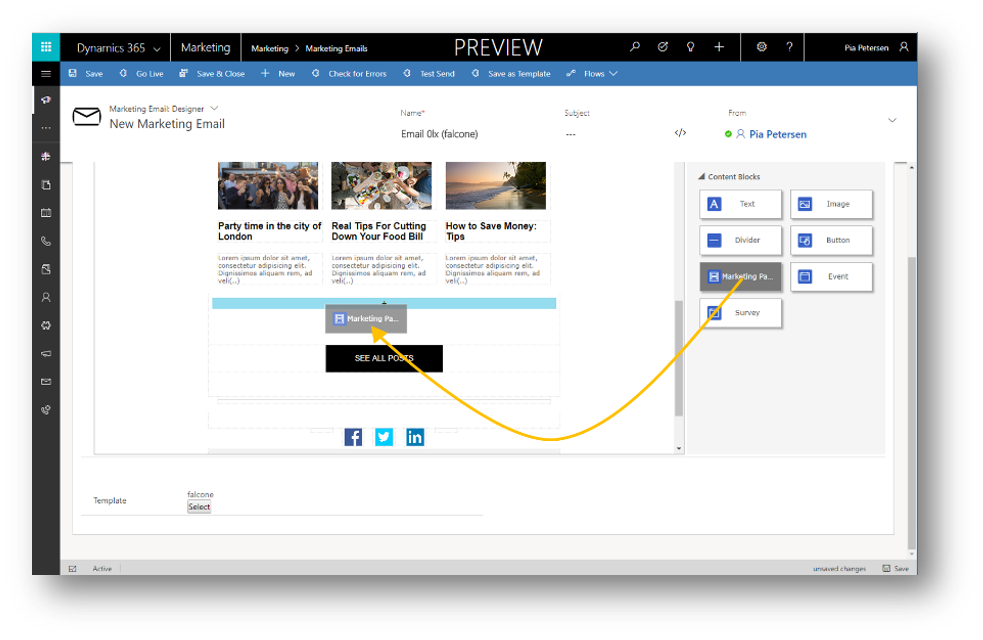
When you drop the Marketing Page block in place, it's automatically selected and the Properties tab opens to show its settings
x - In the Properties tab set the Marketing Page field to the name of a landing page (perhaps the one you already made if you followed along in this blog post: How to Create Landing Pages in the new Dynamics 365 for Marketing - link)
You now have a button with a text saying Click Here (if clicked the recipient is taken to the marketing page)
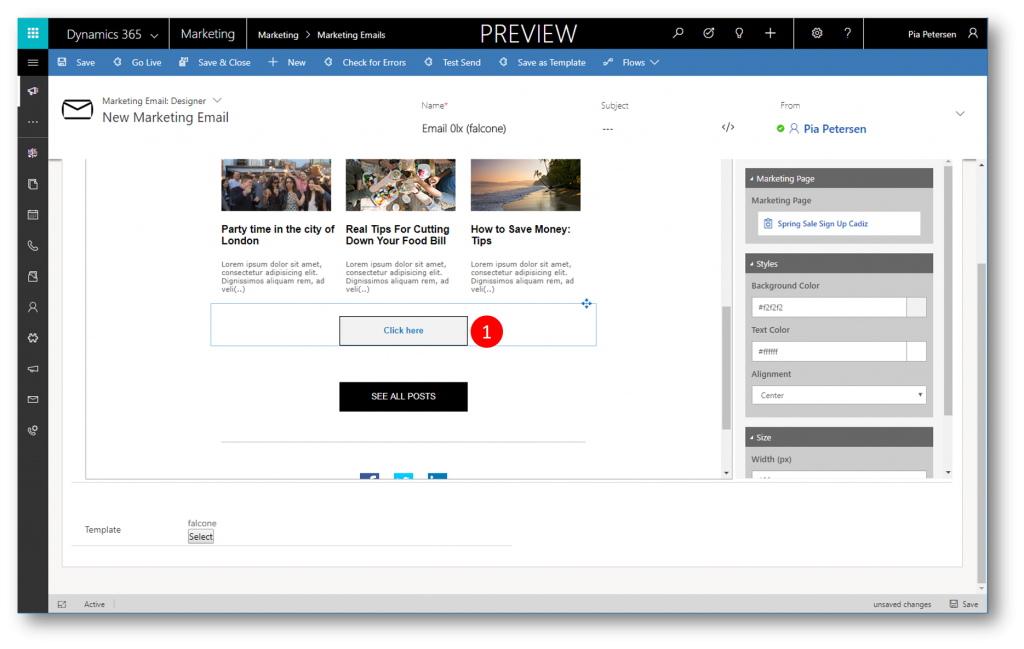
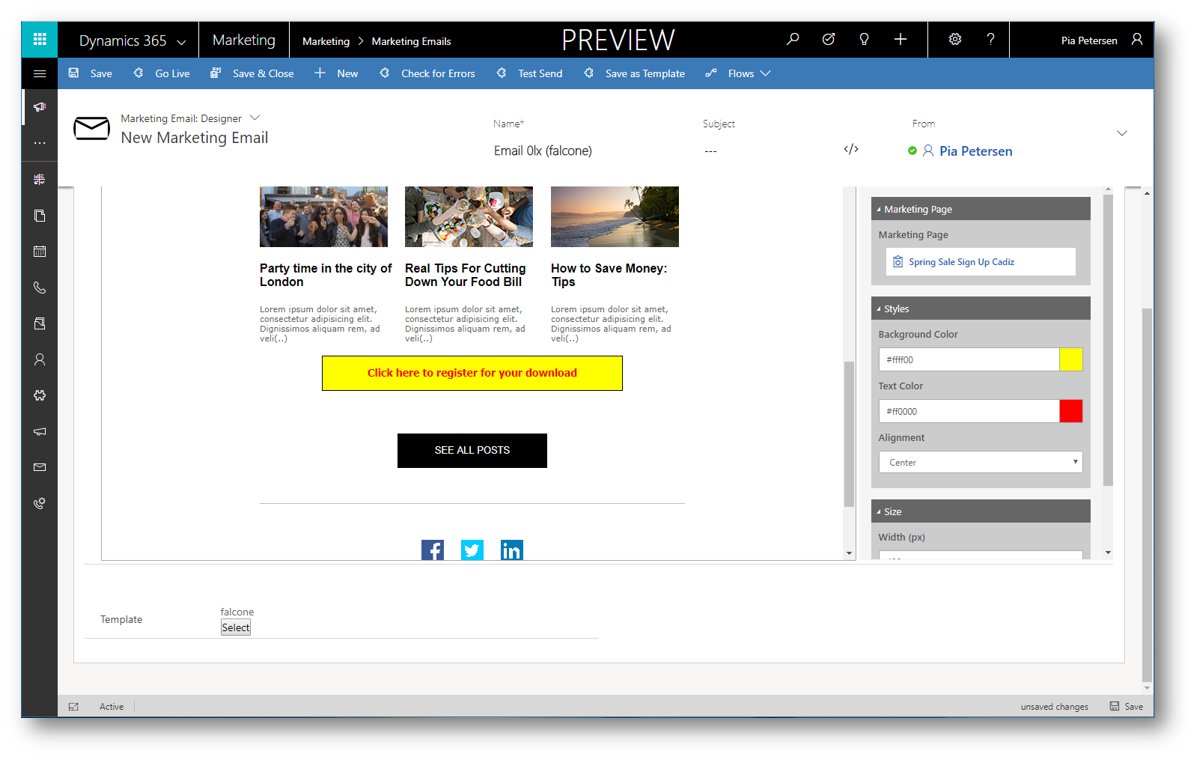
- Style and format the button
- Edit and style the button text by working directly on the canvas and using the floating toolbar, just as you would with a Text block. You might enter text such as “Click here to register for your download”
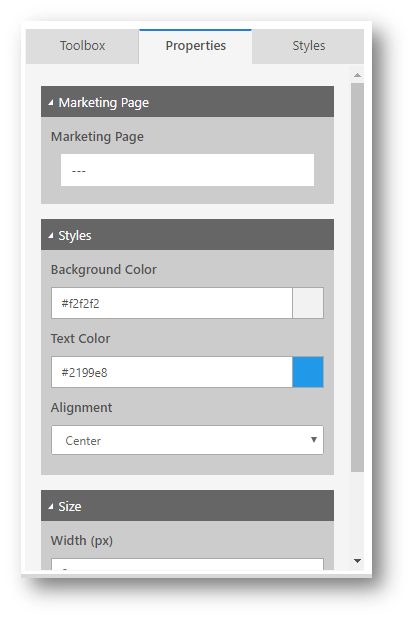
- Working on the Properties tab in the Styles and Size sections, choose a background color, text color, height, and width for the button

- Click Save to save your message, click Check for Errors, fix any issues, and then click Go Live to publish the message and make it available for customer journeys
- Go to Marketing Execution and then click Marketing Emails to create a new email message (refer to this blog post for more: "Try Dynamics 365 for Marketing" - link)
-

Email with download link and email with follow up message
Create two more marketing emails
- A download link message
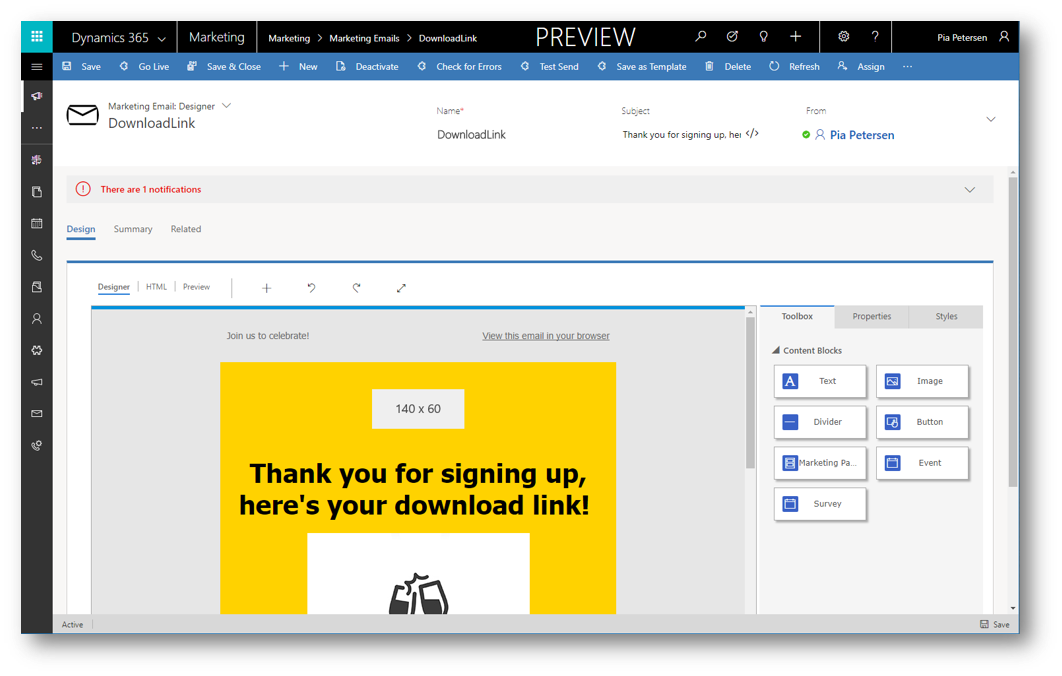
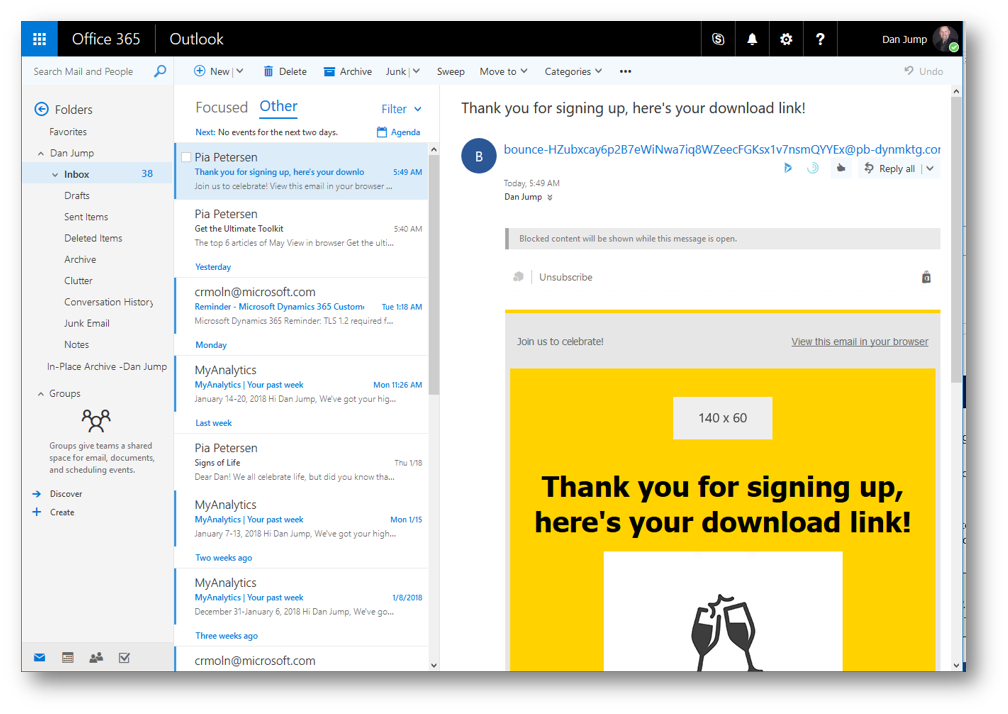
This message will be sent after a contact submits the form on the landing page- Let the subject be "Thank you for signing up, here's your download link!" but don't worry too much about the content for now
In a real project, you would include a link to the promised download here

- Save, Check for Errors, and Go Live
x
- Let the subject be "Thank you for signing up, here's your download link!" but don't worry too much about the content for now
- A follow-up message
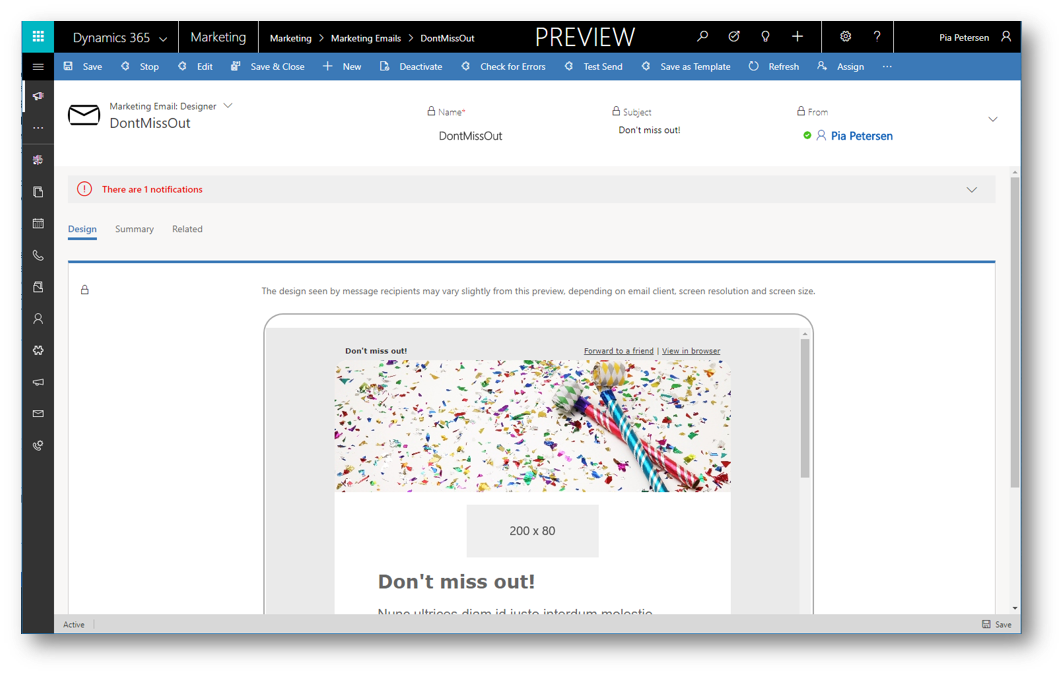
This message will be sent if a contact does not submit the form after a few days- Let the subject be "Don't miss out!", but don't worry too much about the content for now.
In a real project, you probably would repeat most of the original offer here

- Save, Check for Errors, and Go Live
- Let the subject be "Don't miss out!", but don't worry too much about the content for now.
You now have the thee mails needed for the customer journey in place. Next up is to create the journey
Create customer journey
You can refer to this blog post for more details: "Try Dynamics 365 for Marketing" - link
- Go to Marketing Execution, click Customer Journeys and then create a new (blank) customer journey
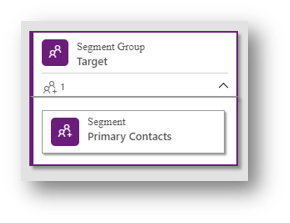
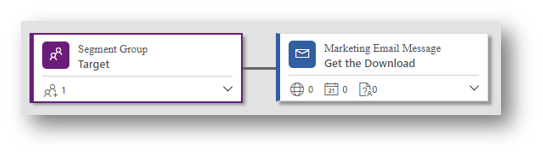
- Place a Segment Group tile in the first position, and configure its child Segment tile to reference a segment
- Add an Email tile right after the Segment Group, and configure it to reference the first email message you made above (with message with the landing page button)

Add a landing page
Although your email message includes a link to a landing page, the journey is not aware of that link, nor even of the landing page itself.
This journey should react to landing page submissions, so you need to reference the page and link it to the message by adding a marketing-page tile as a child to the email tile.
- Drag a Marketing Page tile from the Toolbox, and drop it directly onto the Marketing Email Message tile
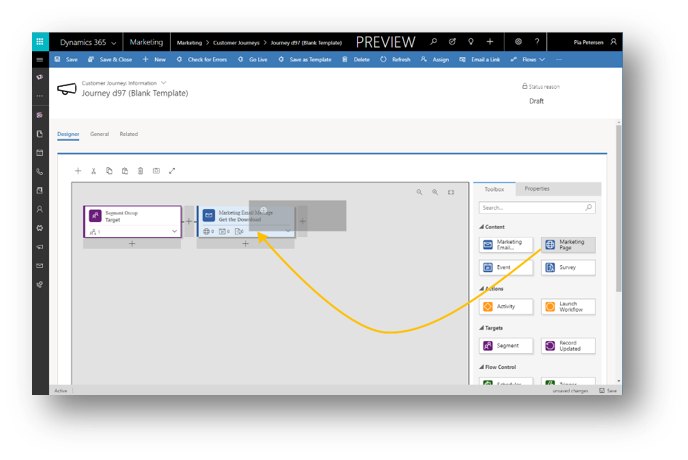
- To see the child tile for the Marketing Page you just added, expand the Marketing Email Message tile
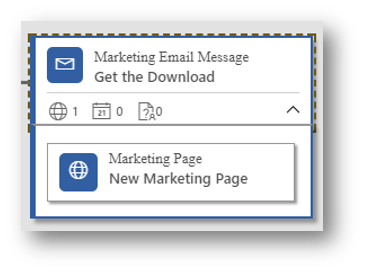
- Select the Marketing Page child tile, open the Properties tab, and set the following
-
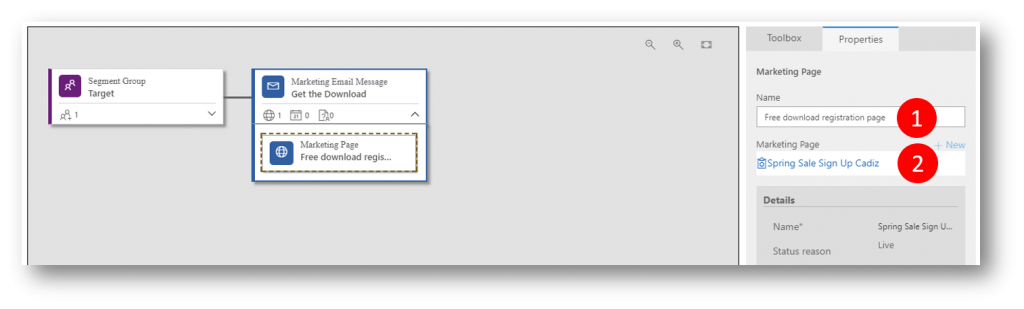
- Name: Type a value that you recognize later (such as “Free download registration page”)
- Marketing Page: Set to the name of the landing page you made above
-

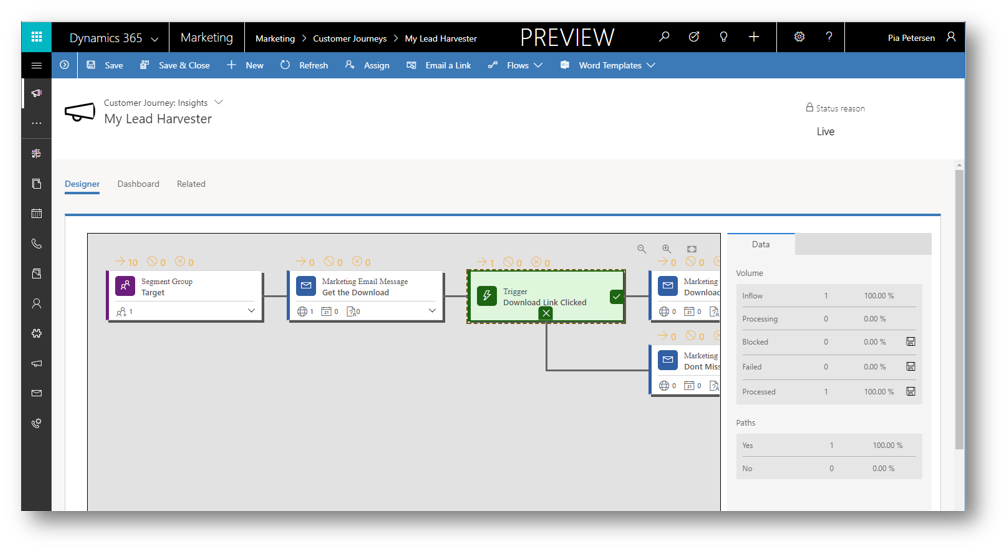
Add a trigger tile
Trigger tiles add interactivity to the journey by splitting the flow and establishing logical criteria for deciding which path each contact will take. As mentioned earlier we will send contacts down one of two paths, depending on their actions
- Drag a Trigger tile from the Toolbox to the space immediately to the right of the Marketing Email Message tile
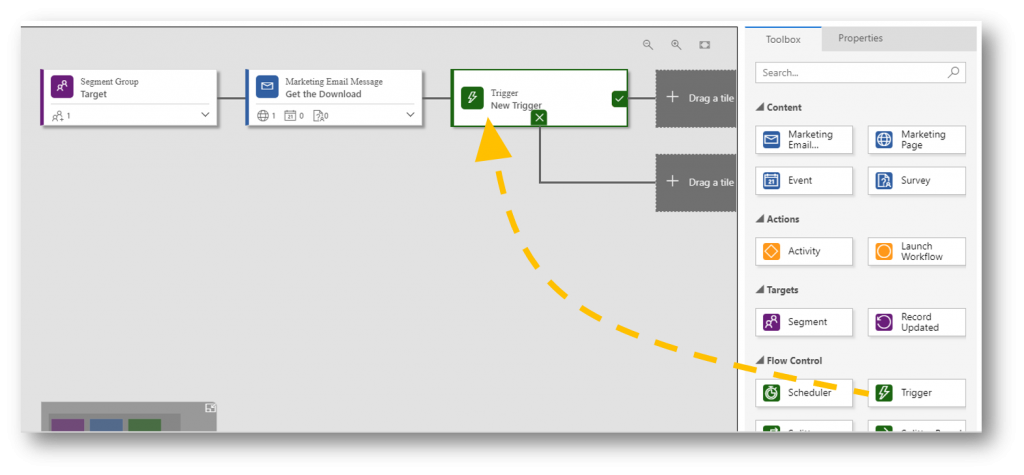
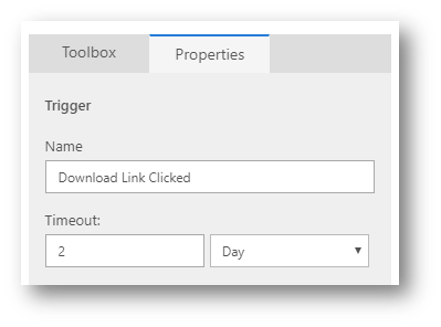
- Select the new Trigger tile on the canvas, and then open the Properties tab
- Name: Type a value that you will recognize later (such as “Download Link Clicked”)
- Timeout: Set a duration to establish how long contacts will wait on this tile before being sent down the false (bottom) path if they don't submit the registration form.
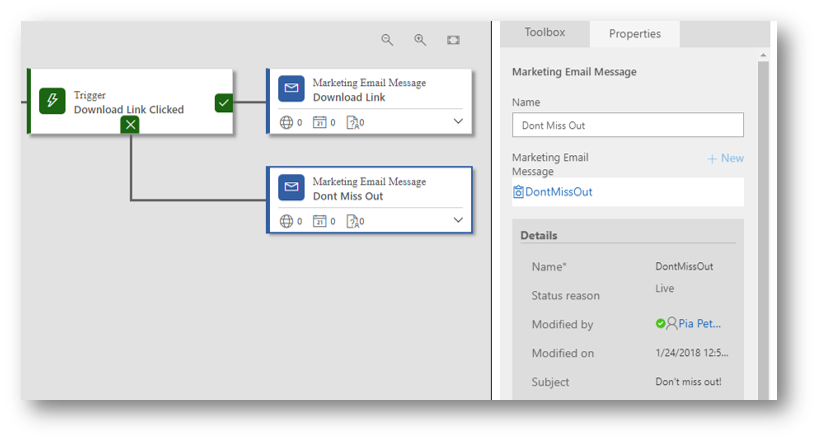
- With the Trigger tile still selected and the Properties tab still open, select +New next to the Set Rules heading
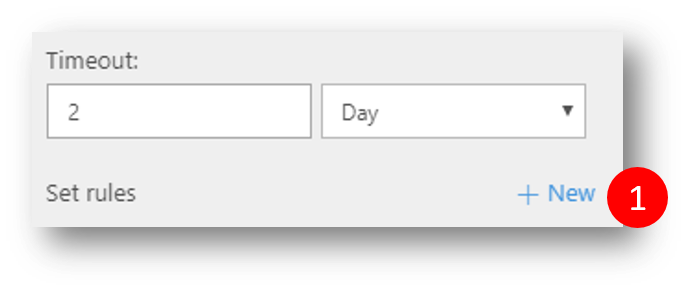
A new rule, called Rule 1, is added for the trigger
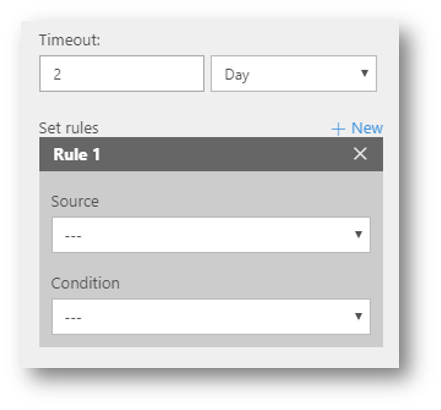
- Make the following settings for Rule 1:
- Source: Choose the name of the Marketing Page tile you added to the Marketing Email Message tile (eg “Free download registration page”).
Note that this references the name of the tile, not the name of the marketing page itself (which by the way was “Spring Sale Sign Up Cadiz” – but thats not important for this exercise) - Condition: Set to User registered
This expression evaluates to true as soon as a contact submits valid information by using the referenced landing page. Each contact will wait at this trigger tile either until its logic evaluates to true or until the timeout period has elapsed, whichever comes first. As soon as a contact fulfills the requirements, it's sent down the true (top) path; if the timeout expires first, the contact is sent down the false (bottom) path instead.

- Source: Choose the name of the Marketing Page tile you added to the Marketing Email Message tile (eg “Free download registration page”).

Add two more marketing email tiles
- Add two more Marketing Email Message tiles after the trigger, one on the top path and one on the bottom path
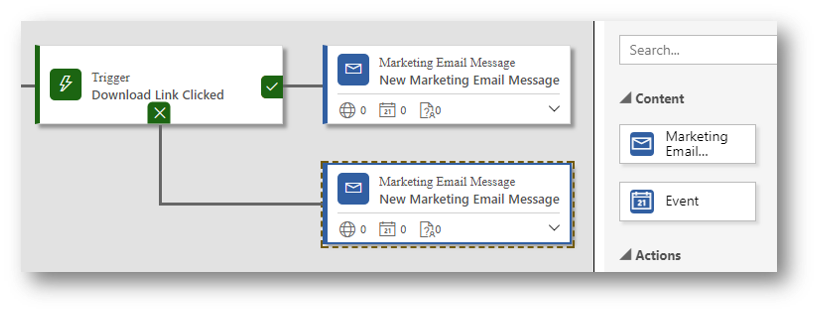
- Configure them as follows:
- Top tile: This message is sent to contacts who submit the form (when the trigger evaluates to true). Configure it to send the download link message that you created earlier in this procedure.
- Bottom tile: This message is sent to contacts who haven't submitted the form within three days of receiving the initial offer. Configure it to send the follow-up reminder message that you created earlier in this procedure.
Test the customer journey
- Save the journey
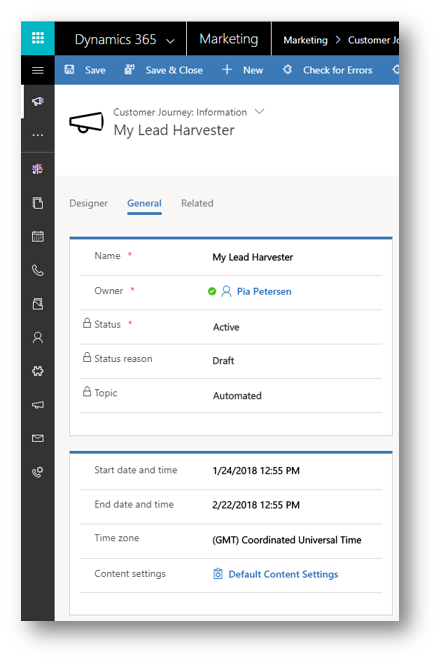
- Go to the General tab to give the journey a name and schedule (note: if you want the journey to kick off immediately make sure to set Start date and time to today)
- Check for Errors and Go Live
After the journey starts open the mailbox of one of the recipients and open the mail received
Then click the download button in the mail to navigate to the download page, fill out the form and click Subscribe to complete the “registration” (the simulated sign up for a download)
Verify in the inbox of the recipient that the second mail (the “Download Link” mail) is received
On the Insights form of the Customer Journey notice the statistics for the Trigger tile (one contacts sent down the top/yes branch so far)
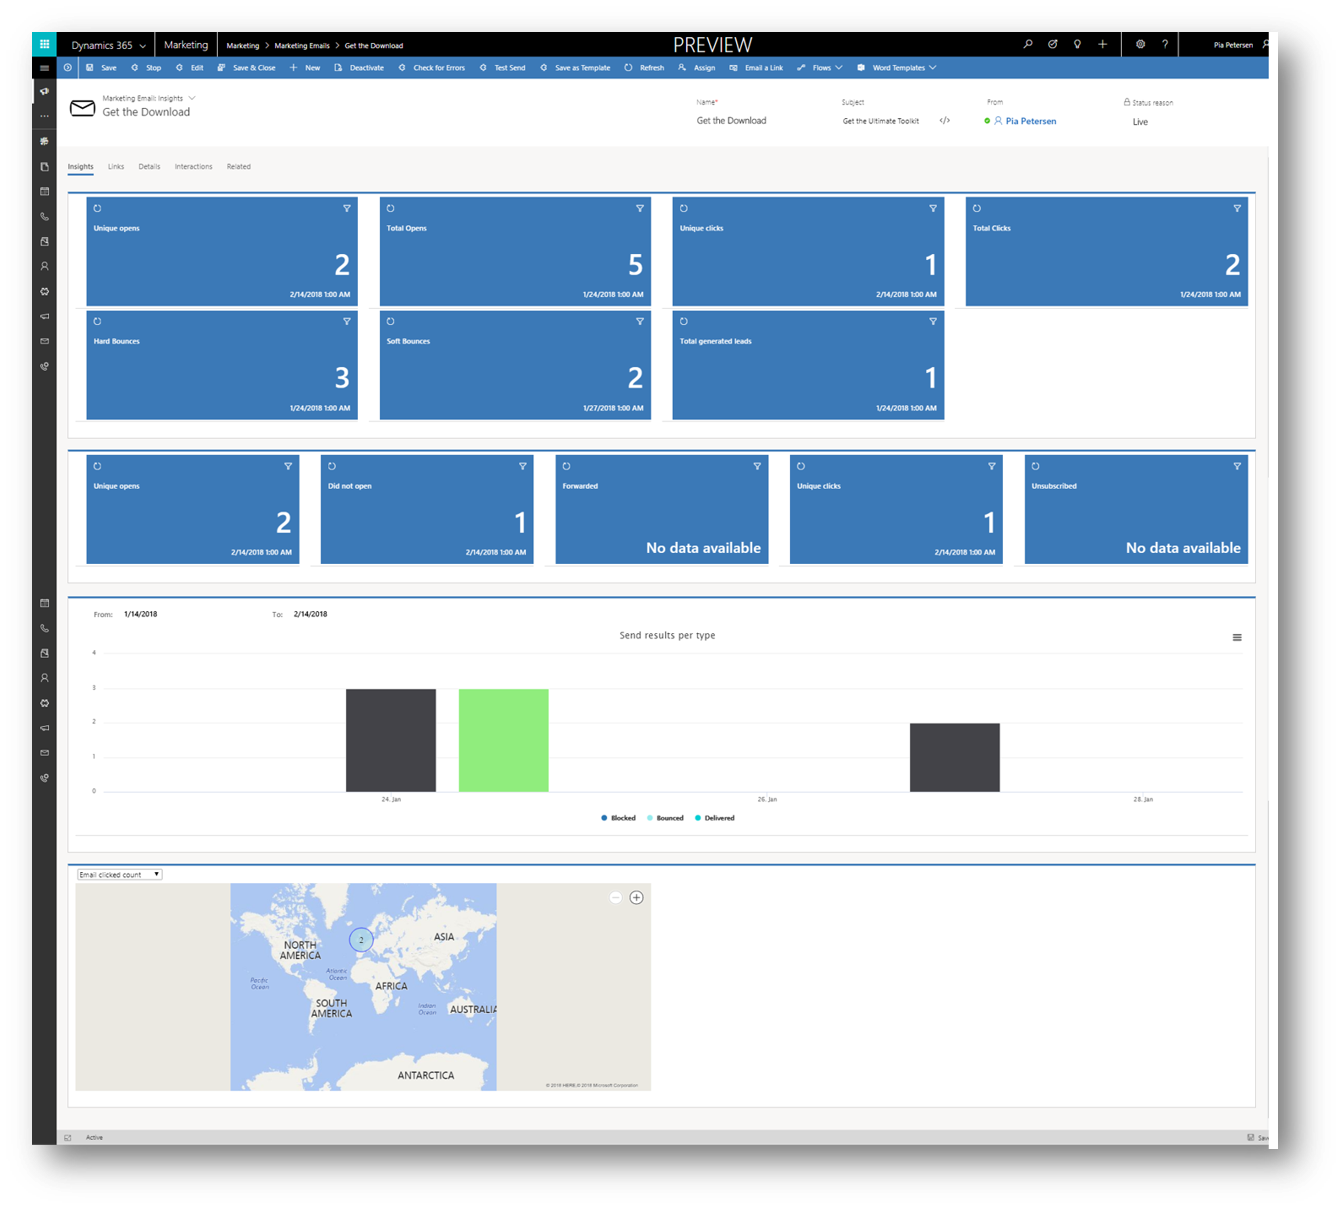
You can also navigate to the first email of the the flow, and - on the Insights tab - get lots of information about that mail (unique opens, unique clicks etc)
Close
I hope you got a feeling for the power in Customer Journeys by now, how you can use Dynamics 365 to visualize and automate the journey that customers will take while interacting with your marketing initiatives on their way to making a purchase - and I wish you lots of good times with Dynamics 365 for Marketing
Note
This blog post is part of a five posts series to help you get started with Dynamics 365 for Marketing
- How to Create a Dynamics 365 for Marketing Trial (1/5) - link
- Try Dynamics 365 for Marketing (2/5) - link
- How to Create Landing Pages in the new Dynamics 365 for Marketing (3/5) - link
- Interactive Customer Journeys in Dynamics 365 for Marketing (4/5) - link
- Lead Scoring in Dynamics 365 for Marketing (5/5) - link
See Also
- Dynamics 365 for Marketing Help and Training - link