Social CRM at its best - Leads or Cases in Dynamics CRM from Social Posts in Microsoft Social Engagement
Microsoft Social Engagement (MSE) provides a platform for capturing public posts from social media.
When you send a social post from MSE to a Dynamics CRM with the new Link2CRM feature, a new social activity record is created in Dynamics CRM. The rule framework in Dynamics CRM can automatically turn these Social Activities into other types of CRM records, for example into a lead, an opportunity, or a case. Below is shown a tweet linked to CRM as a Lead.

In this blog post I'll walk you through how the Link2CRM feature works as is (that is with no rules defined) and then show you how to automate the process using the Automatic Record Creation and Update Rules framework in CRM
Steps
- Connect MSE to CRM
- Use the new Link2CRM feature as is out-of-the-box (will create social activity)
- Take a closer look at the Social Activity Additional Properties field
- Manually convert Social Activity to Case
- Set up Rule, incl Channel Group/Property
- See automation at work
x
(you can click the pictures for larger image)
x
Connect MSE to CRM
If you haven't done so already you need to connect your MSE to your CRM
Note: You may need to turn your pop-up blocker OFF in order for MSE be able to discover your CRM Online instance(s).
In MSE goto Settings -> Connections > click the "plus" sign
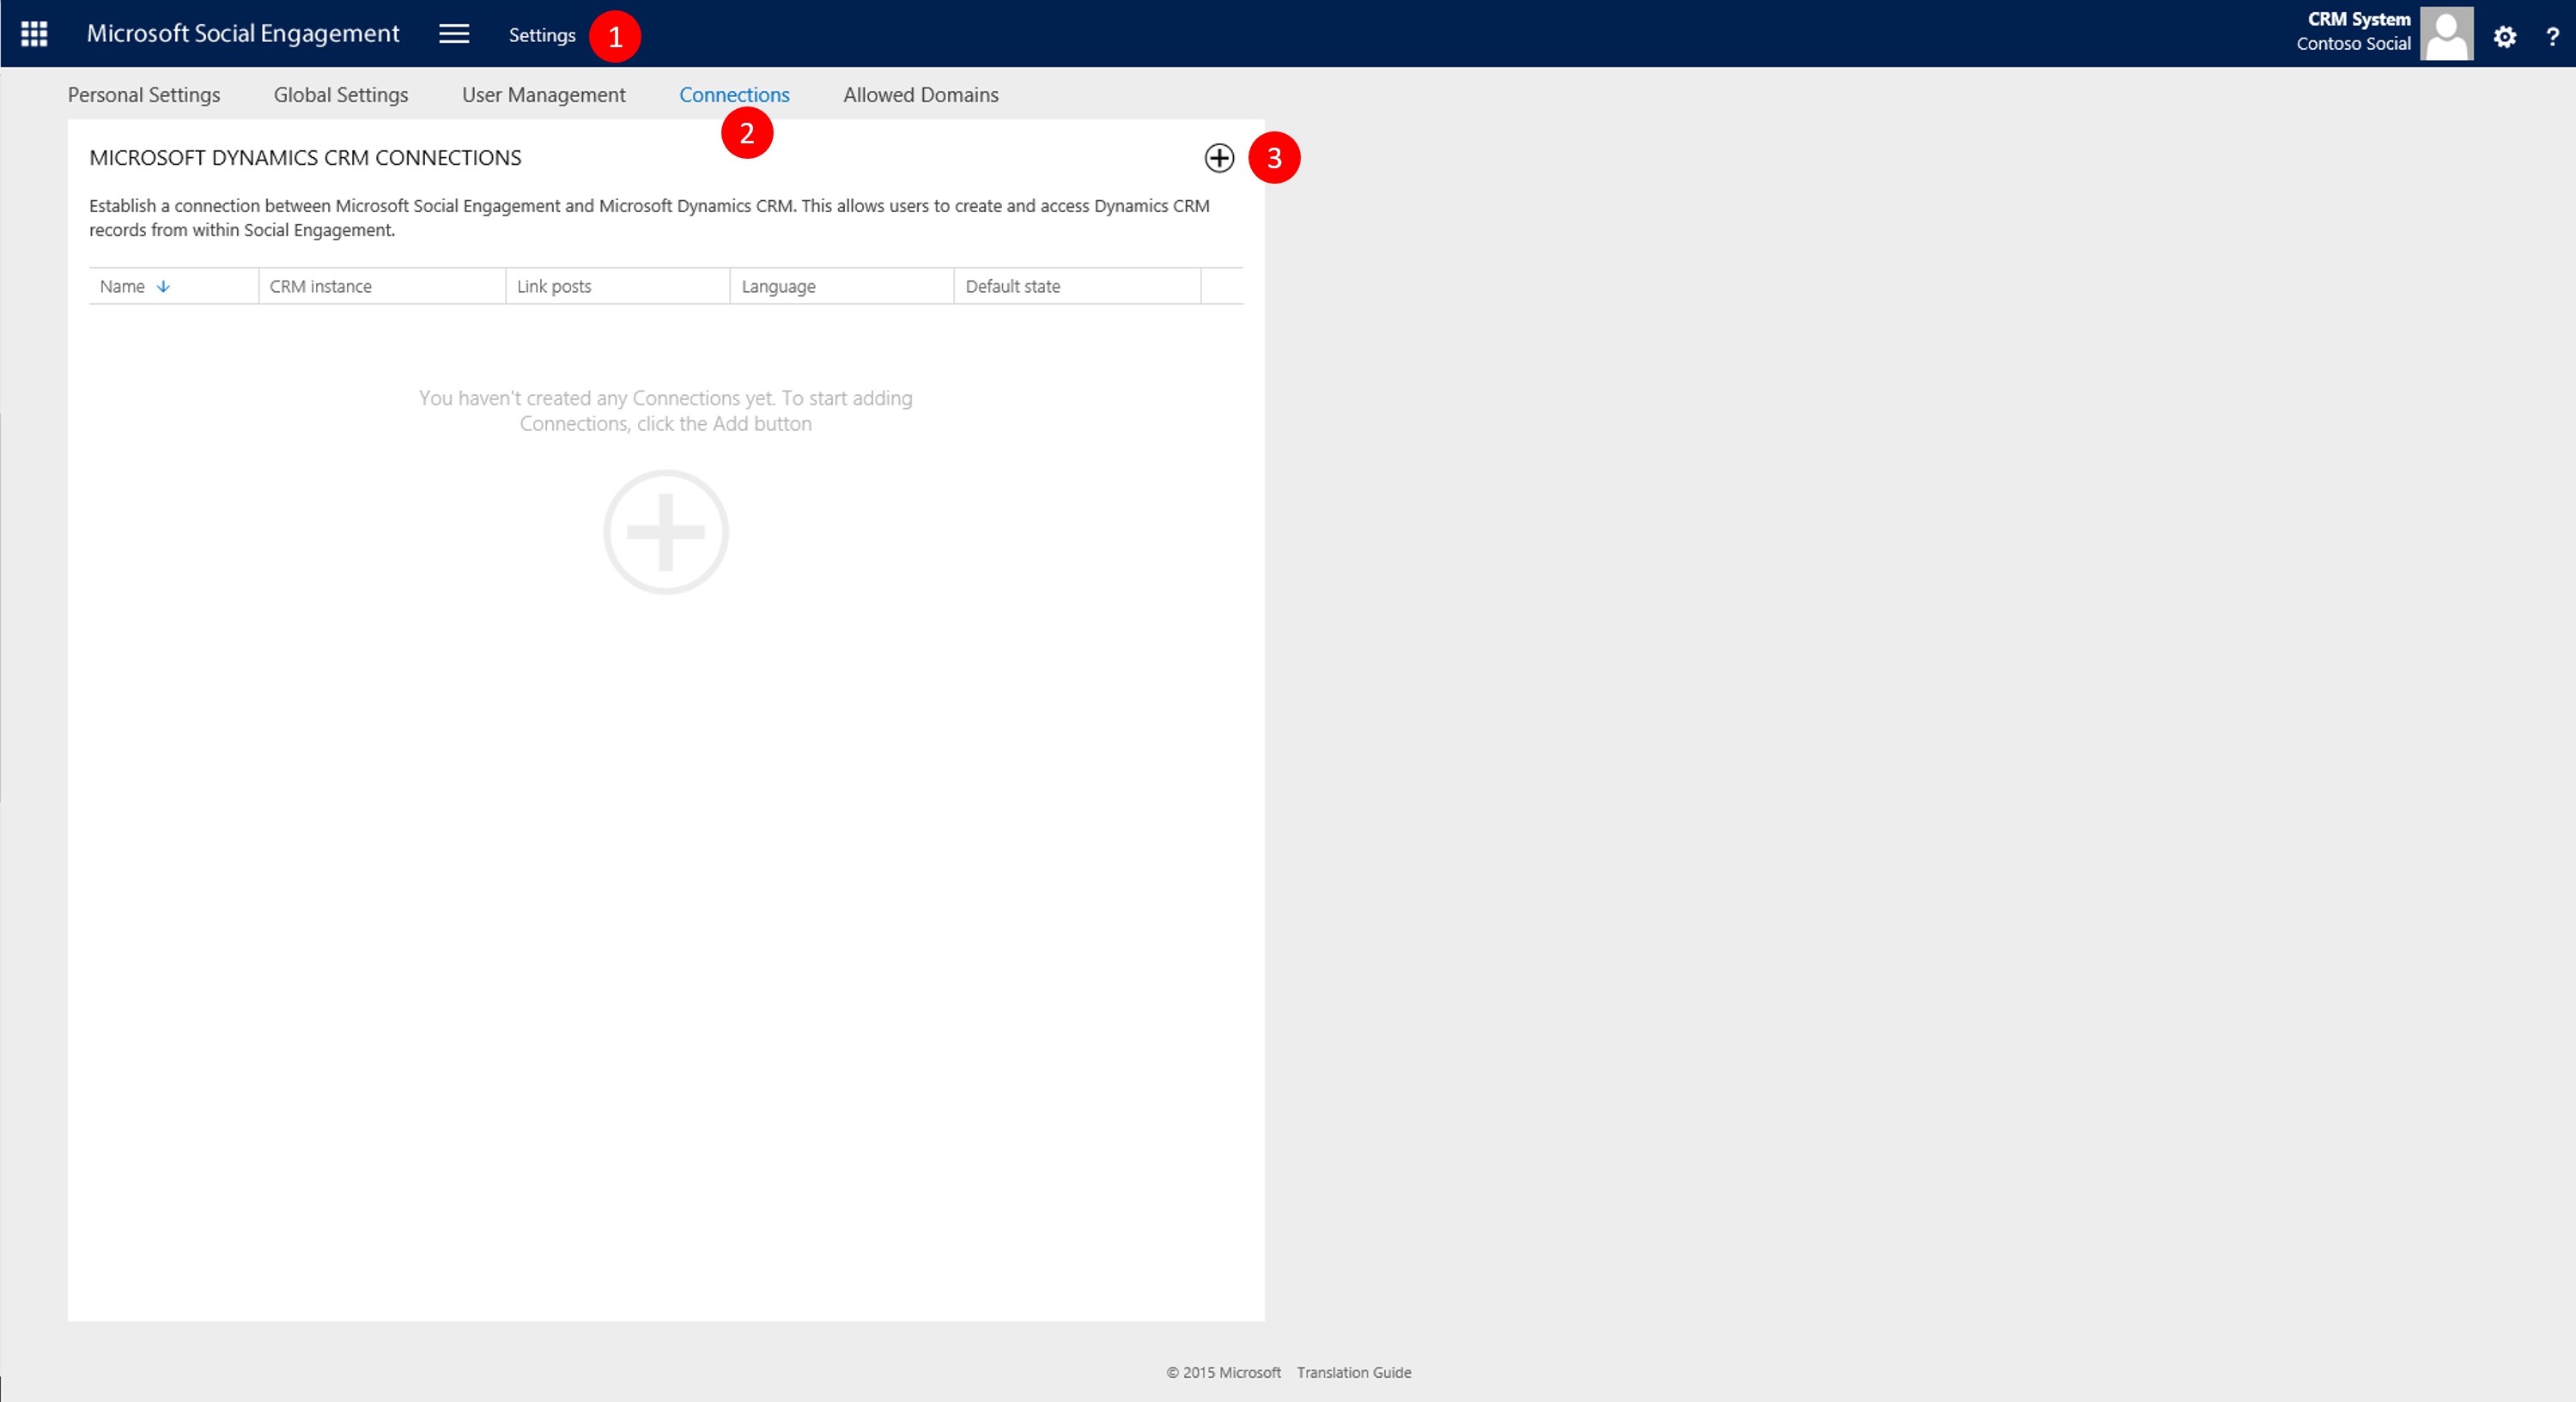
Picture 1: Ready to Add New Connection
In the "Add Connection" dialog pick CRM Online, the Location of your tenant, and let MSE discover your instances. Pick the instance and click Continue (6)
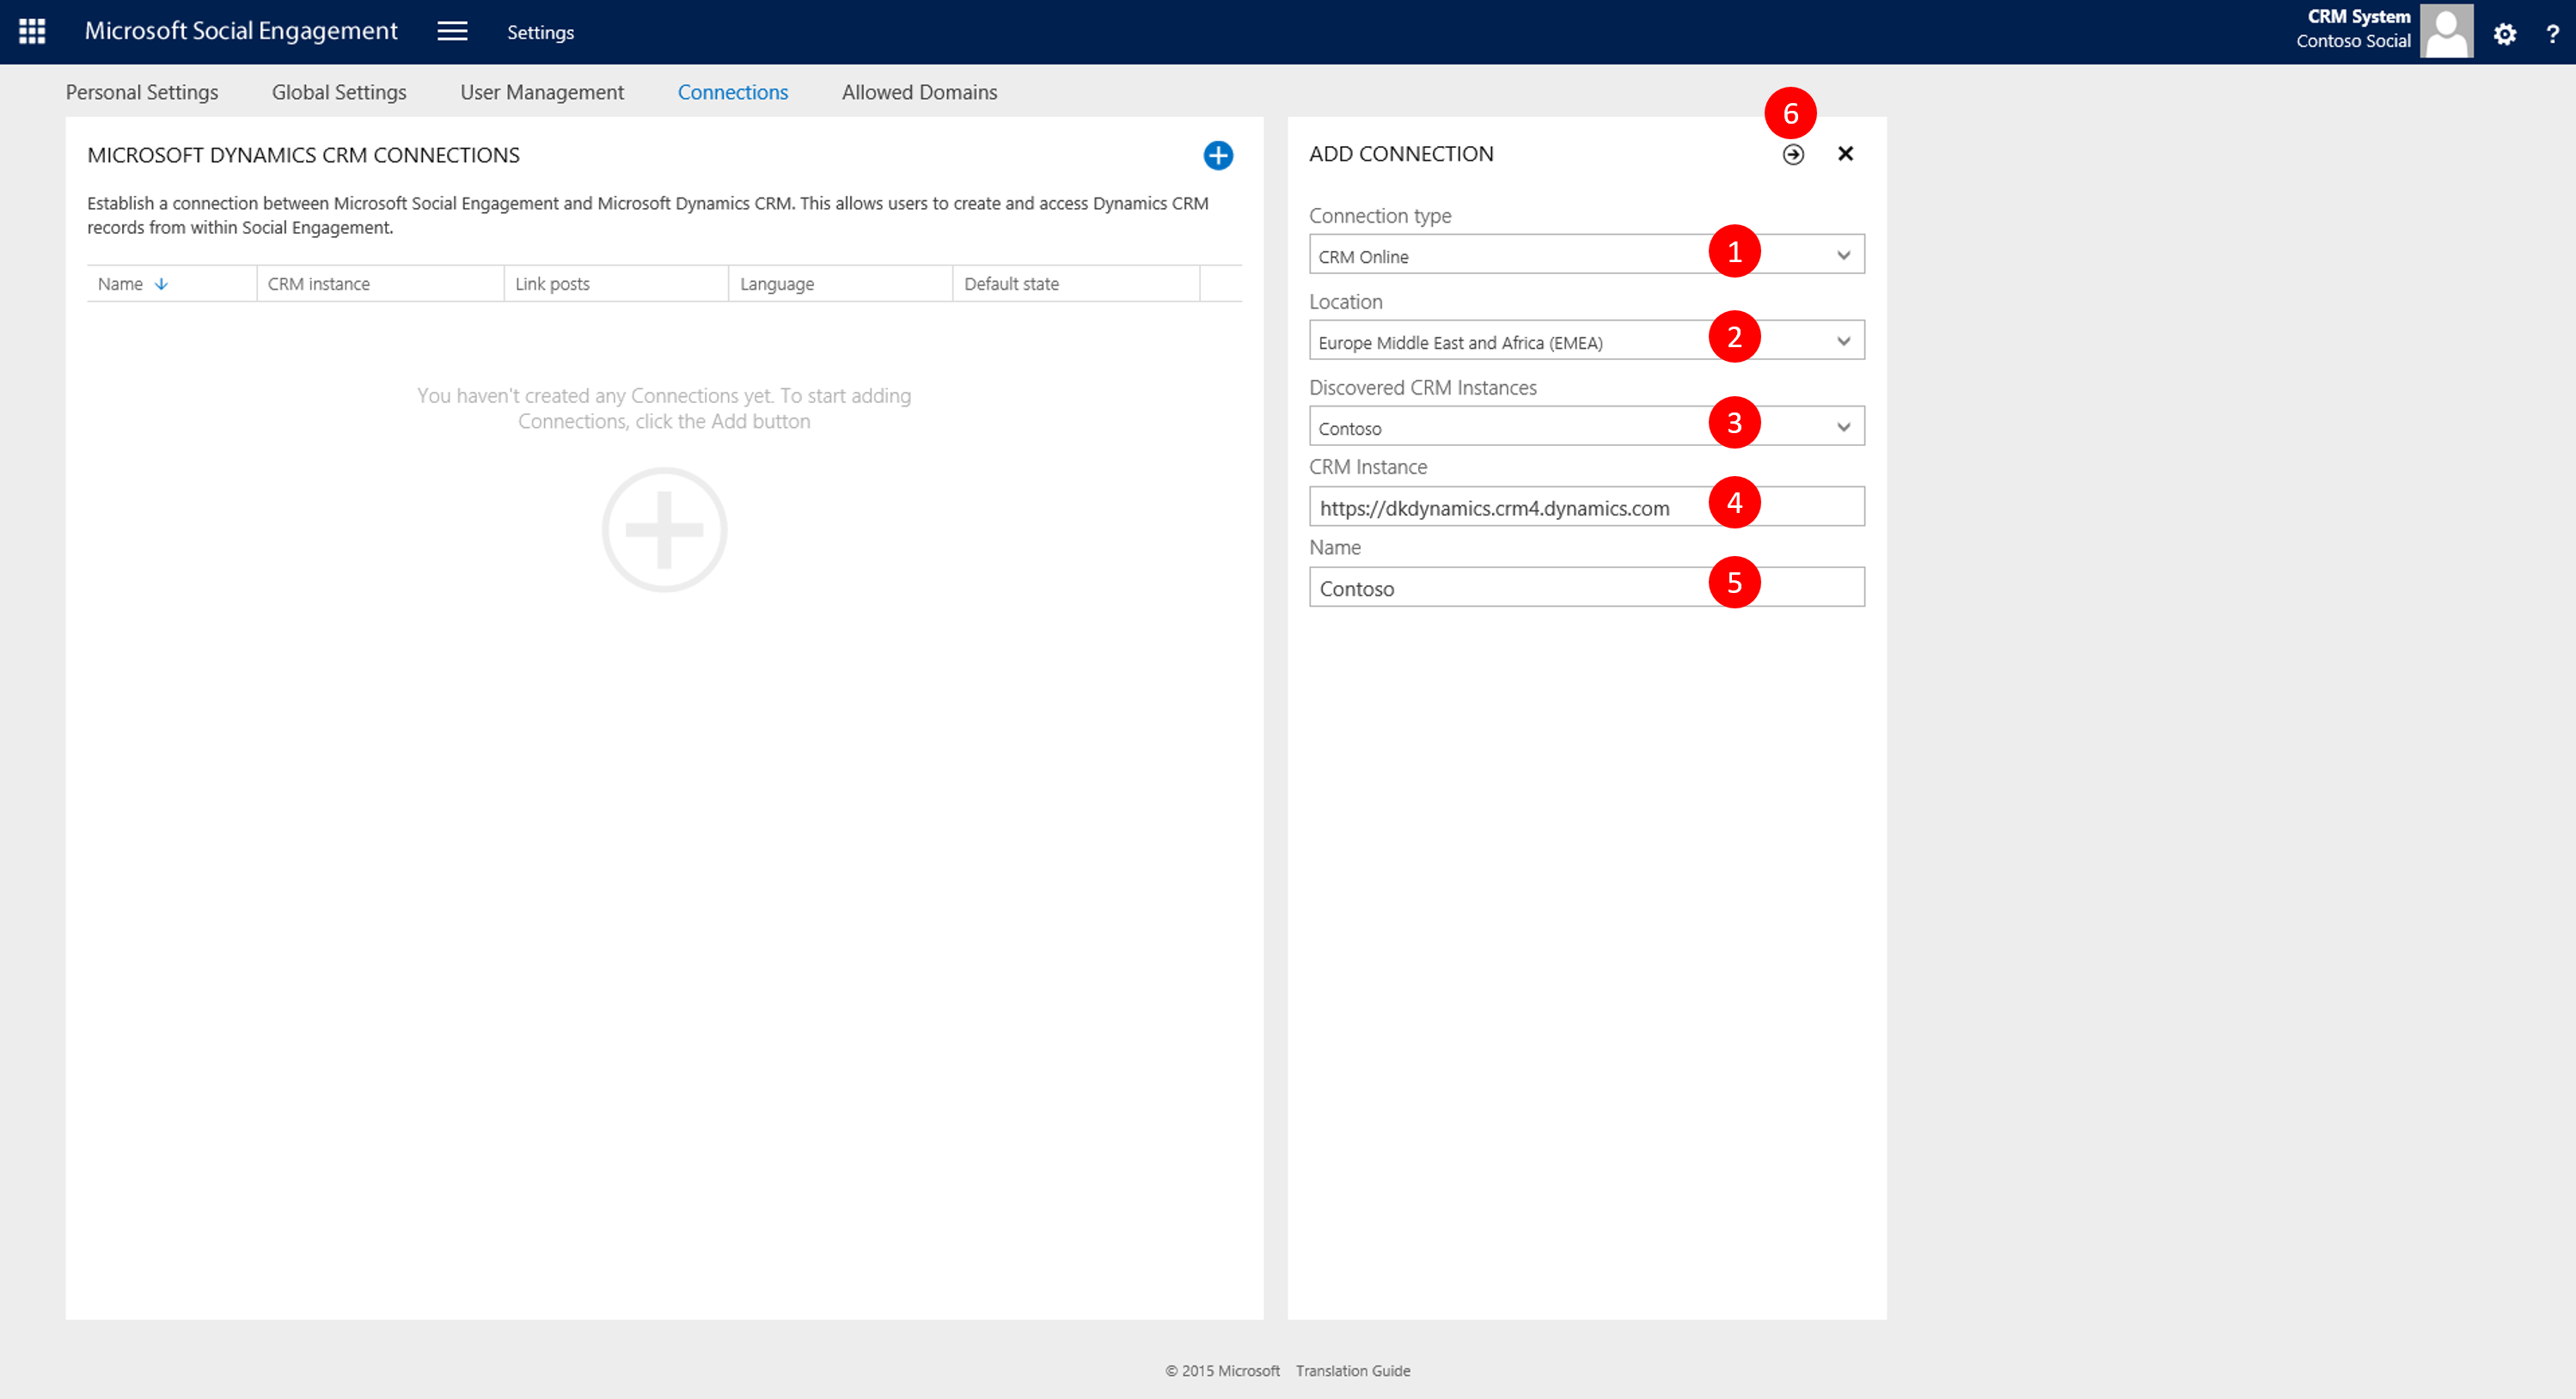
Picture 2: Point to your tenant and have MSE discover your instances
Notice Case and Lead entries created by default (1) and click Save 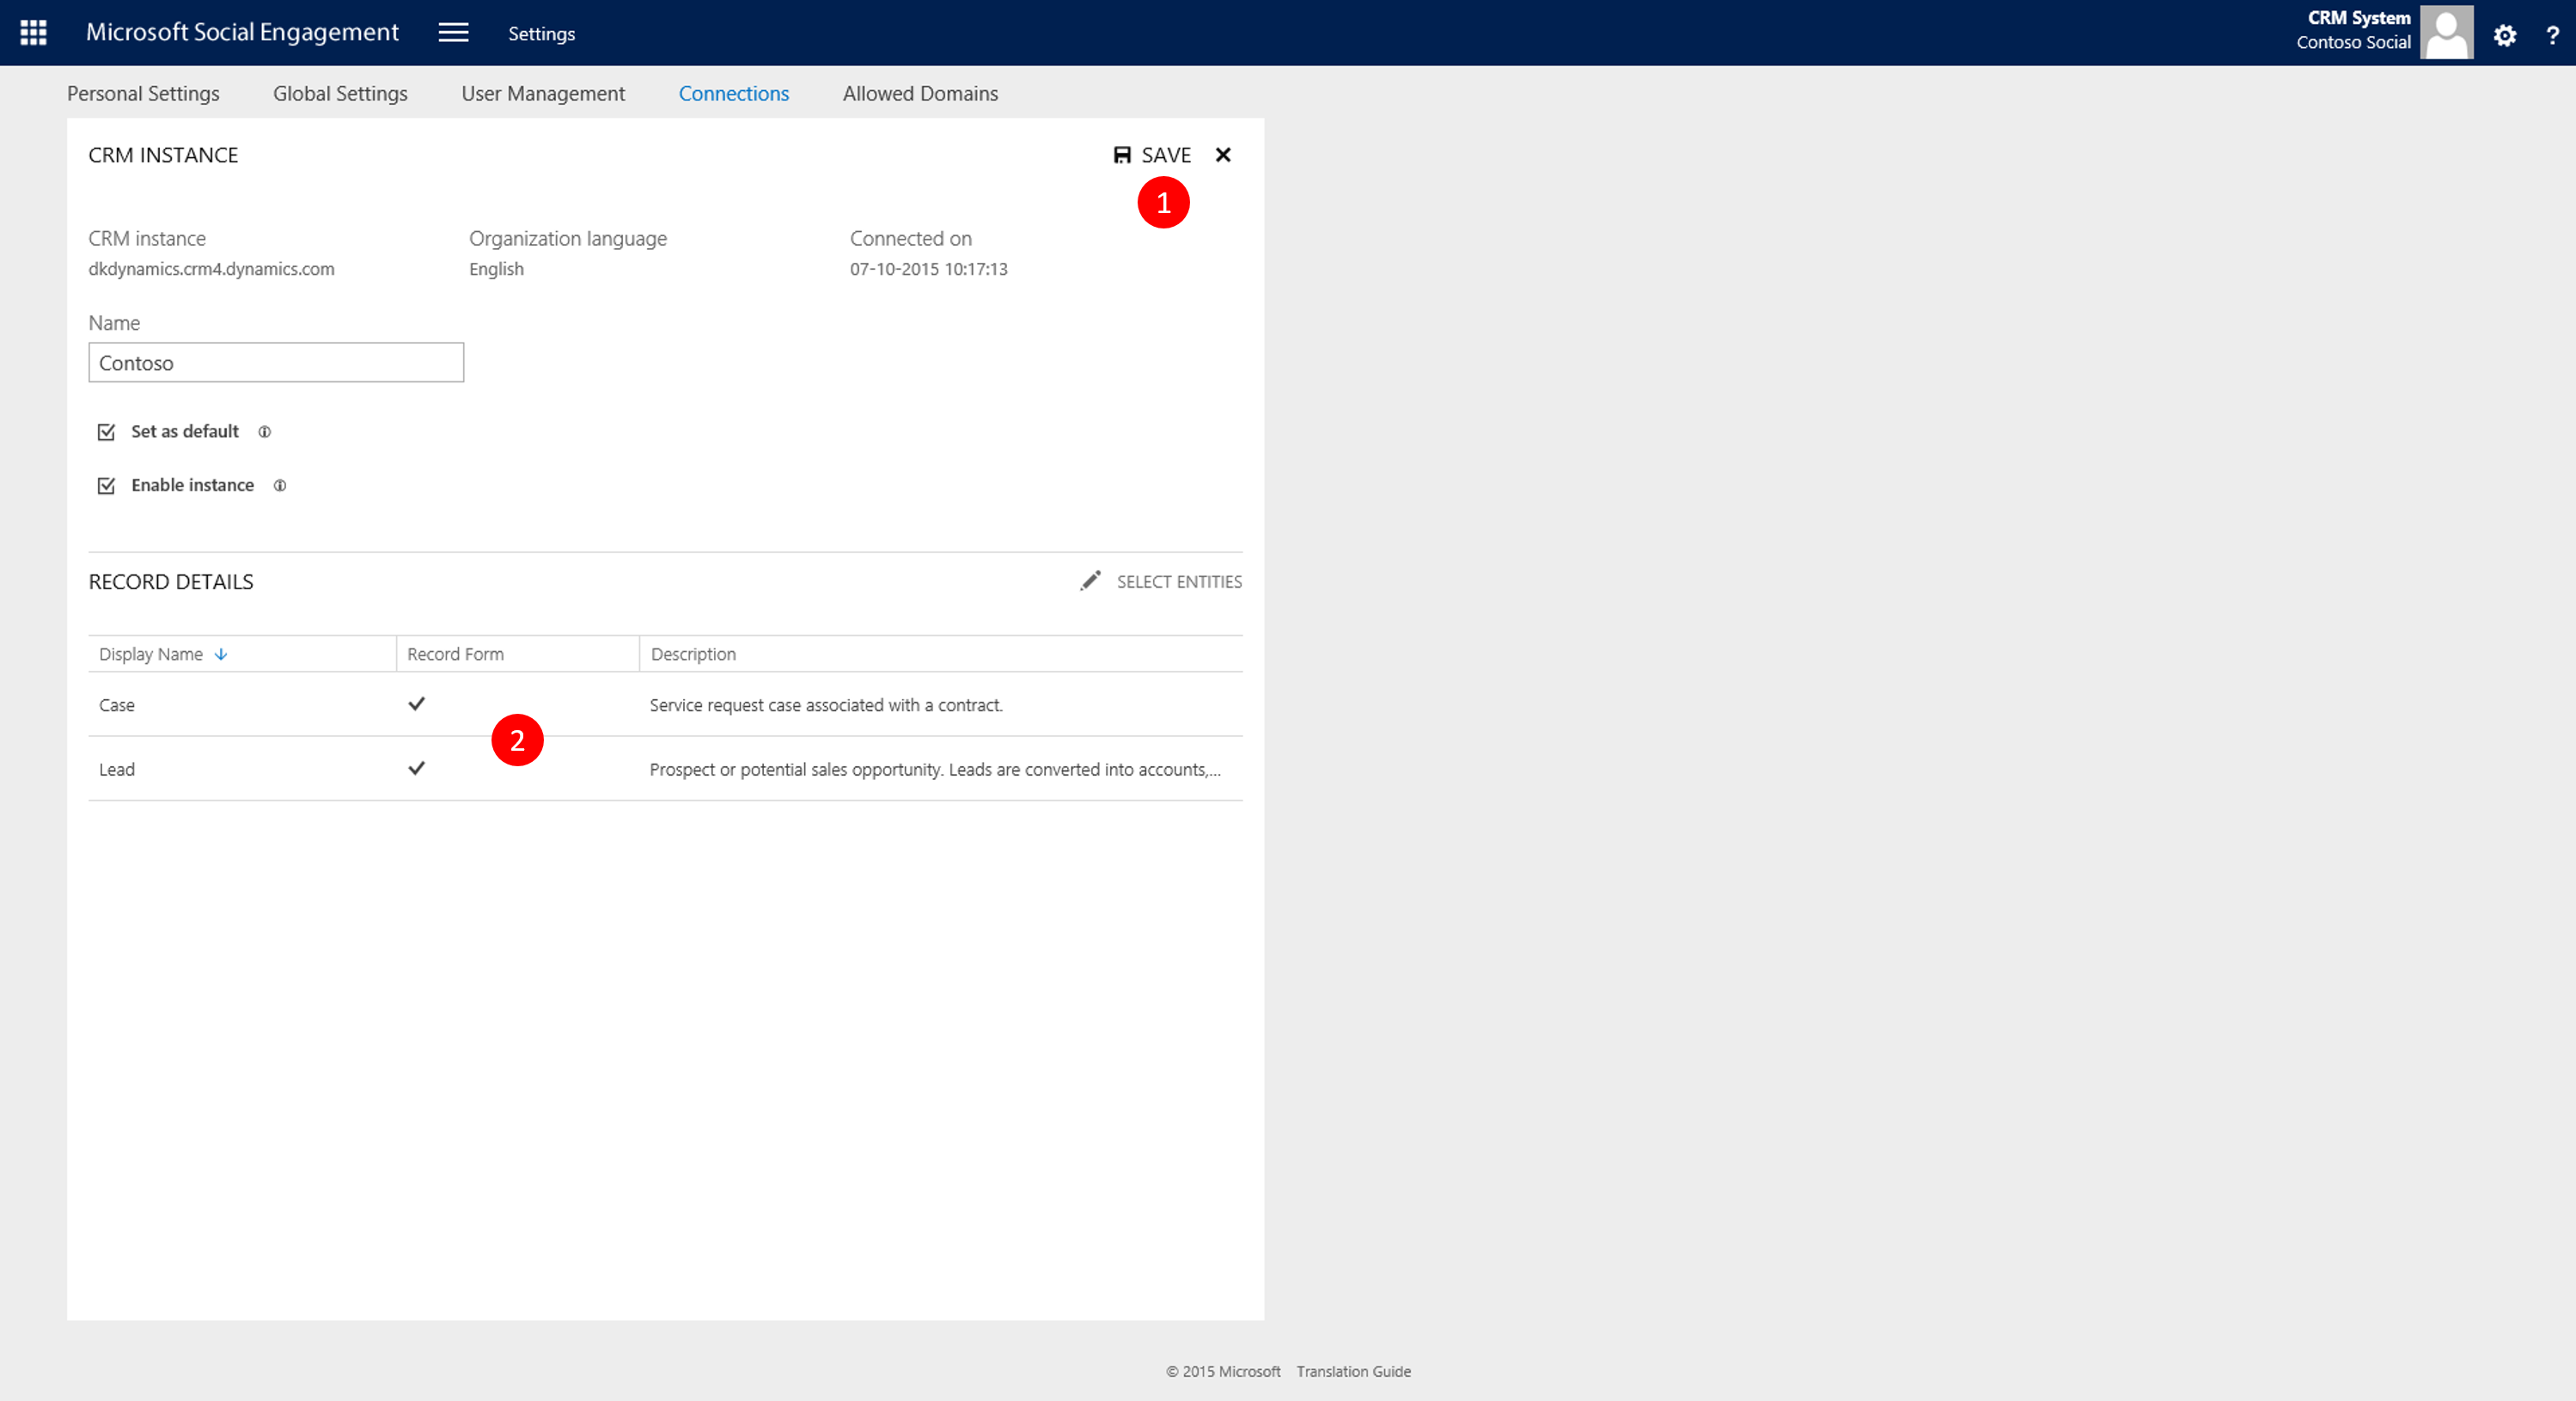
Picture 3: Case and Lead entries created by default
Important - Click the Case entity (1) and make a note of the unique name (2), which is "incident"
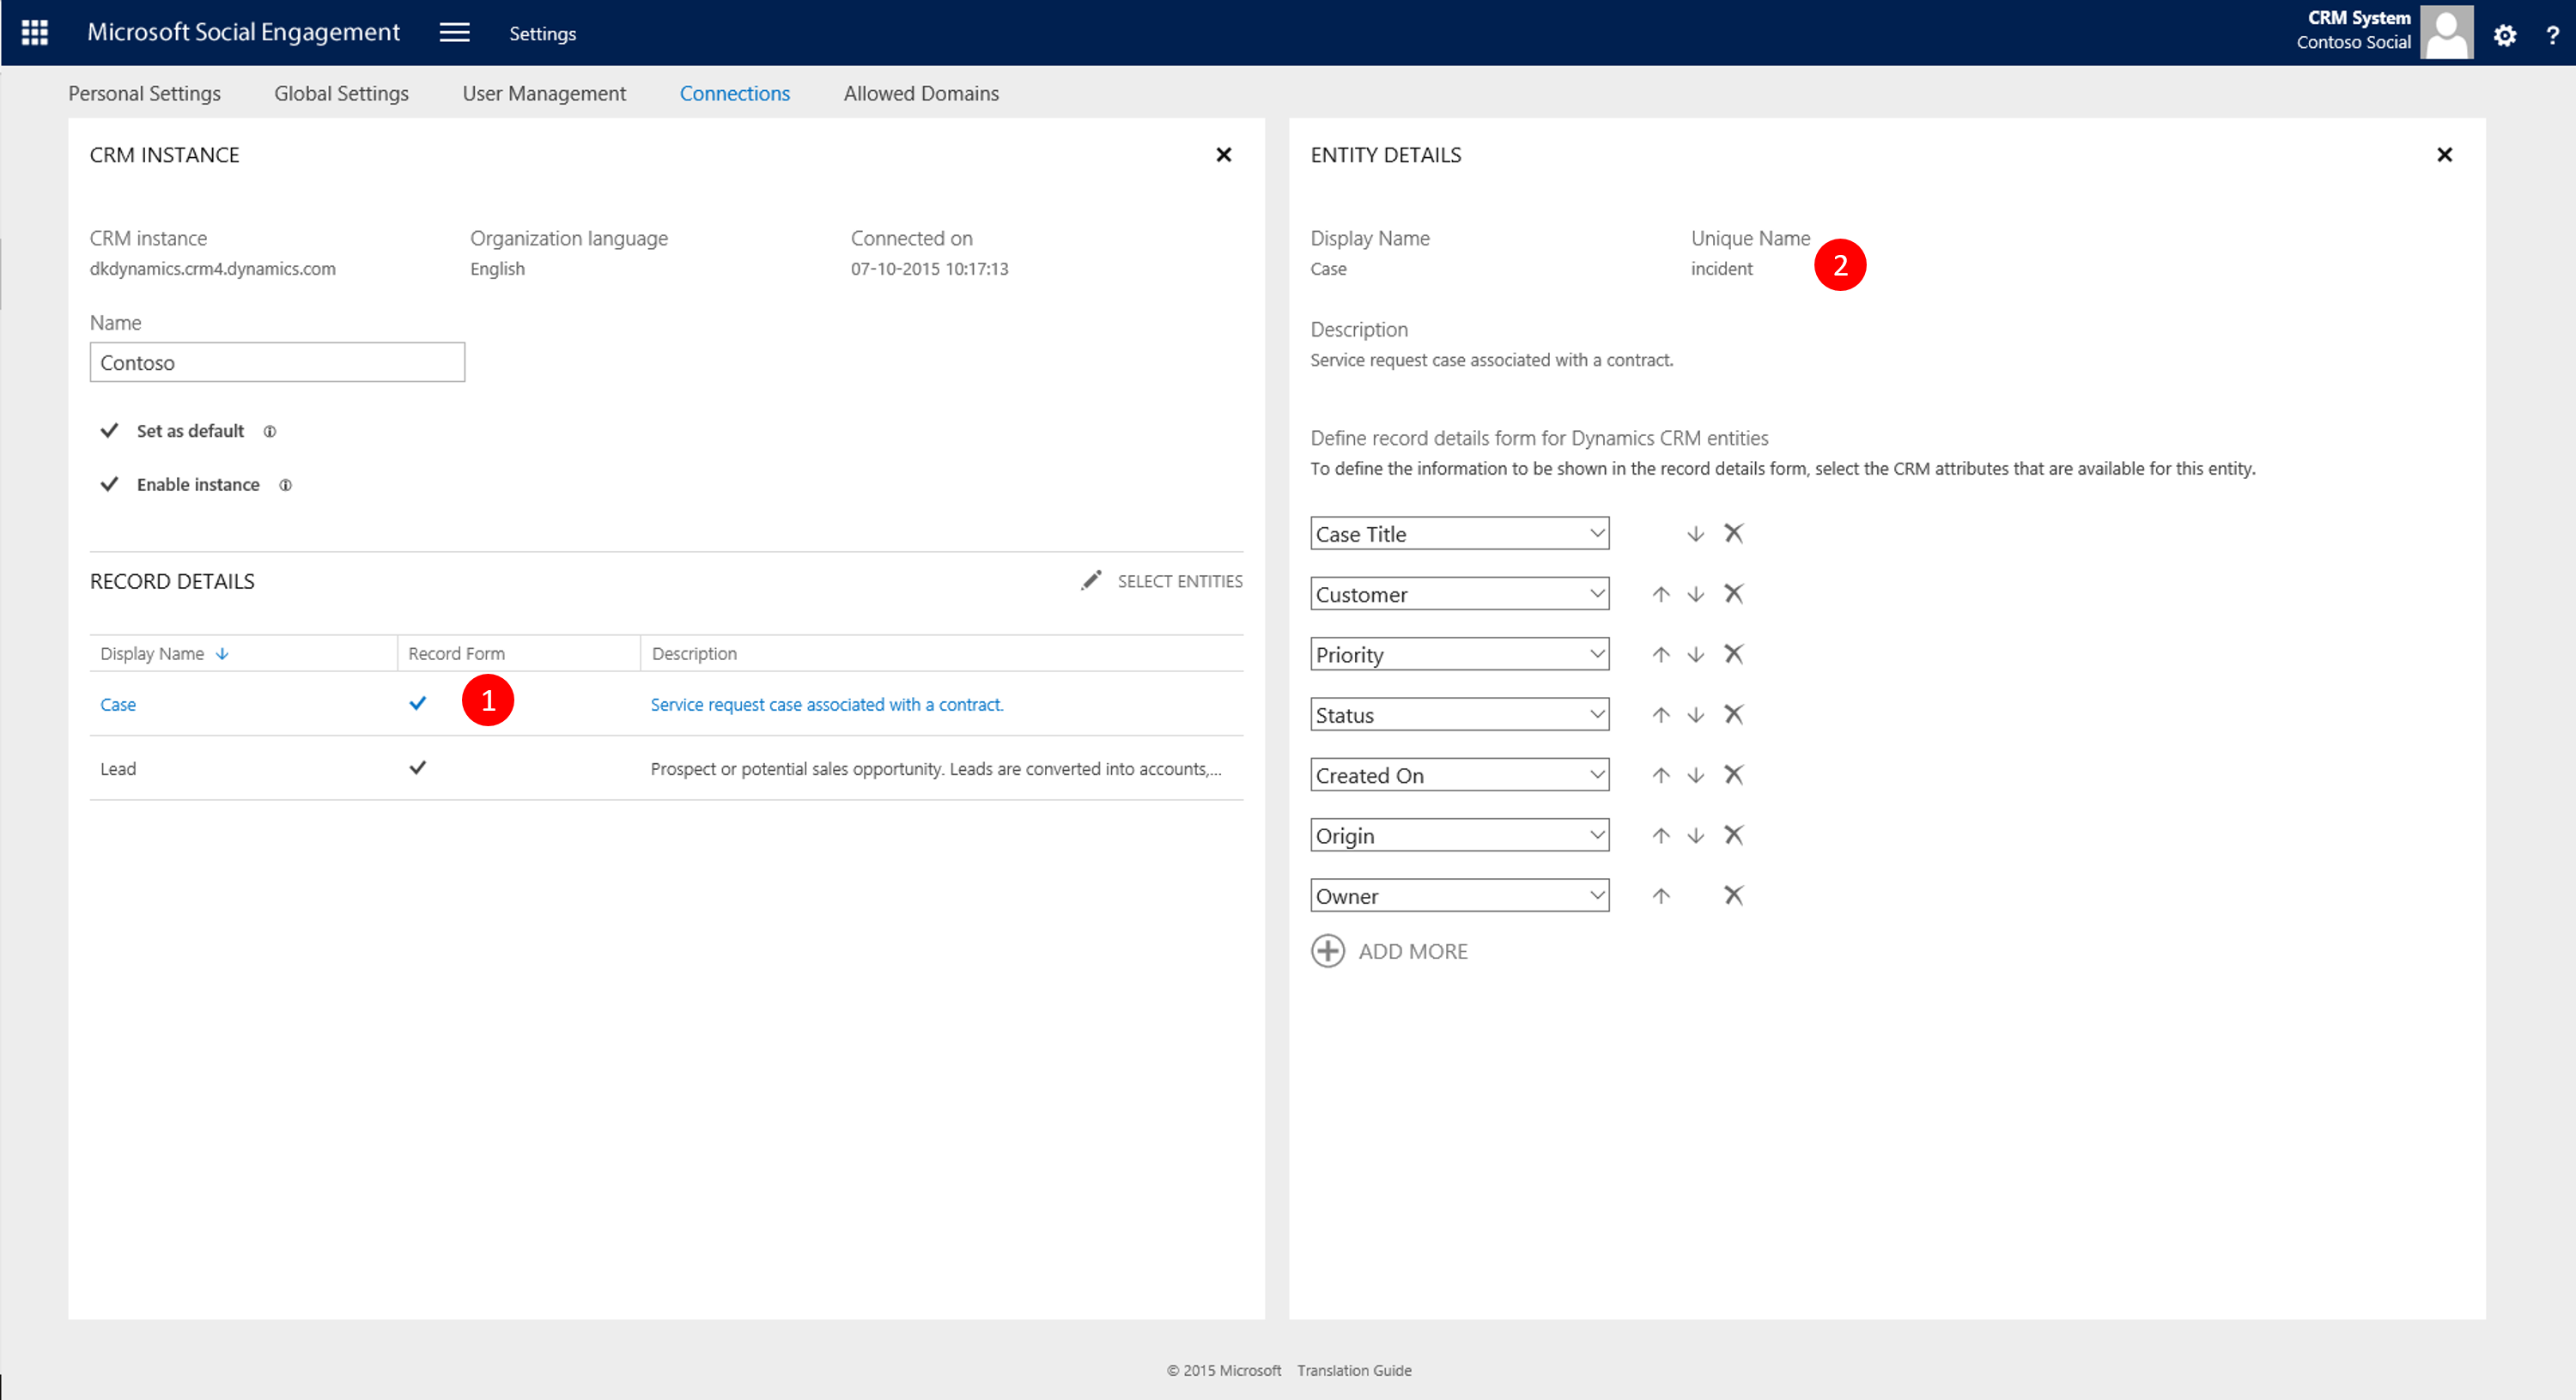
Picture 4: Unique name for Case is "incident"
Important - Click the Lead entity (1) and make a note of the unique name (2), which is "lead"
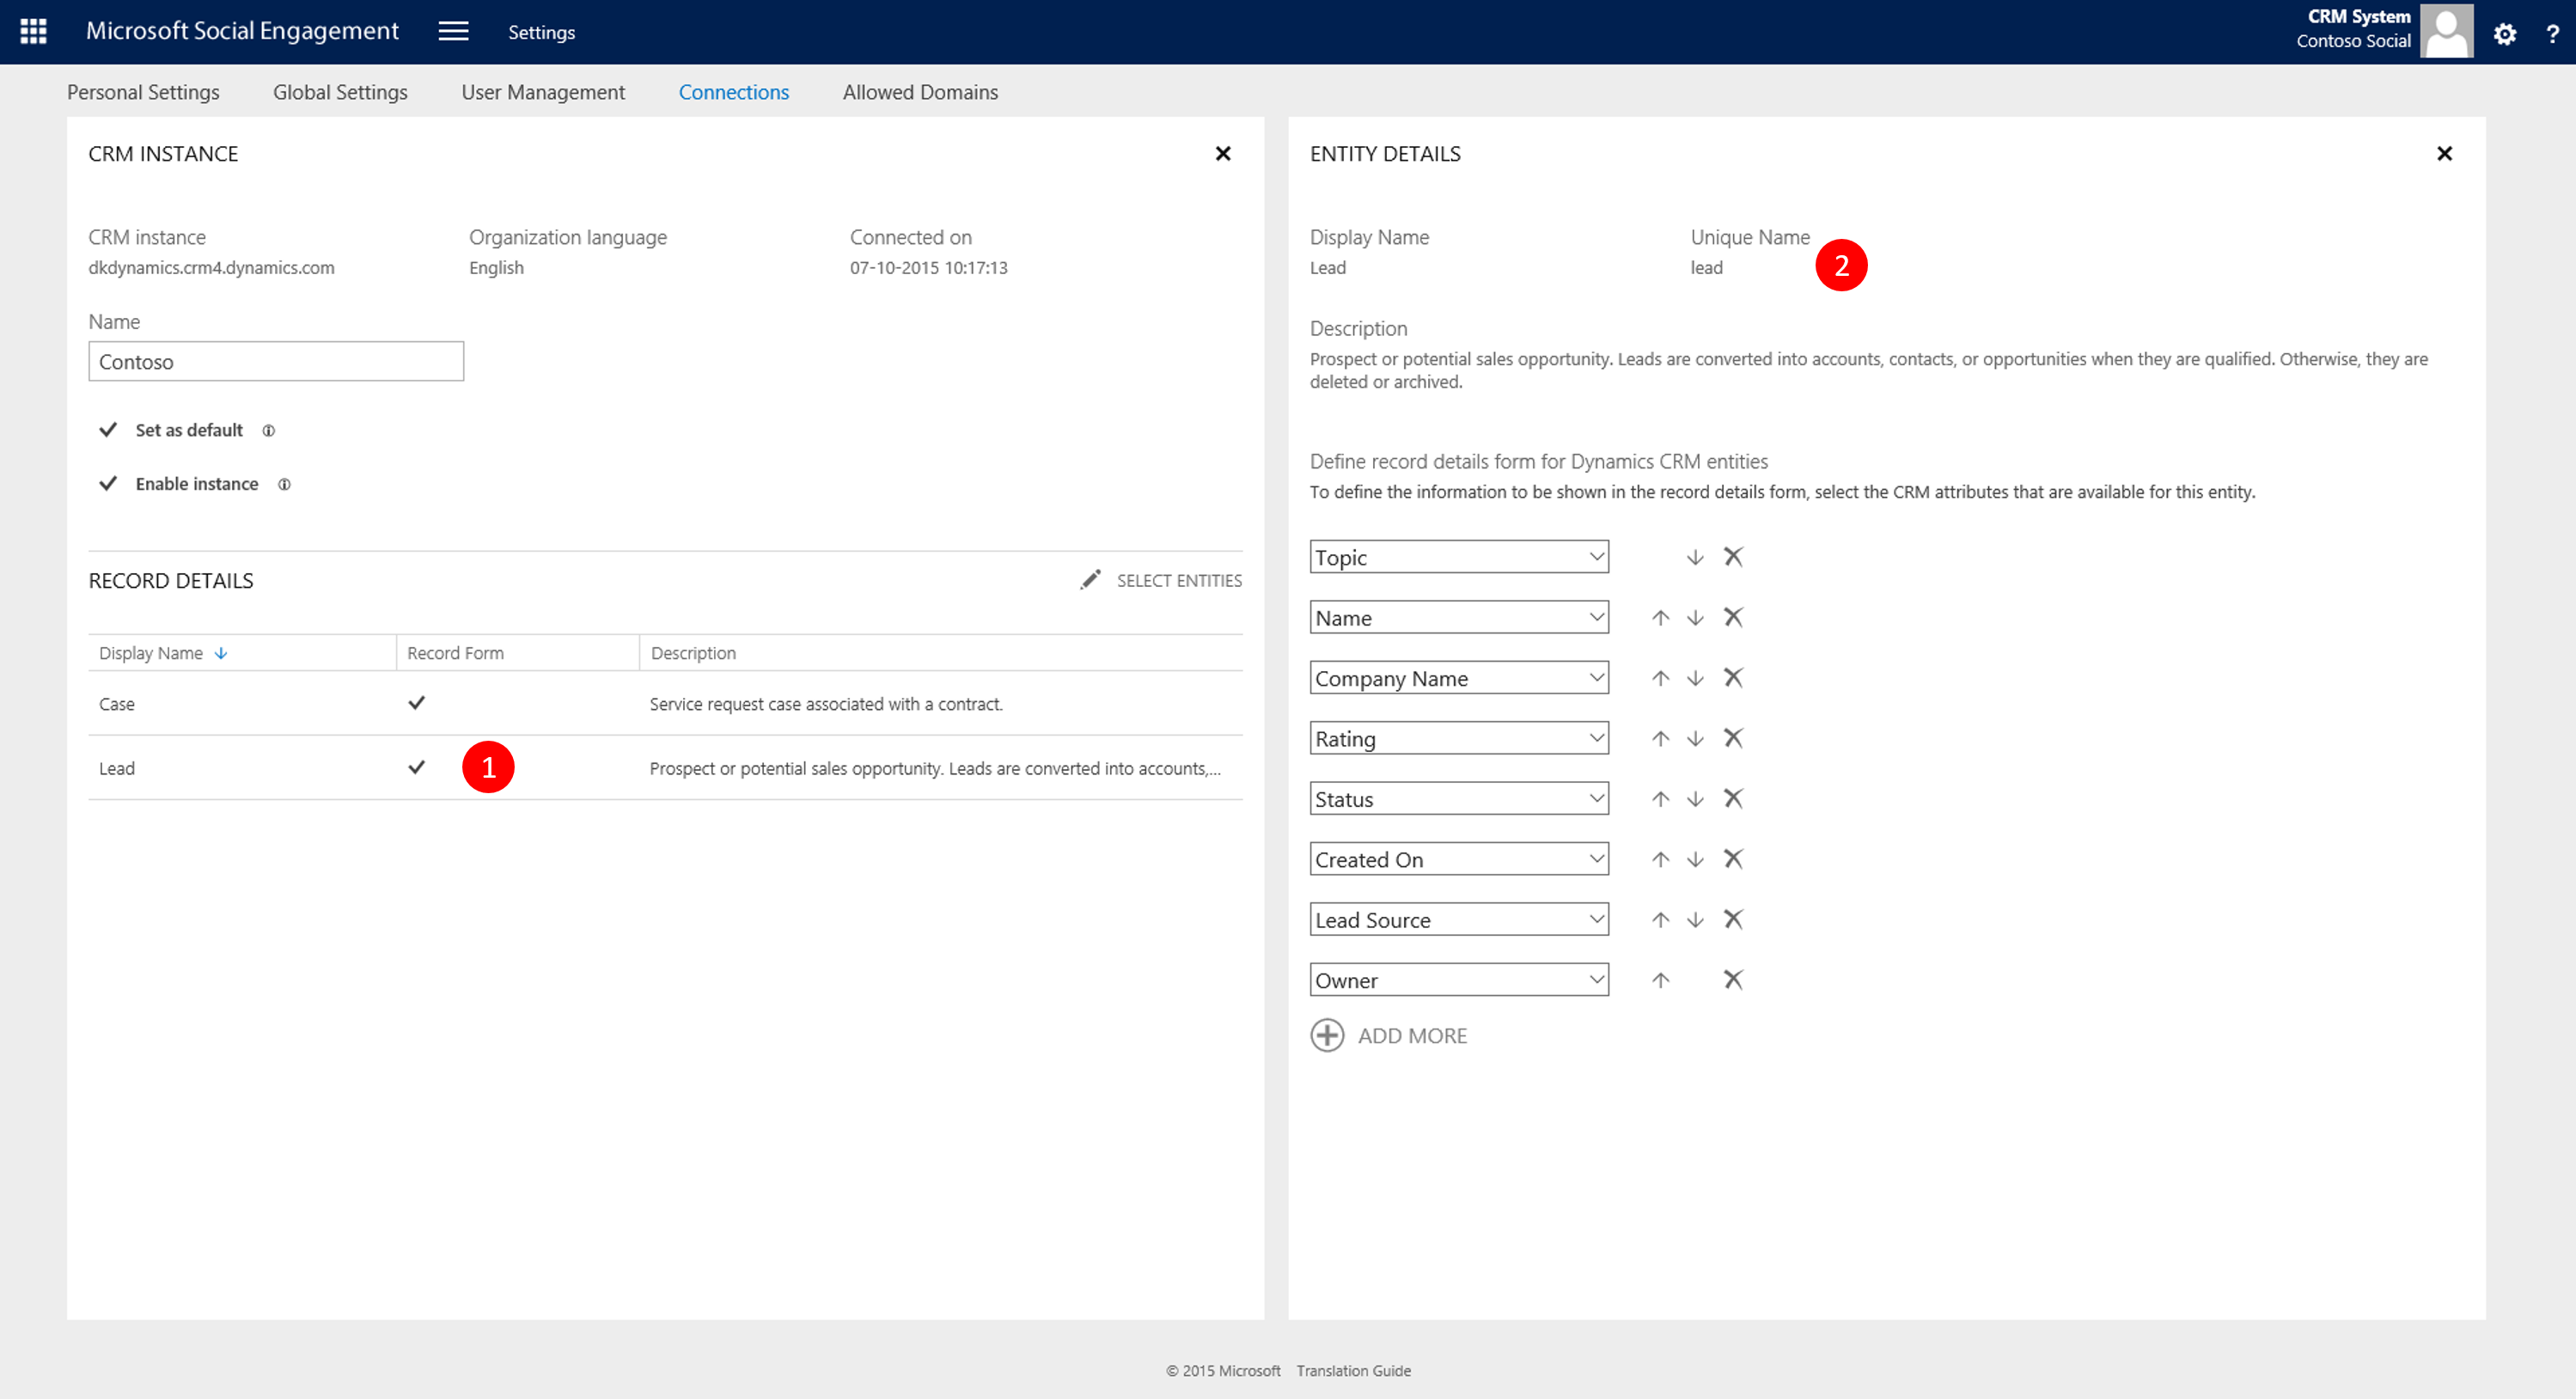
Picture 5: Unique name for Lead is "lead"
All done with the connection
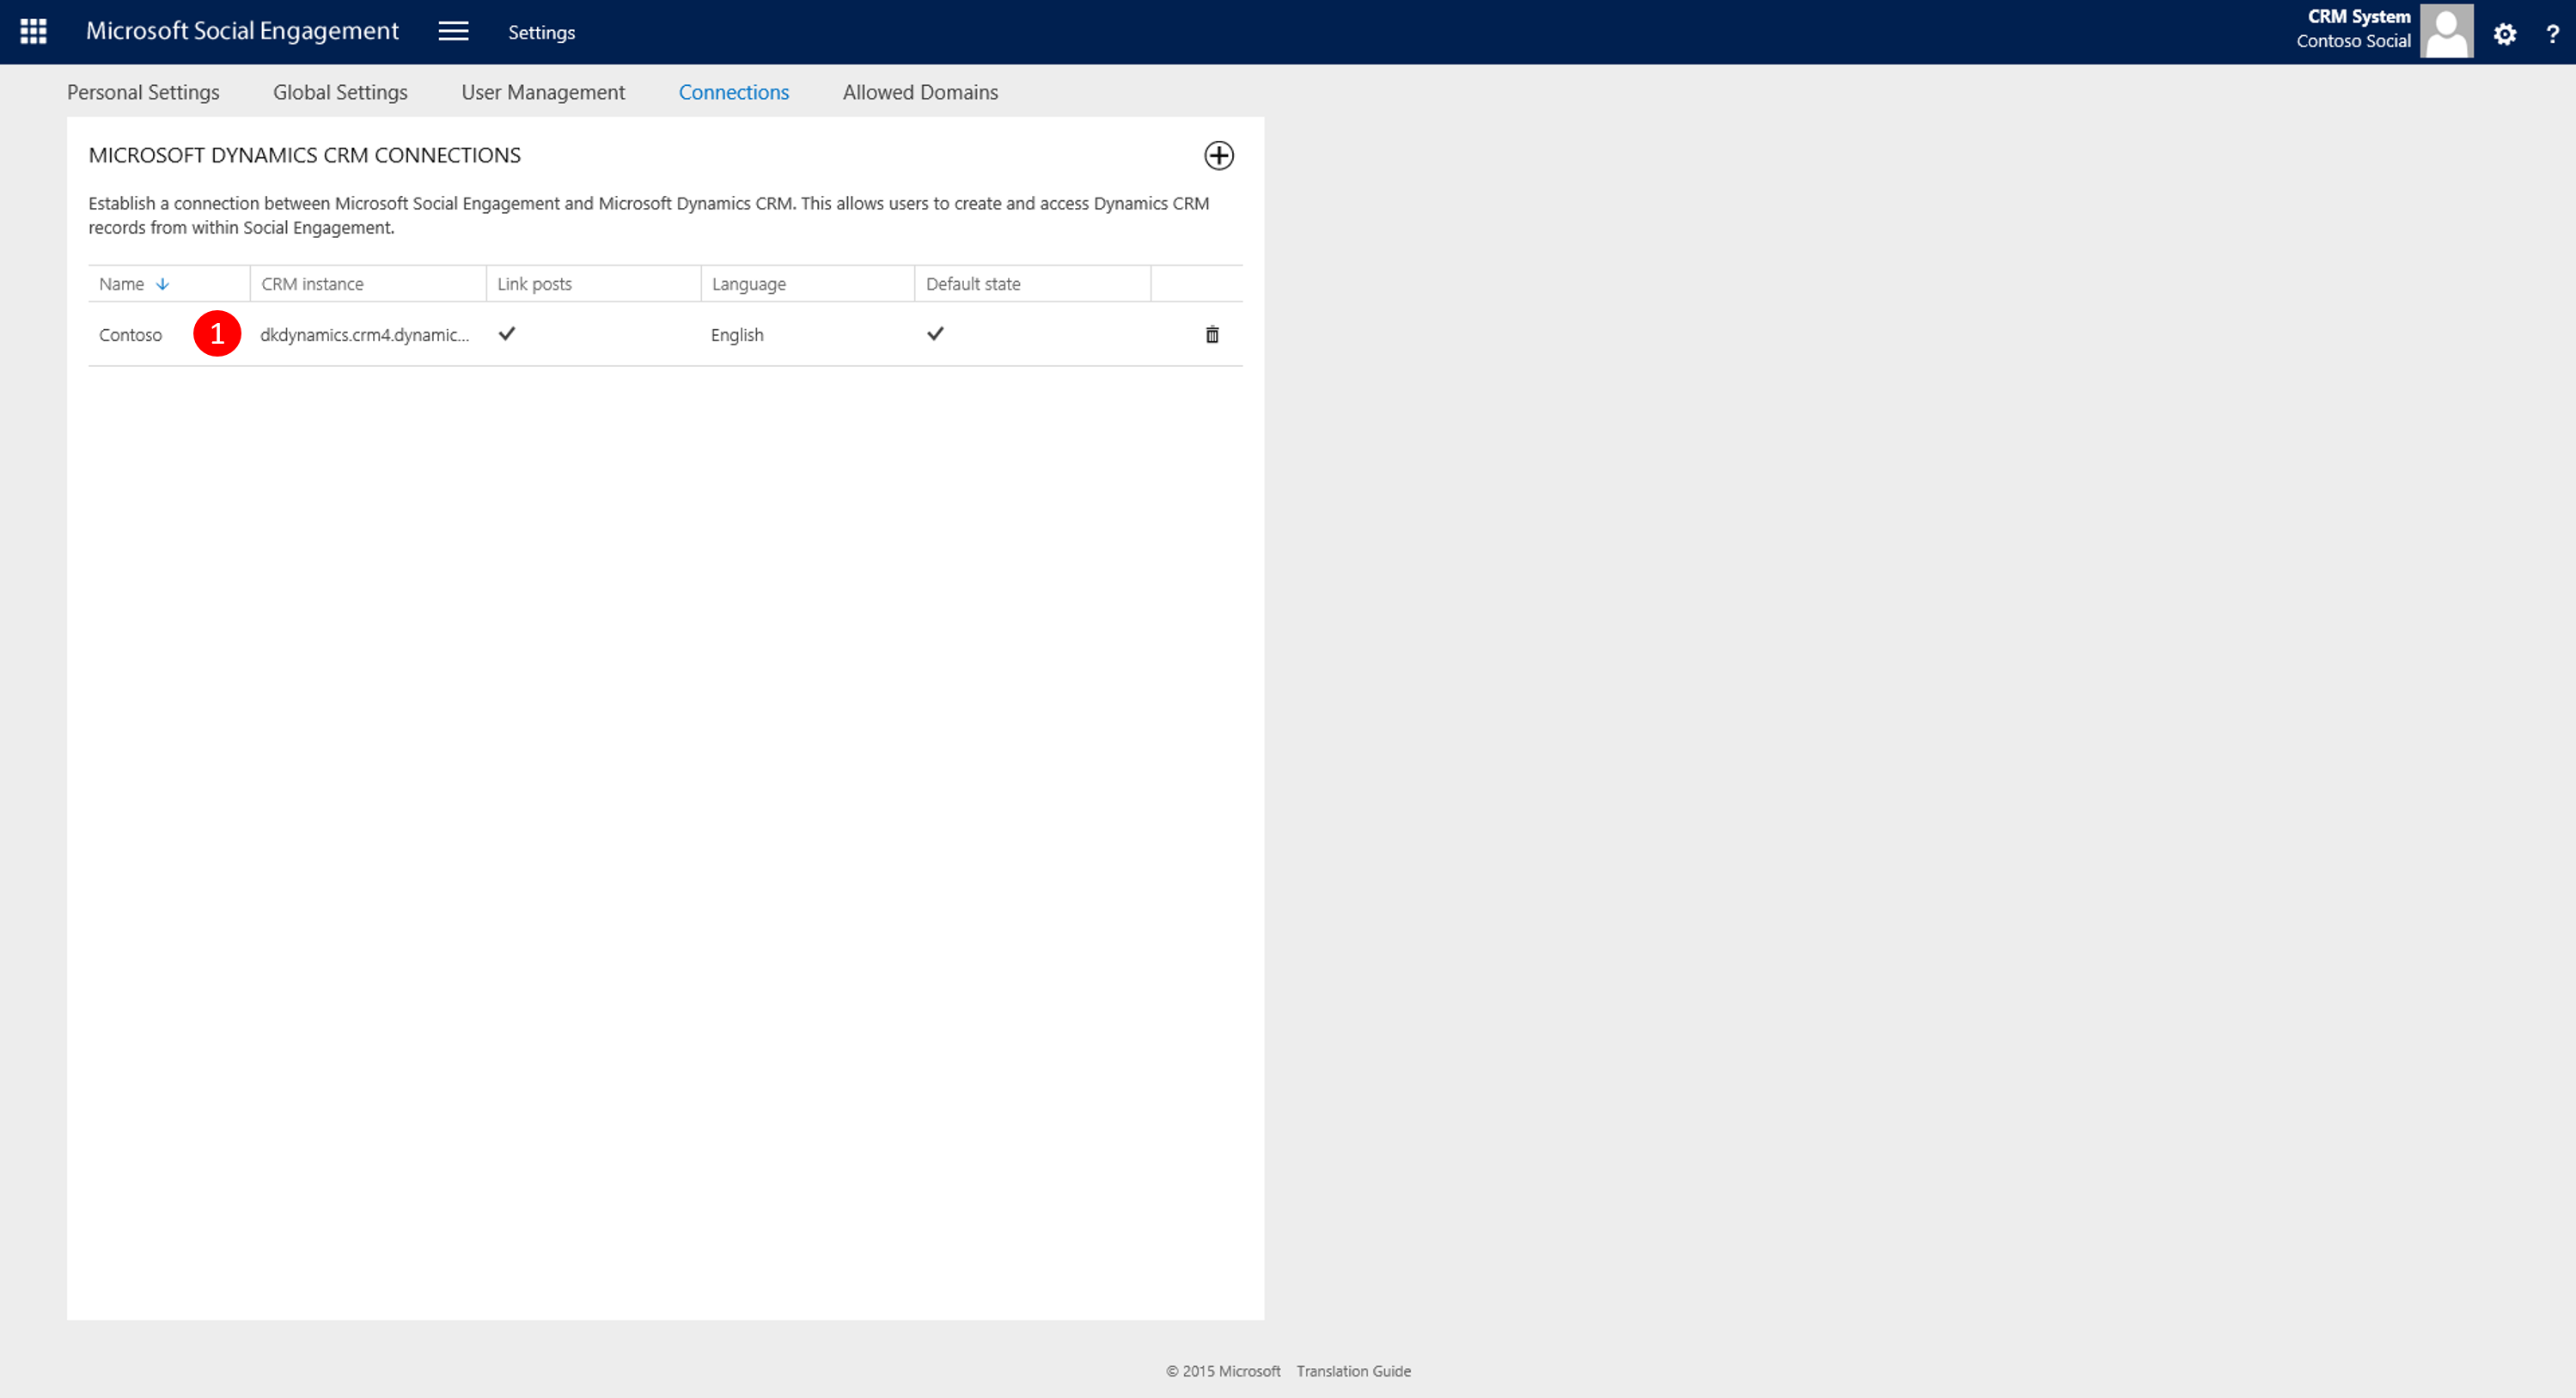
Picture 6: Connection active
x
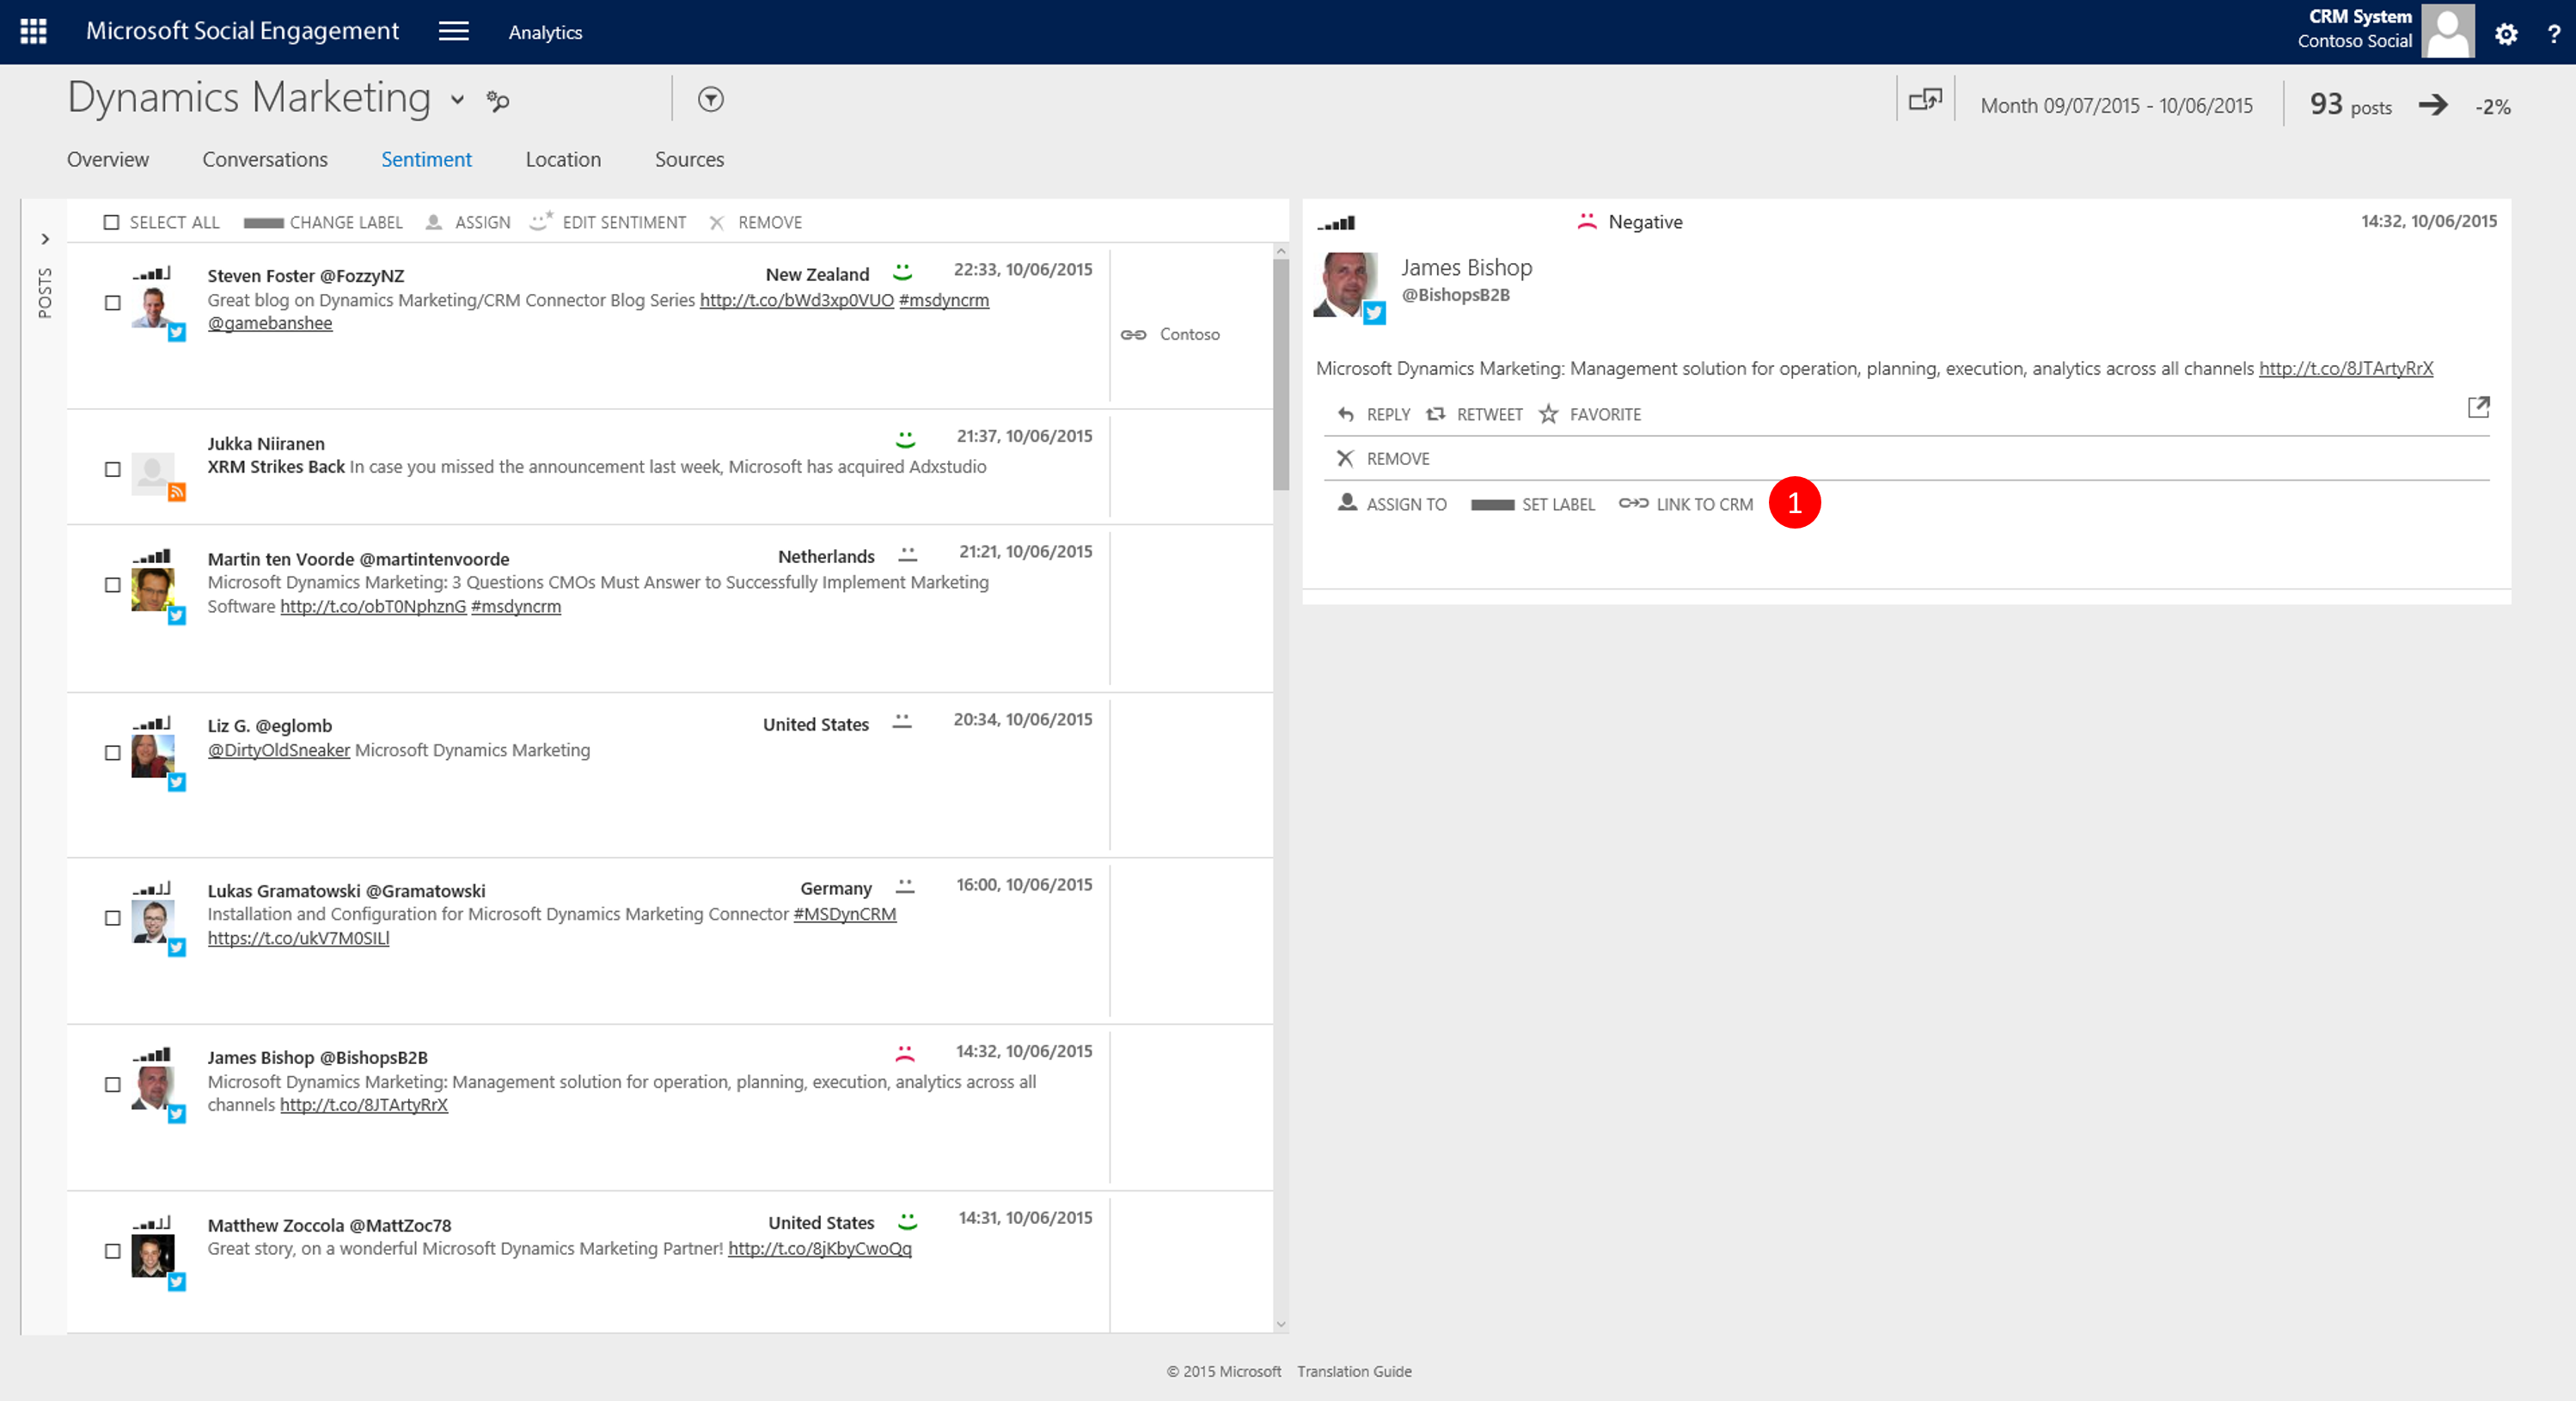
Test Link2CRM feature as is
Now lets test the new feature Link2CRM 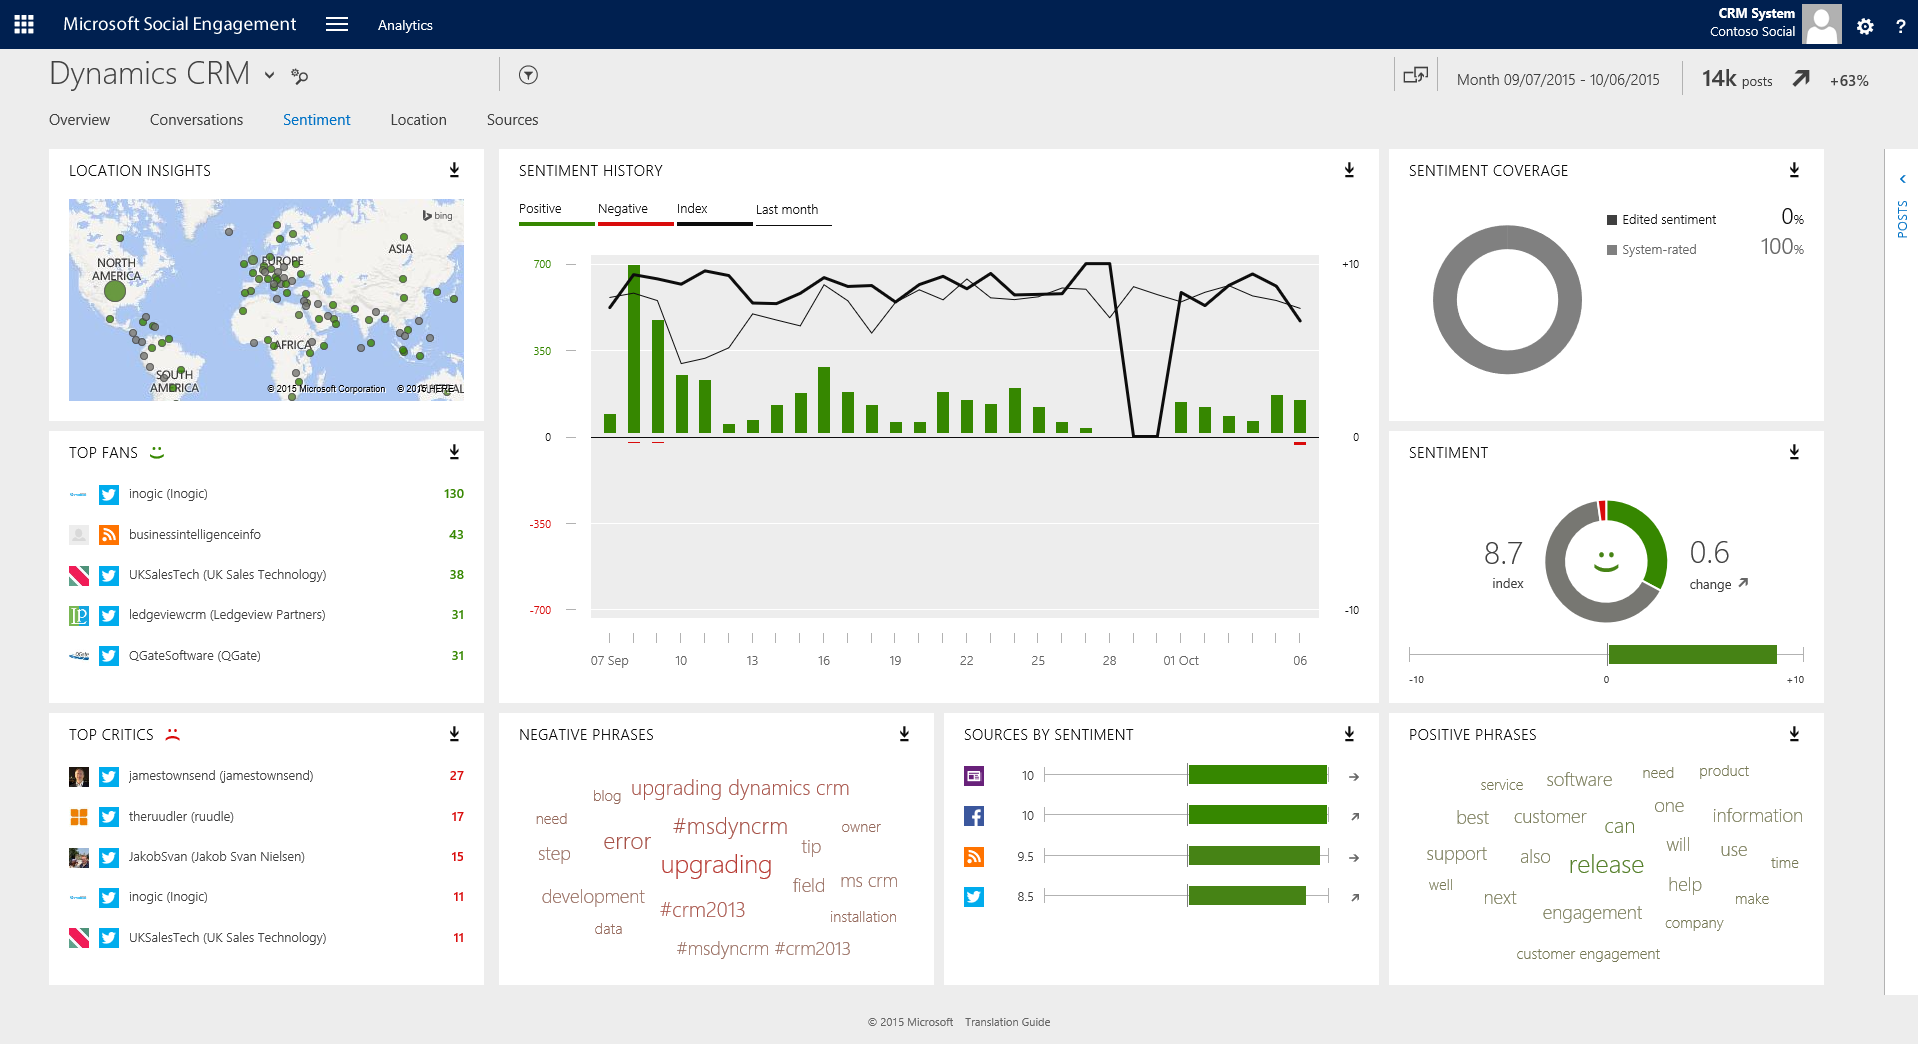
Picture 7: MSE
Navigate to a post and click "Link to CRM" (1)
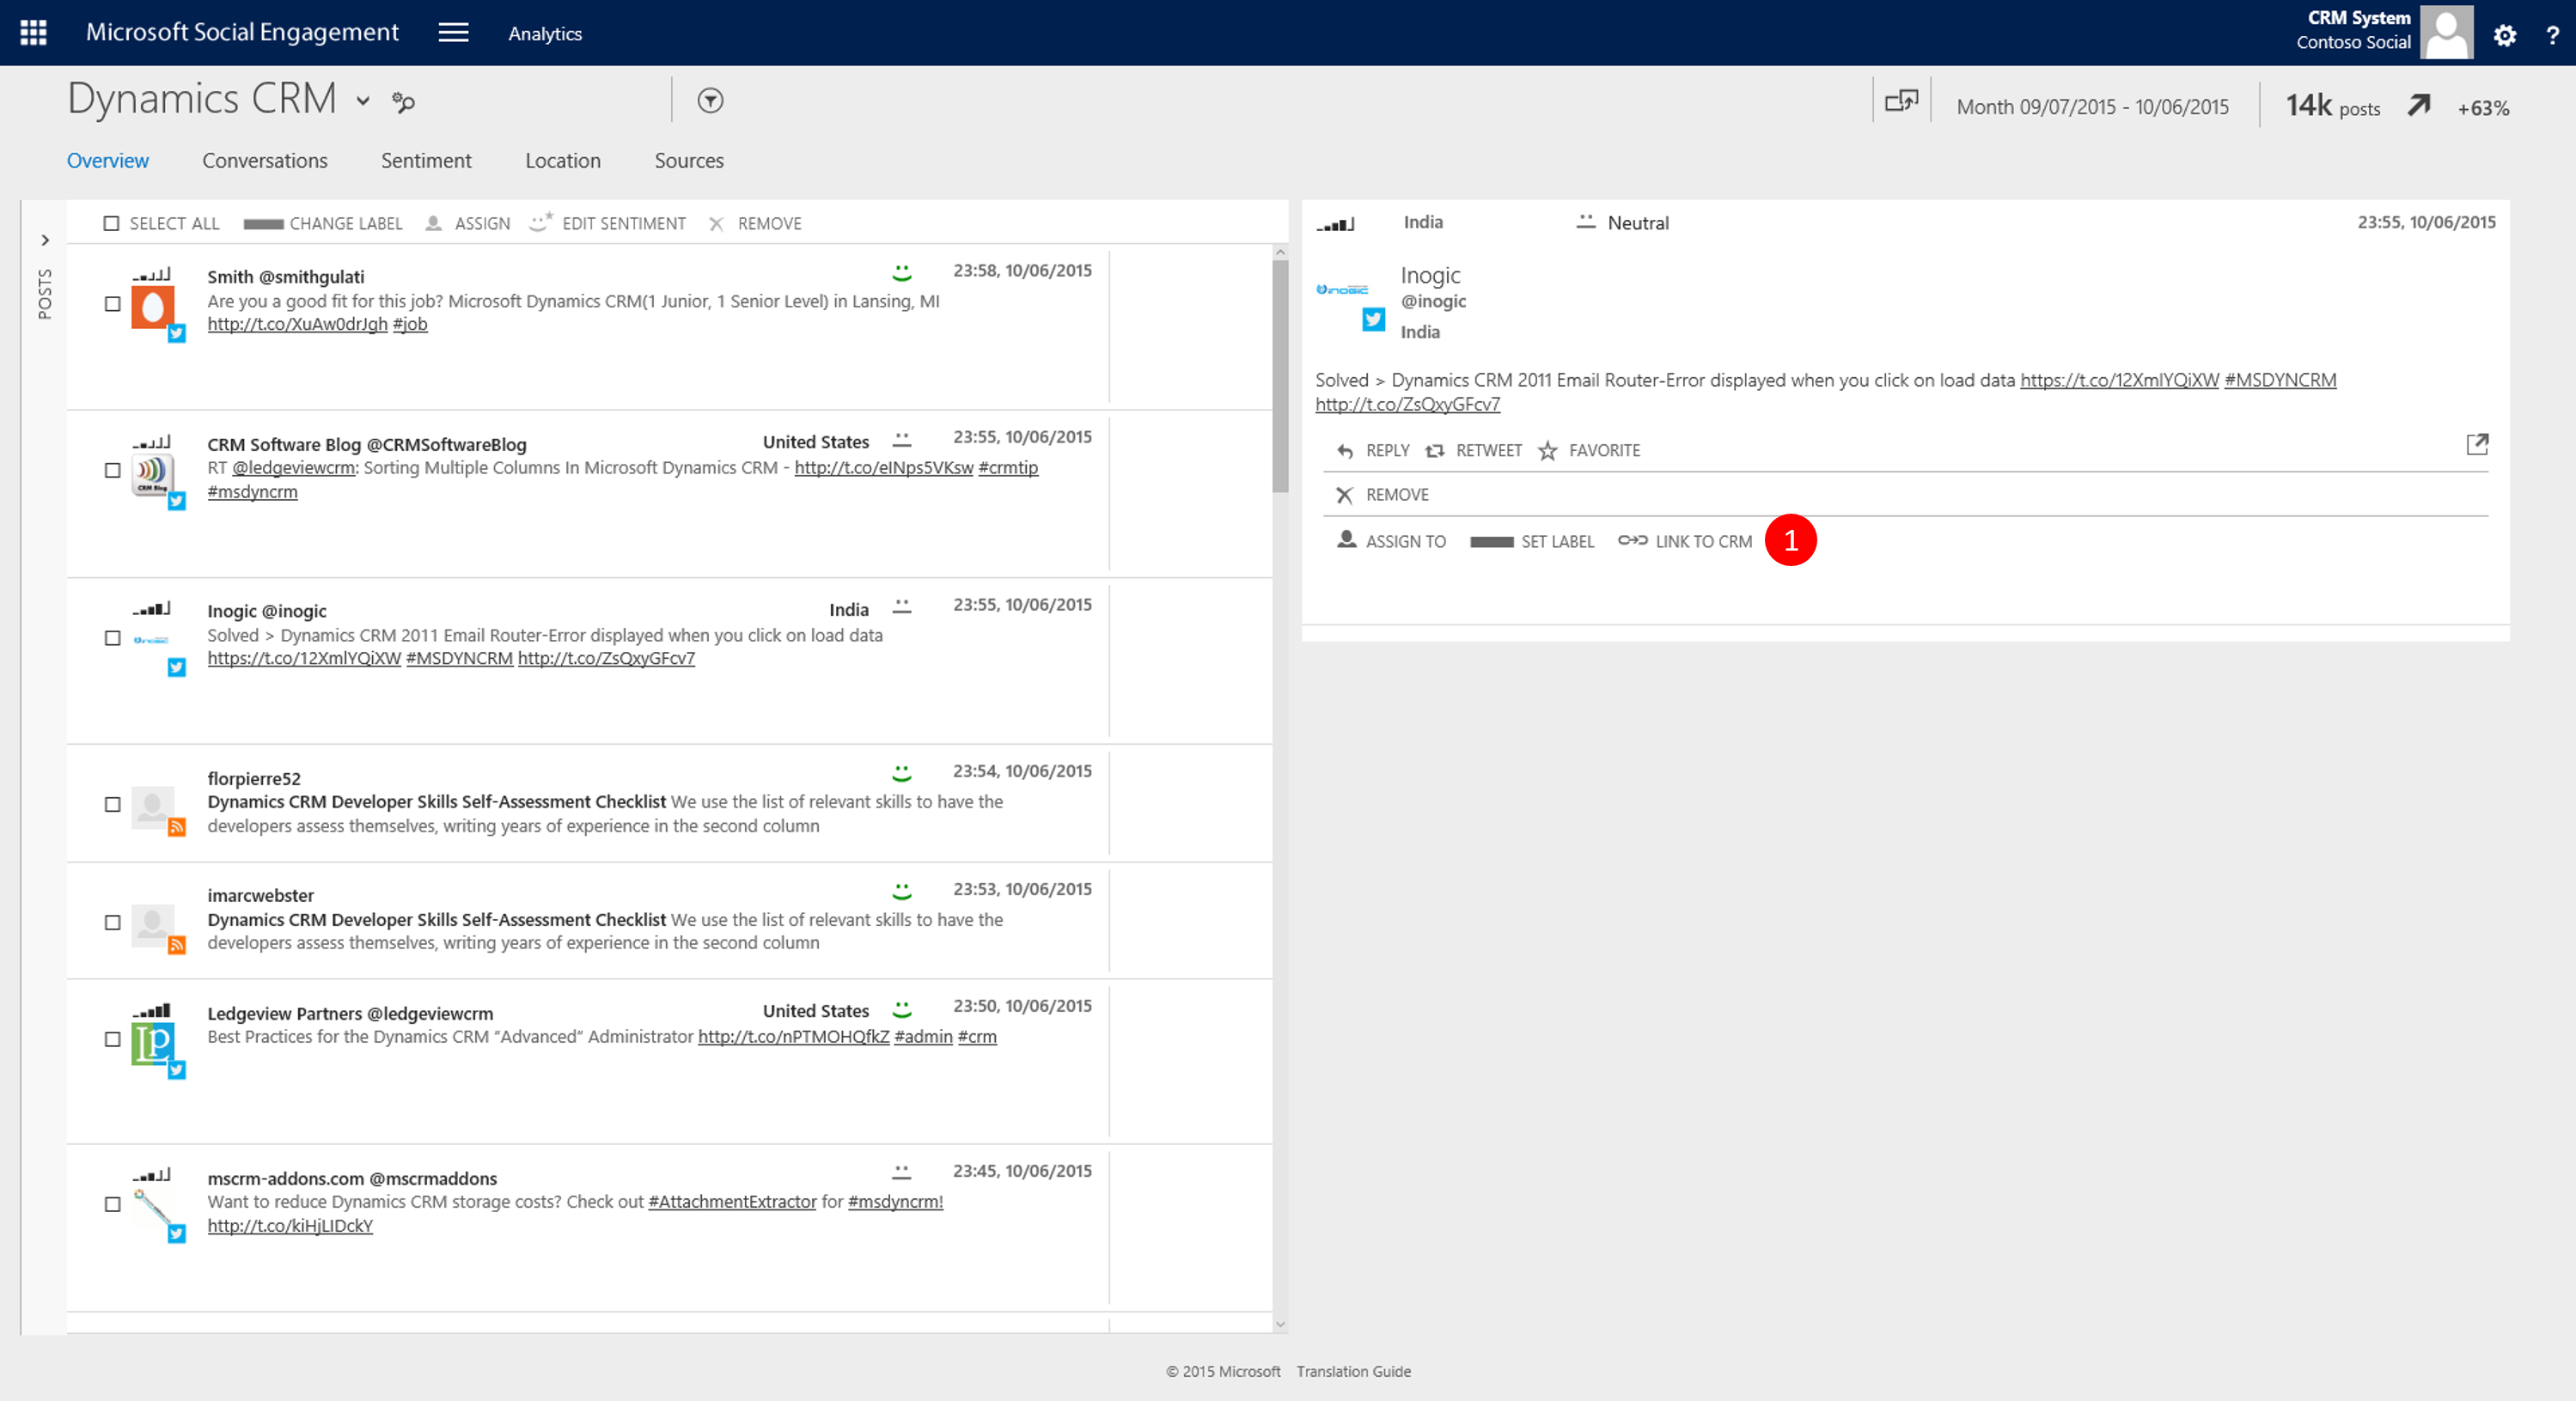
Picture 8: Post ready to link
Pick which record you want to create in the drop-down (note - this doesnt yield the expected result, but we will make it later)
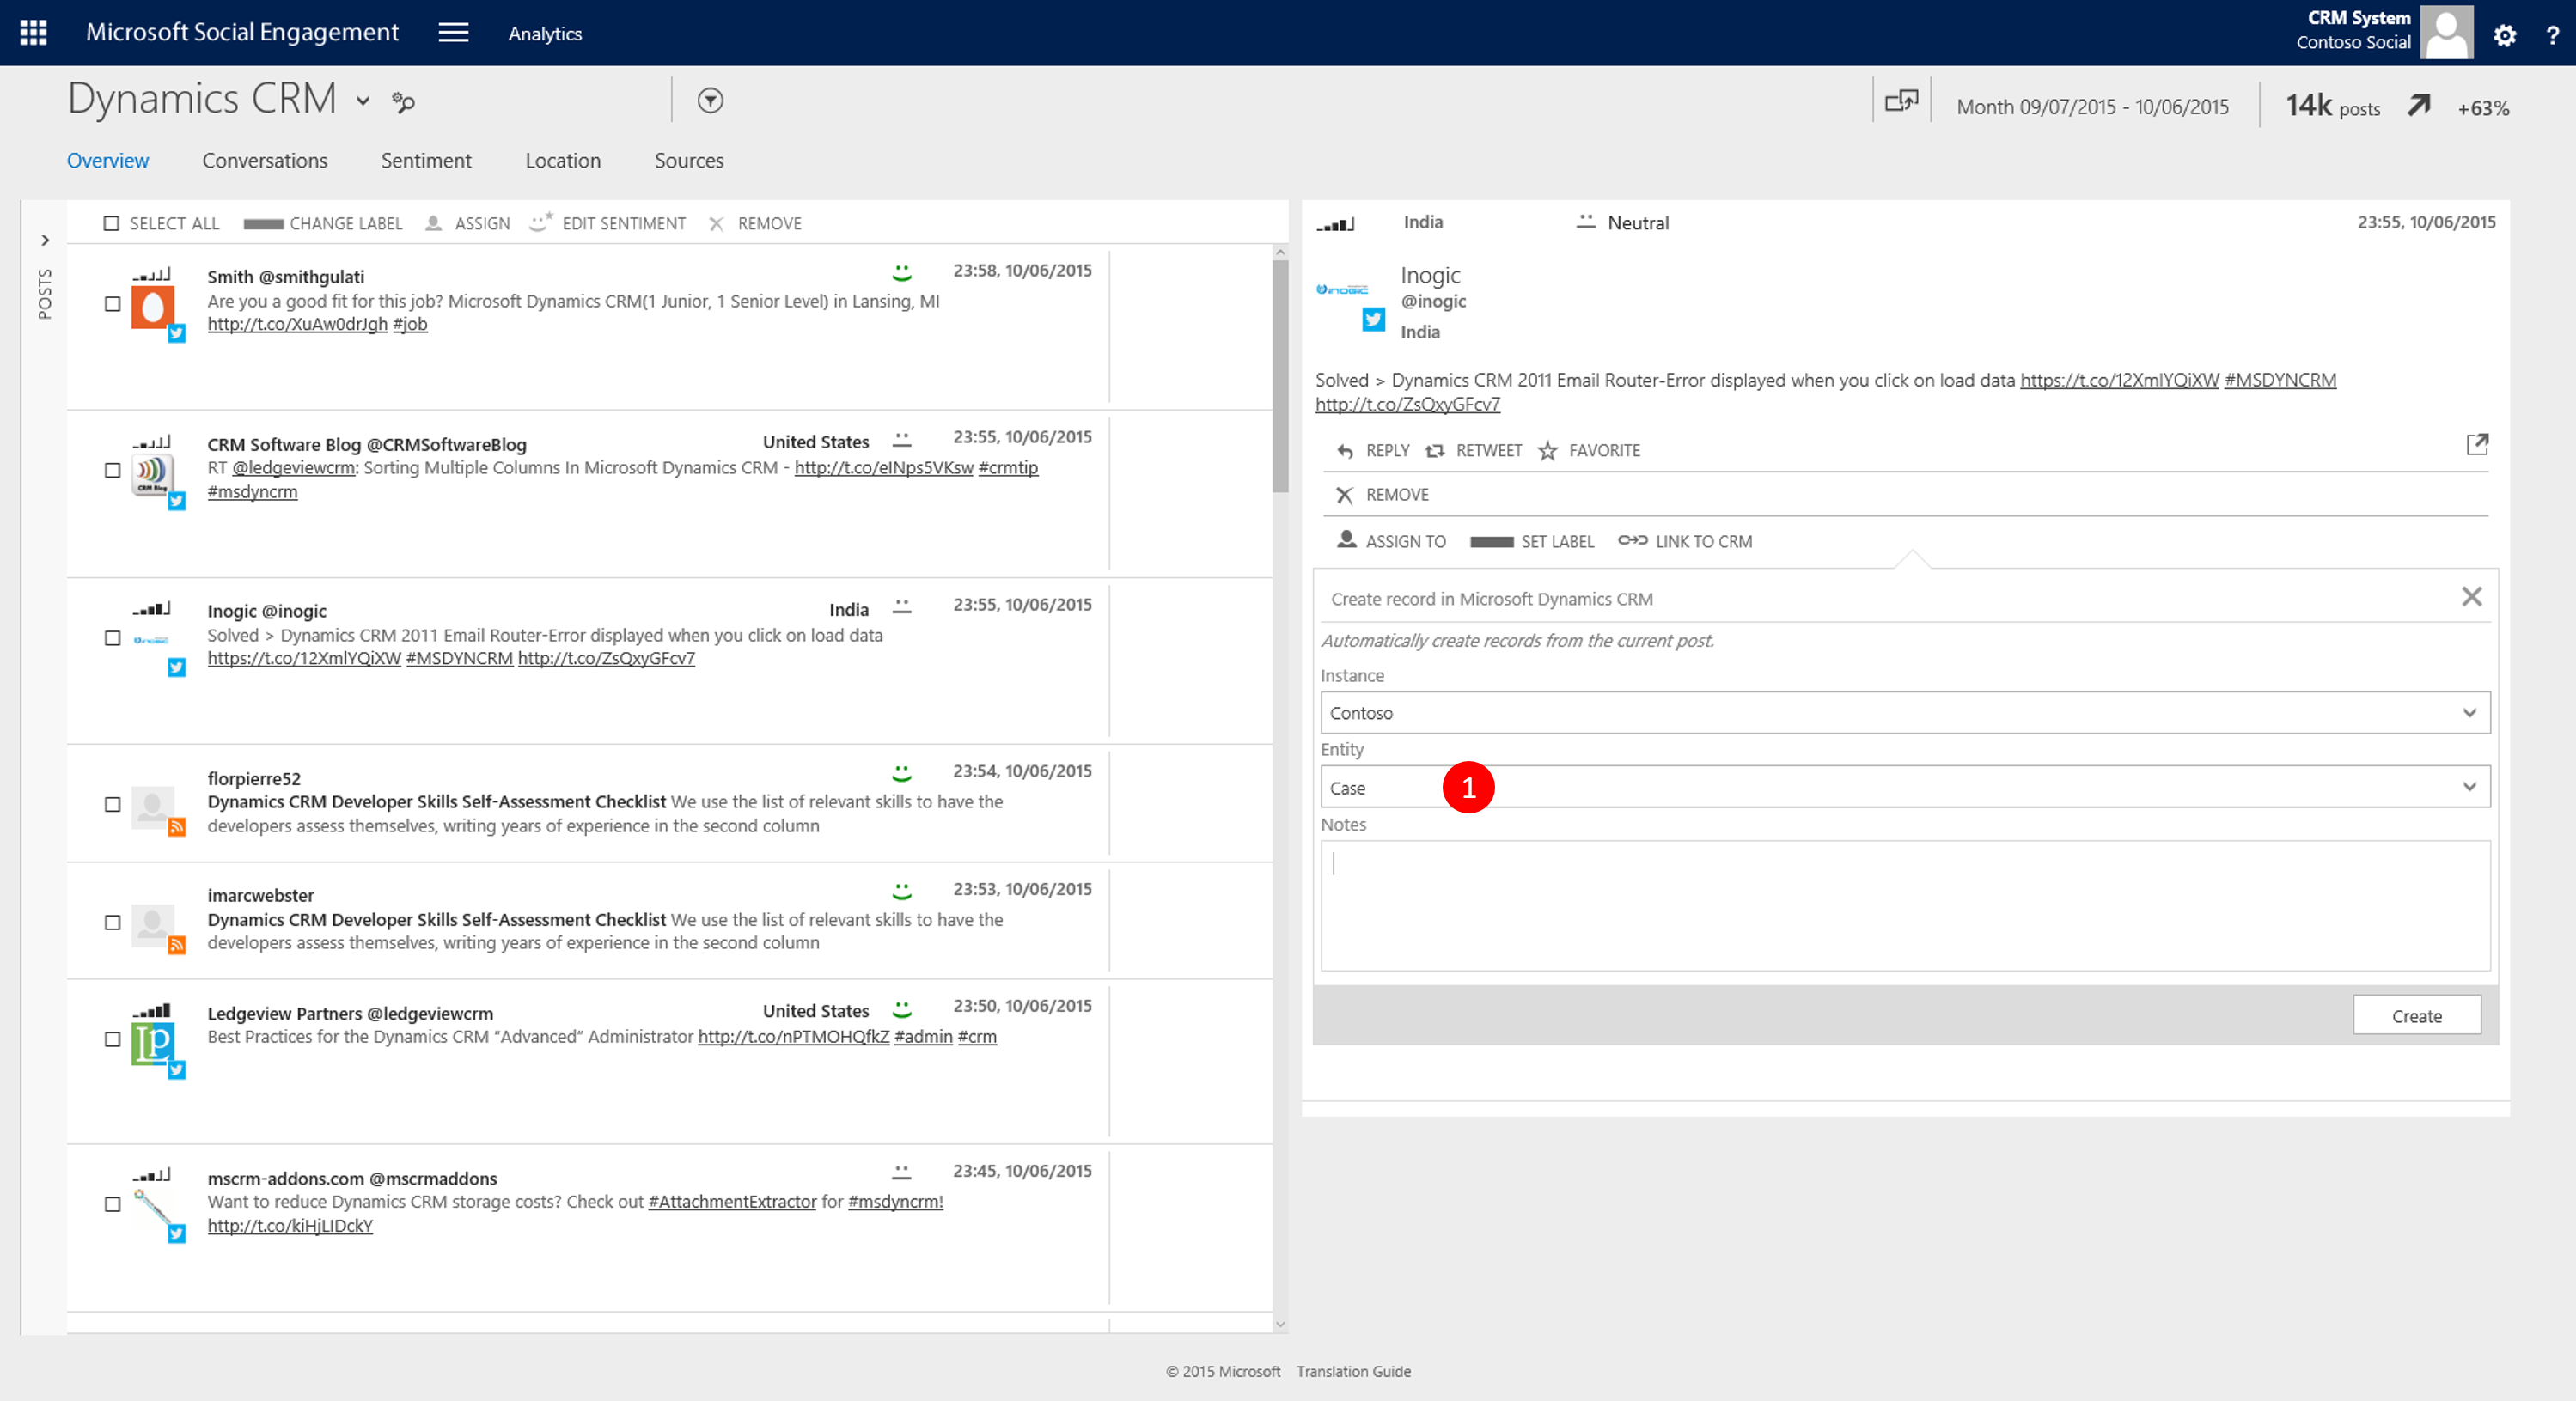
Picture 9: Pick Case
Type a note and click create

Picture 10: Type note
The post now displays a linked icon
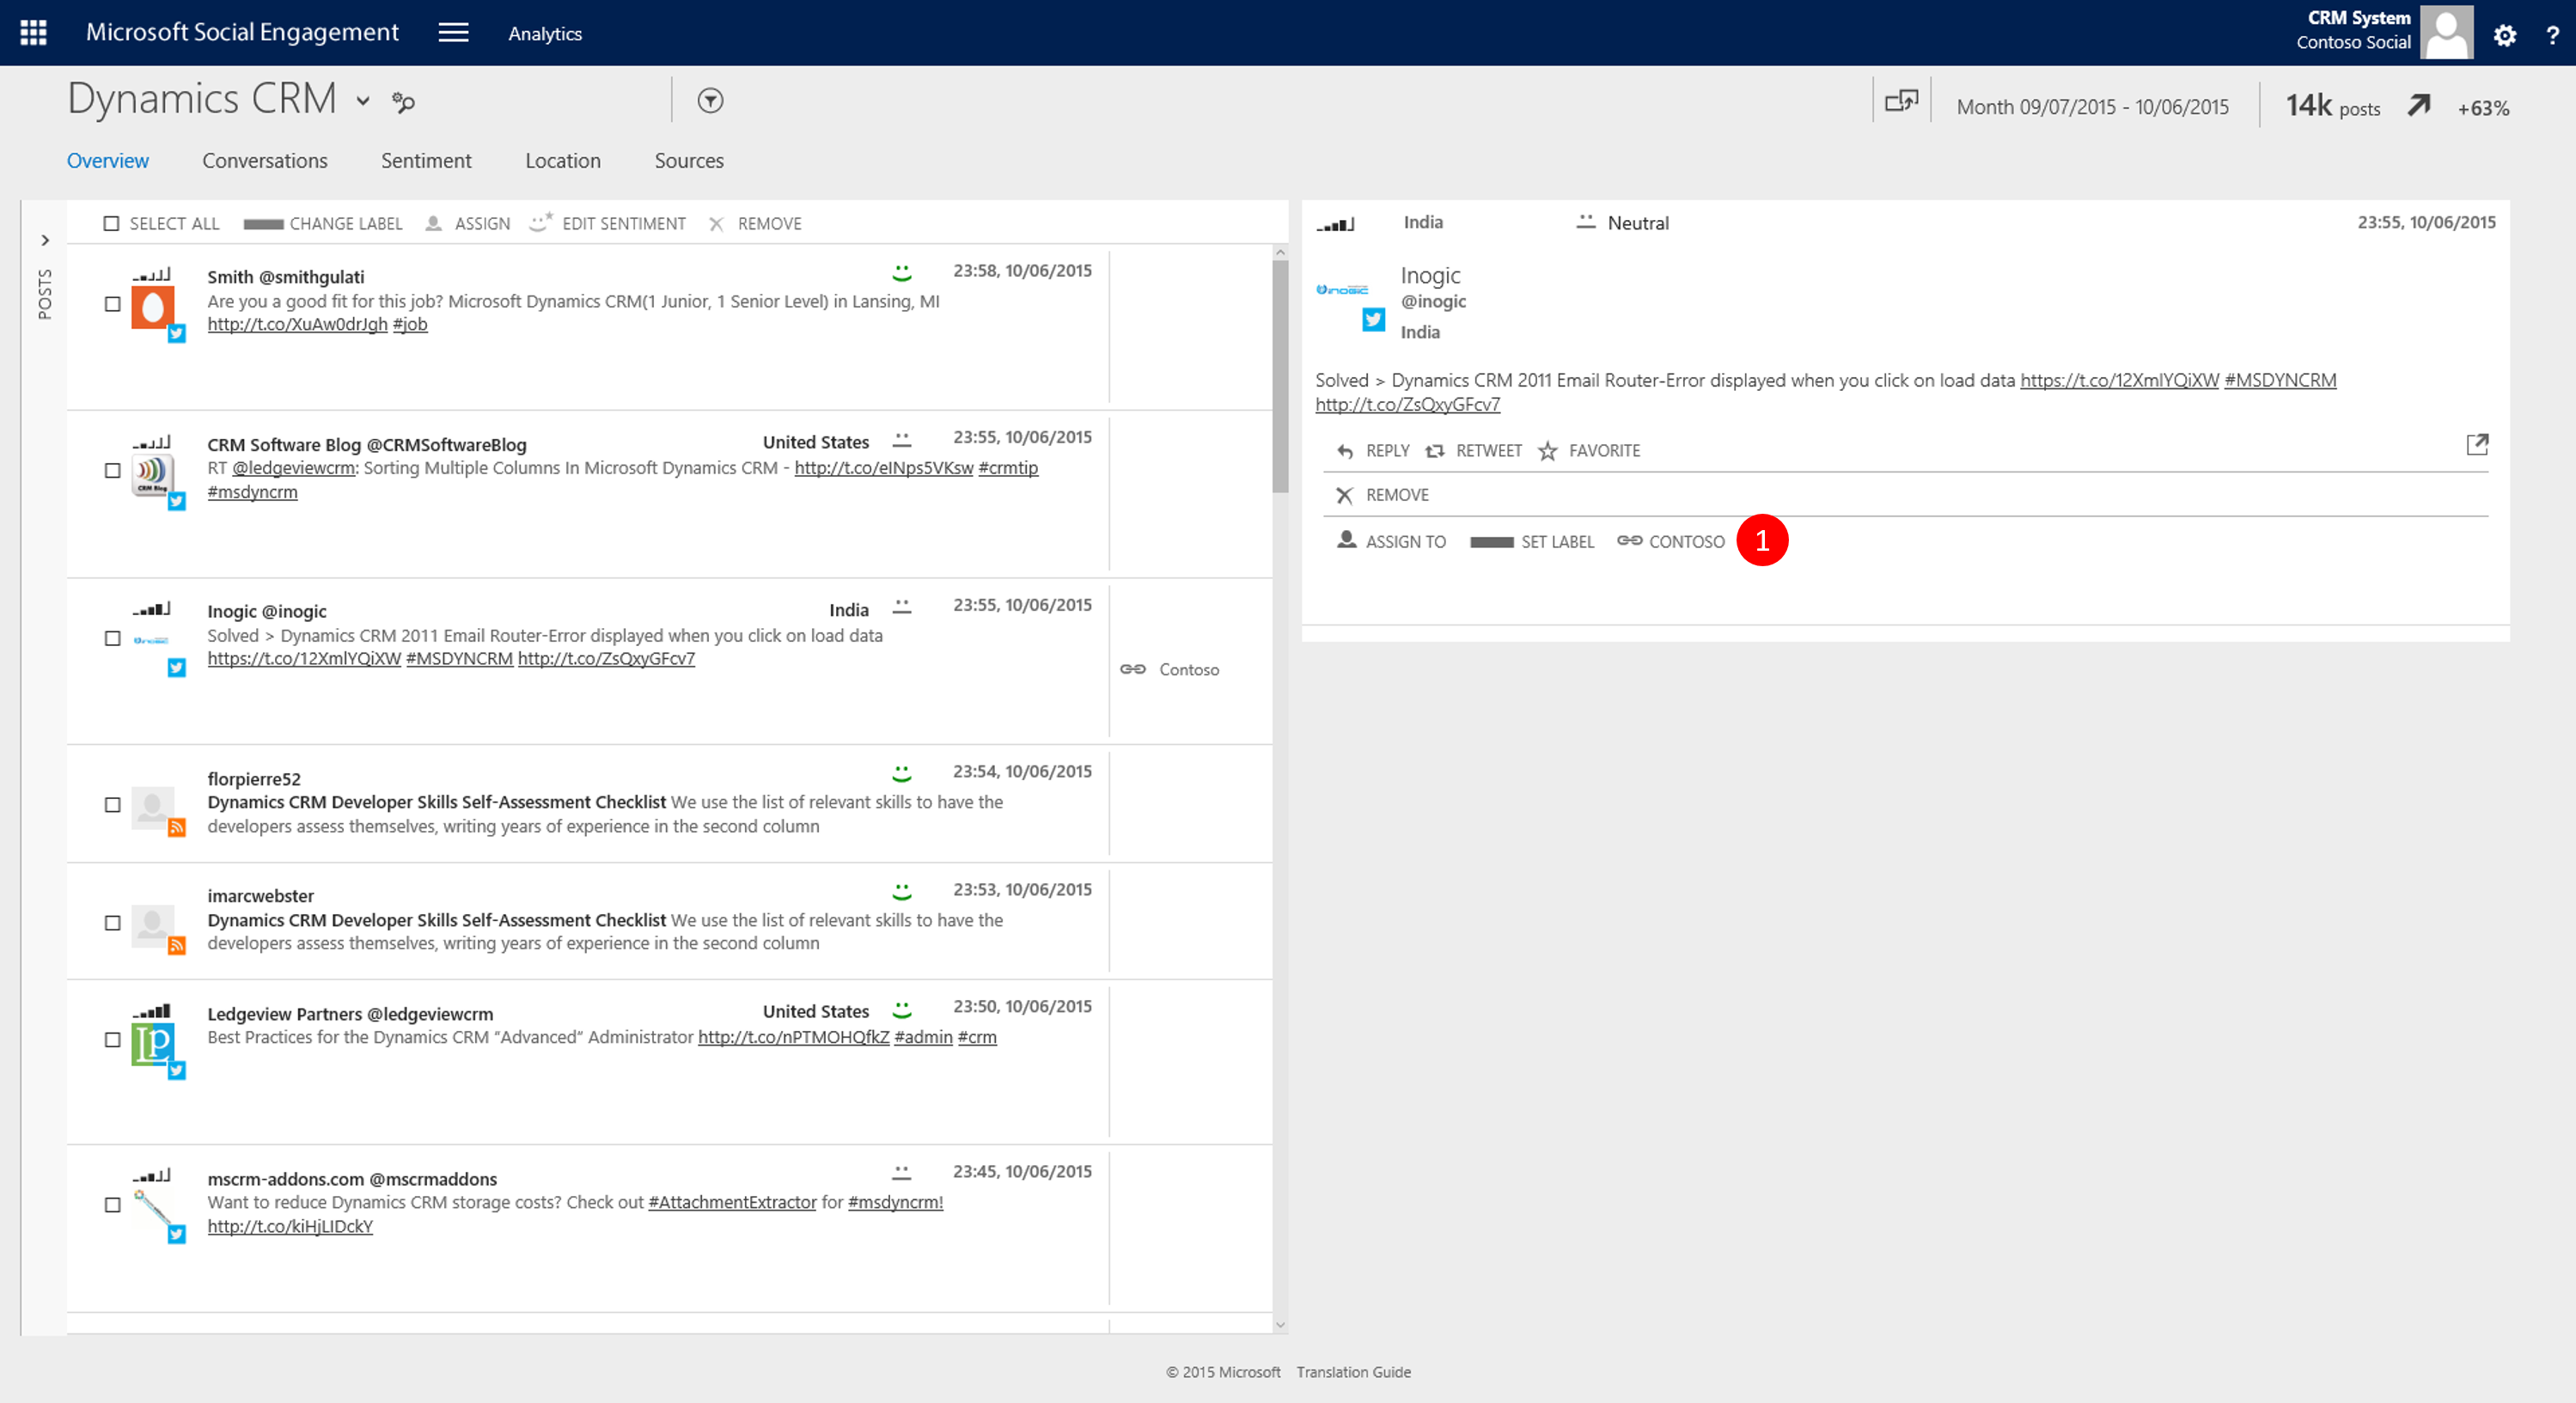
Picture 11: Linked
You can unfold the post to see details about the linked record
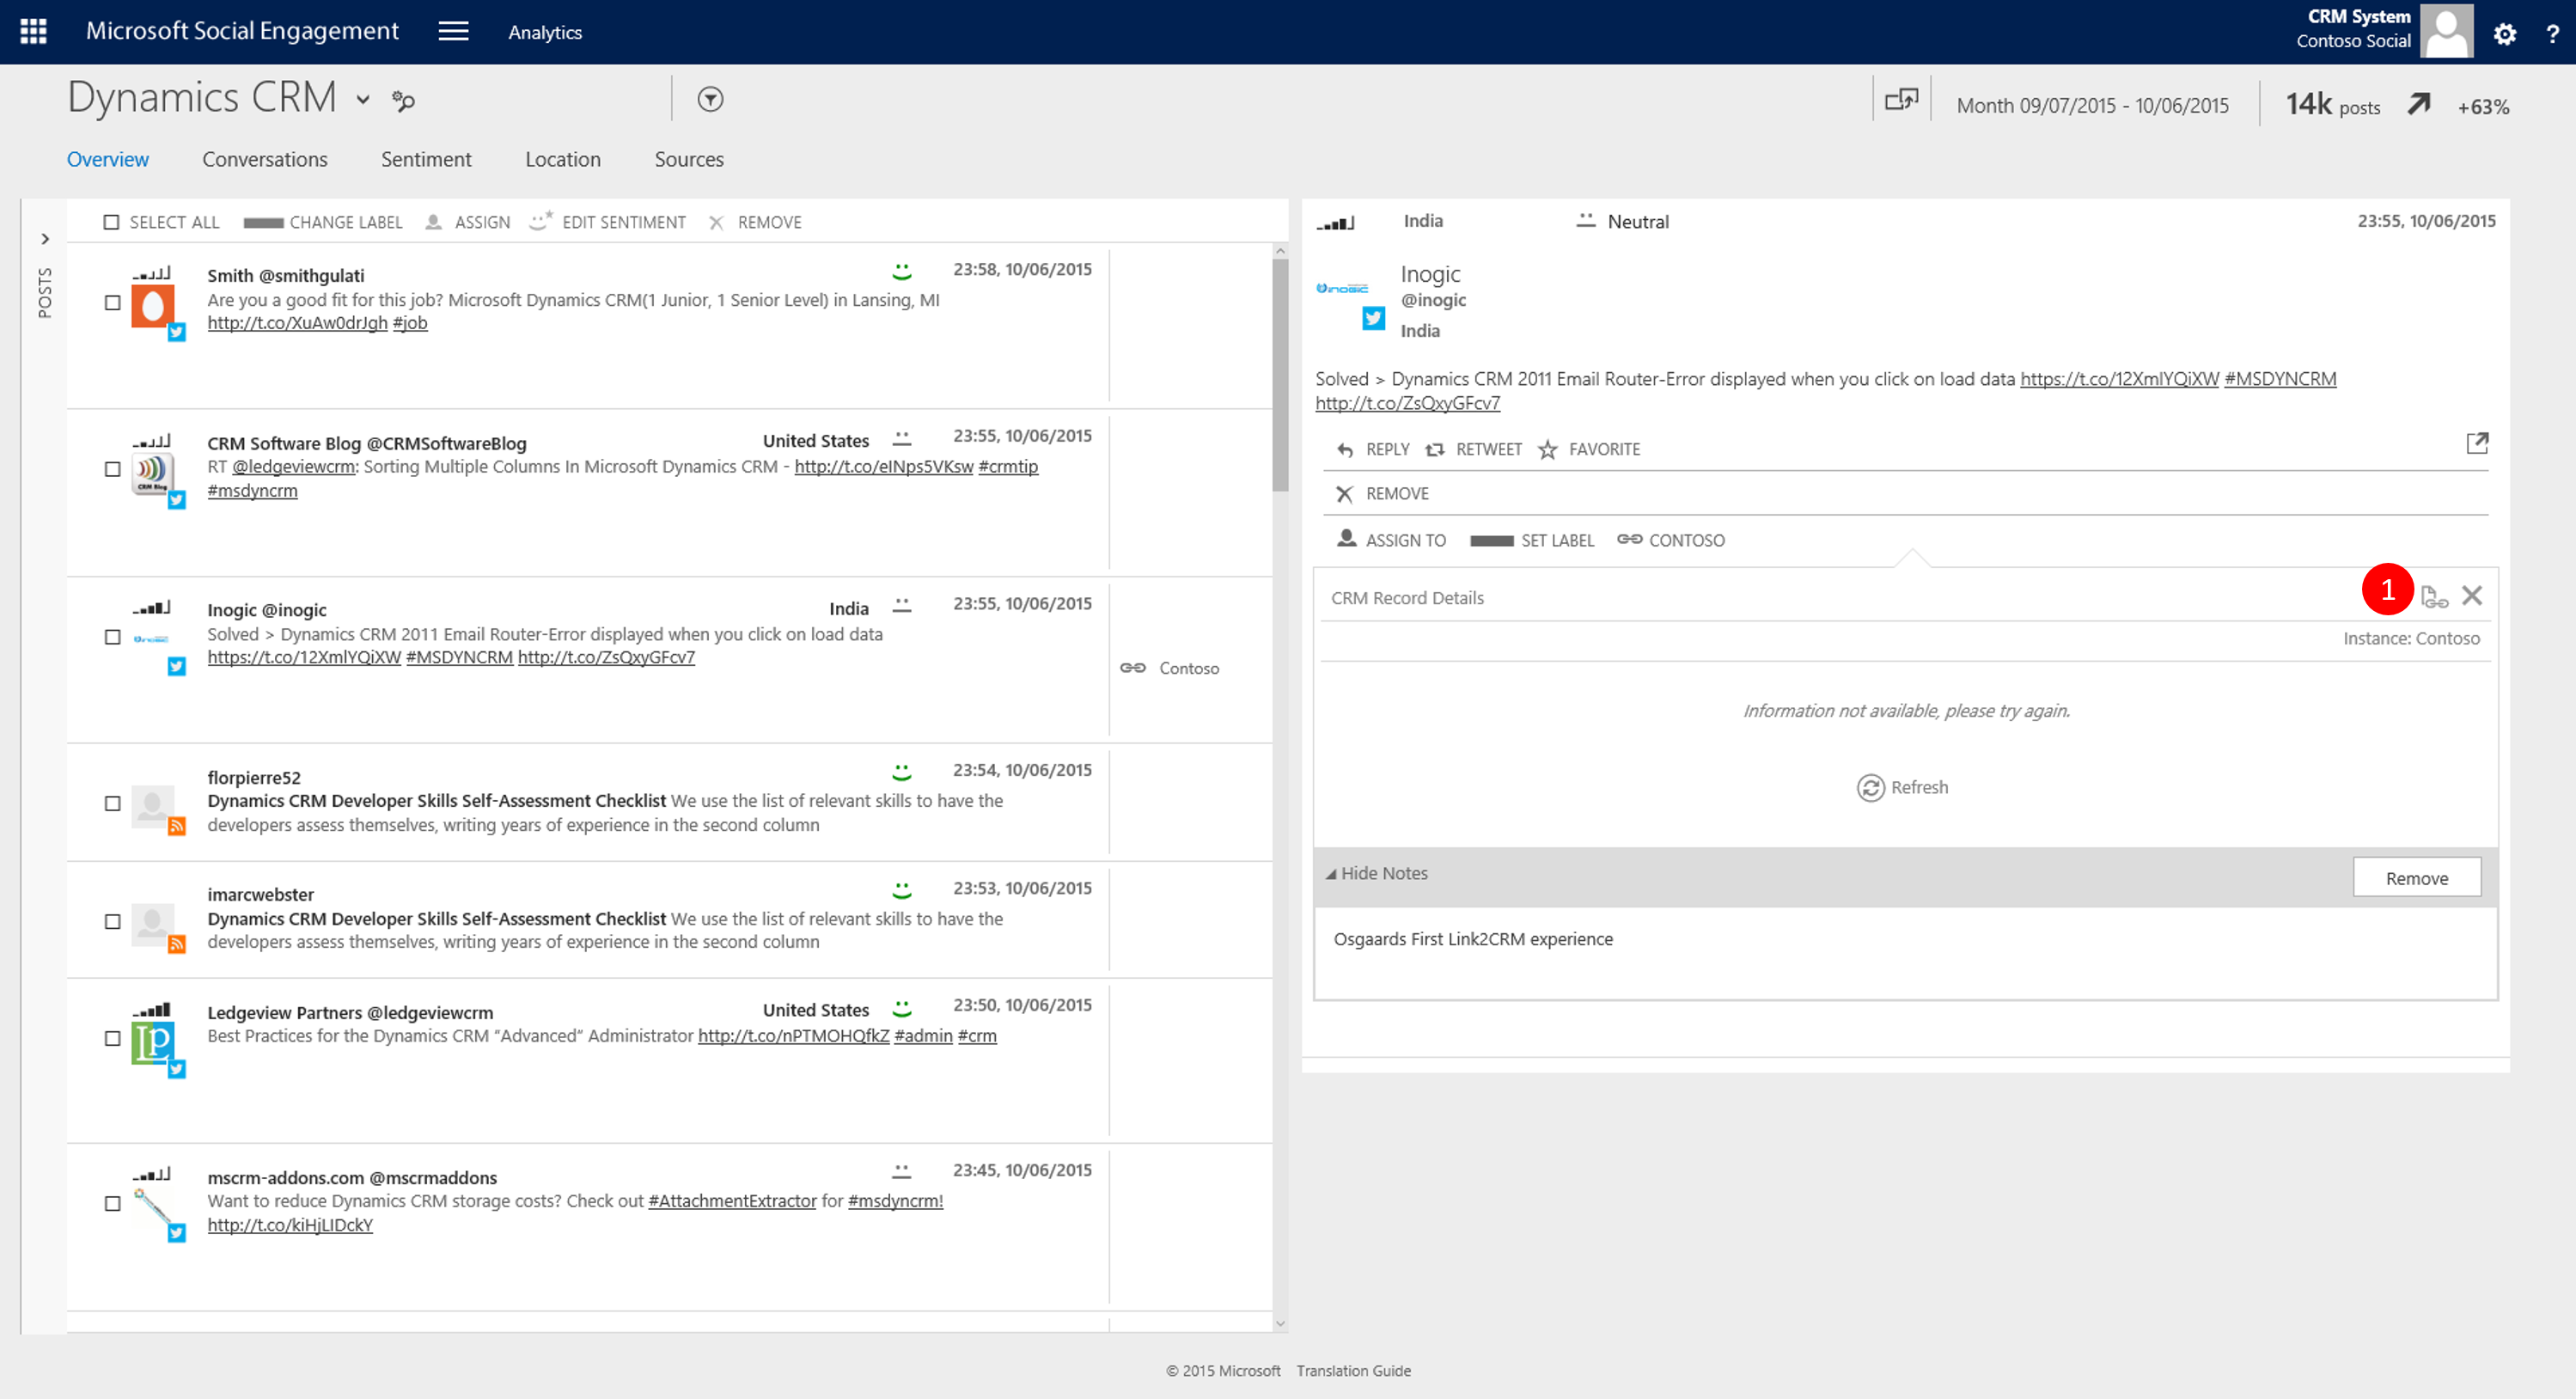
Picture 12: Post linked to Contoso instance
What happened behind the curtains at this stage is MSE created a Social Activity in CRM (not a Case as you might expected since you where offered a choice of entity above).
Navigate to CRM -> Activities -> All Social Activities to see your newly created Social Post
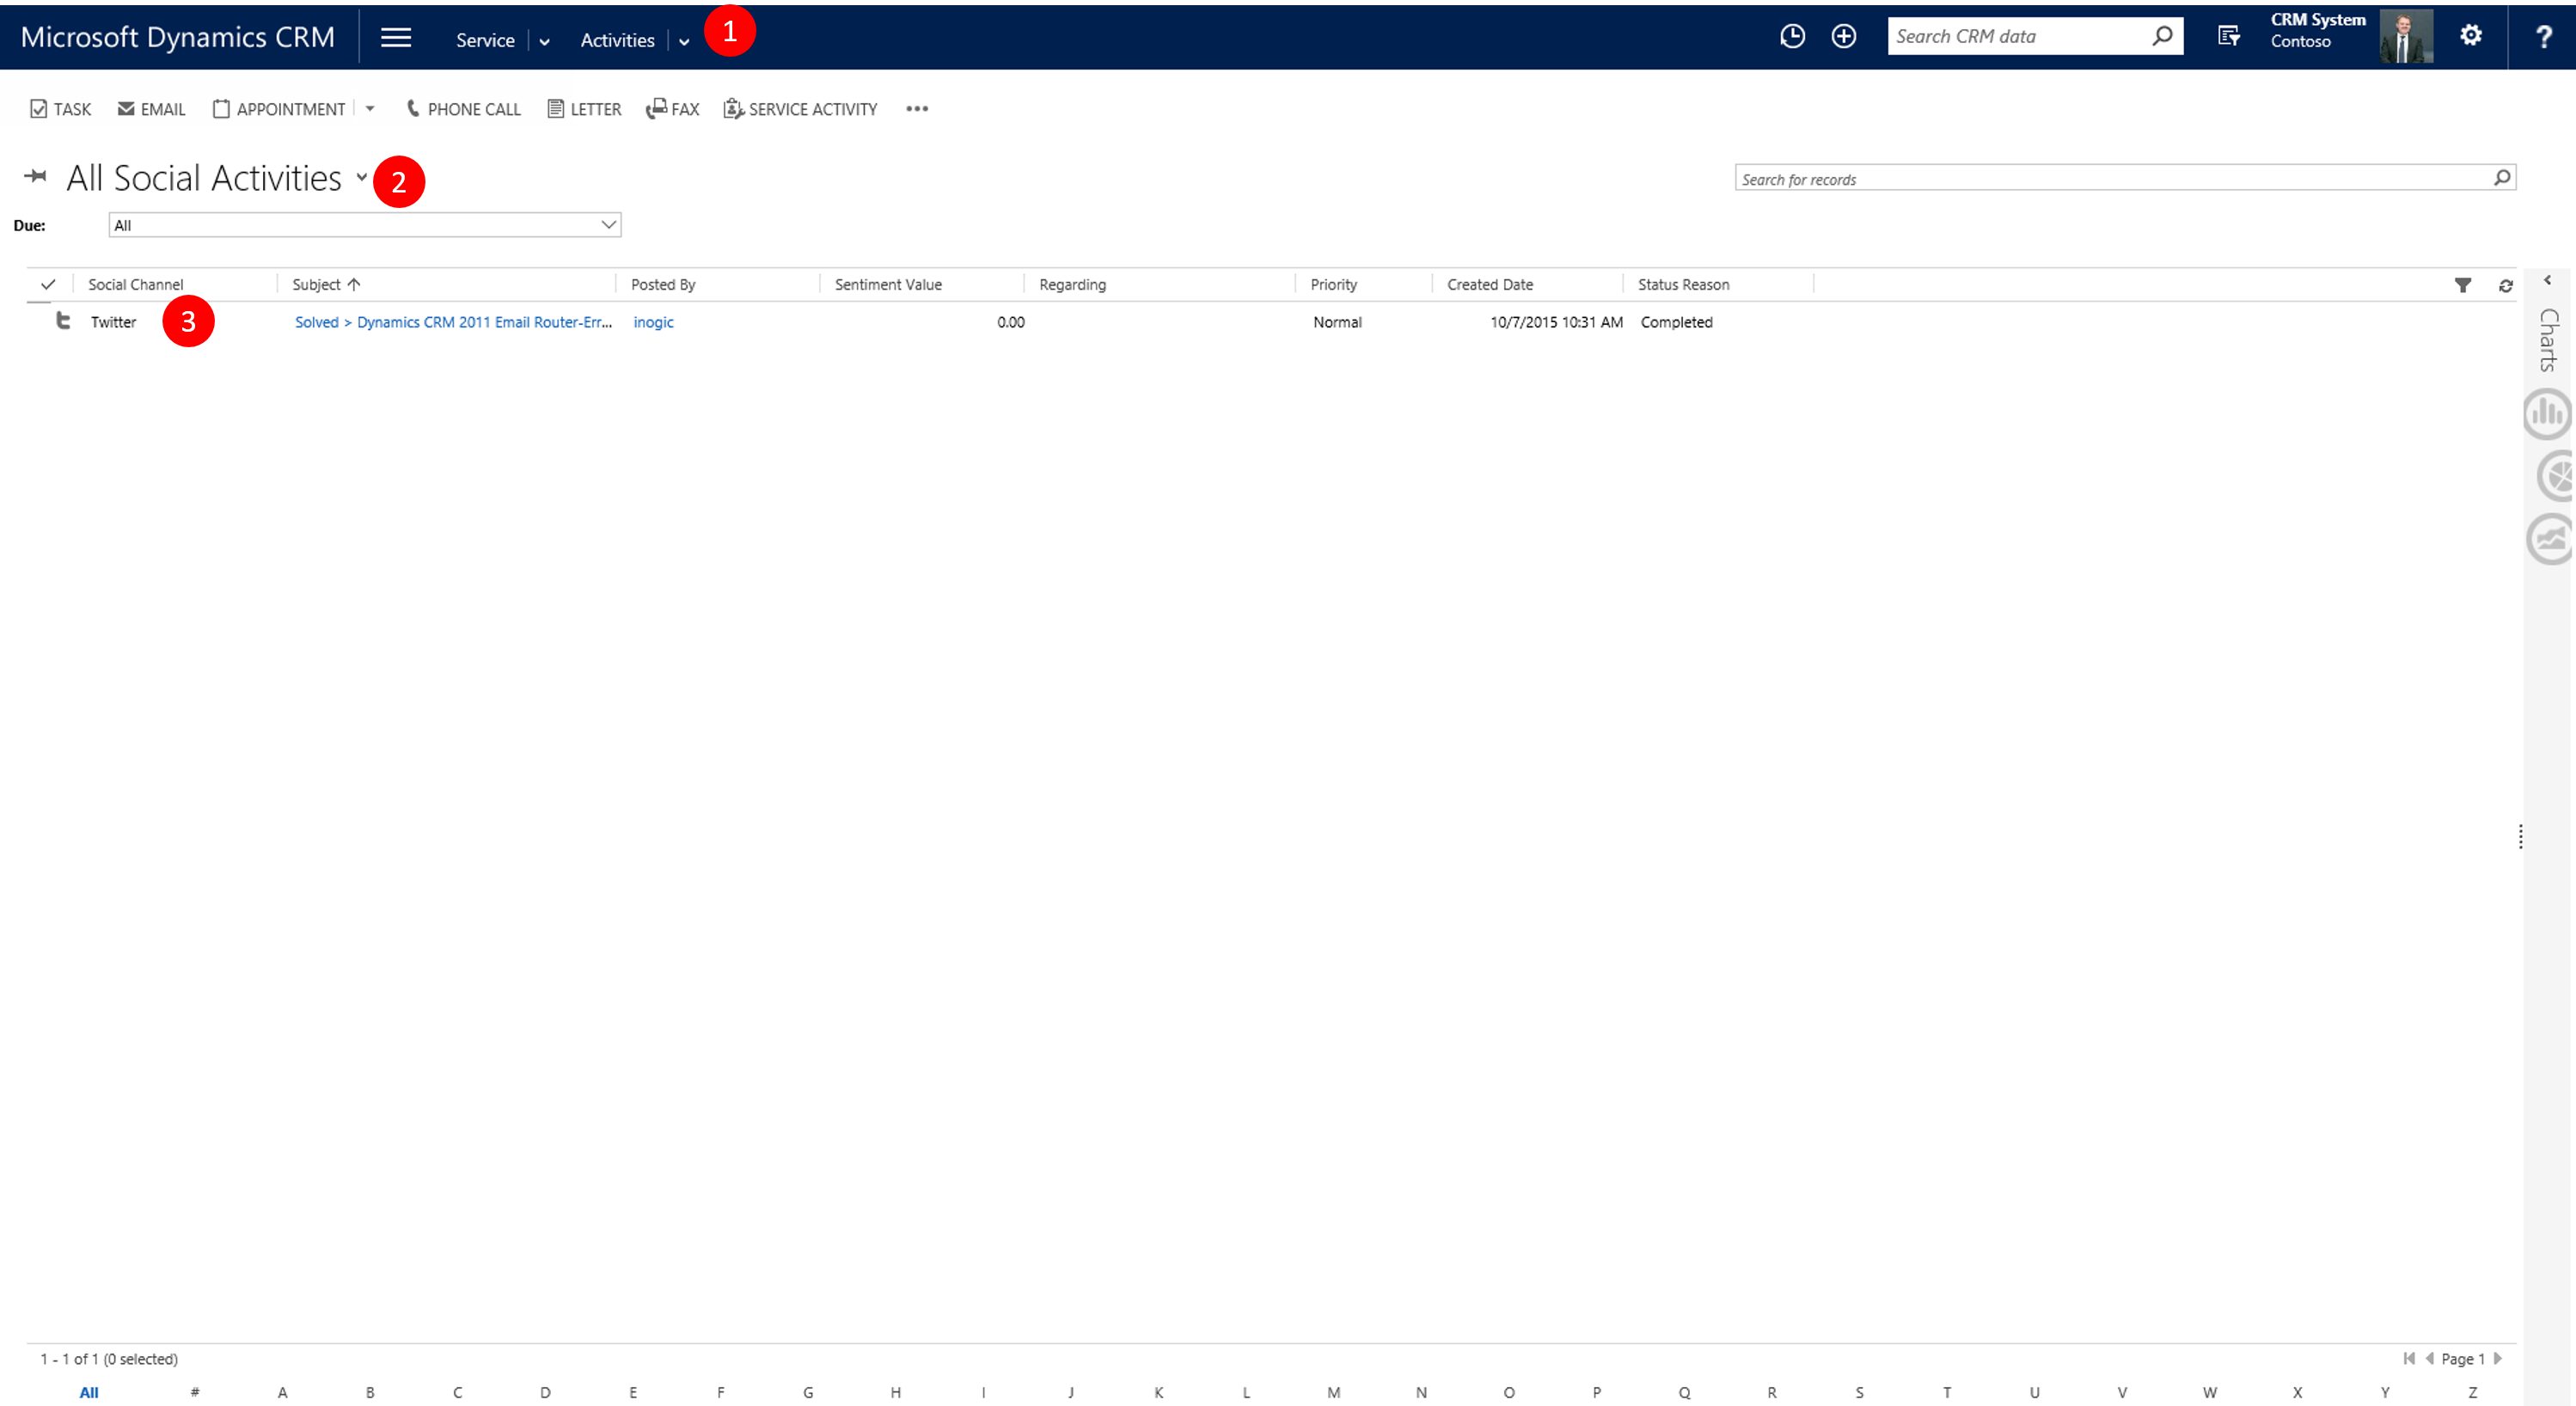
Picture 13: Newly created Social Activity in CRM
x
Closer Look at Additional Properties
Open the new Social Activity and Edit the Form to add and display the field "Additional Properties".
In this field you will find the JSON payload from the post (read more in the links in See Also section). One of the properties brought over is the "userPreferredTargetEntity" property which holds information about your choice in the MSE dropdown.
If you picked Case the property value will be "incident", and if you picked Lead the property value will be "lead".

Picture 14: Additional Parameters field shown on form
Before we leverage this information in a rule lets see how we can create a Case from the Social Activity manually.
Click Convert to Case 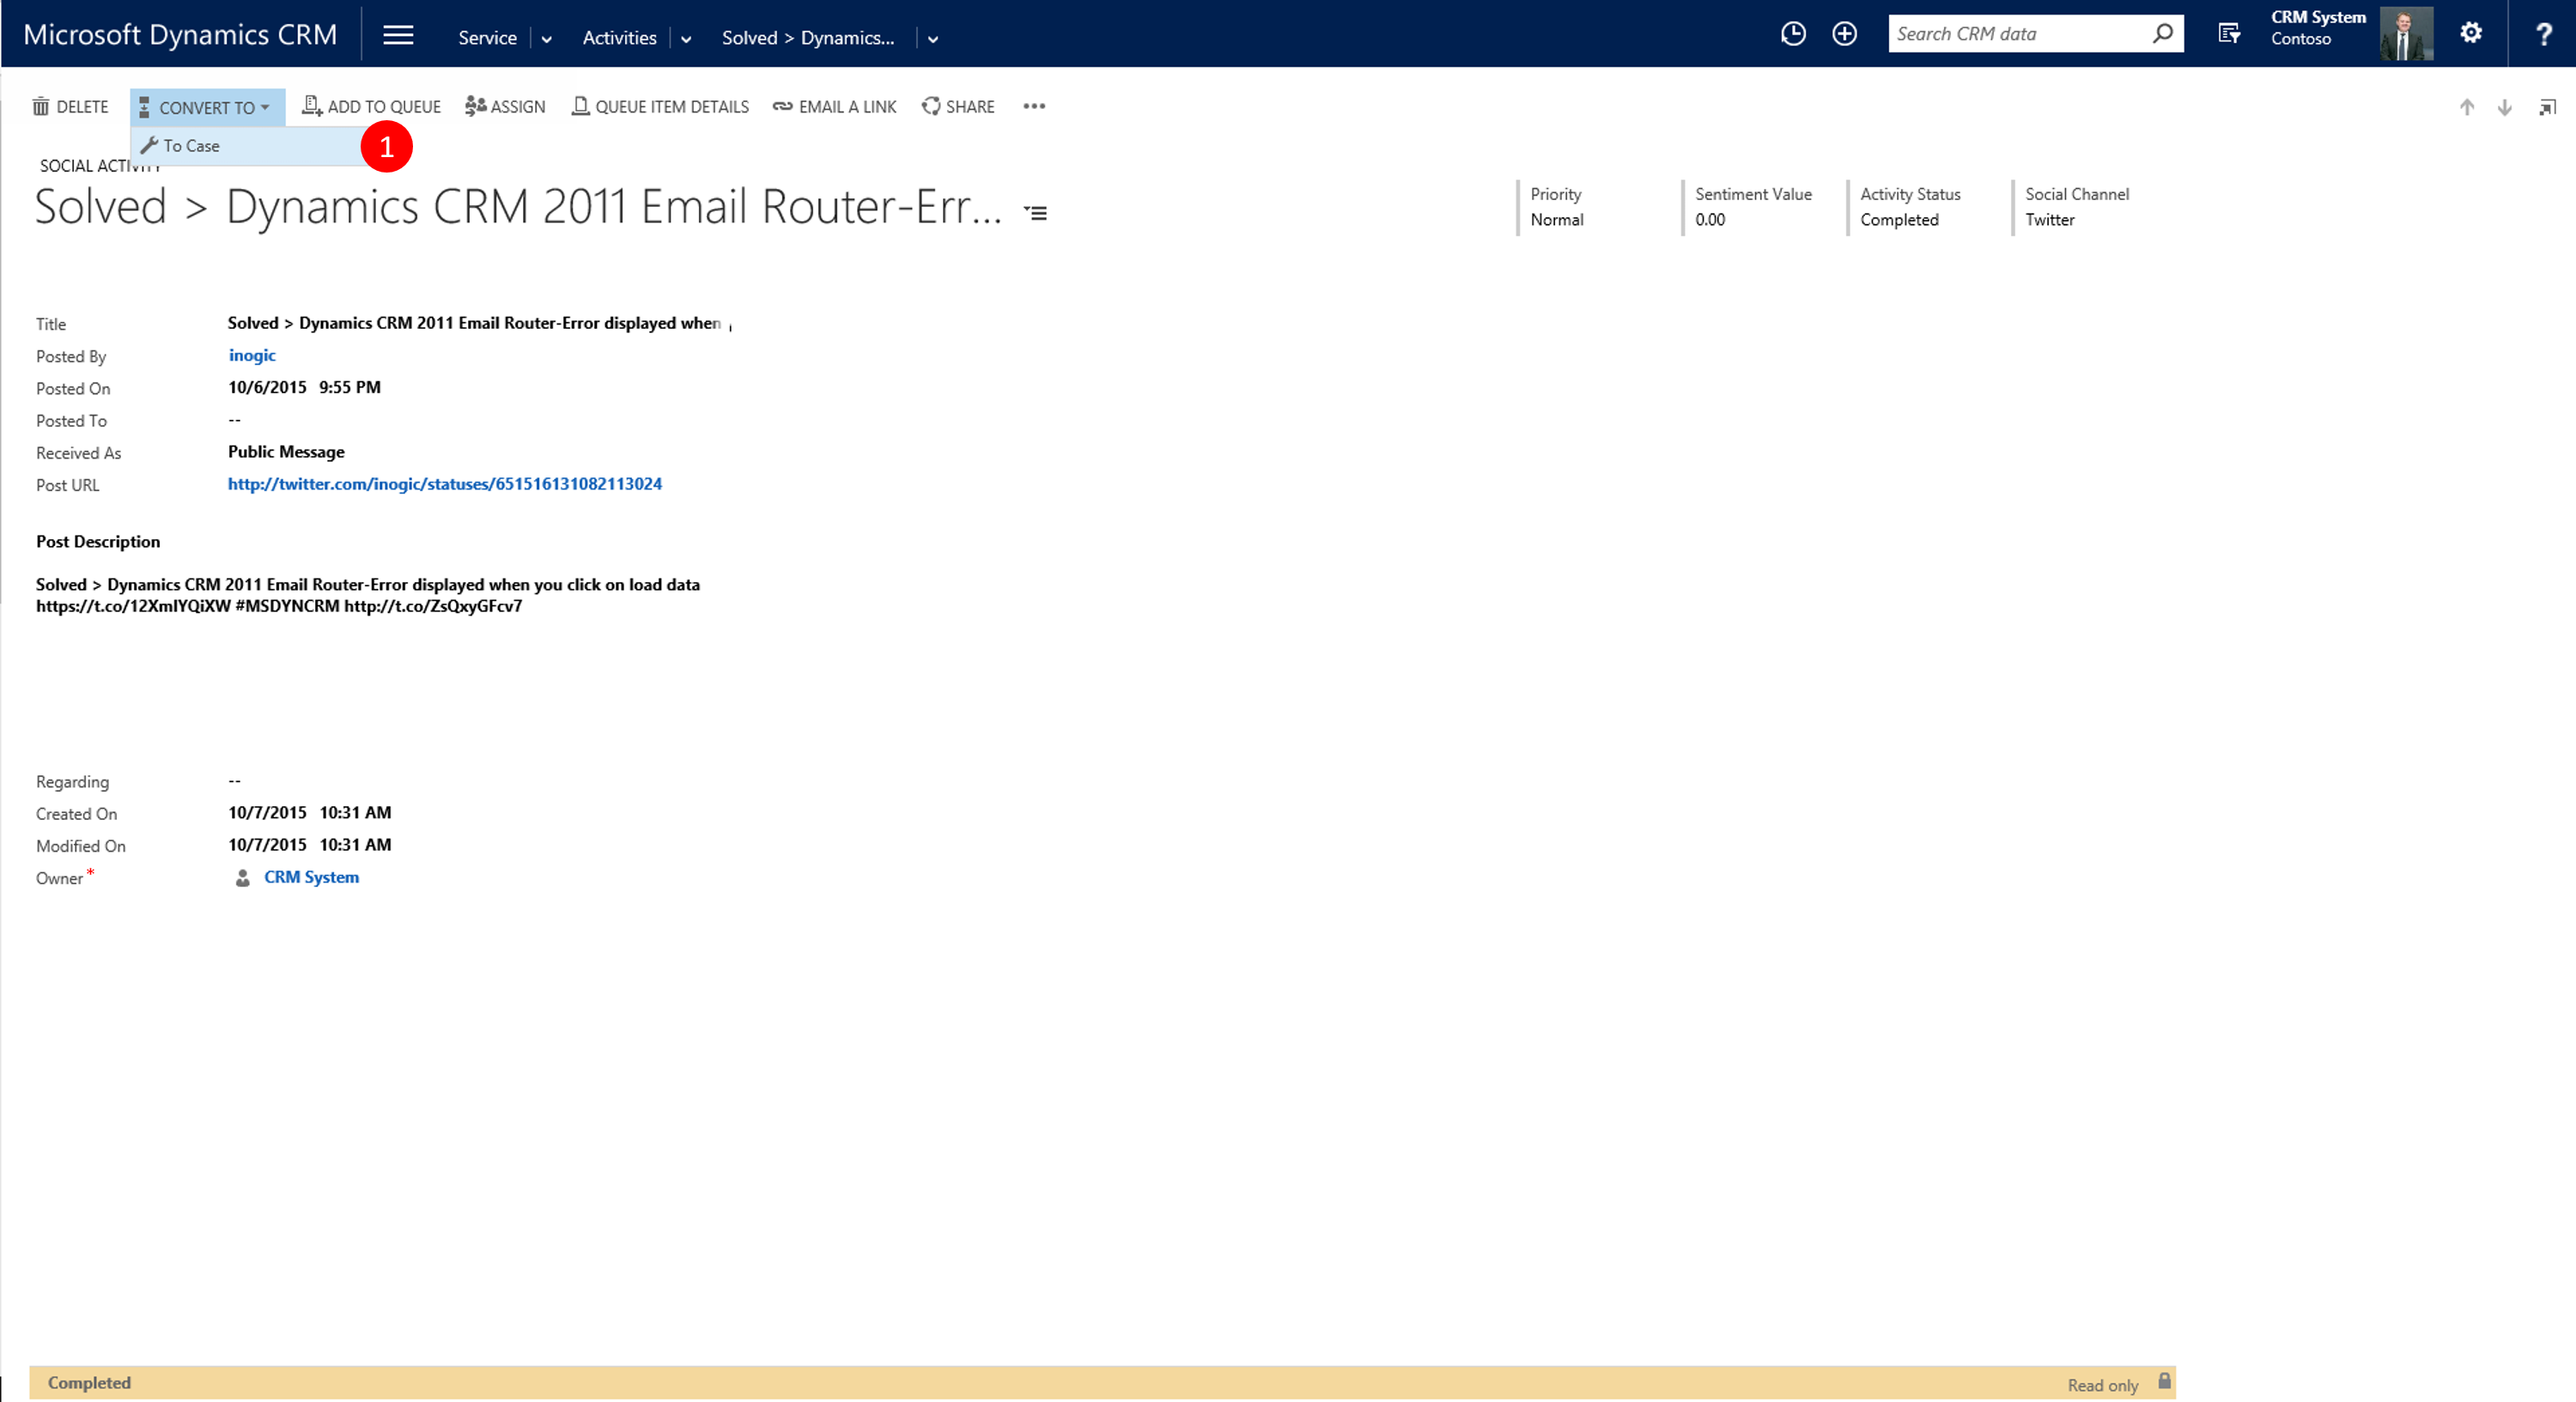
Picture 15: Manually Convert Social Activity to Case
Set the Regarding
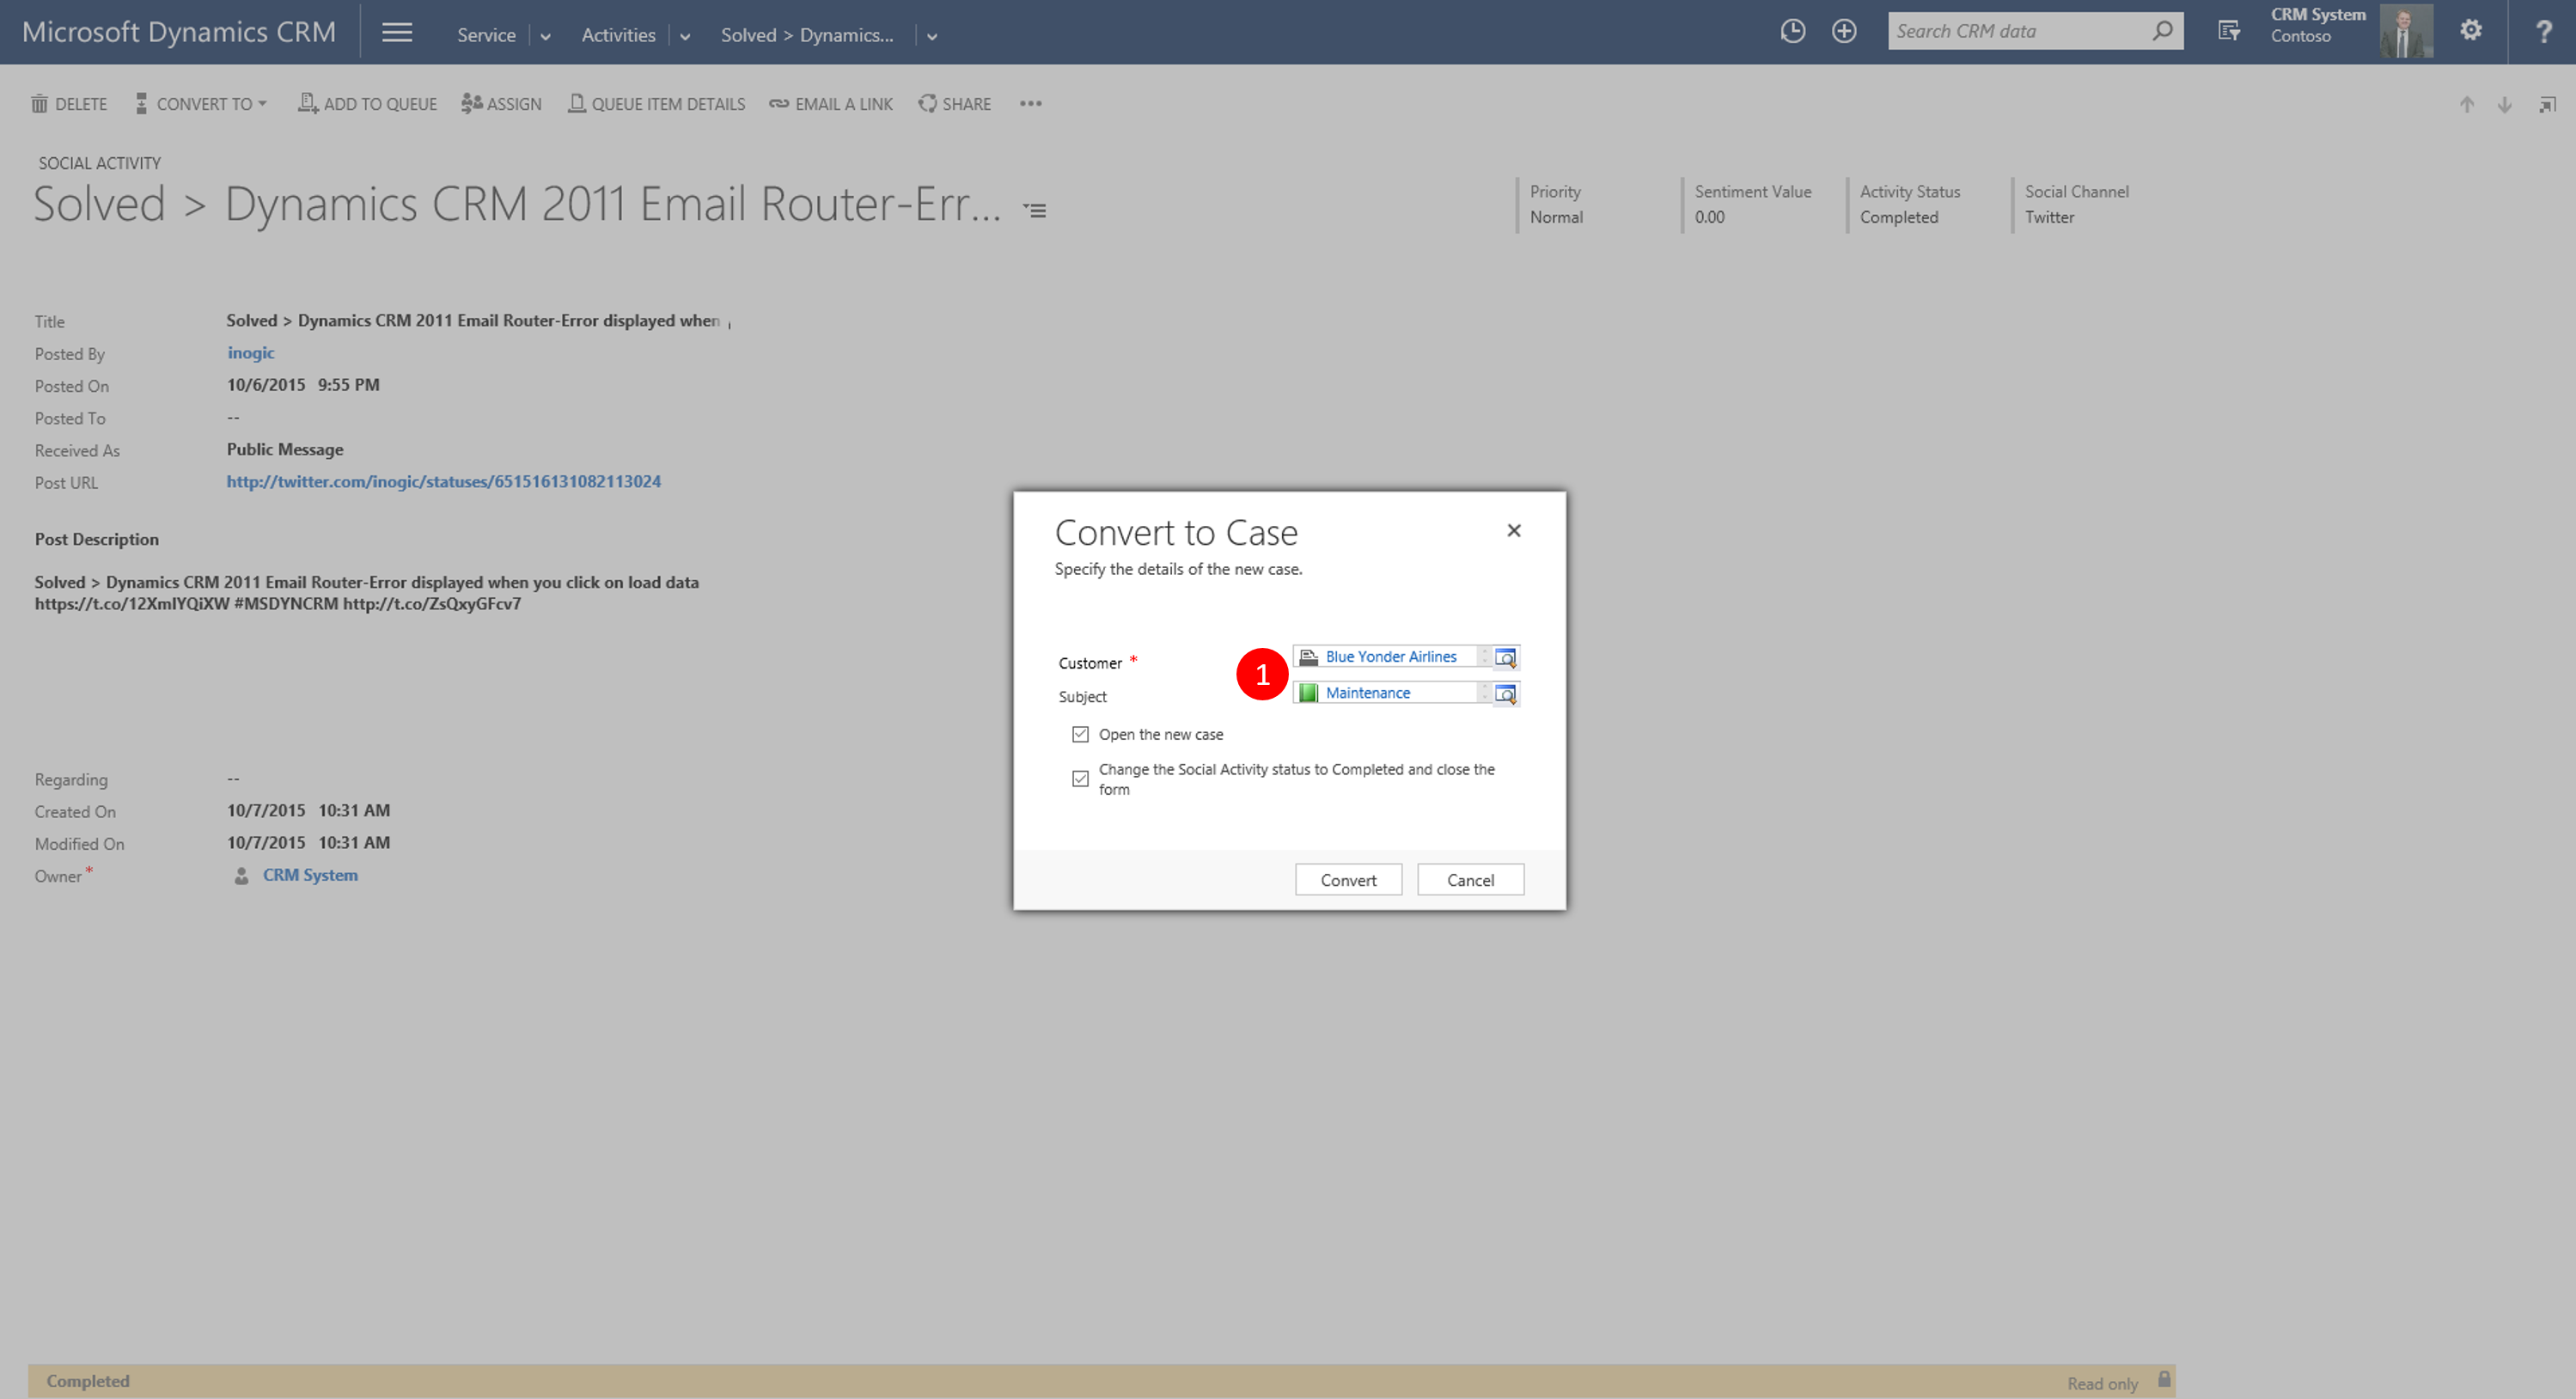
Picture 16: Set Regarding
See the new case in CRM
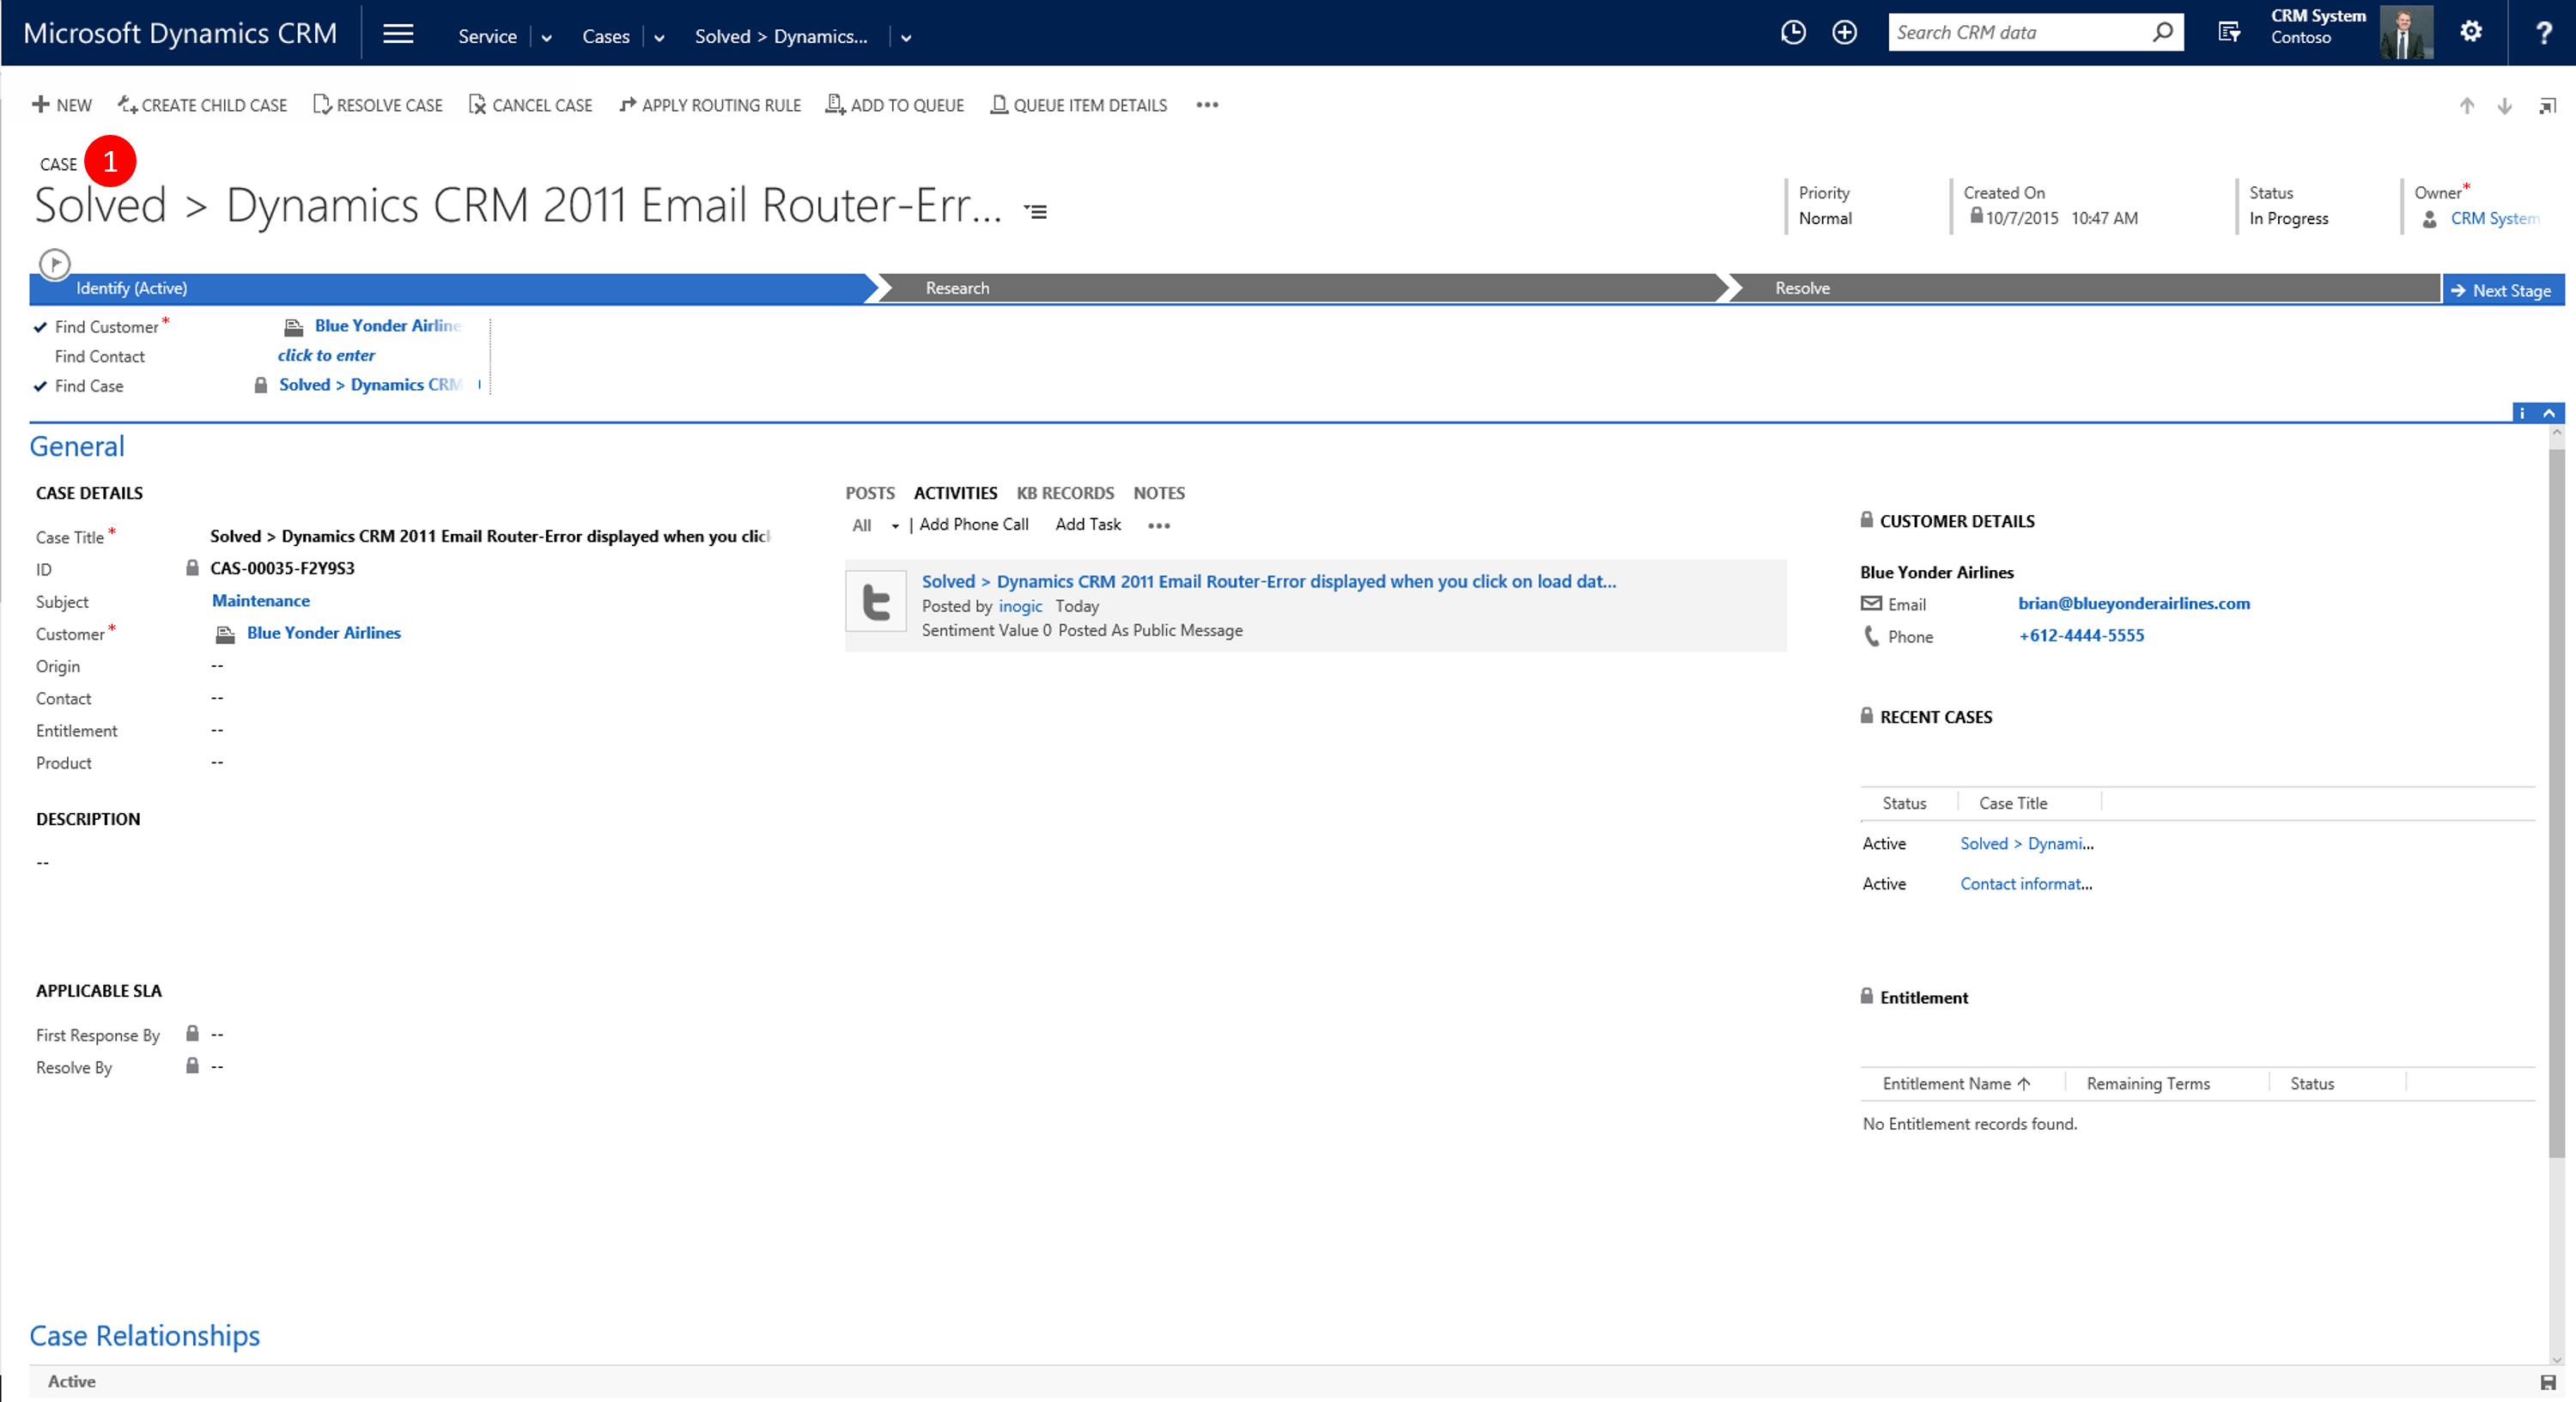
Picture 17: New Case
And see that the post is now displaying a link to a Case
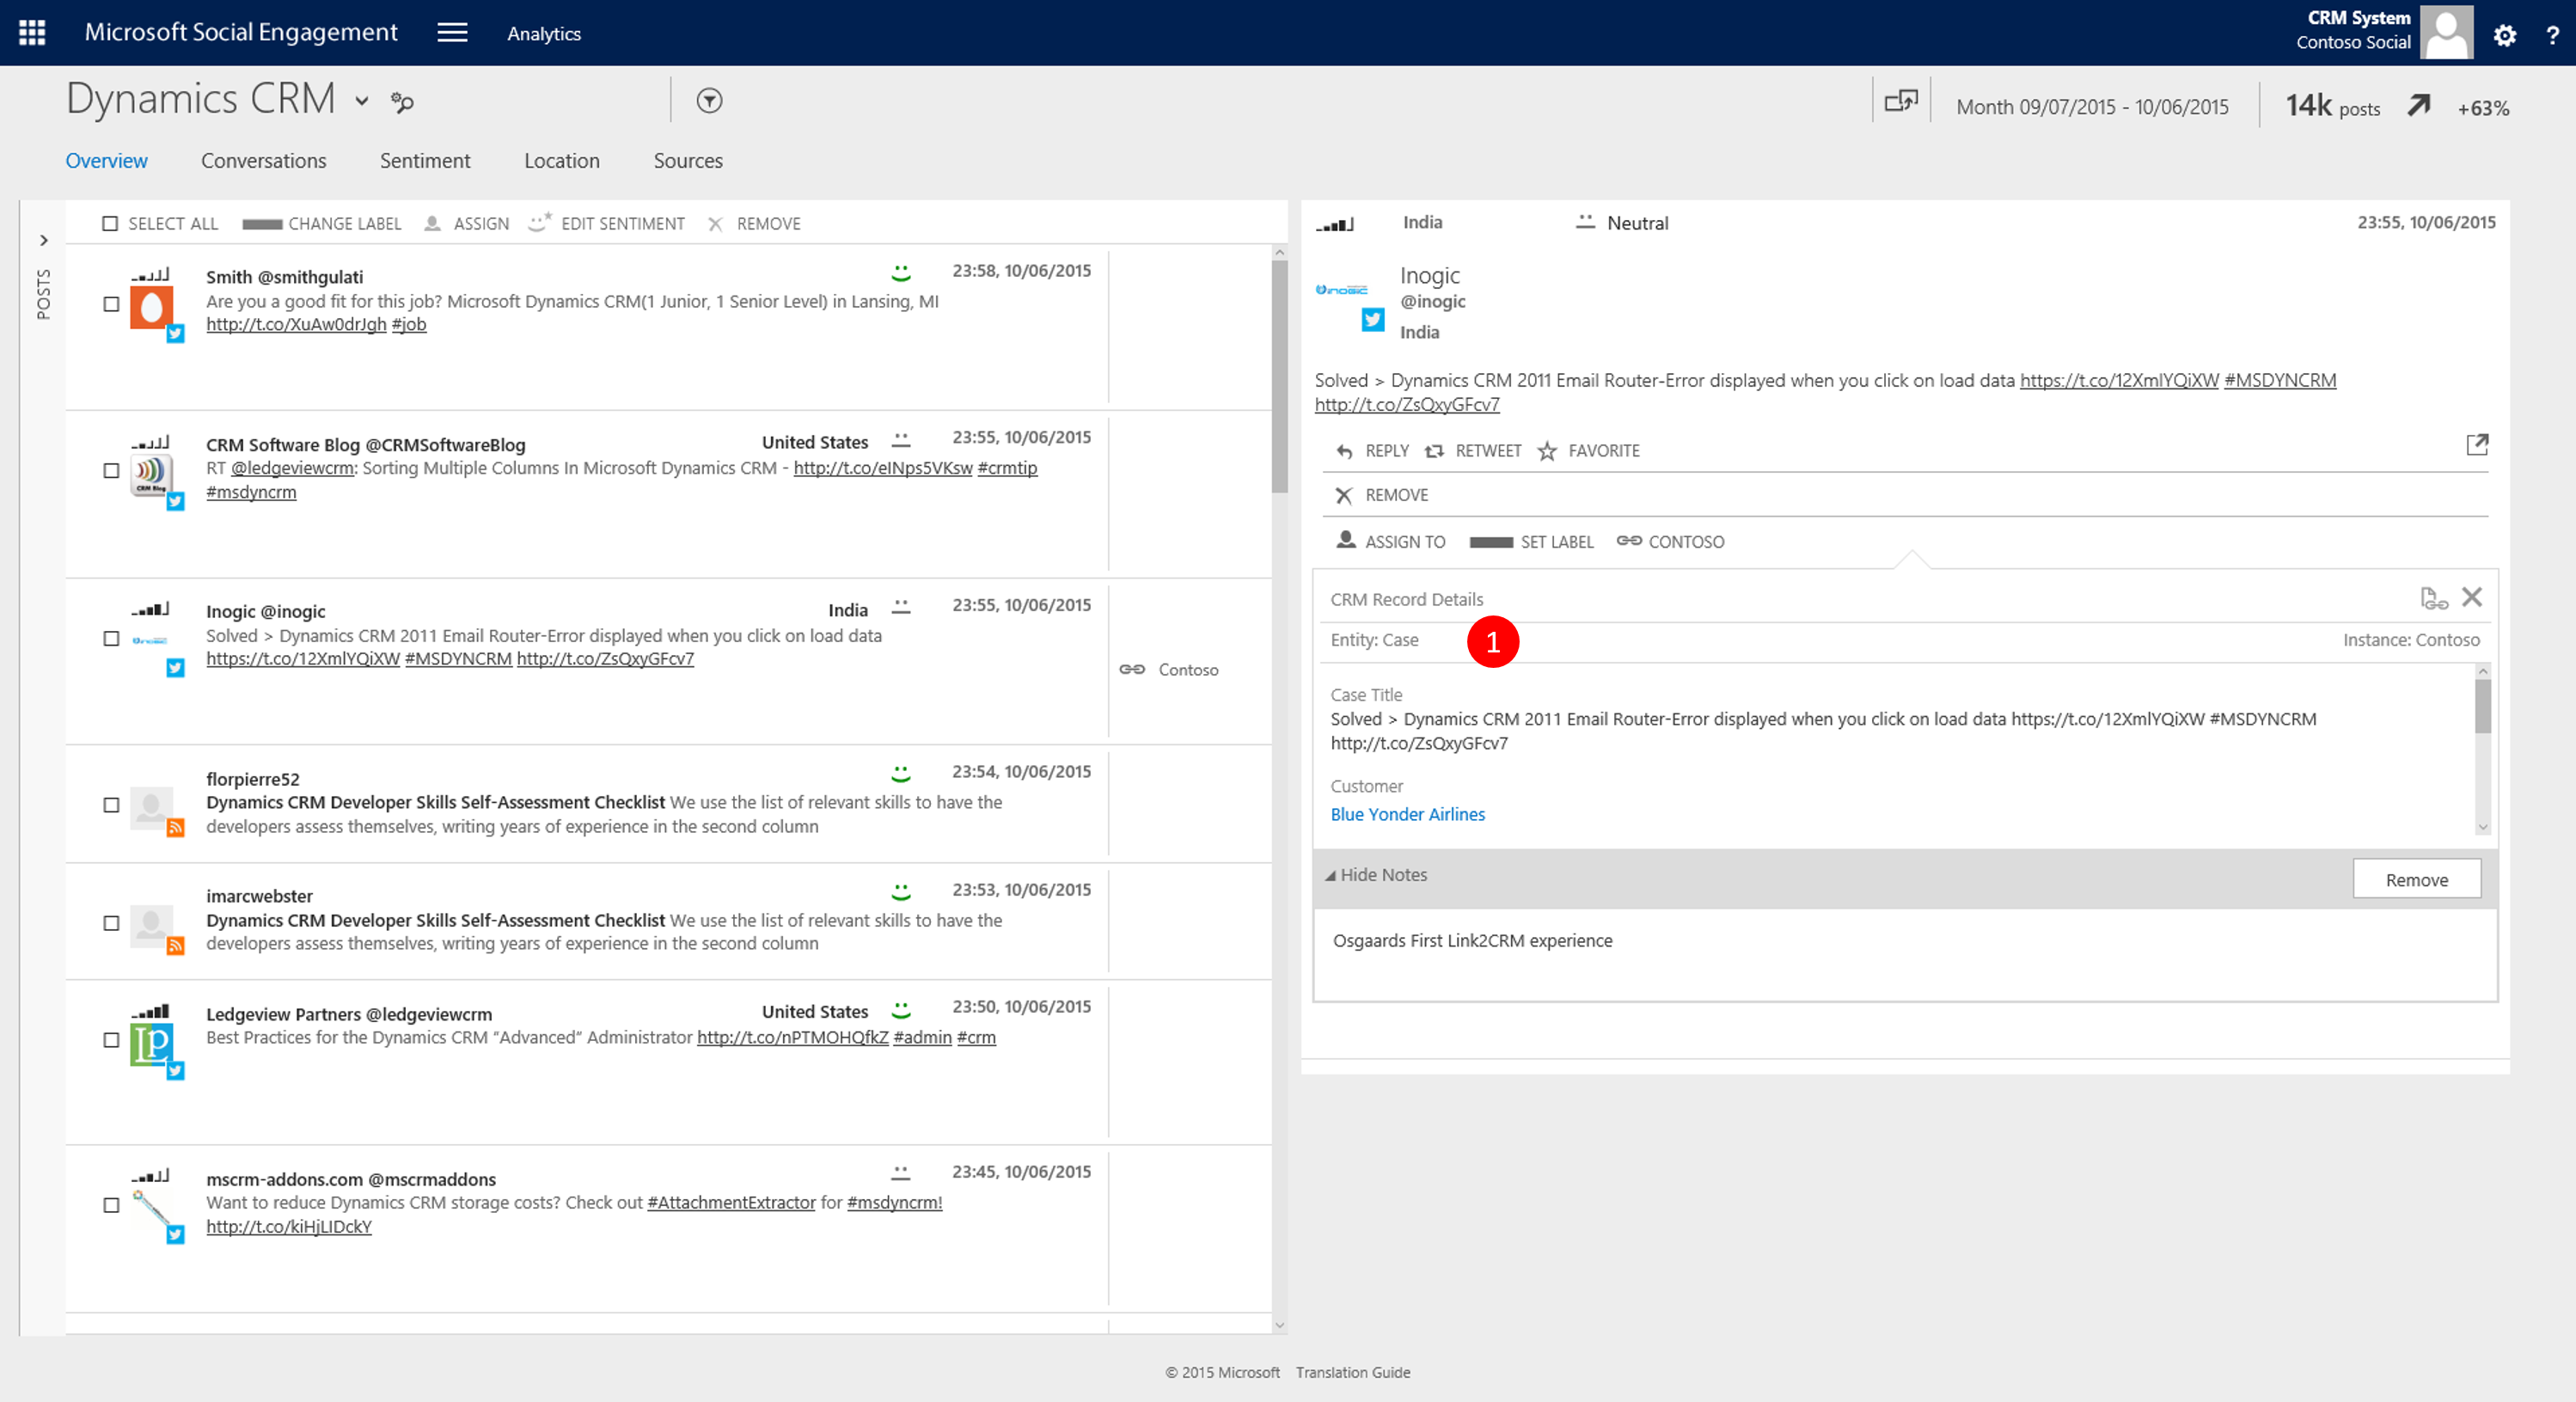
Picture 18: In MSE post now displays Case link
x
Set Up for Automatic Record Creation
Now using the information from the JSON payload lets set up a Automatic Record Creation rule that creates the records we'd expect from our choice in the entity drop-down in MSE
Navigate to CRM and click Settings -> Business Management -> Automatic Record Creation and Update Rules 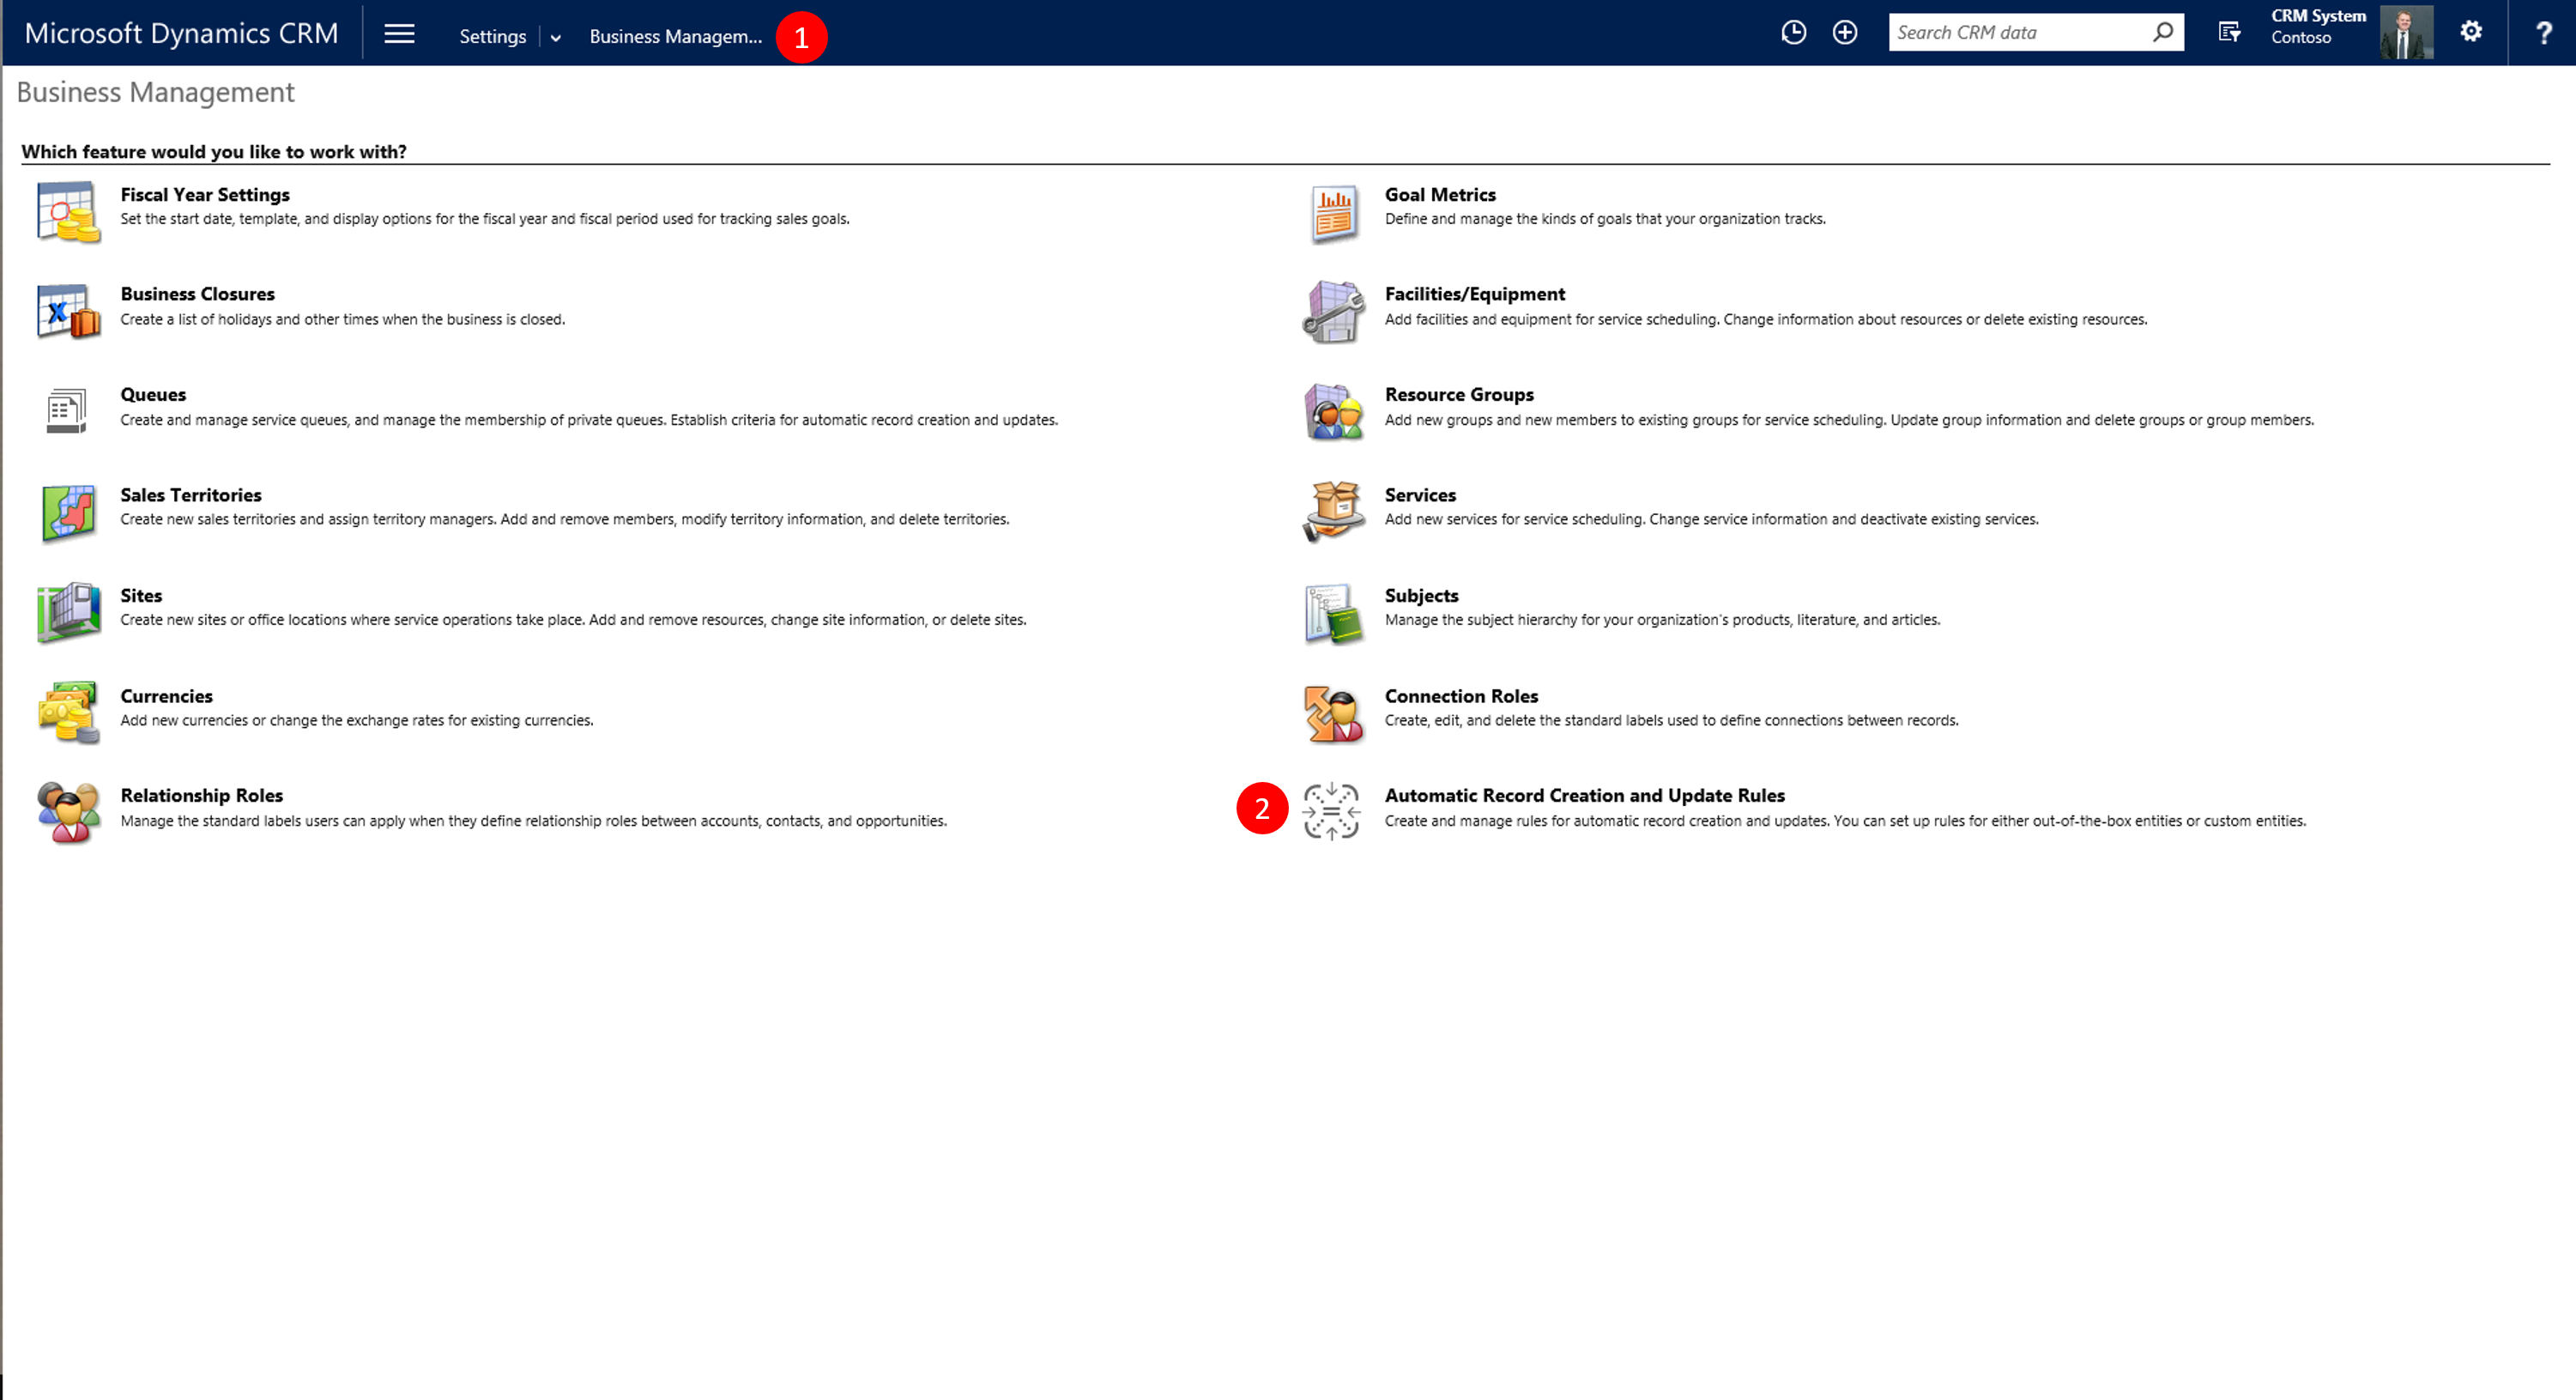
Picture 19: Settings, Automatic Record Creation and Update Rules
Create a New Rule
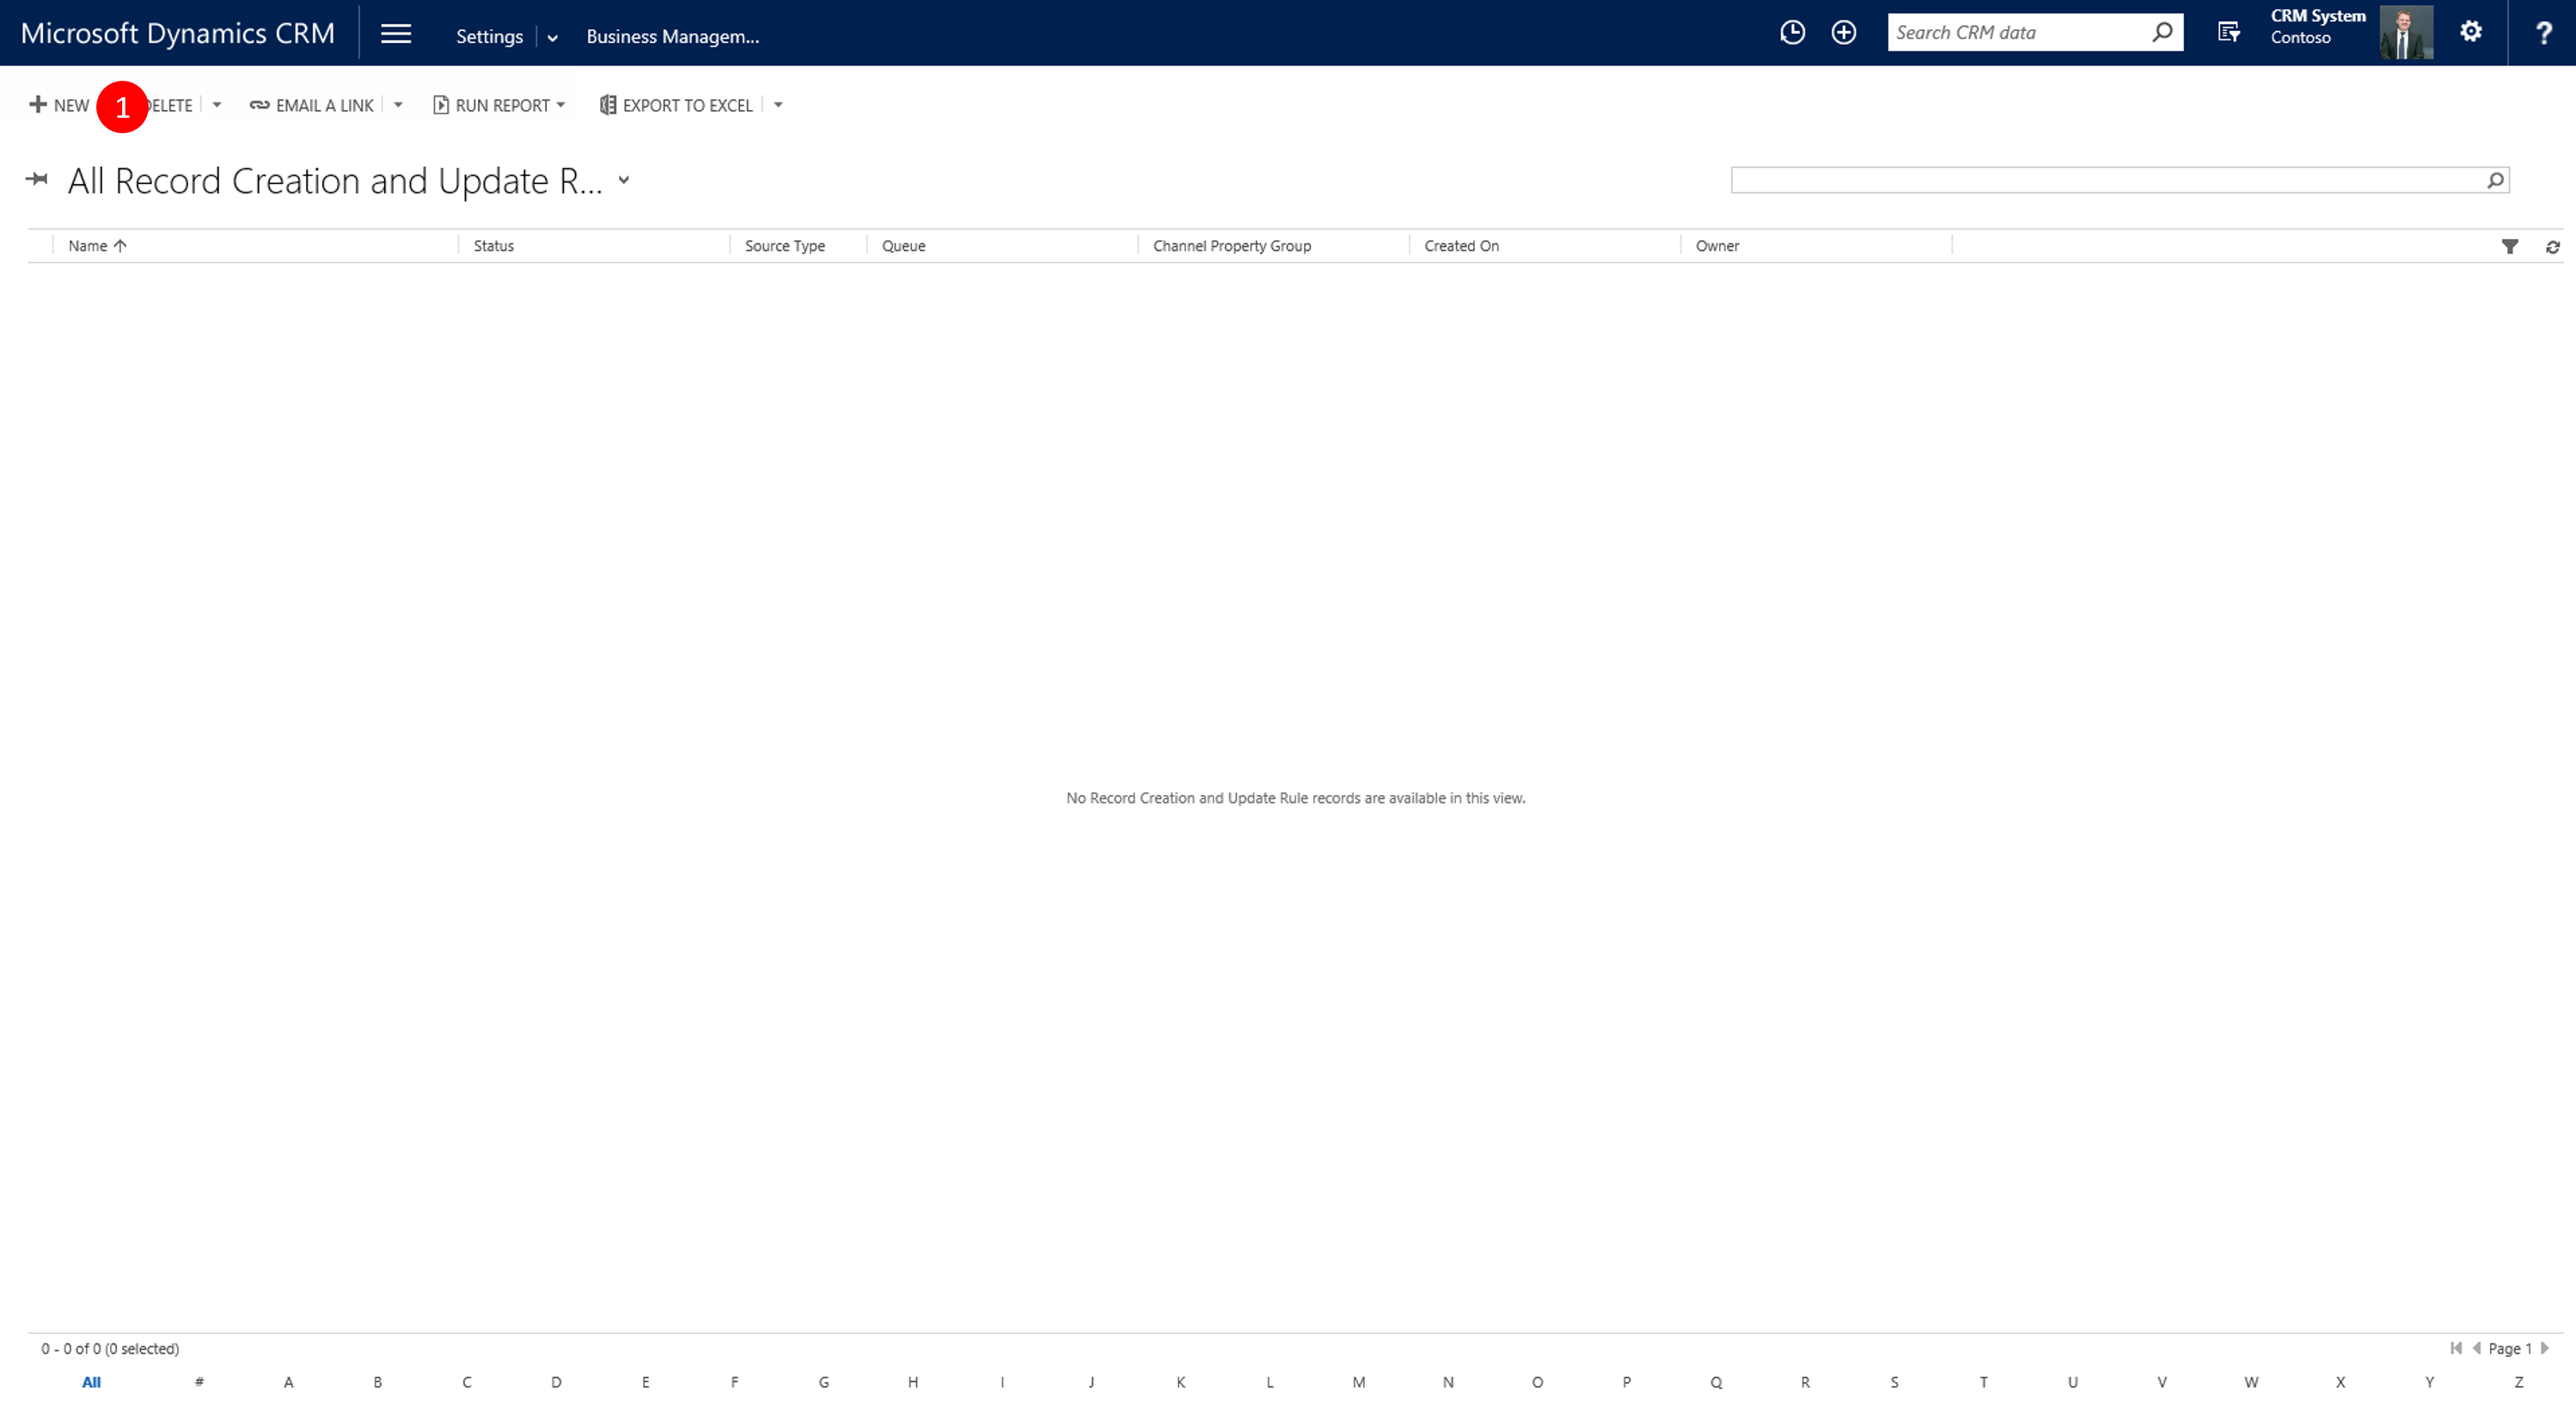
Picture 20: New Rule
Provide required information (name and source type = social activity)
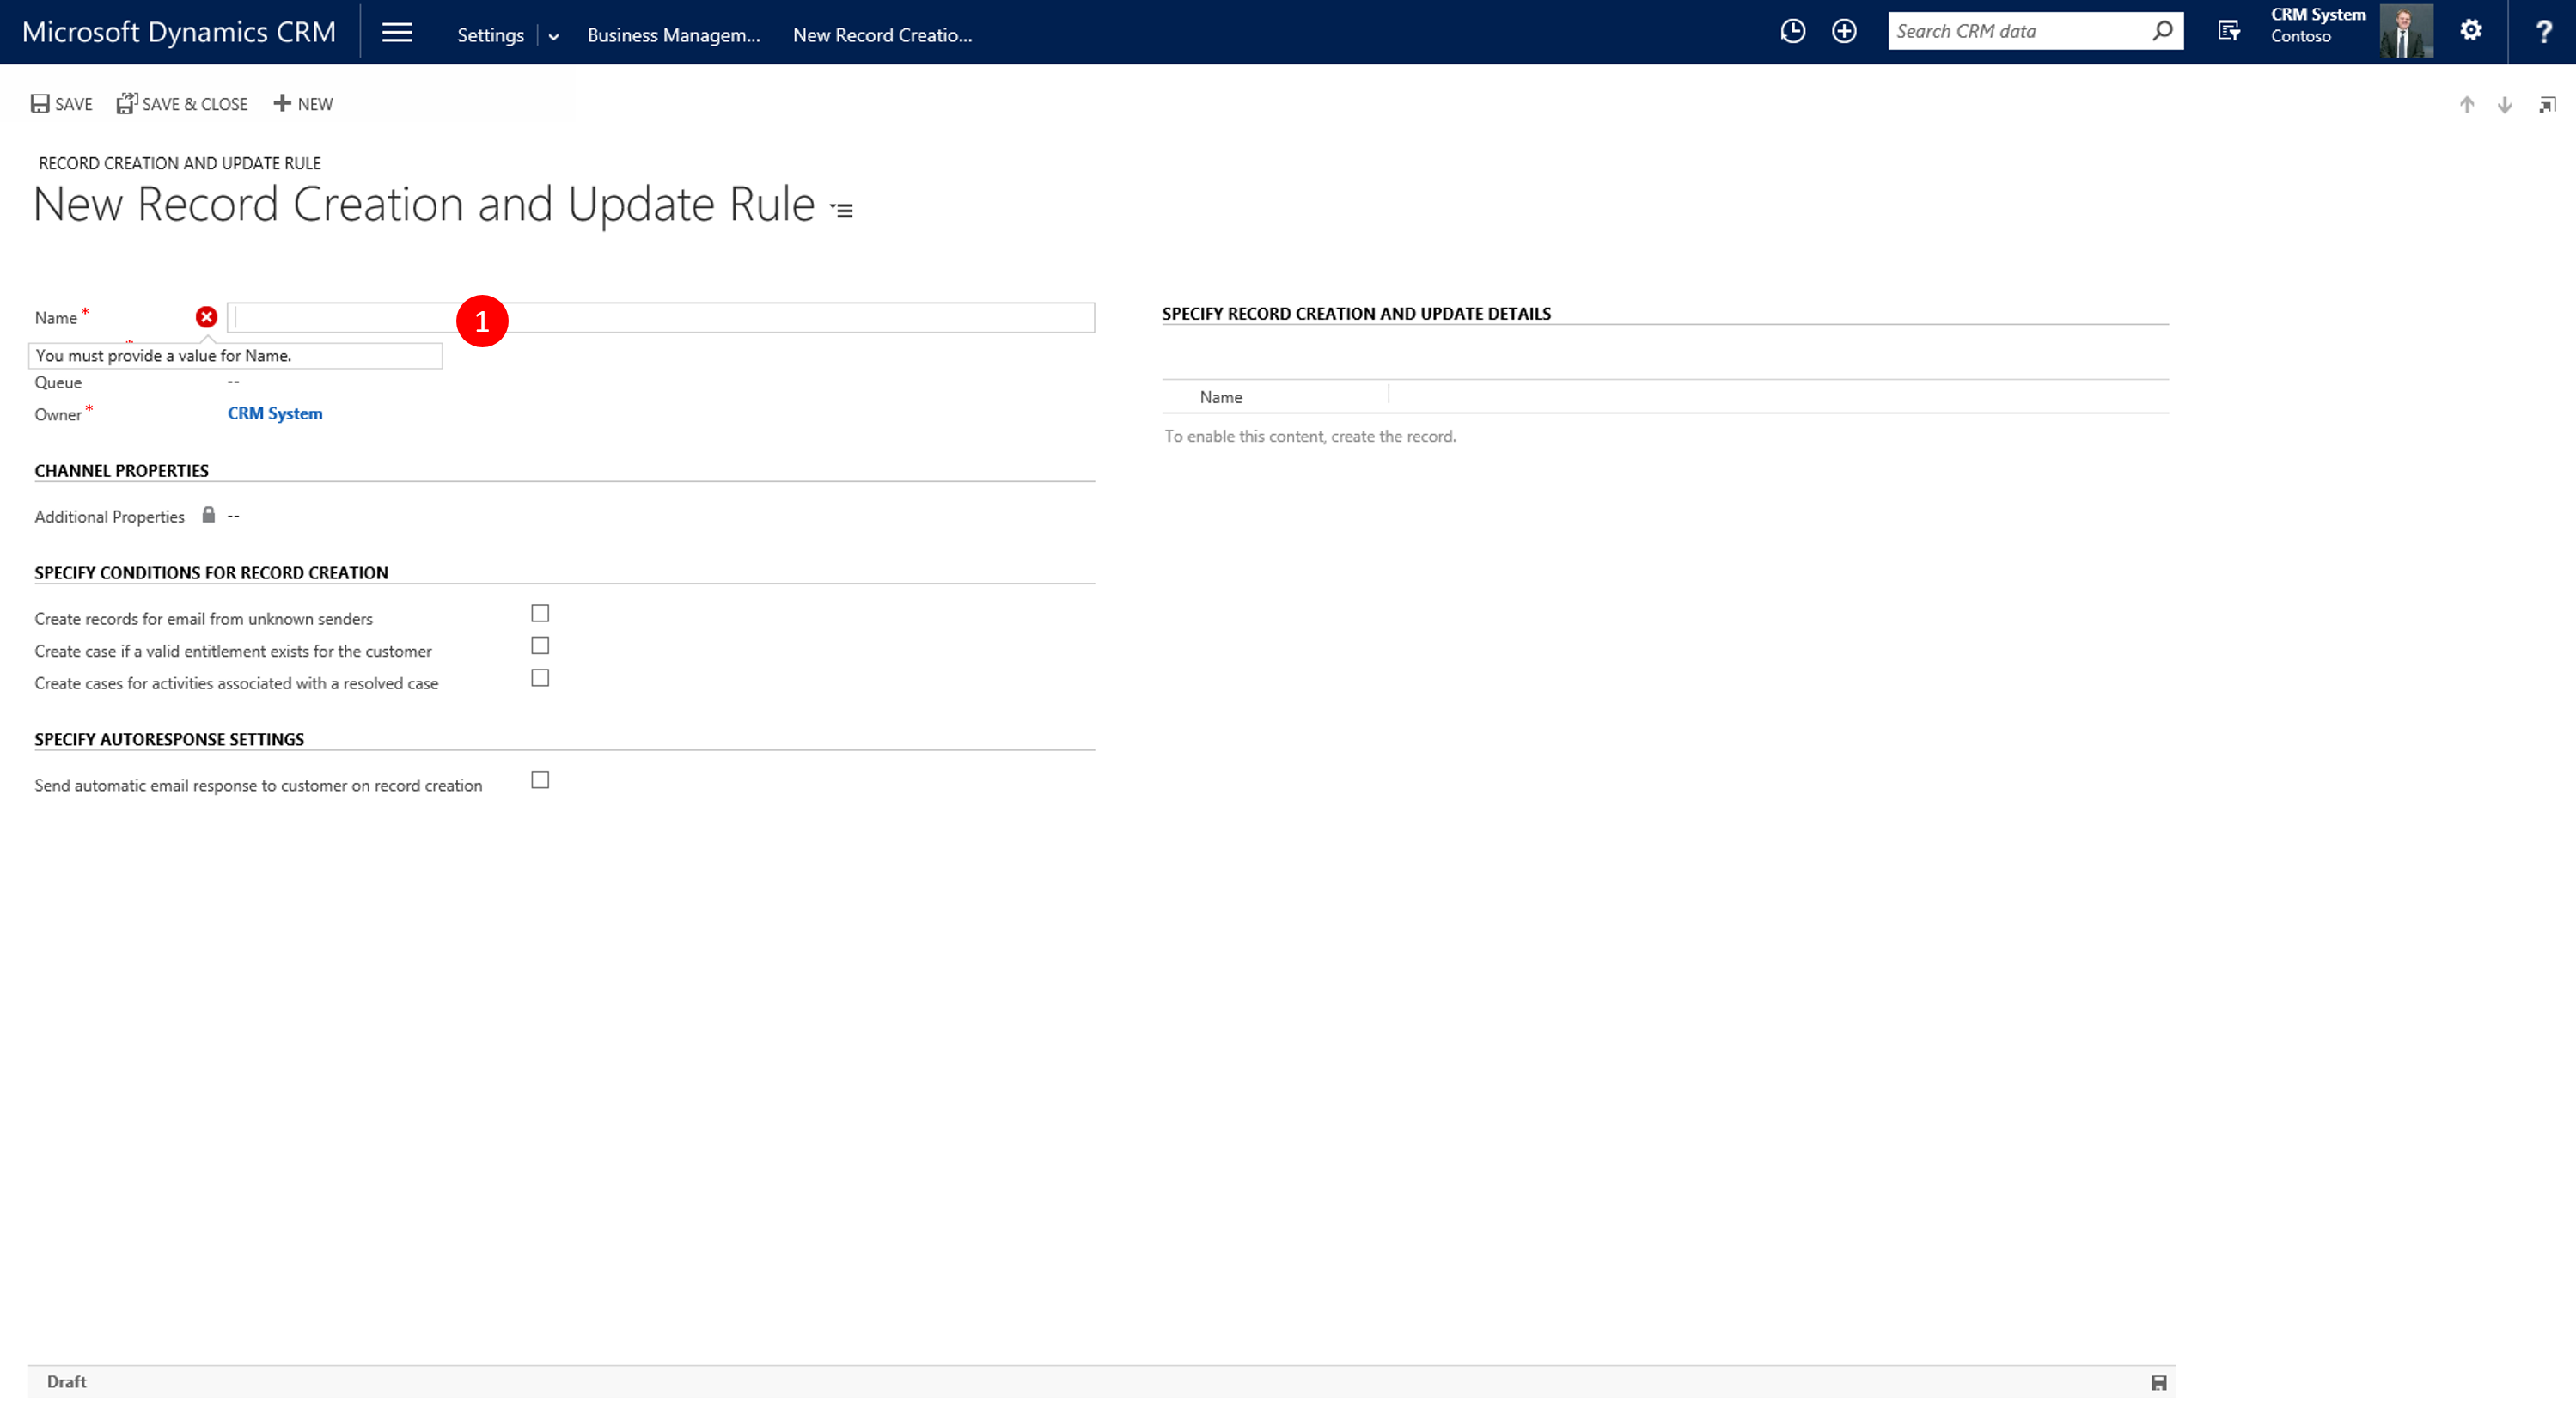
Picture 21: Provide Name and Source Type
Click Save
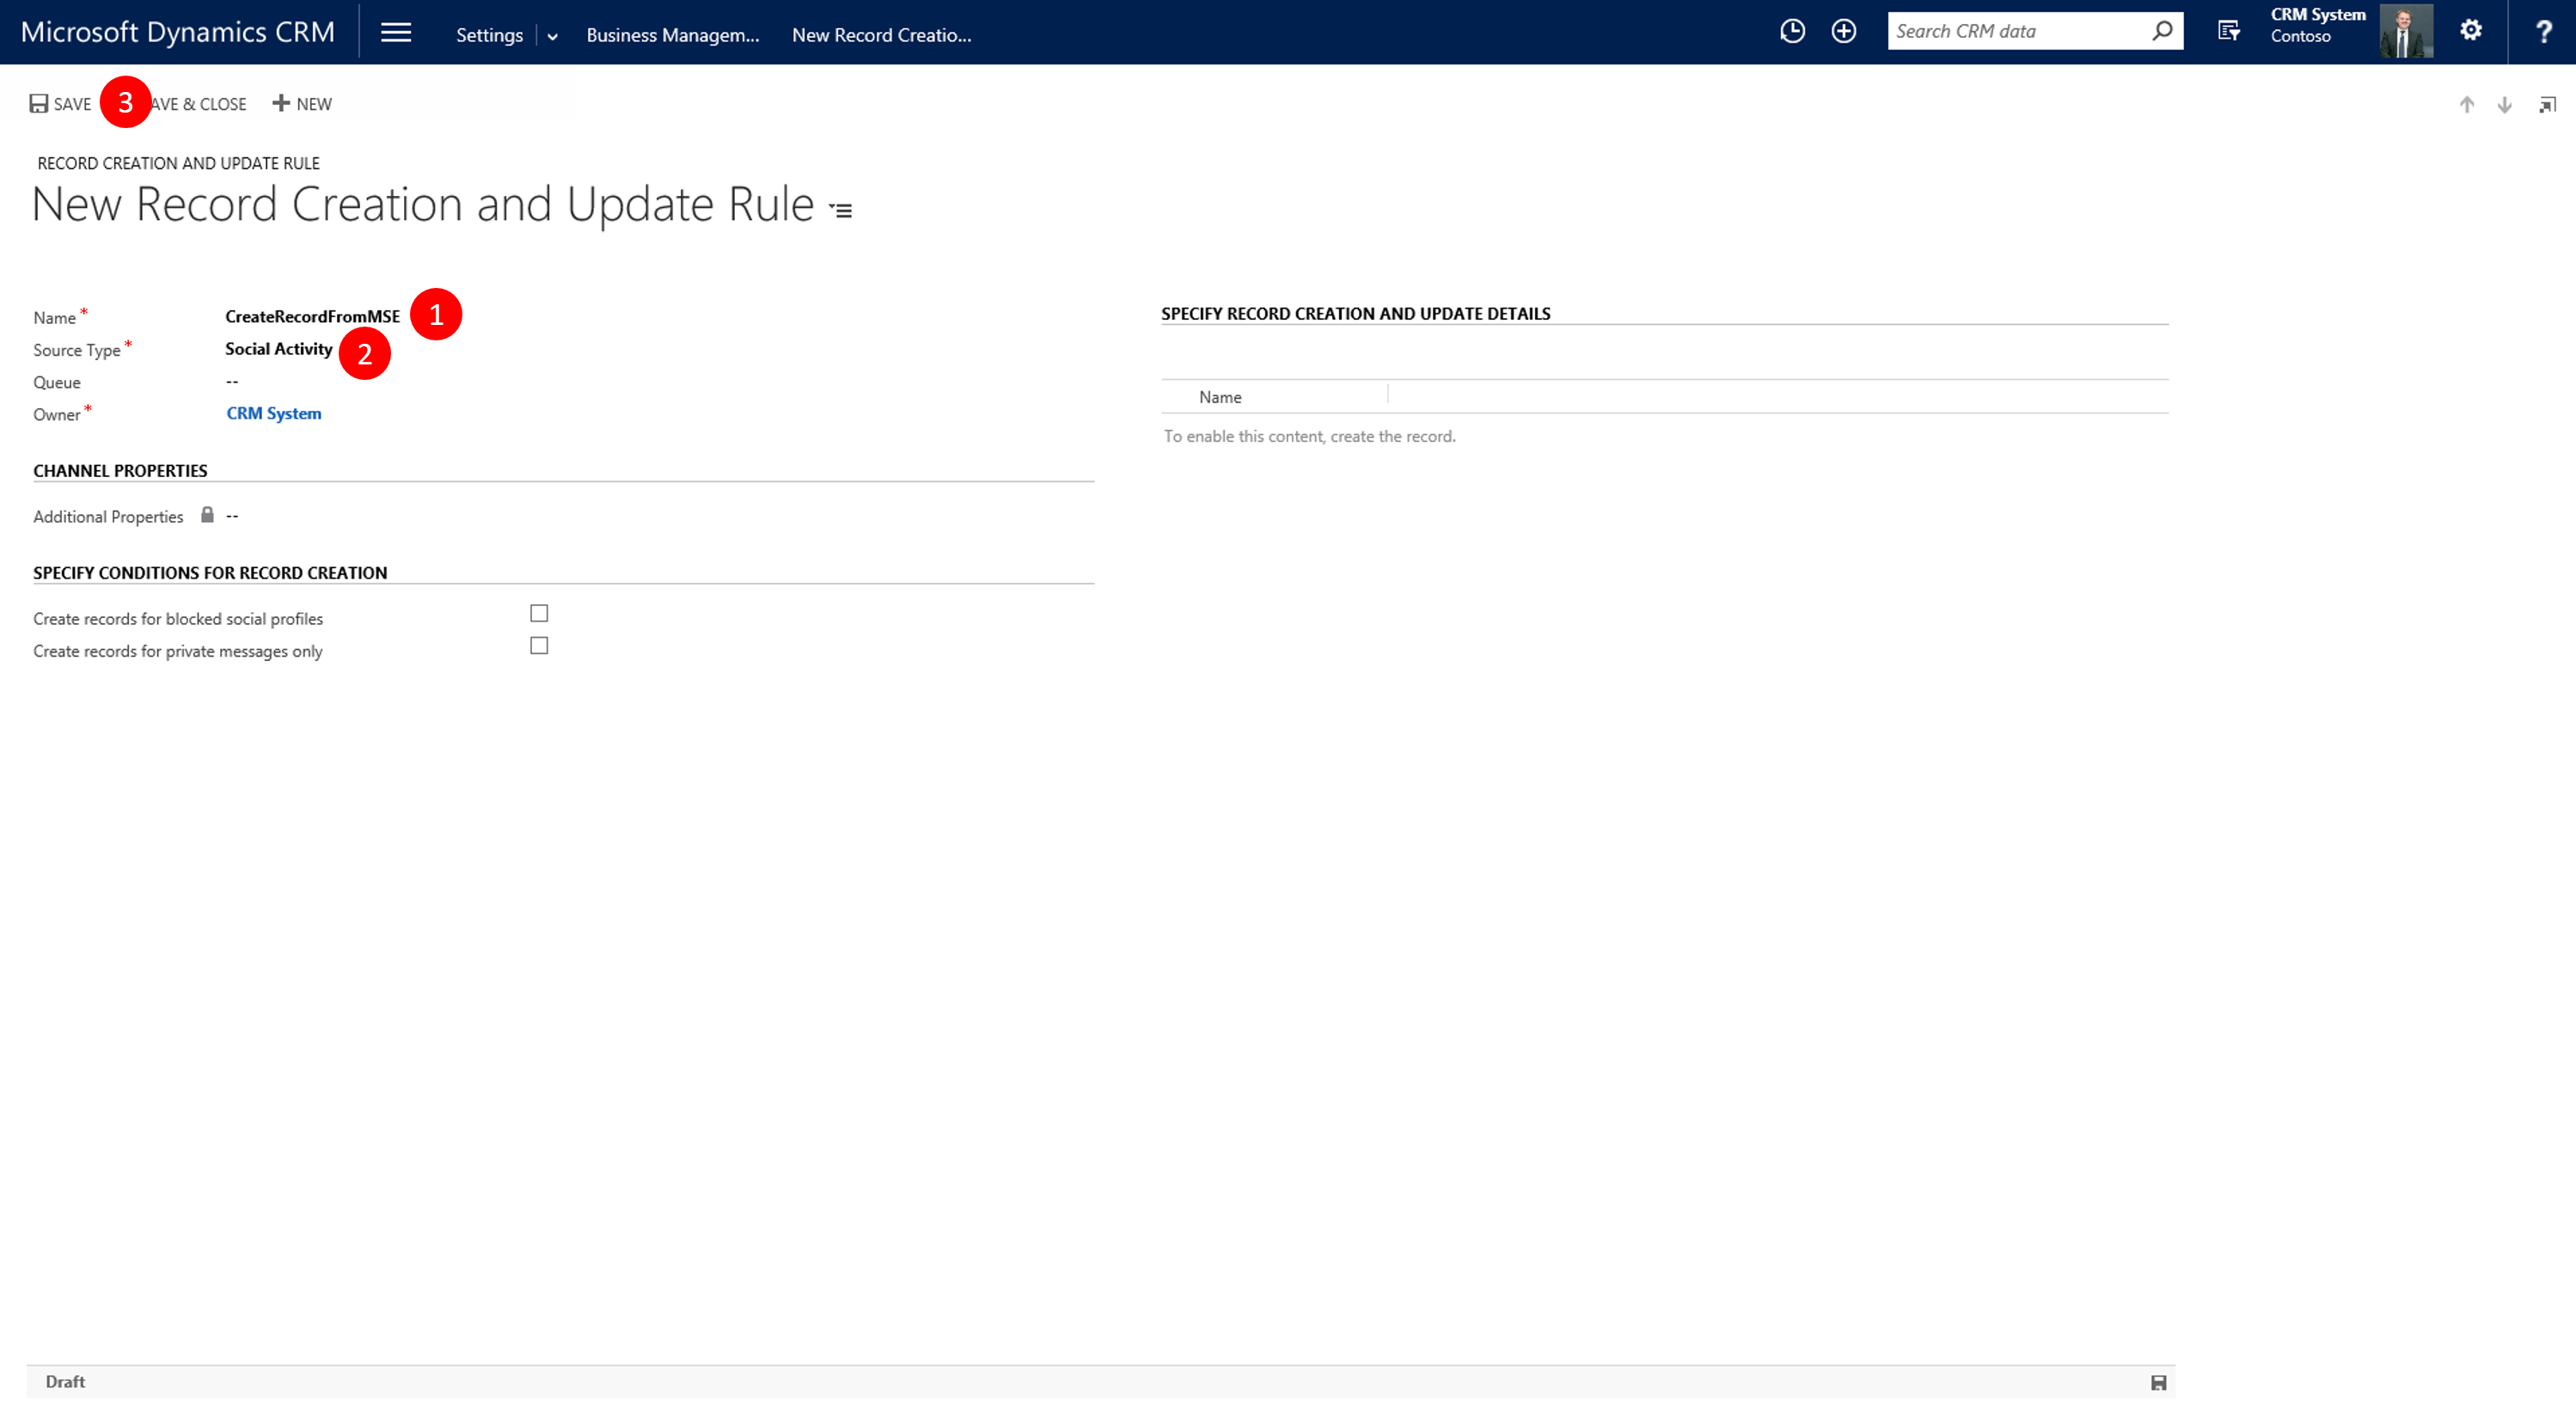
Picture 22: Save
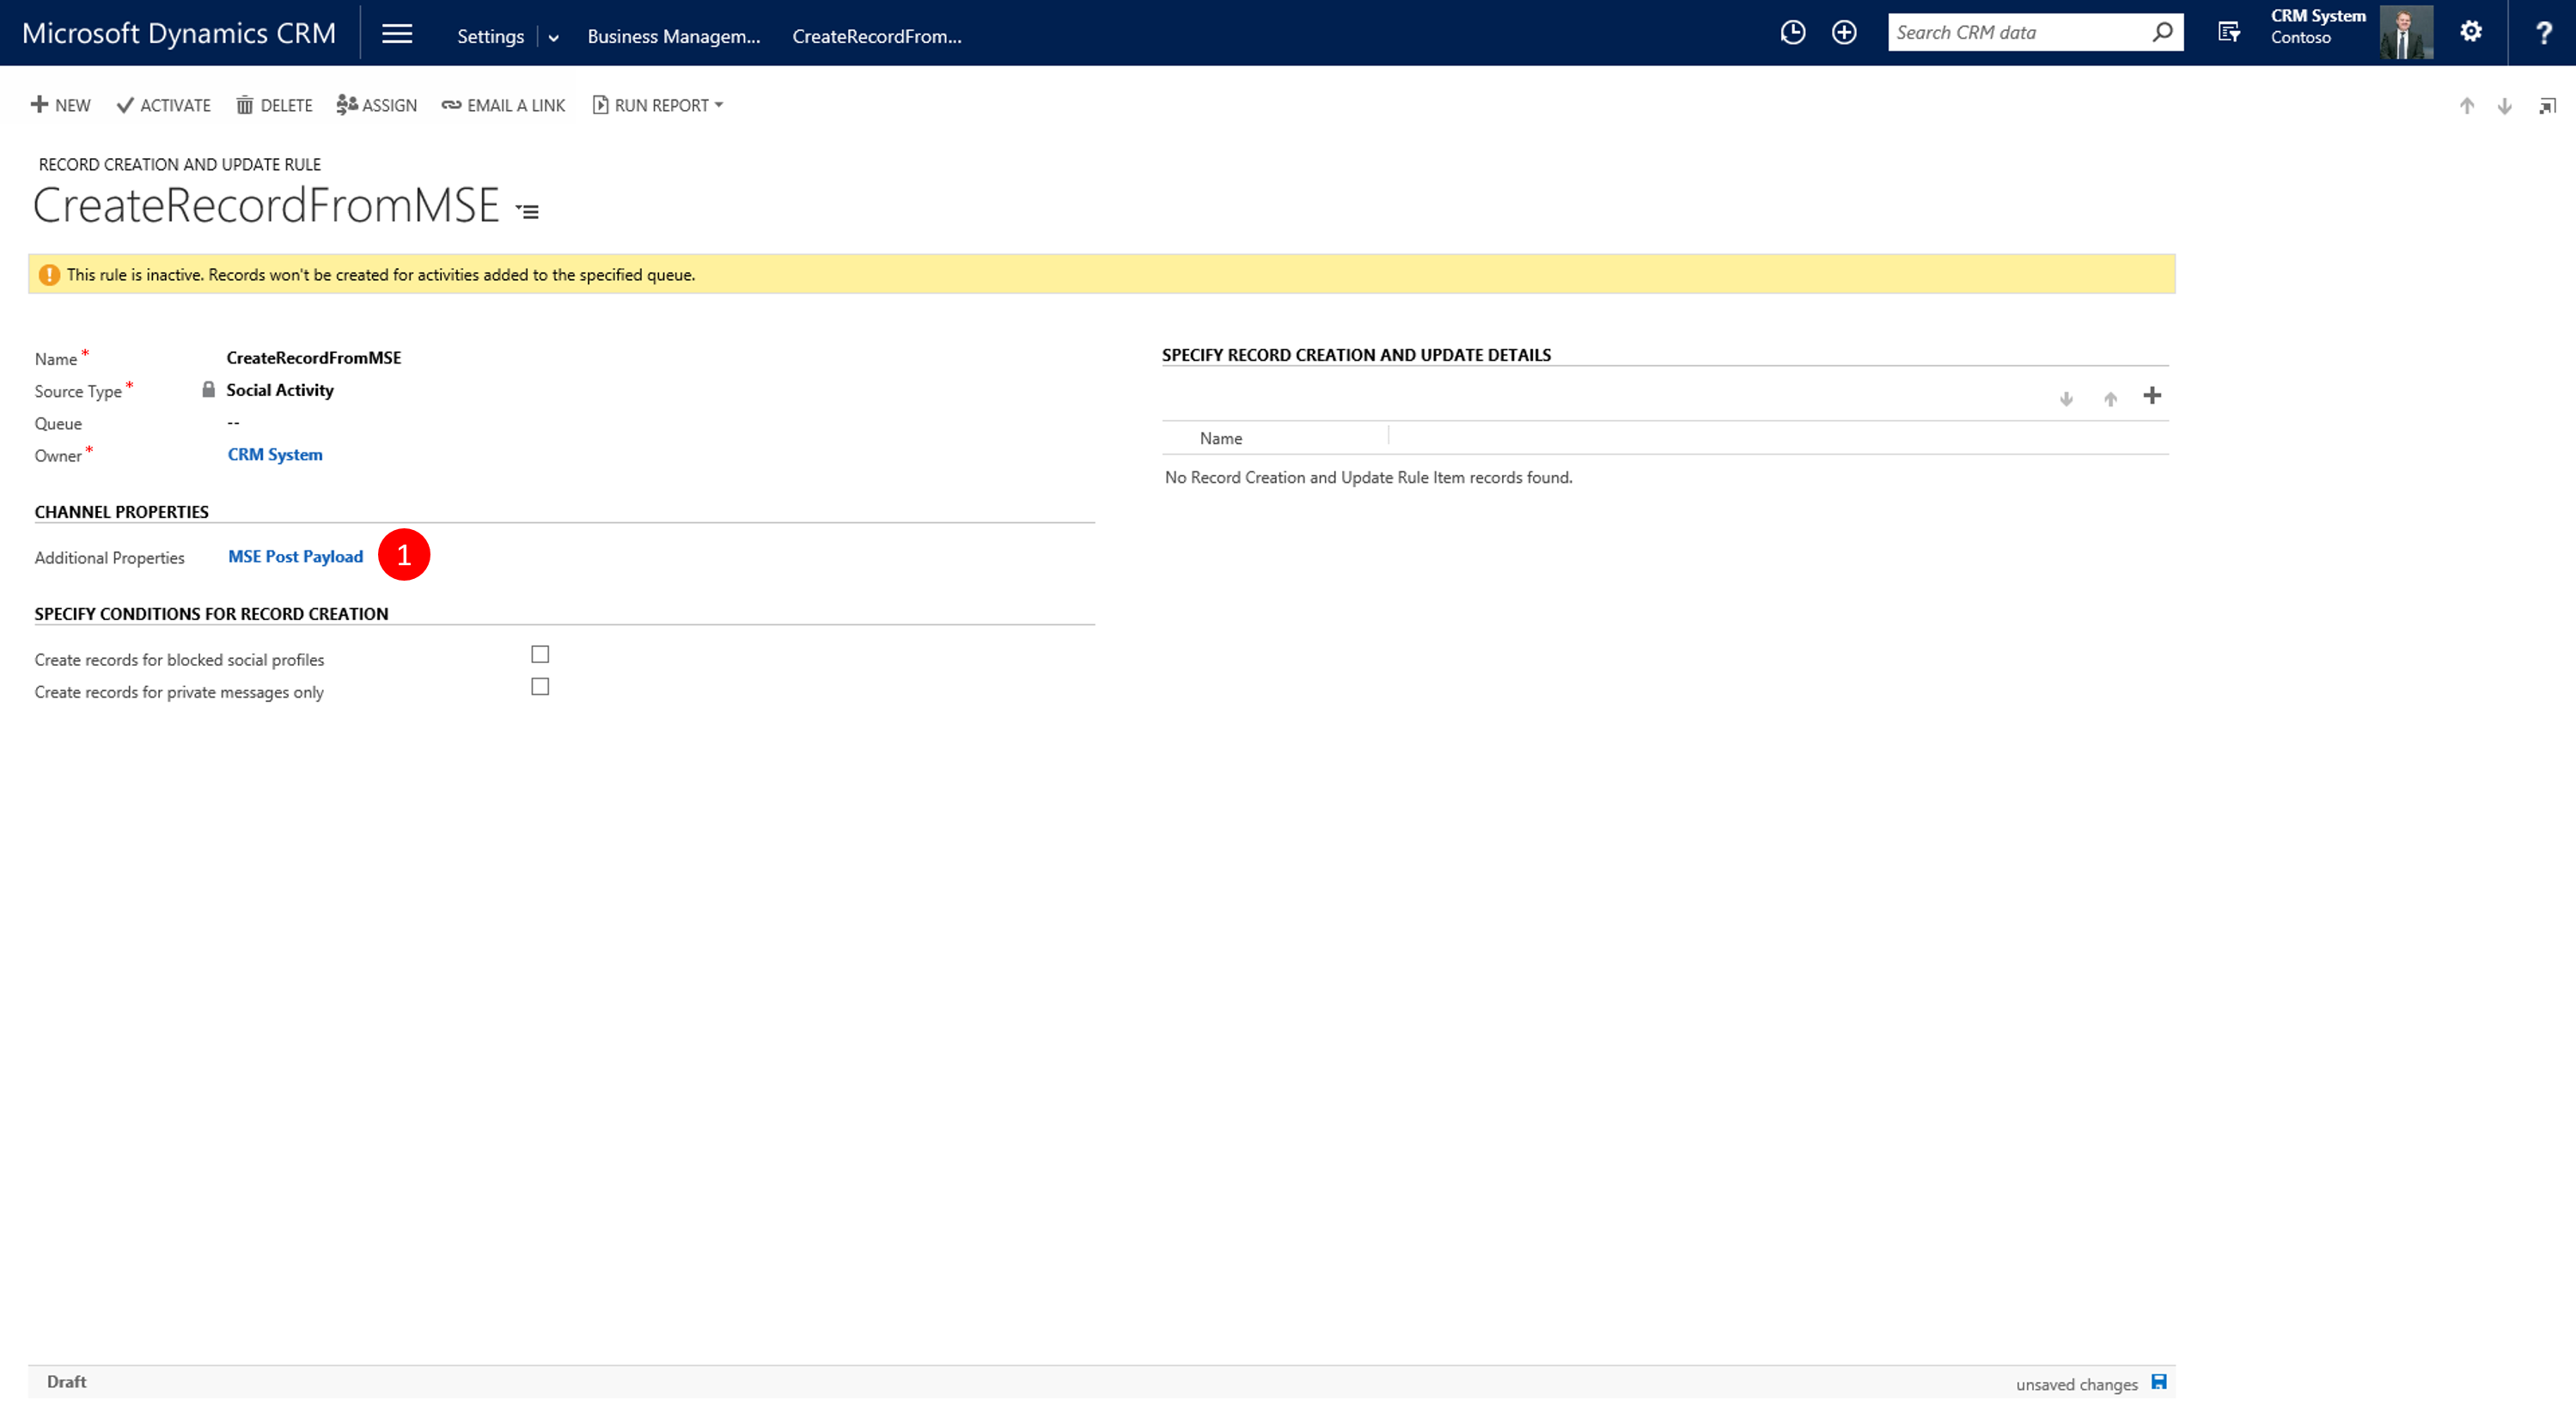
To leverage the information in the JSON payload as conditional parameter in the rules we are about to build, we must first create a new Channel Property
- Create a Channel Property Group and call it eg. "MSE Post Payload"
- Pick the type Social Activity
- Create a Channel Property with the name "userPreferredTargetEntity" (important you match the JSON property name) and data type Single Line of Text
Picture 23: Pick Channel Property 
Picture 24: Channel Property Group with Channel Property
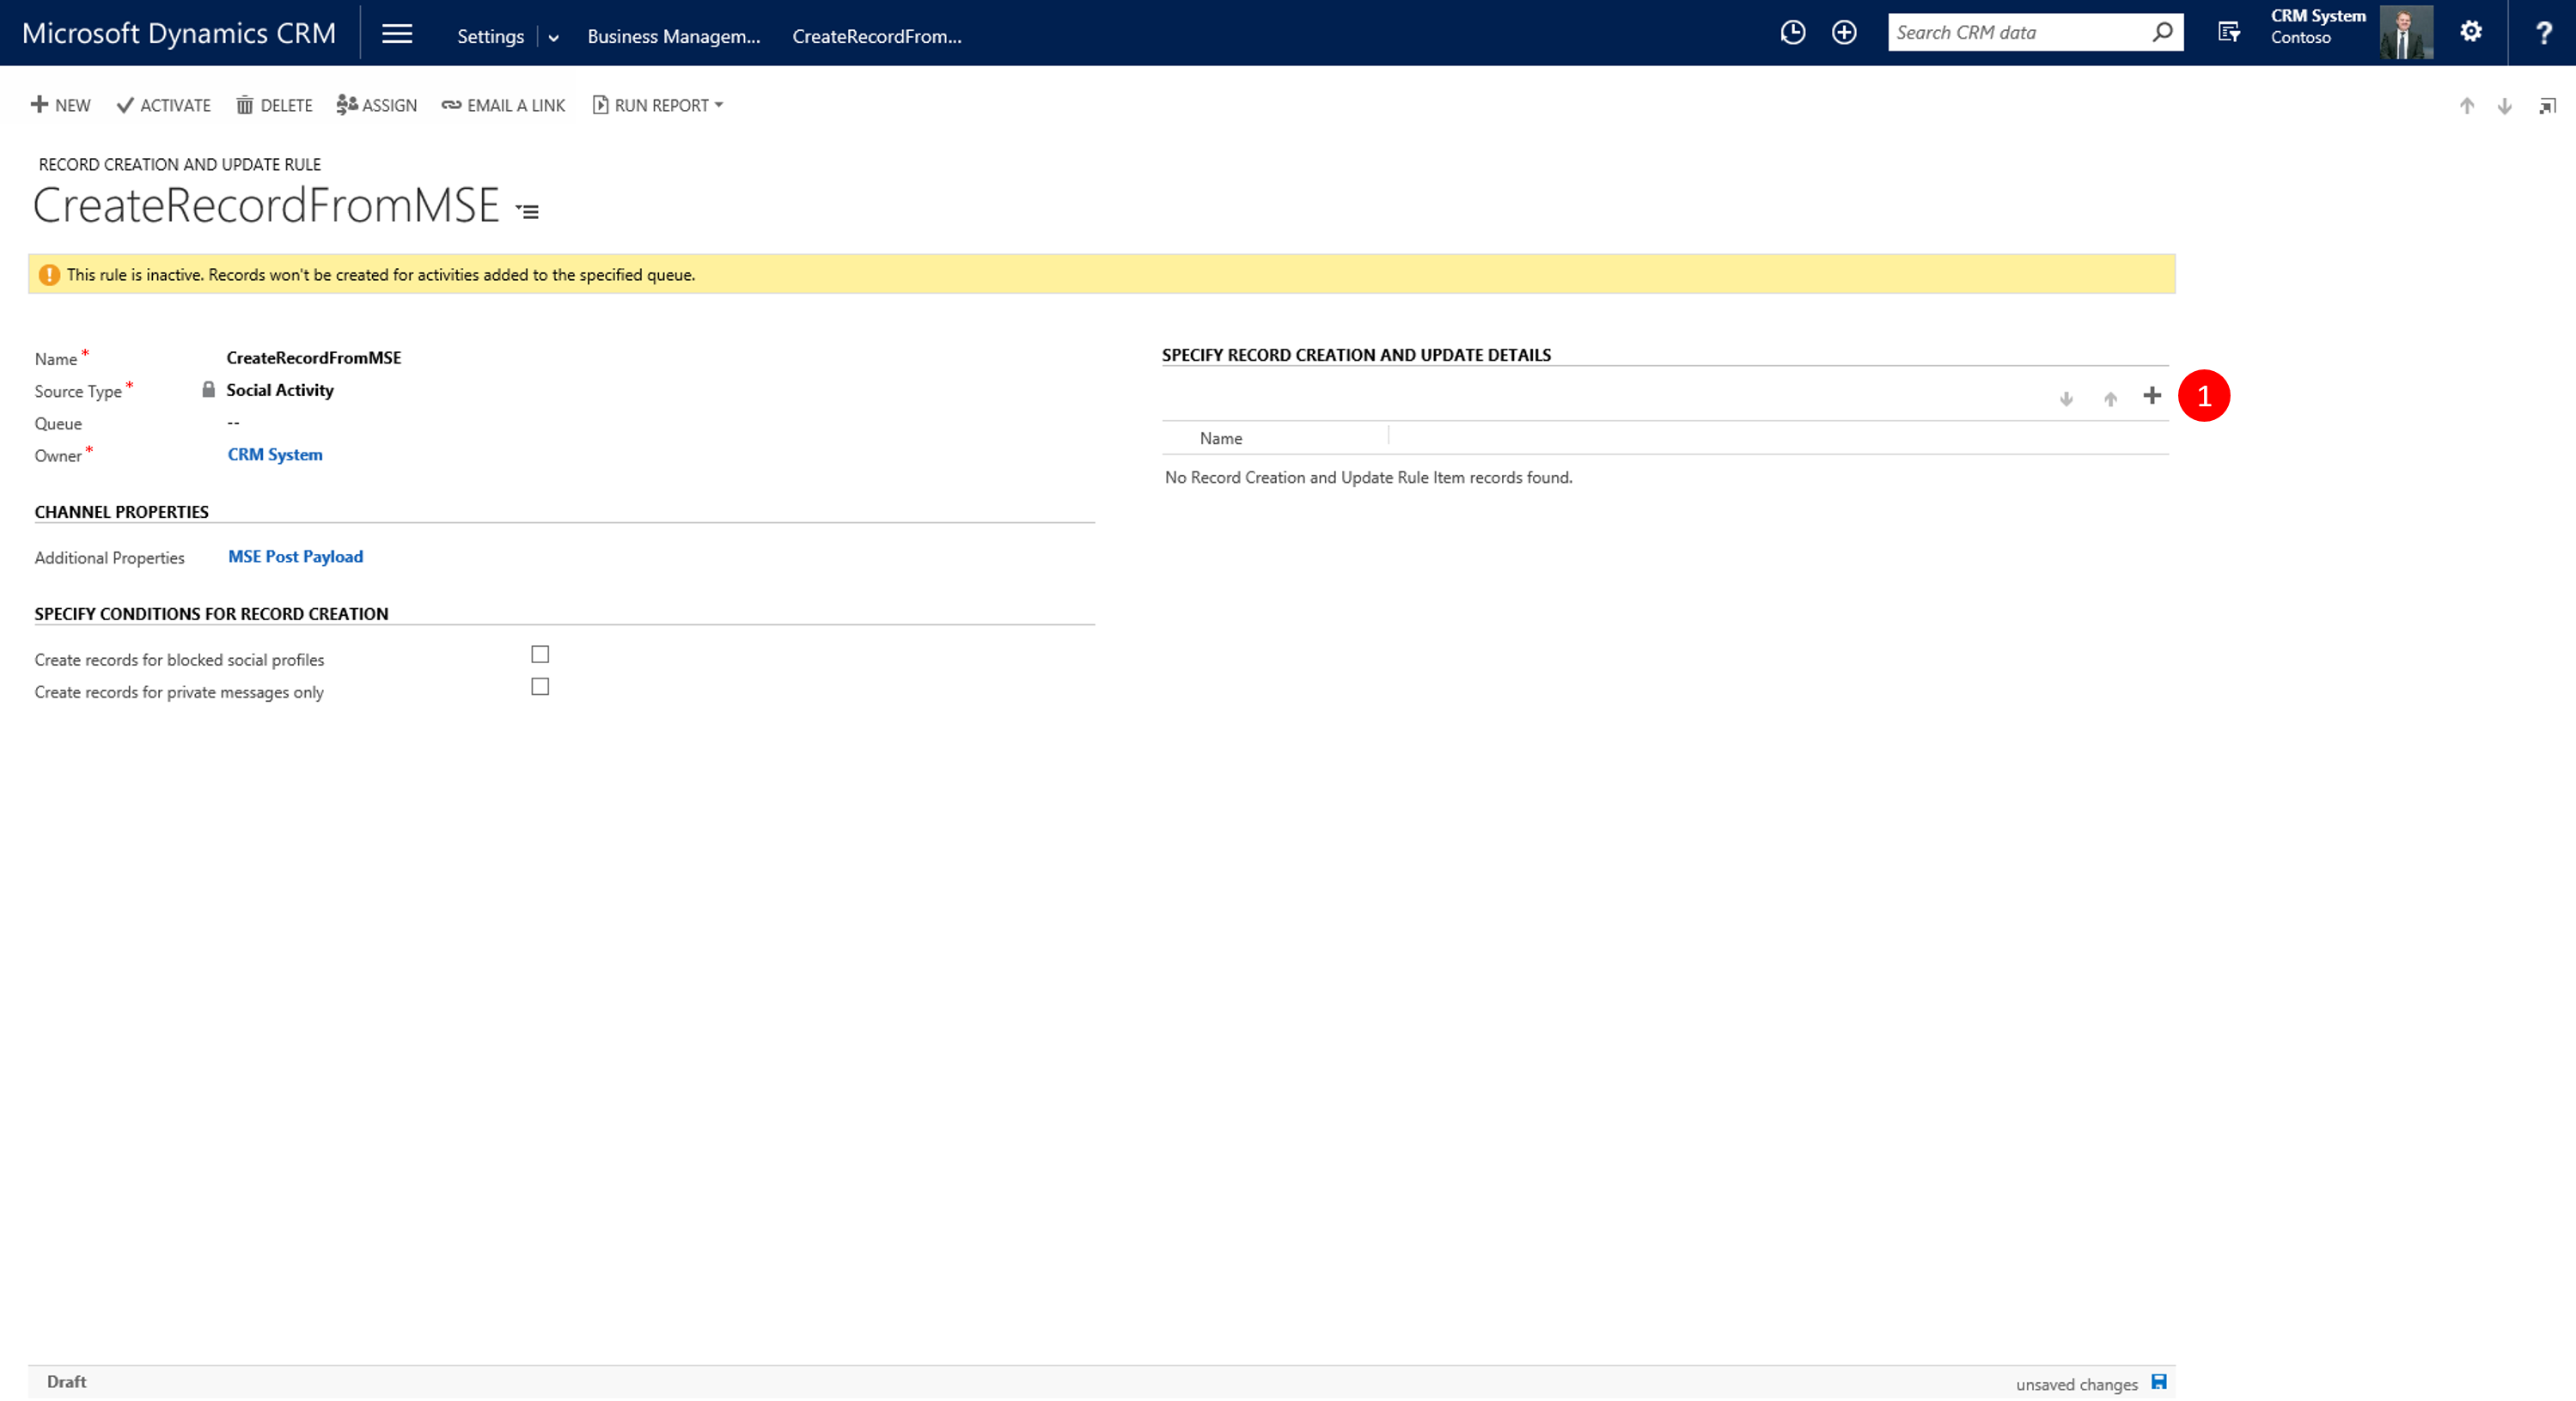
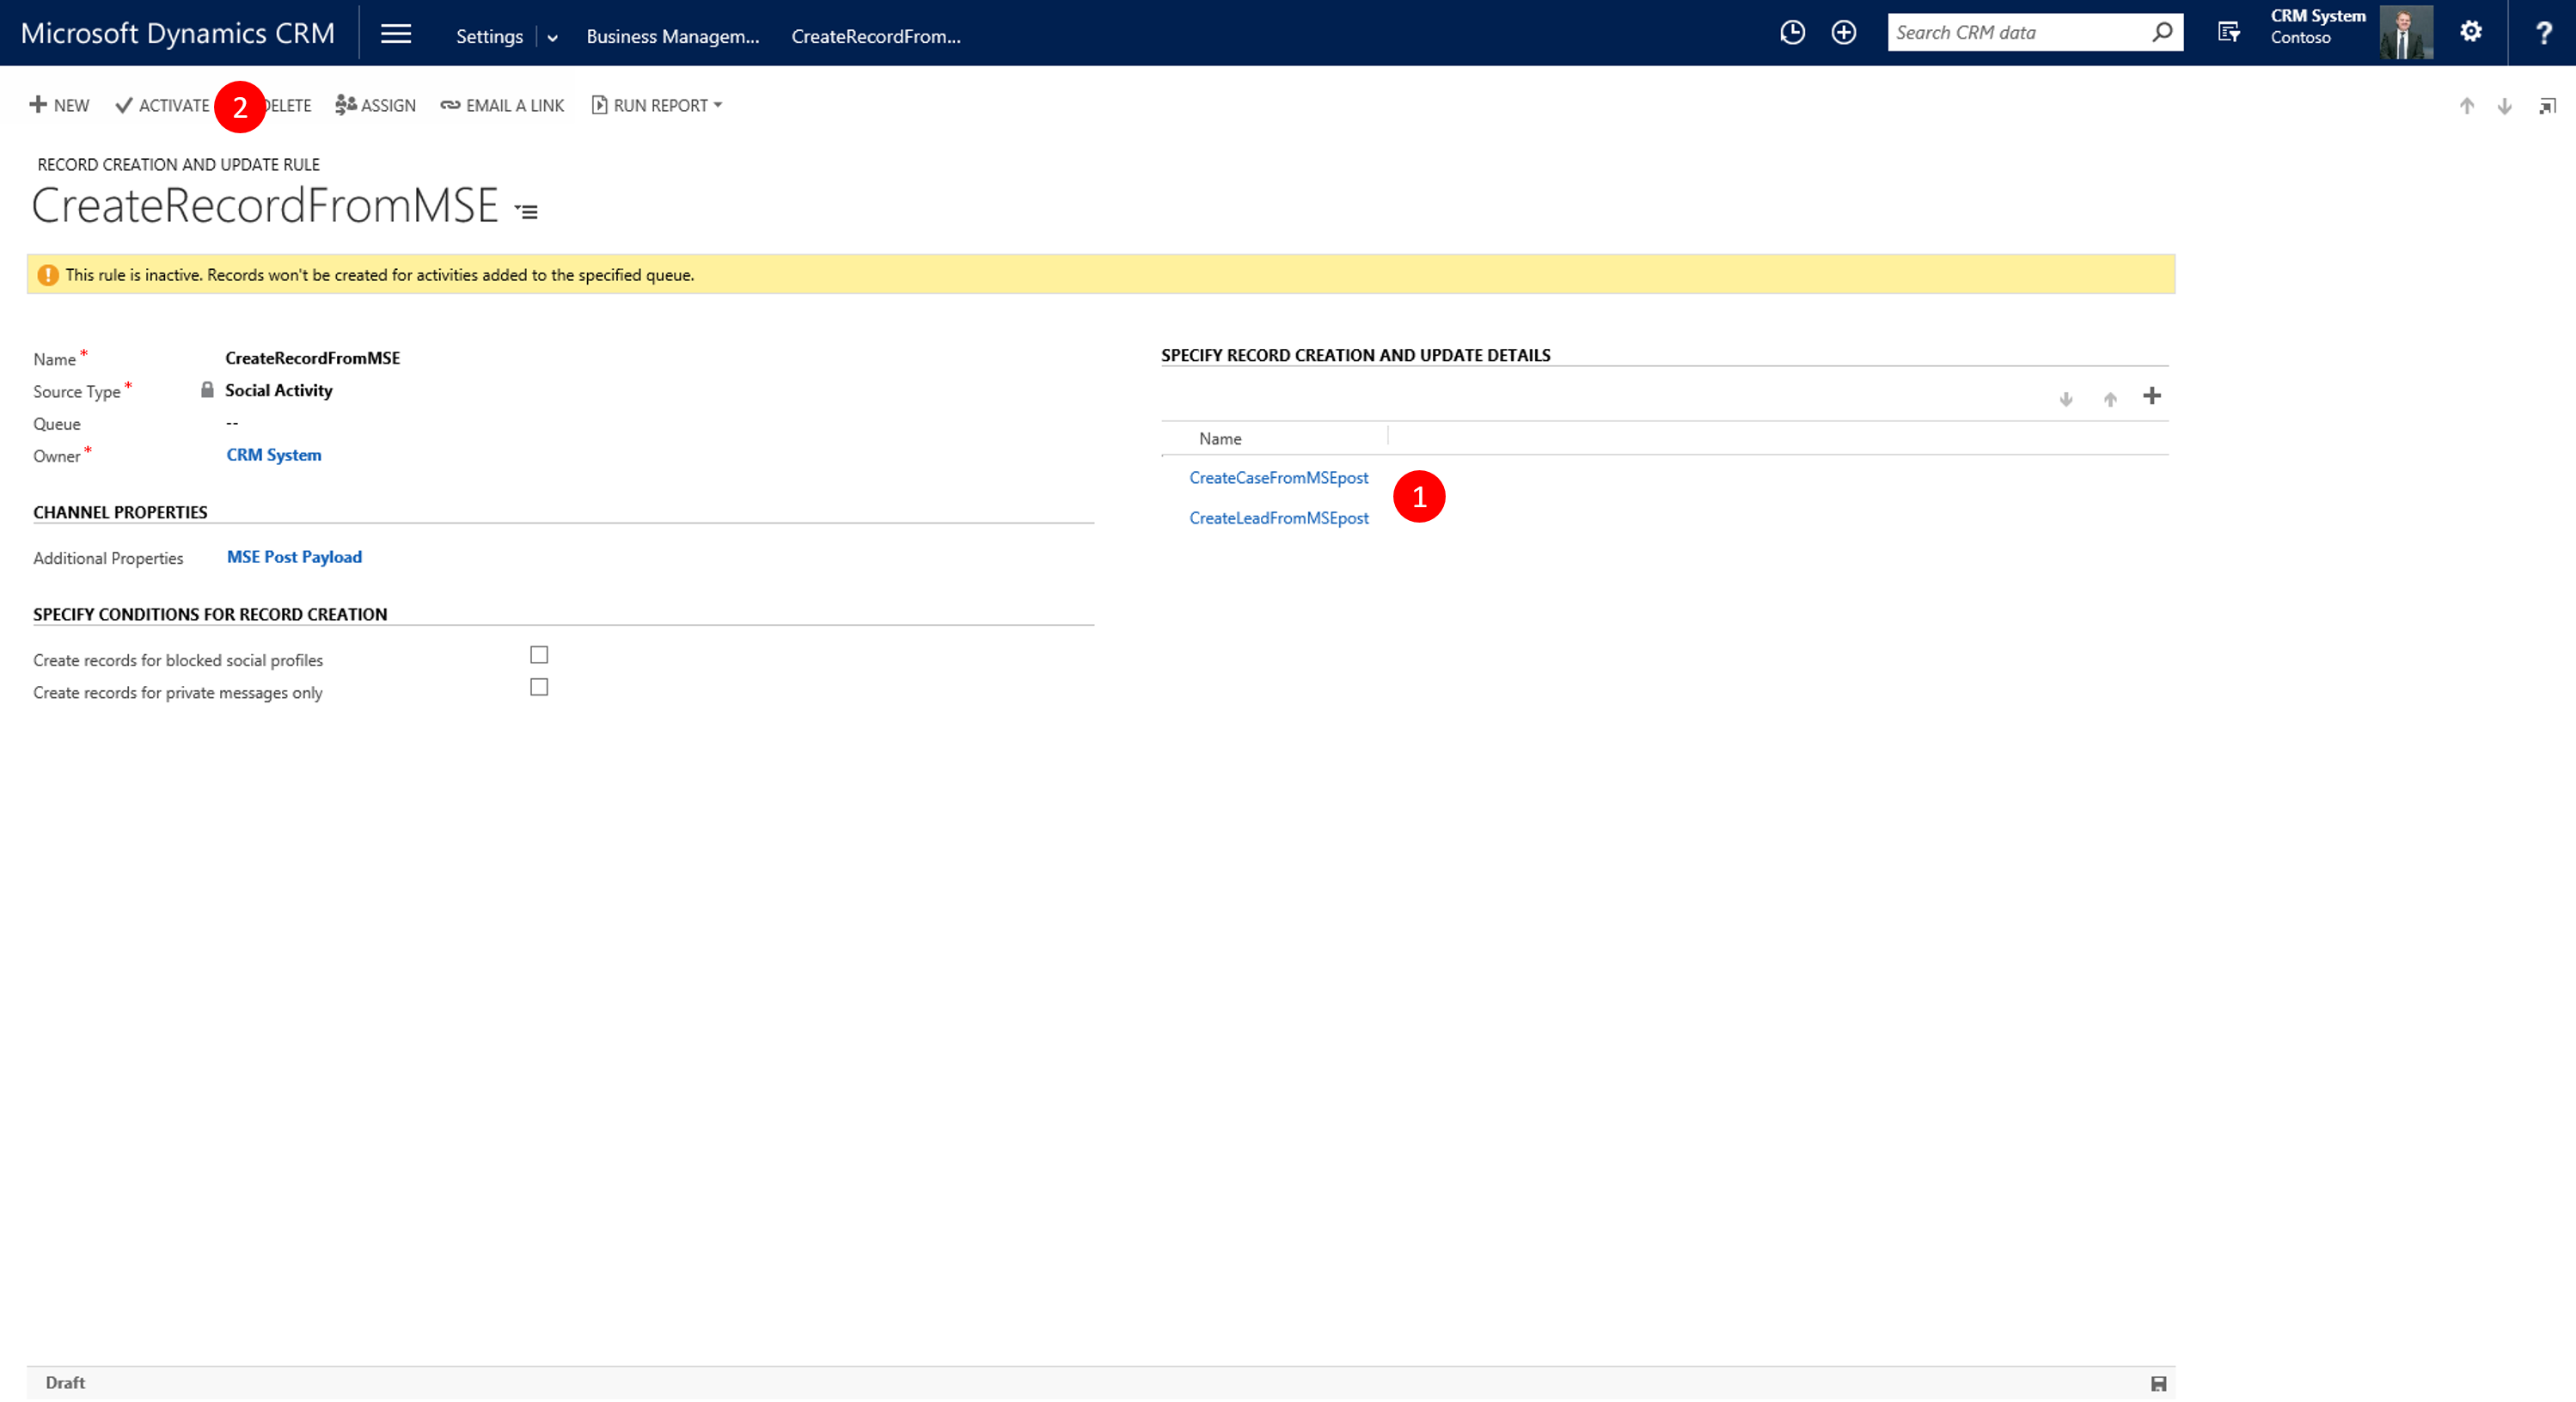
With the Channel Property in place we are now ready to create two rules - one for a Case and one for a Lead
Click the "plus" sign to open the Rules editor
Picture 25: Create Rules
Name the rule eg. CreateCaseFromMSEpost -> Save -> and pick Channel Properties for the Condition
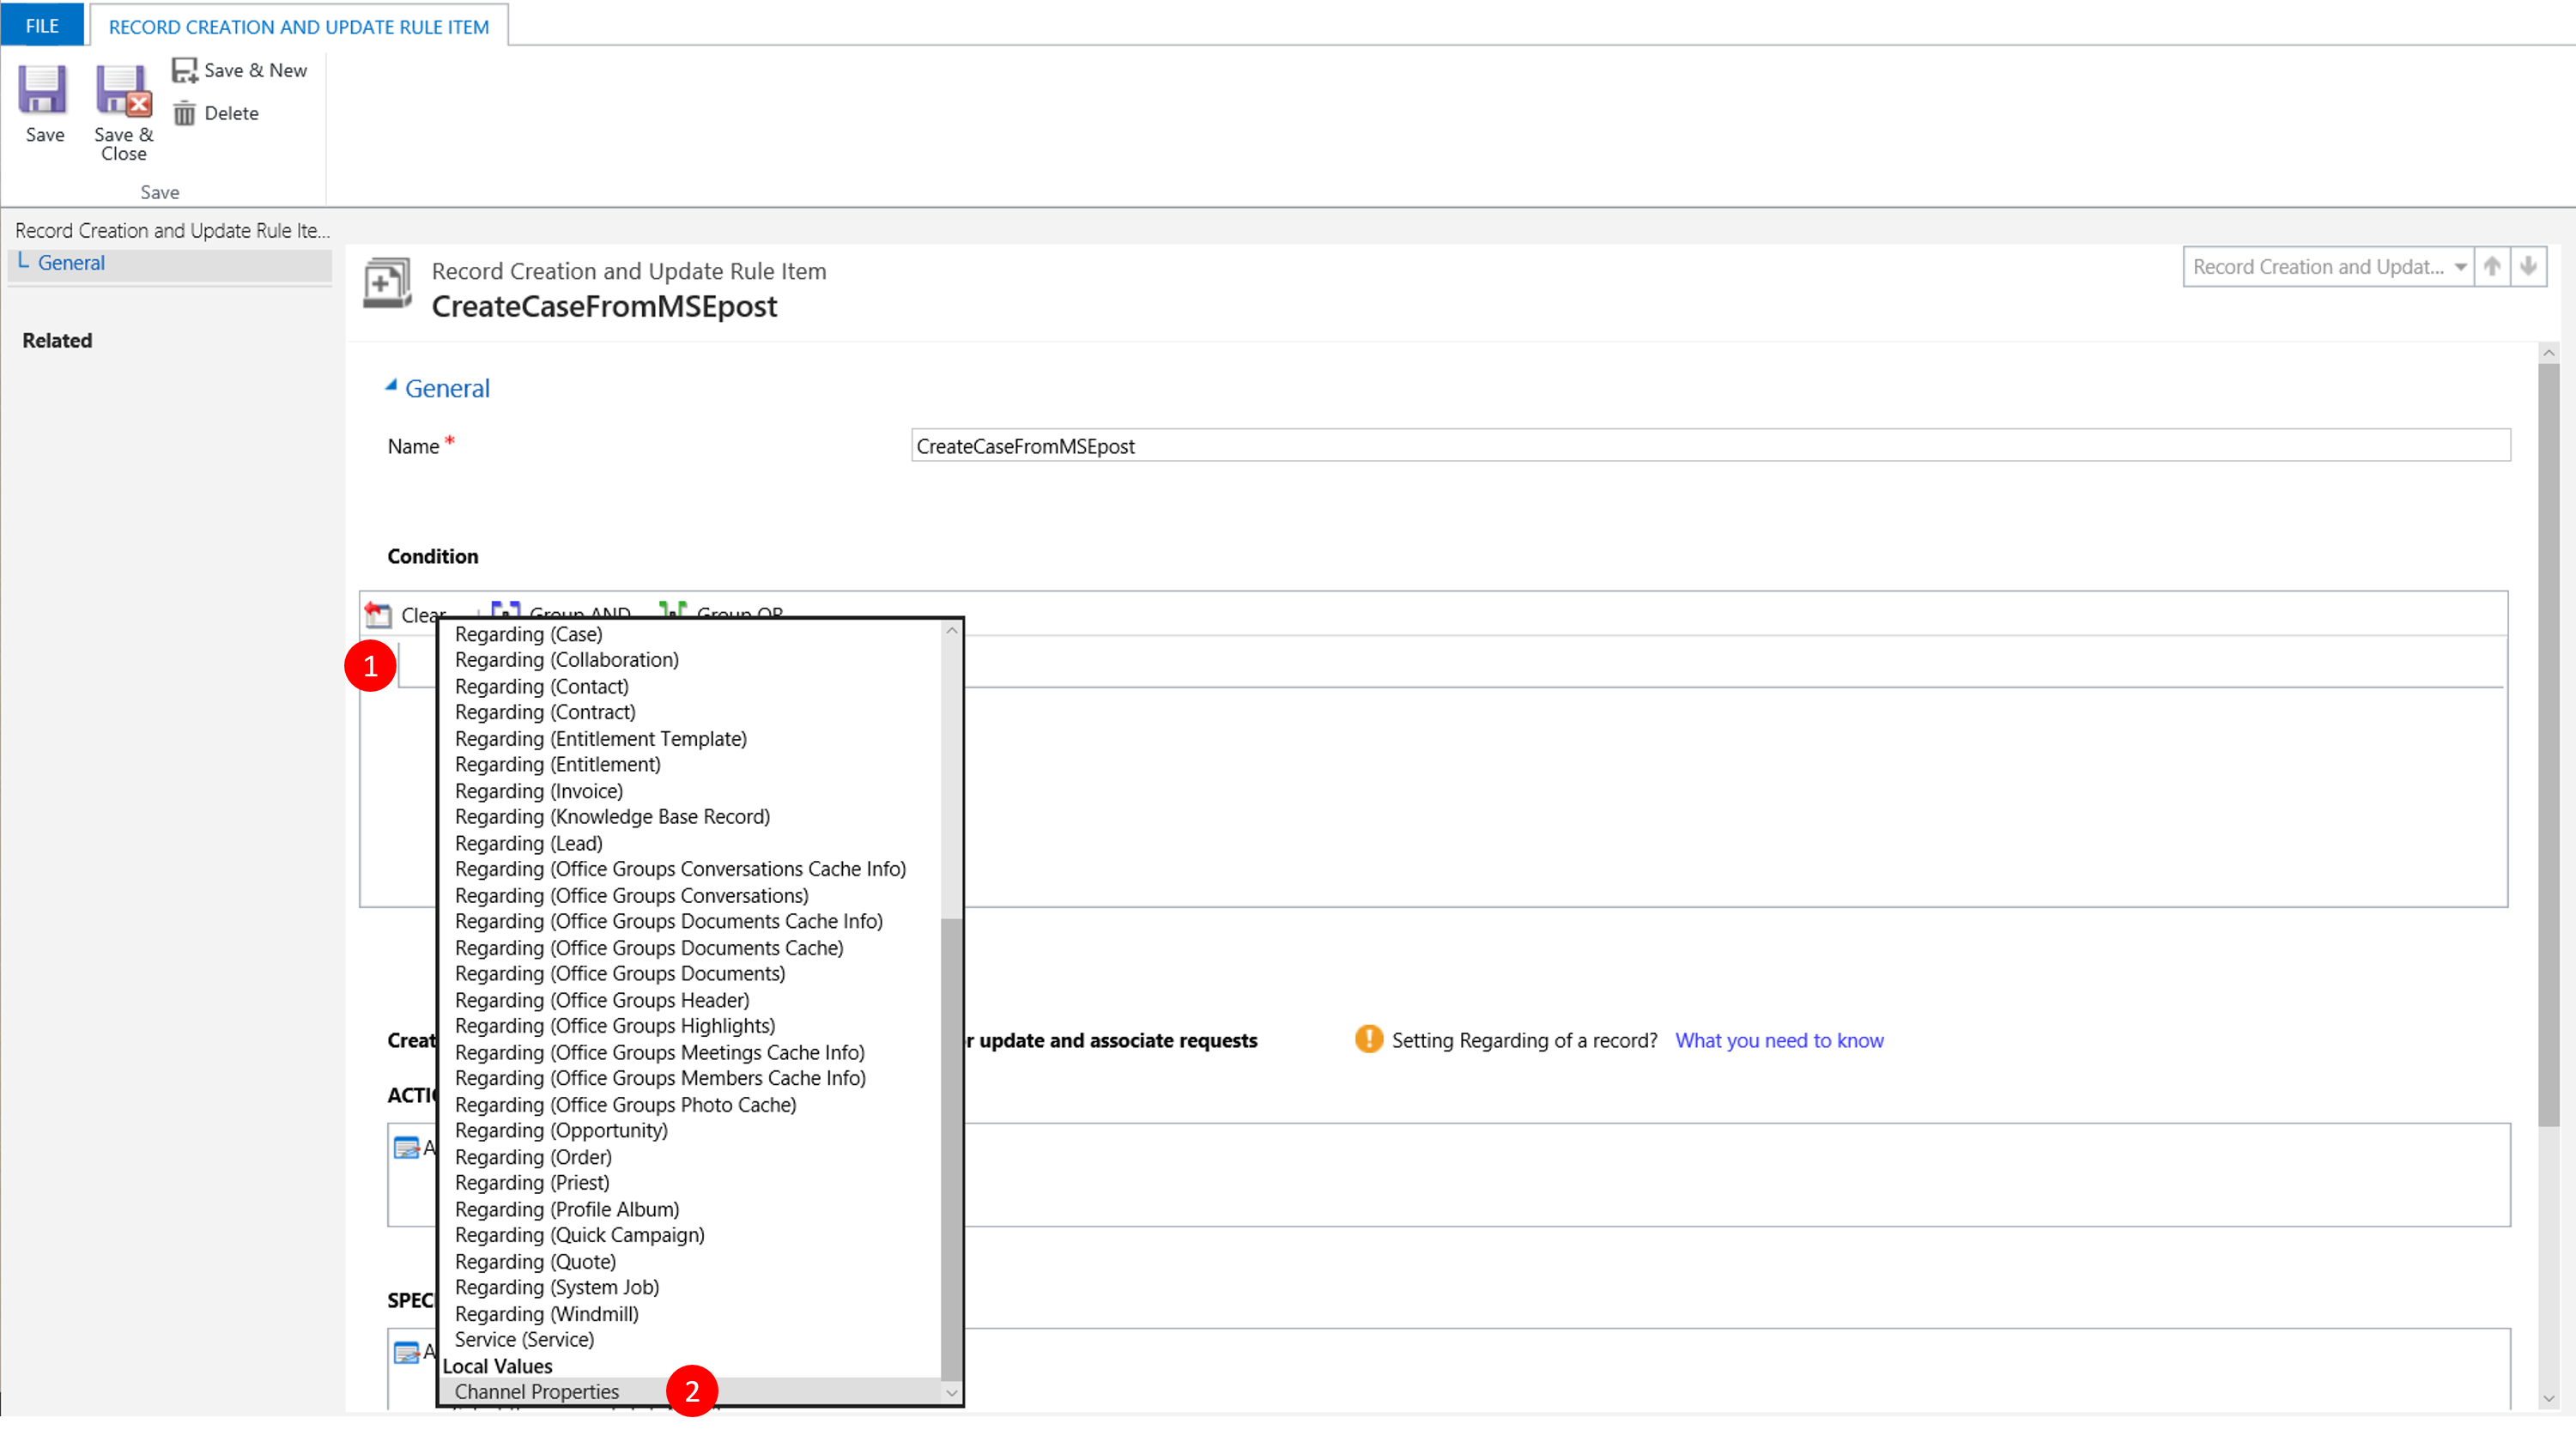
Picture 26: Condition based on Channel Properties
Set the condition to "userPreferredTargetEntity" equals "incident"
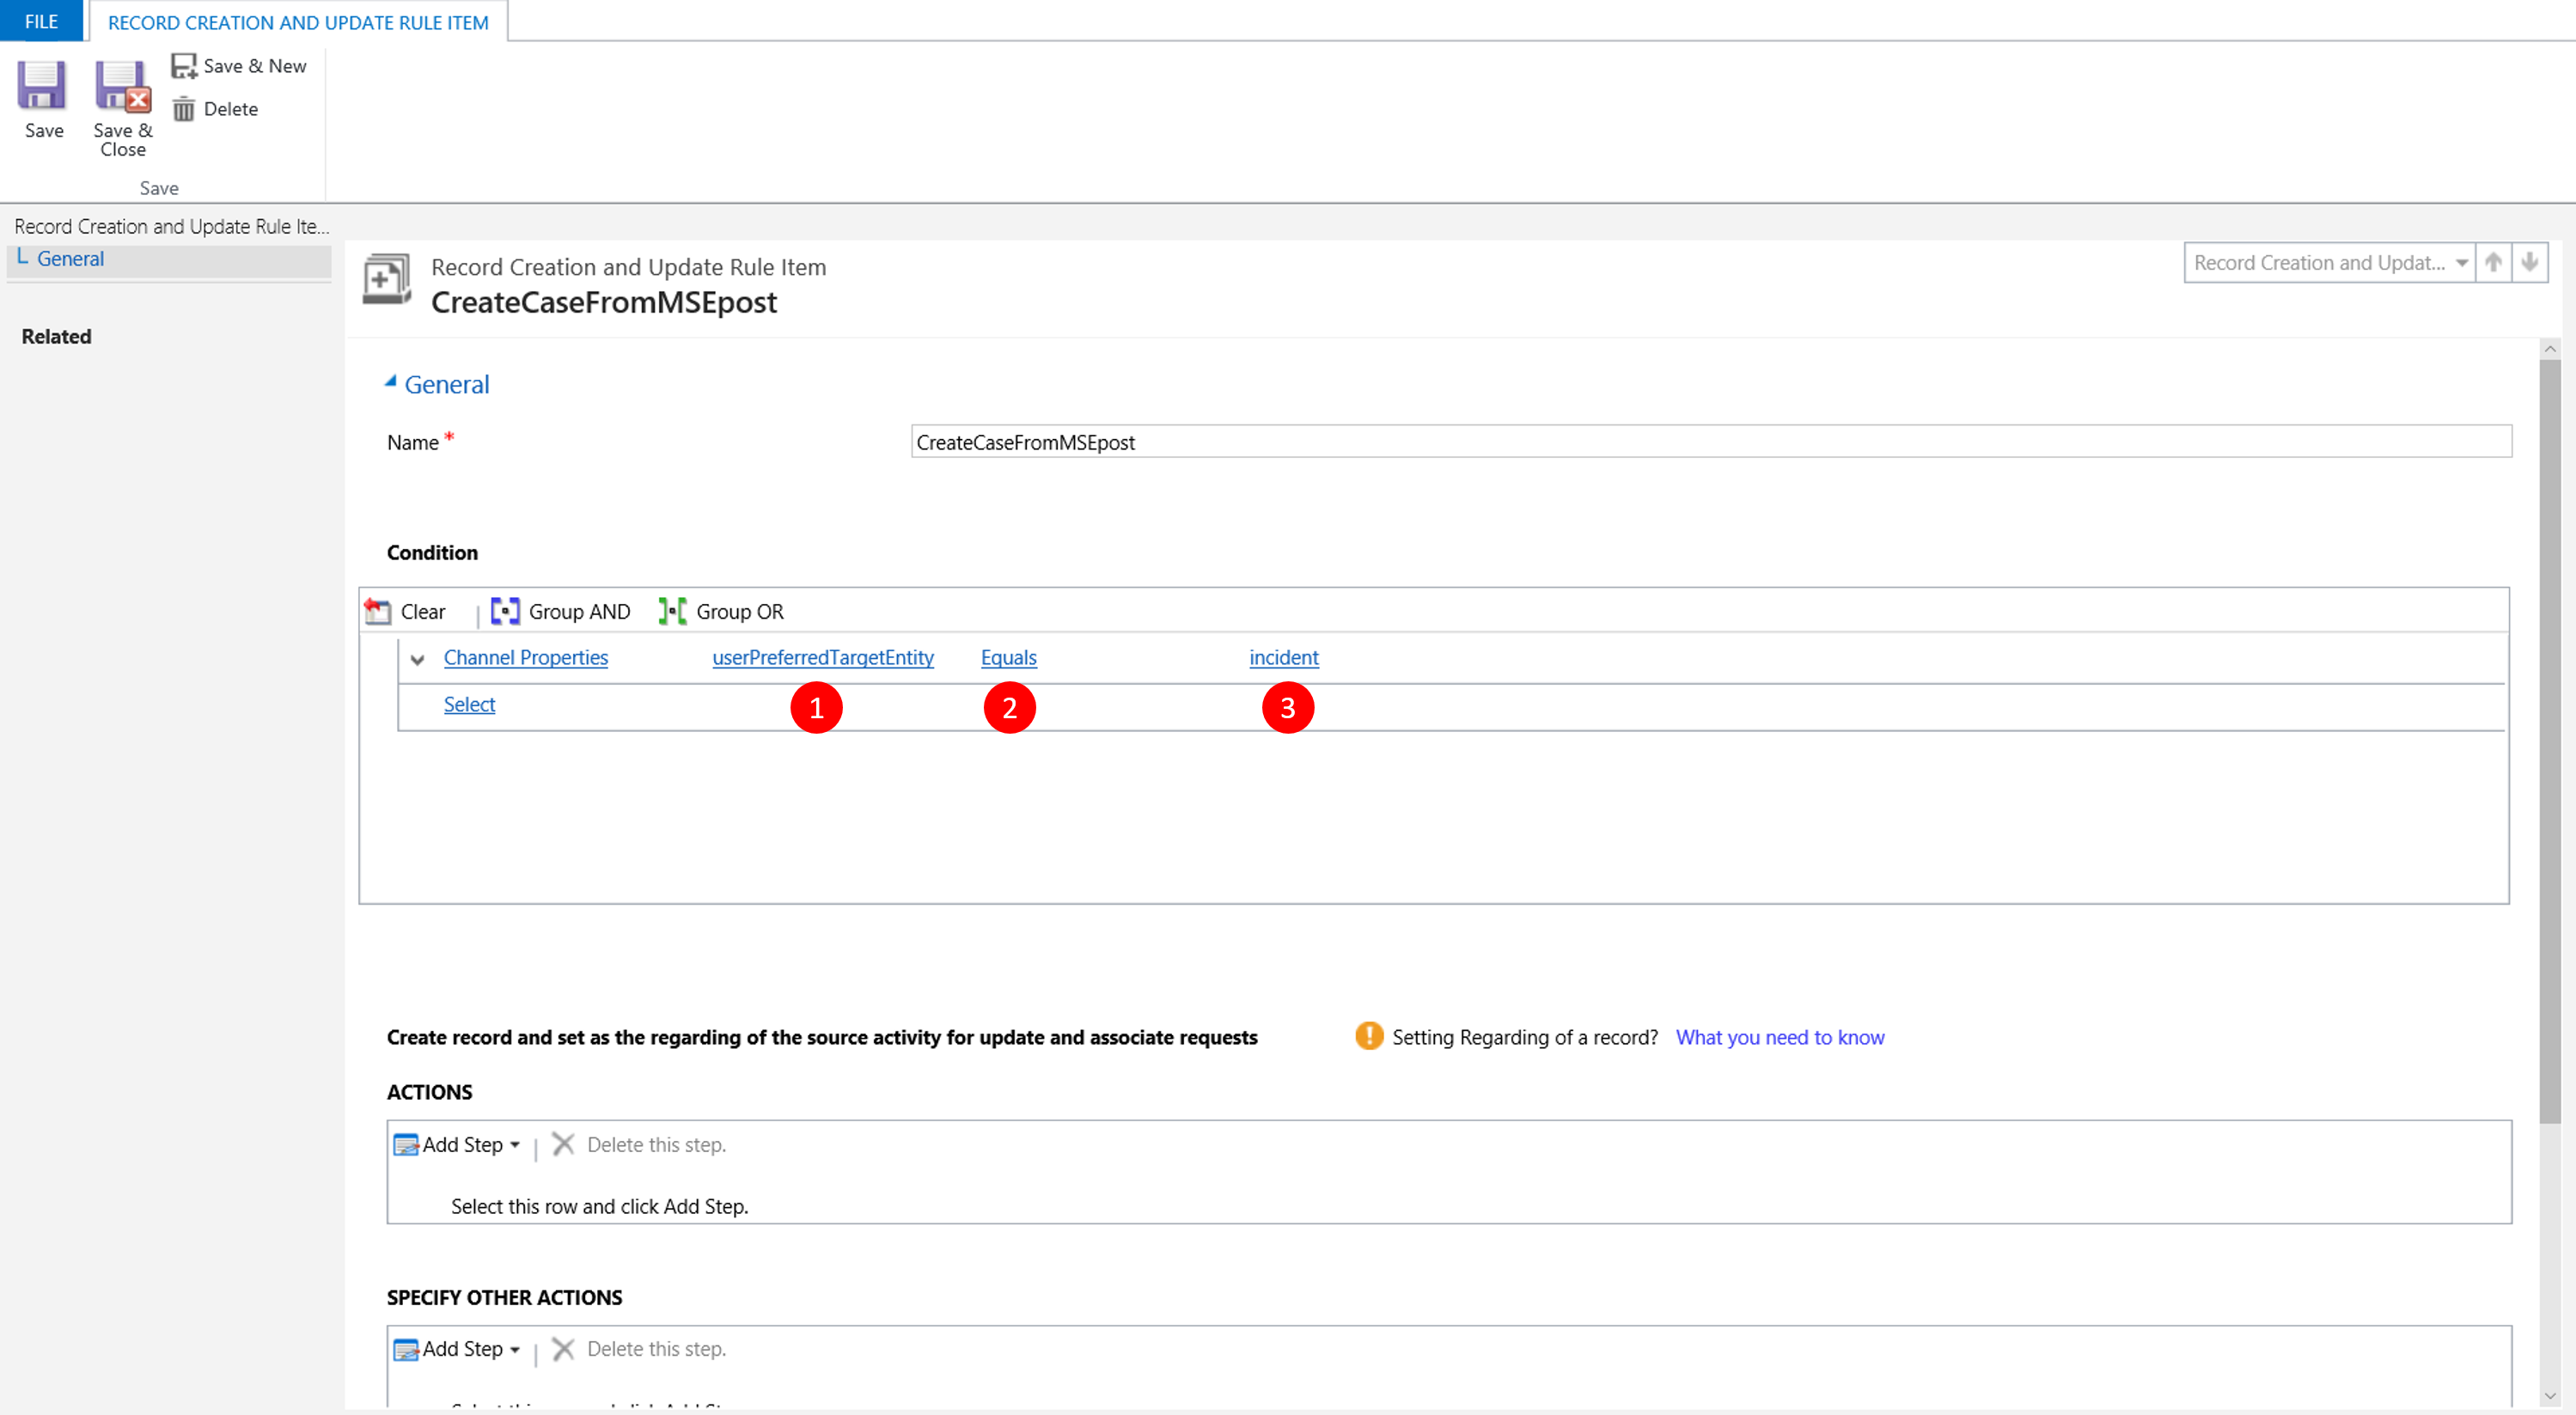
Picture 27: Condition is "userPreferredTargetEntity" equals "incident"
For the action pick Create Record -> Case
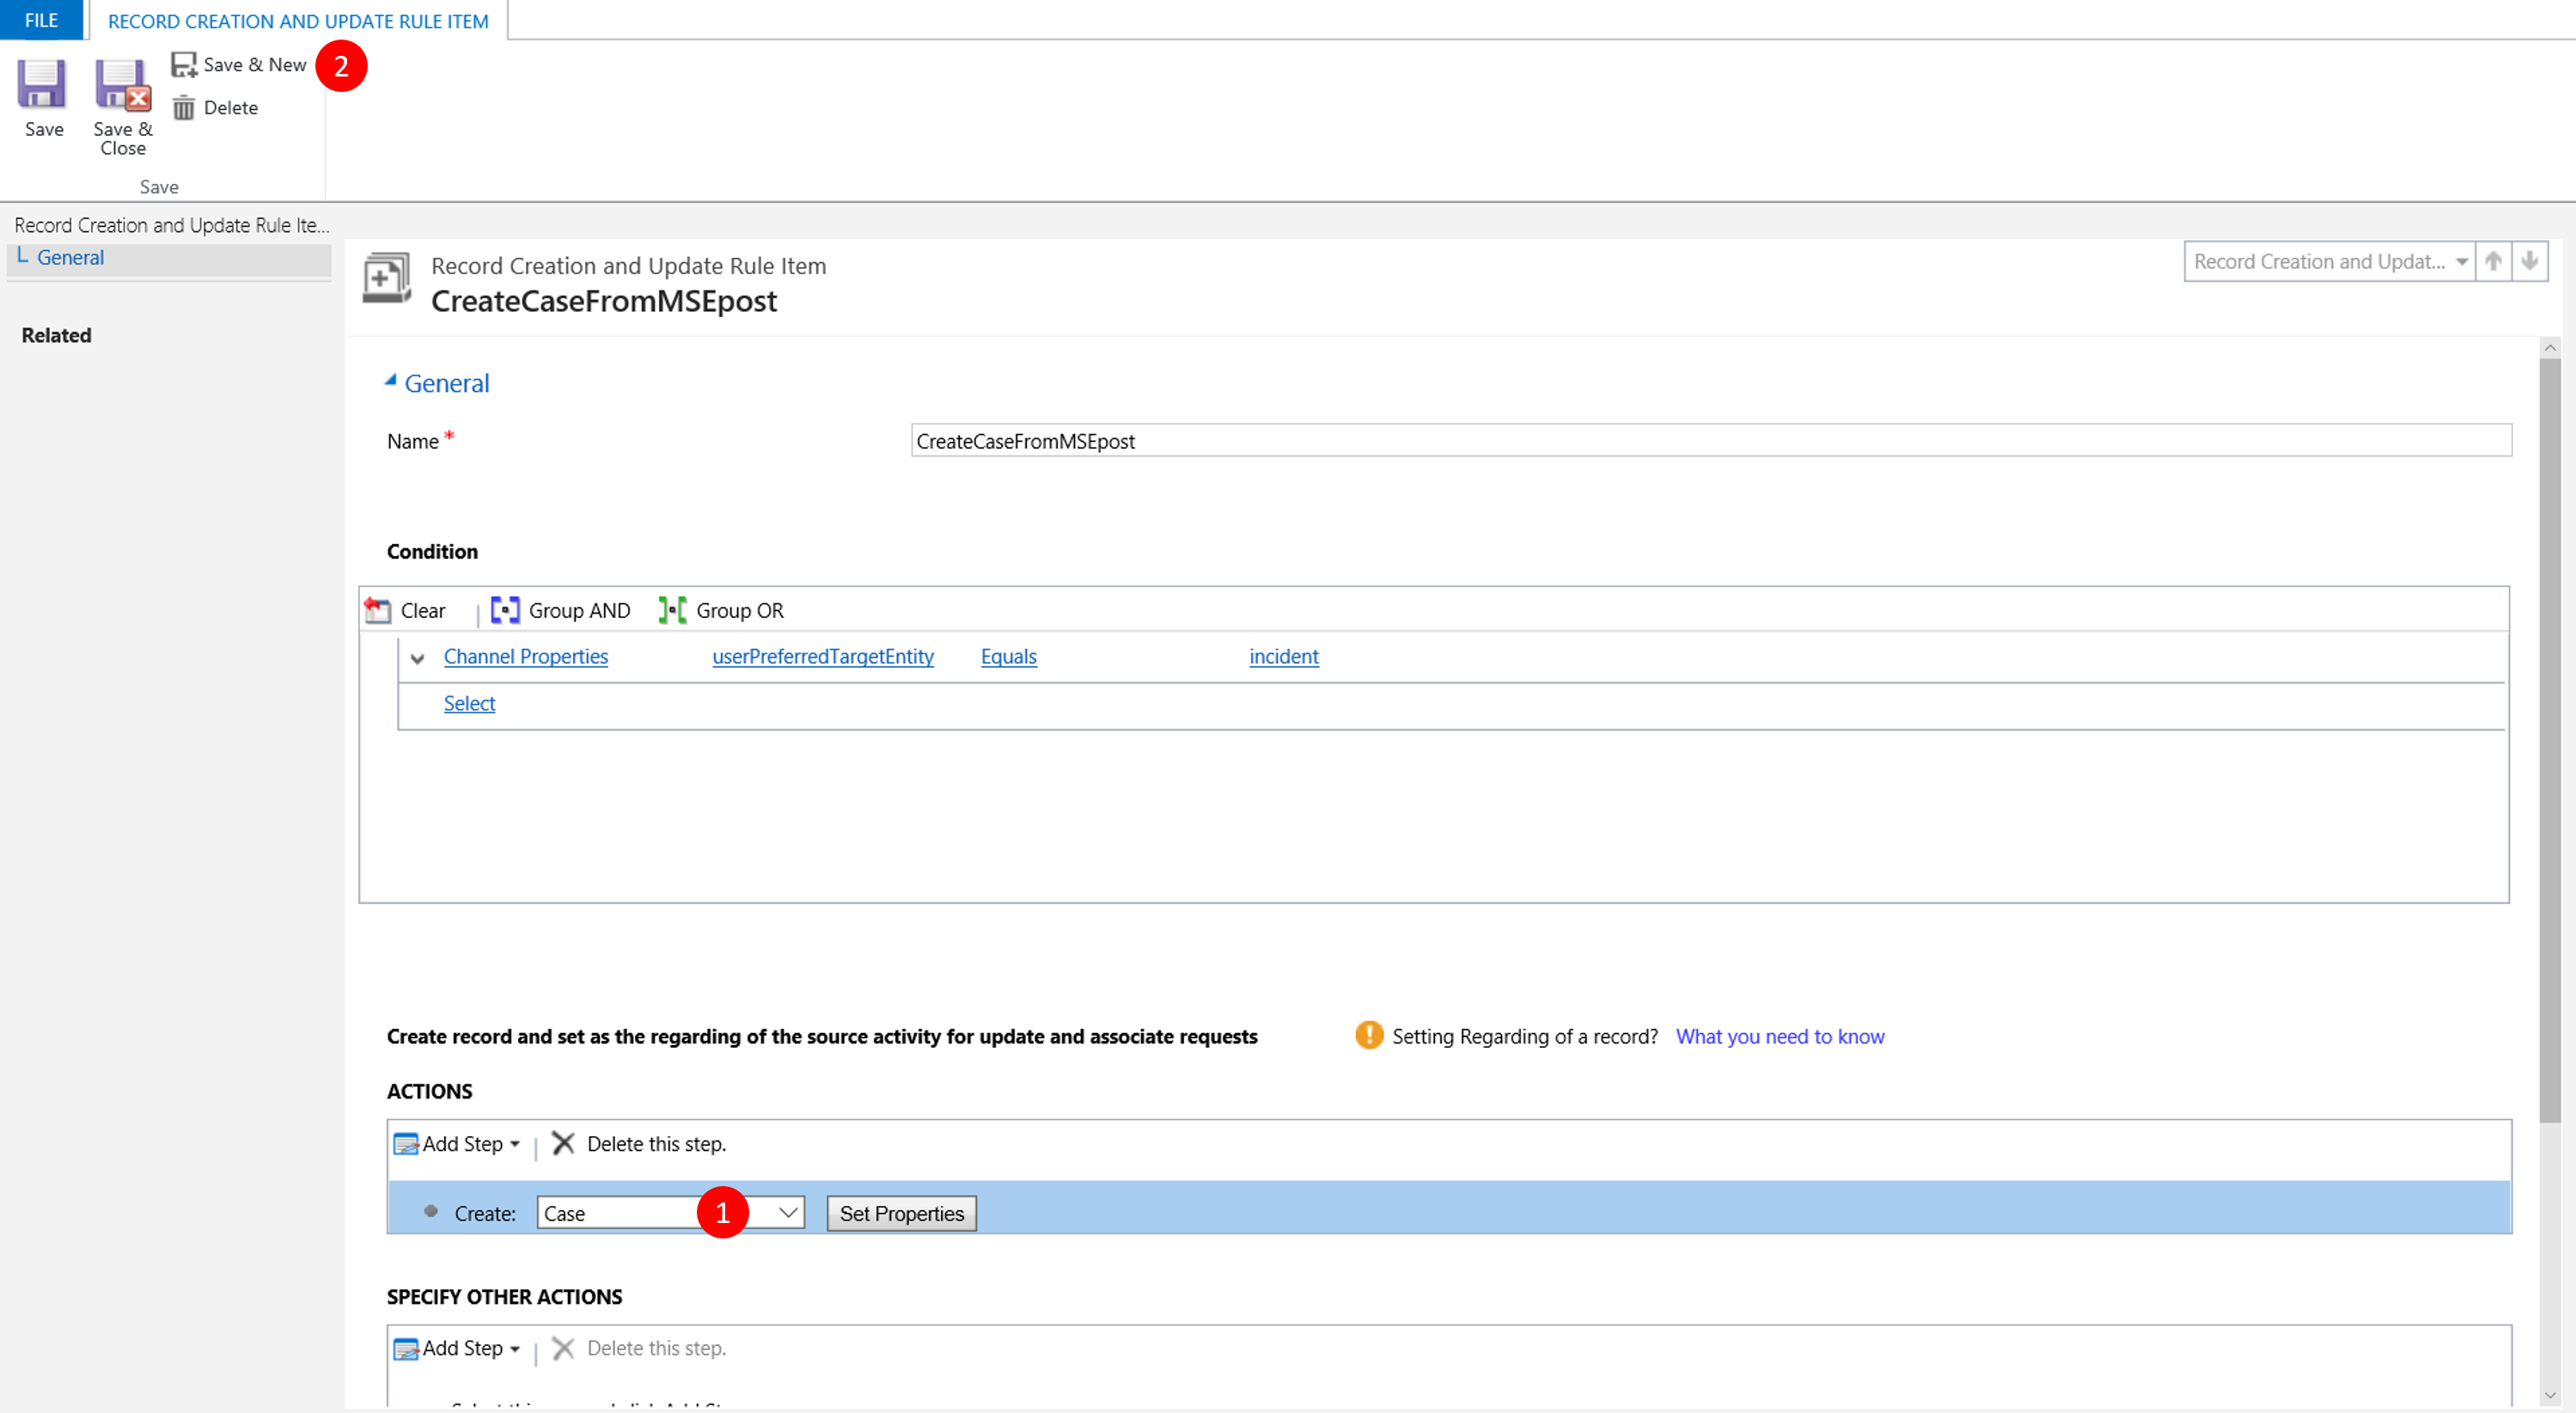
Picture 28: Action is Create Case
Repeat the above to create a rule for creating a Lead record
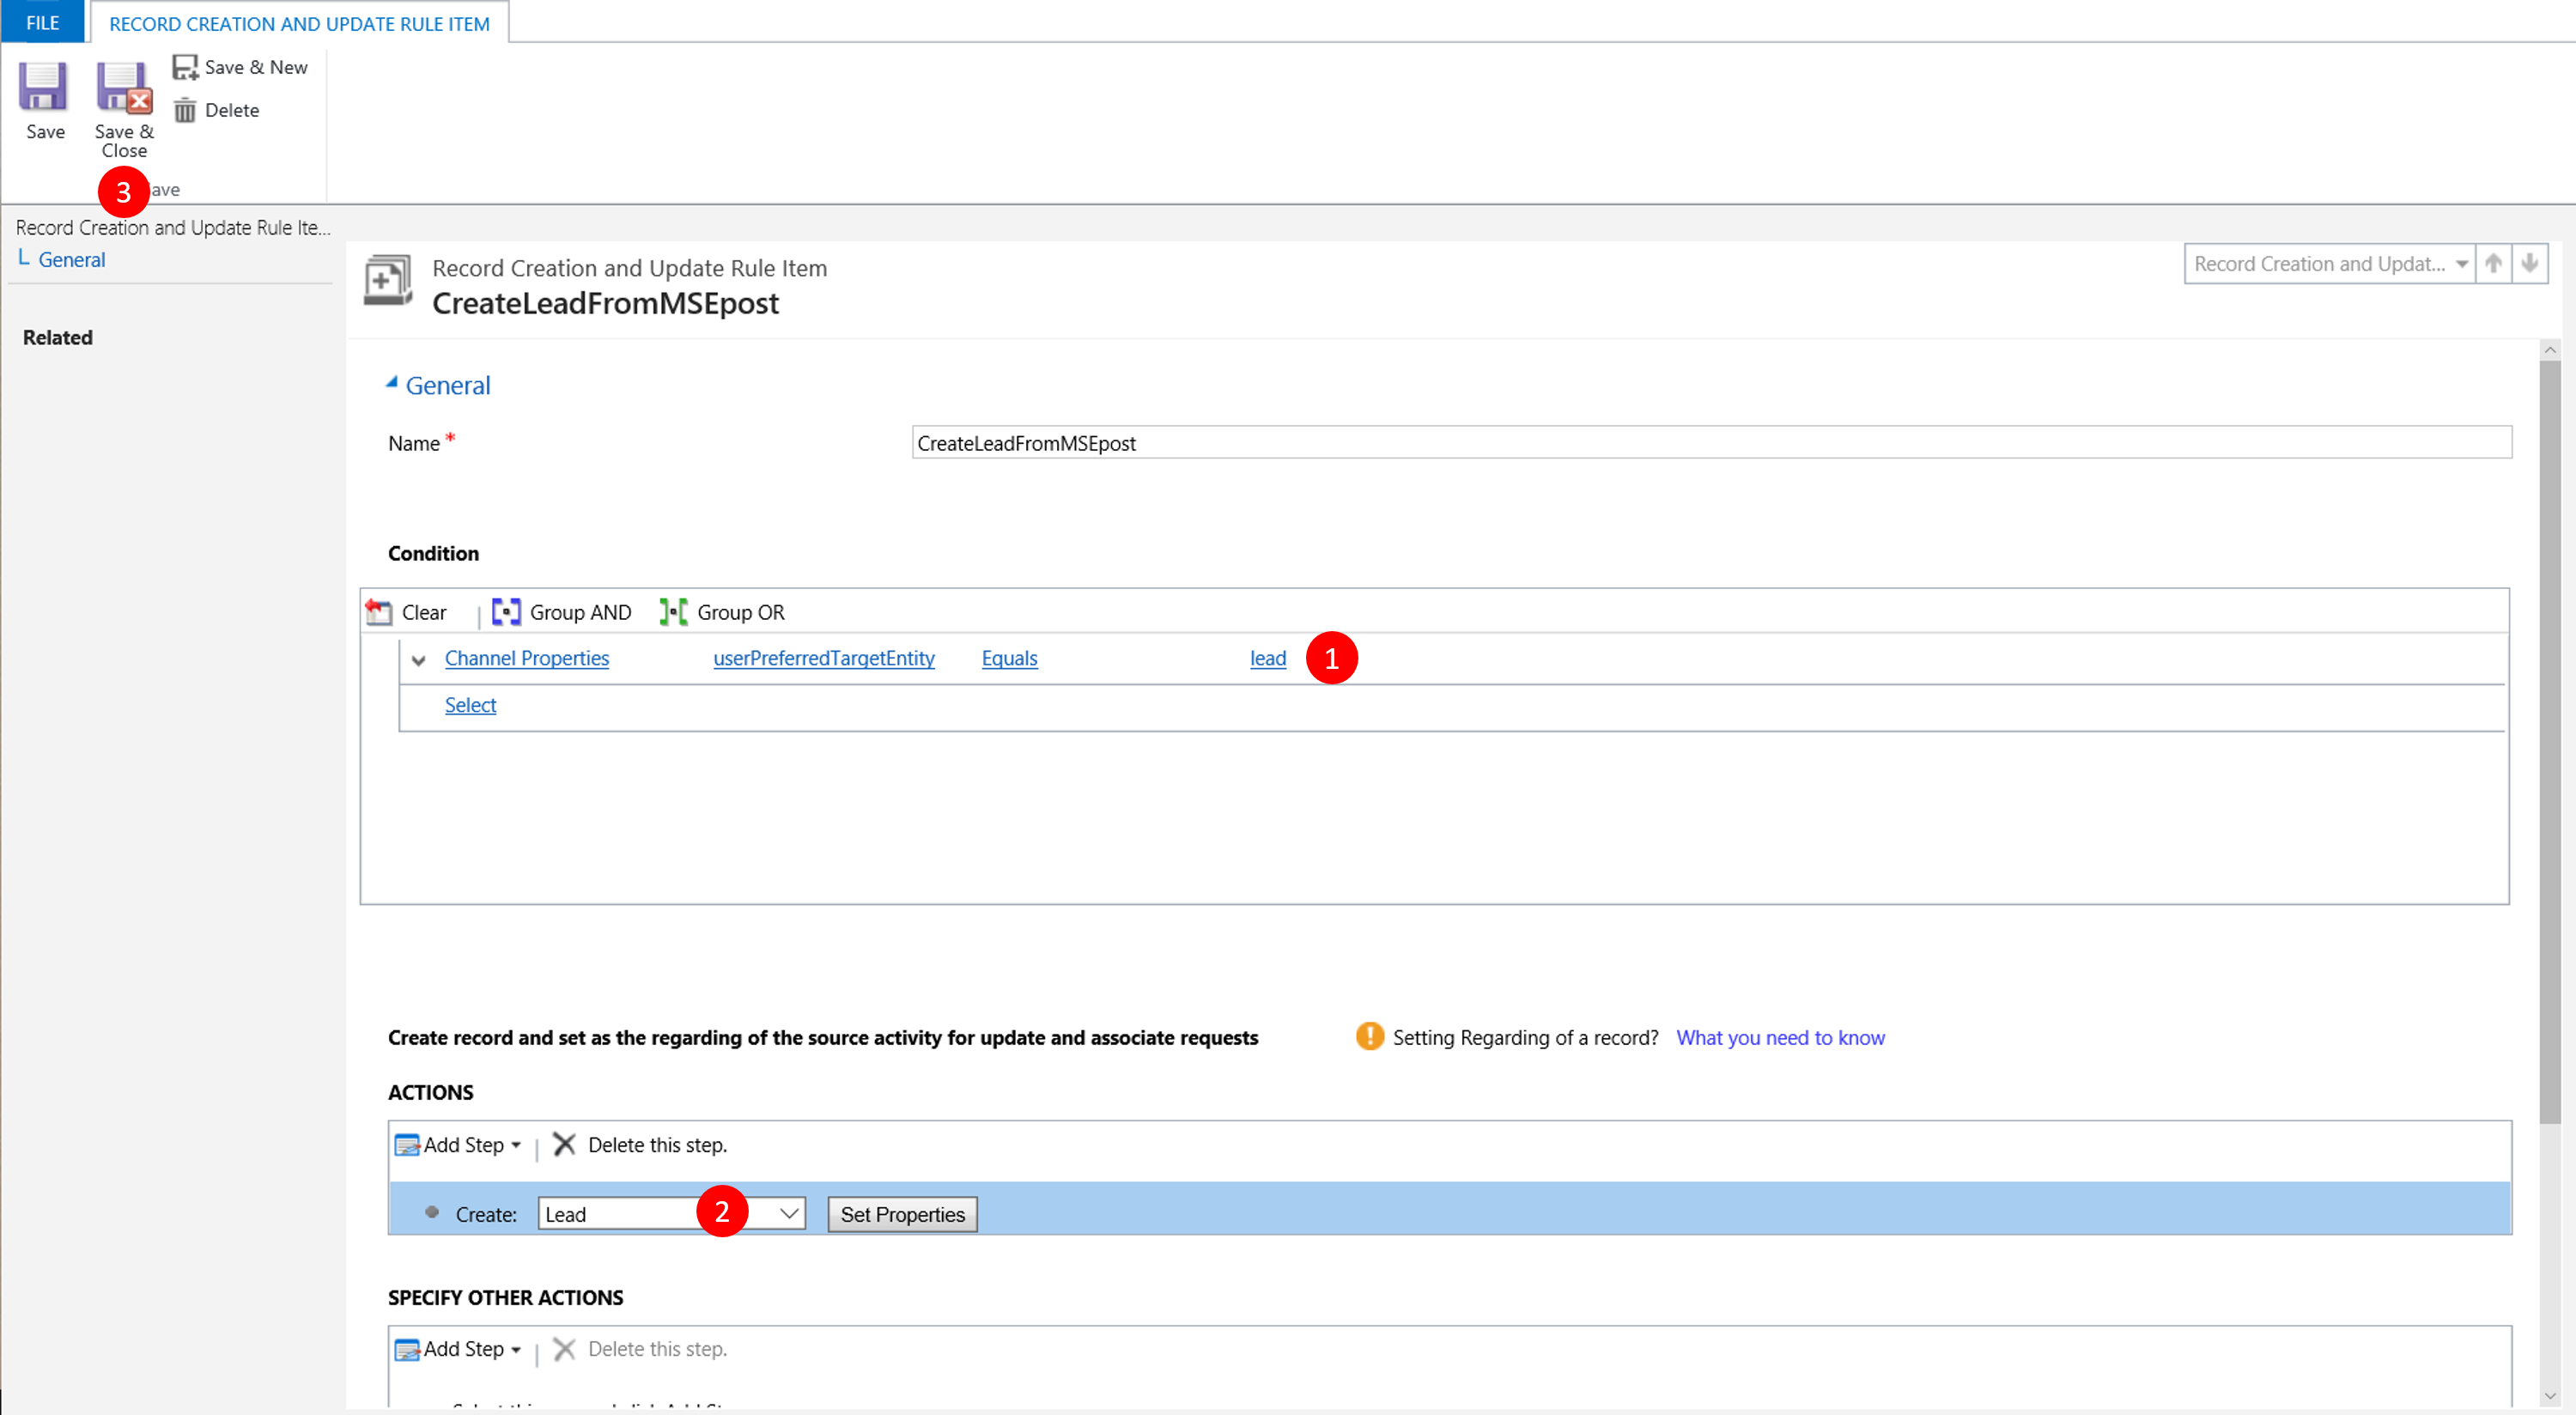
Picture 29: Condition is "userPreferredTargetEntity" equals "lead"
When done verify your two rules is created and click Activate (2) to activate rule
Picture 30: Action is Create Lead
x
See Automation at work
Finally we can test to see if the rules will create Leads or Cases from our posts
Open MSE and navigate to a post, click Link to CRM, chose Create Lead and see verify that a Lead record is created
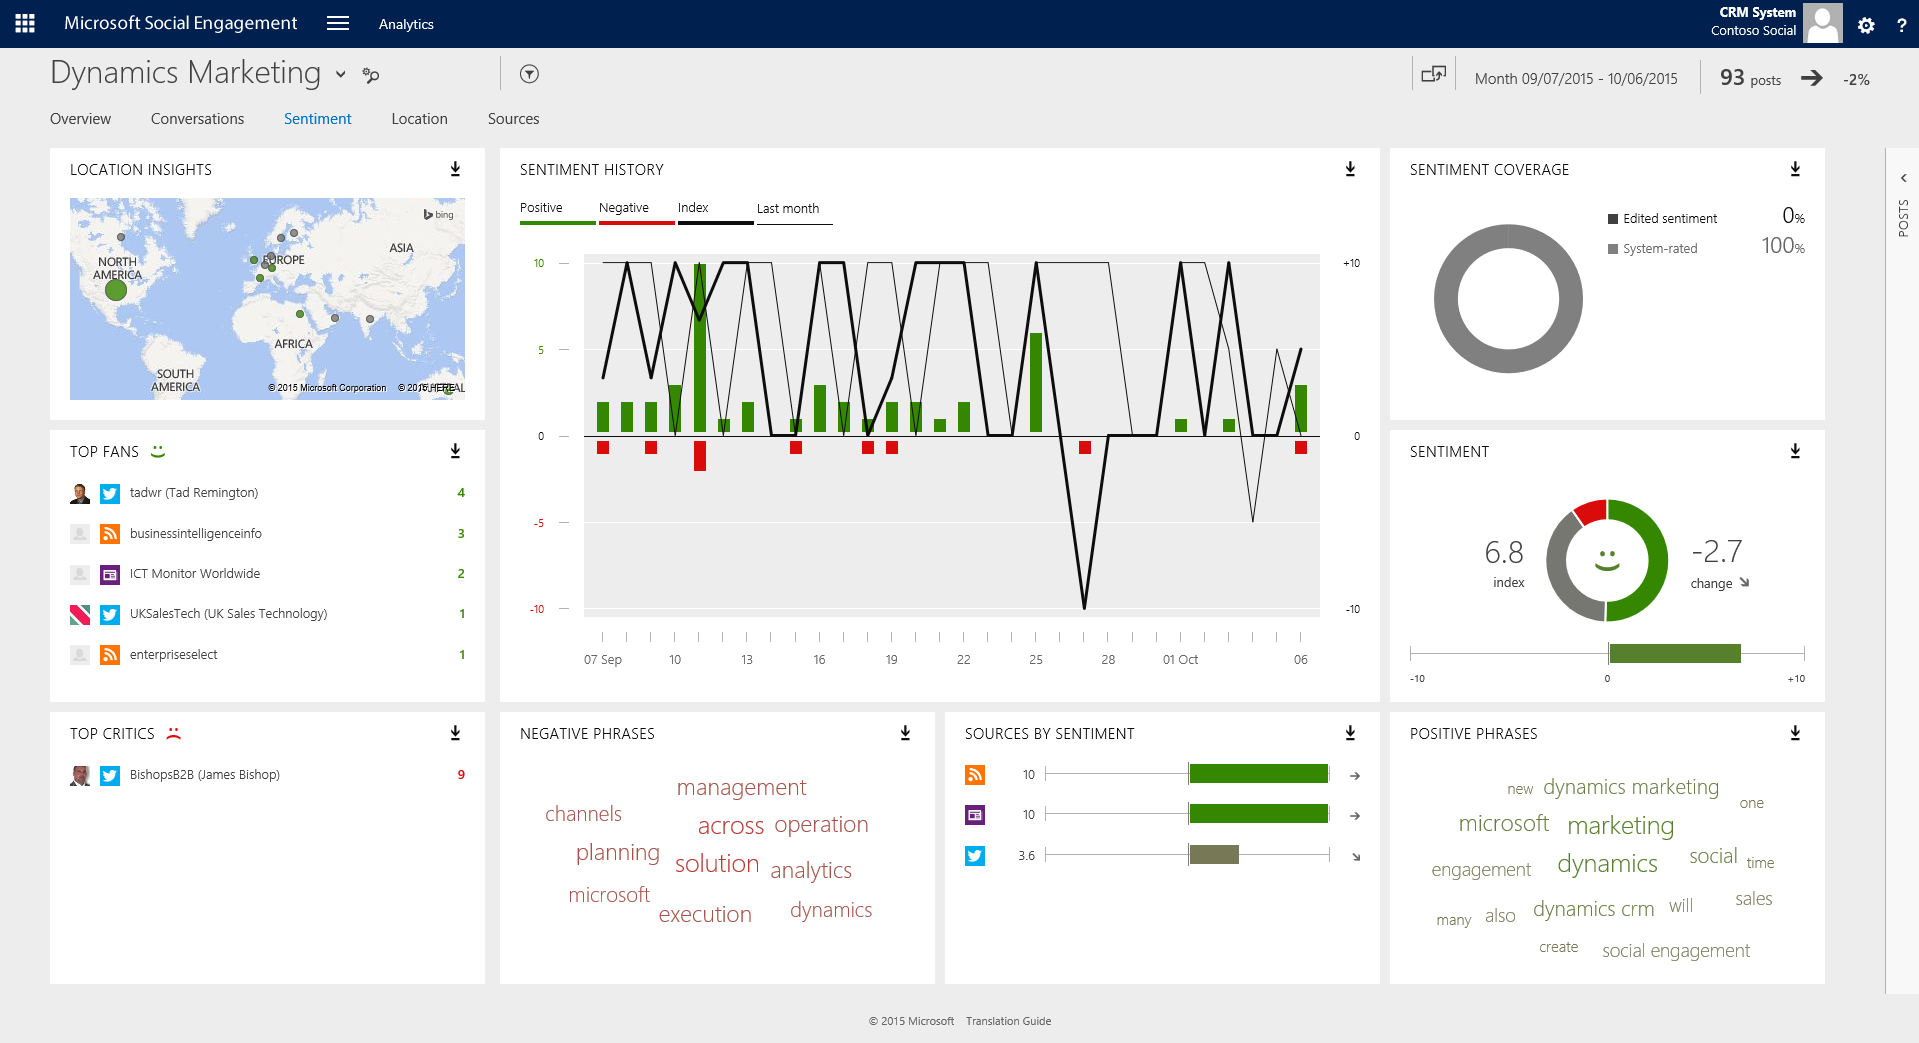
Picture 31: MSE 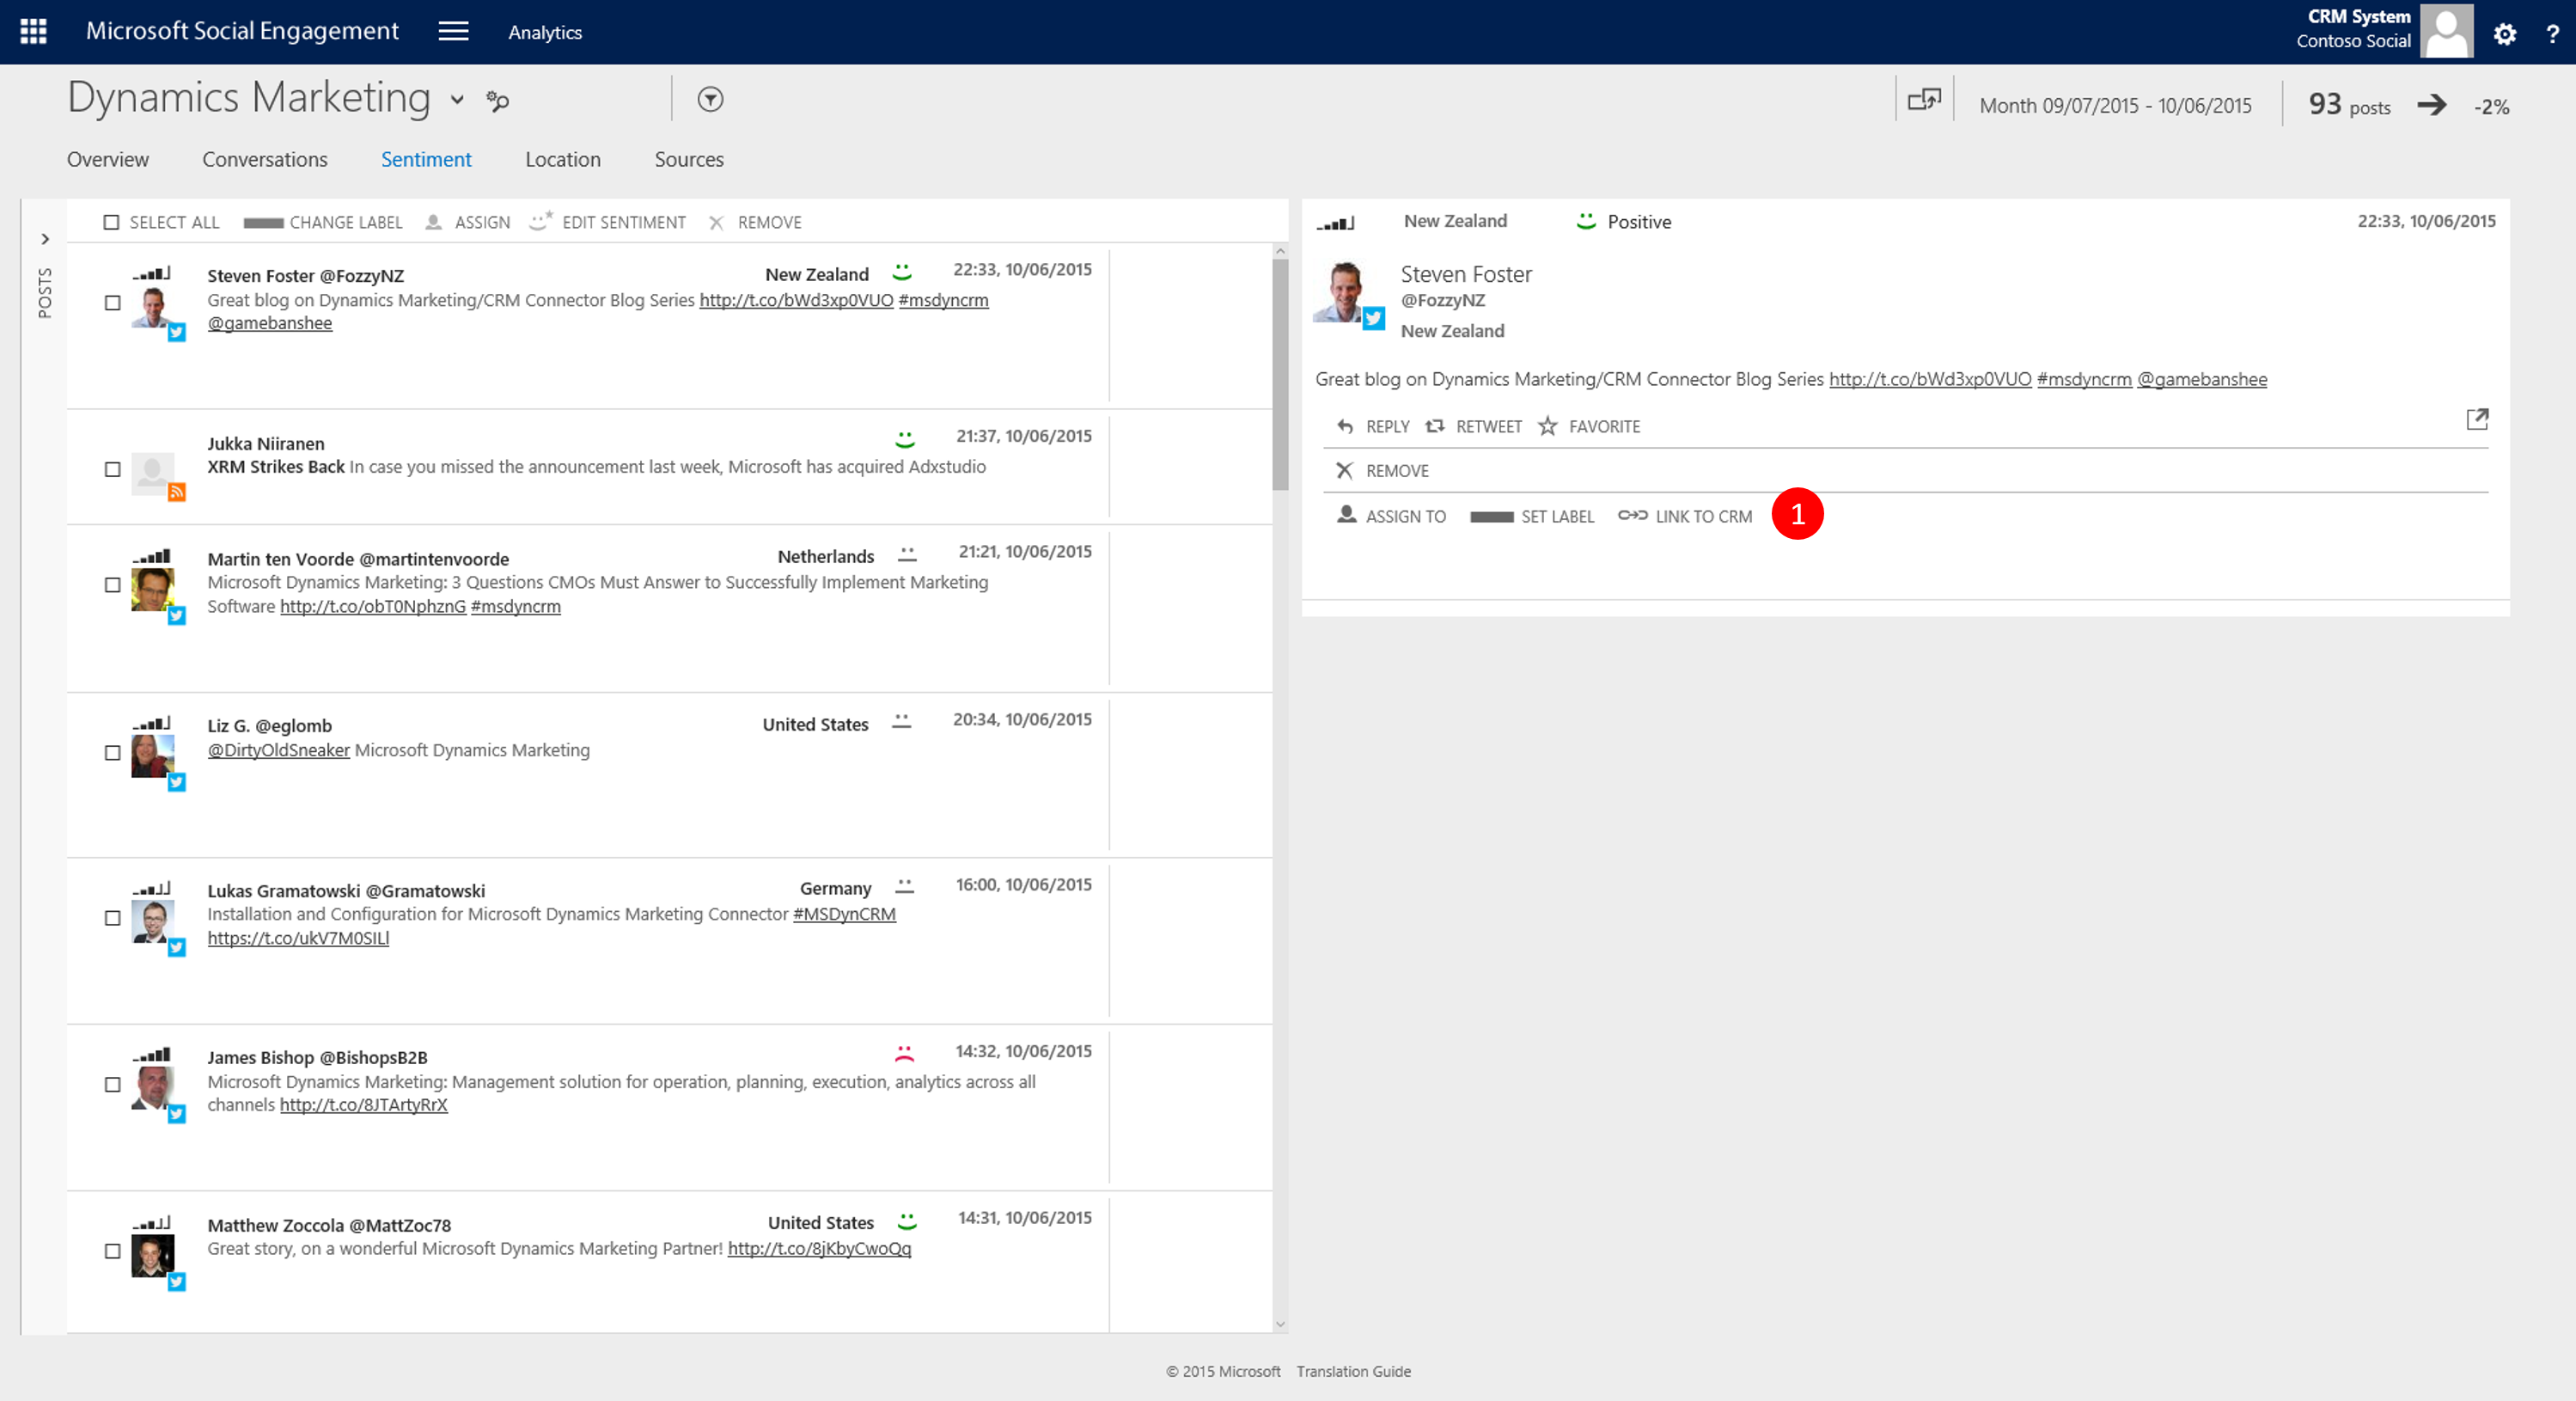
Picture 32: Navigate to post and click Link to CRM 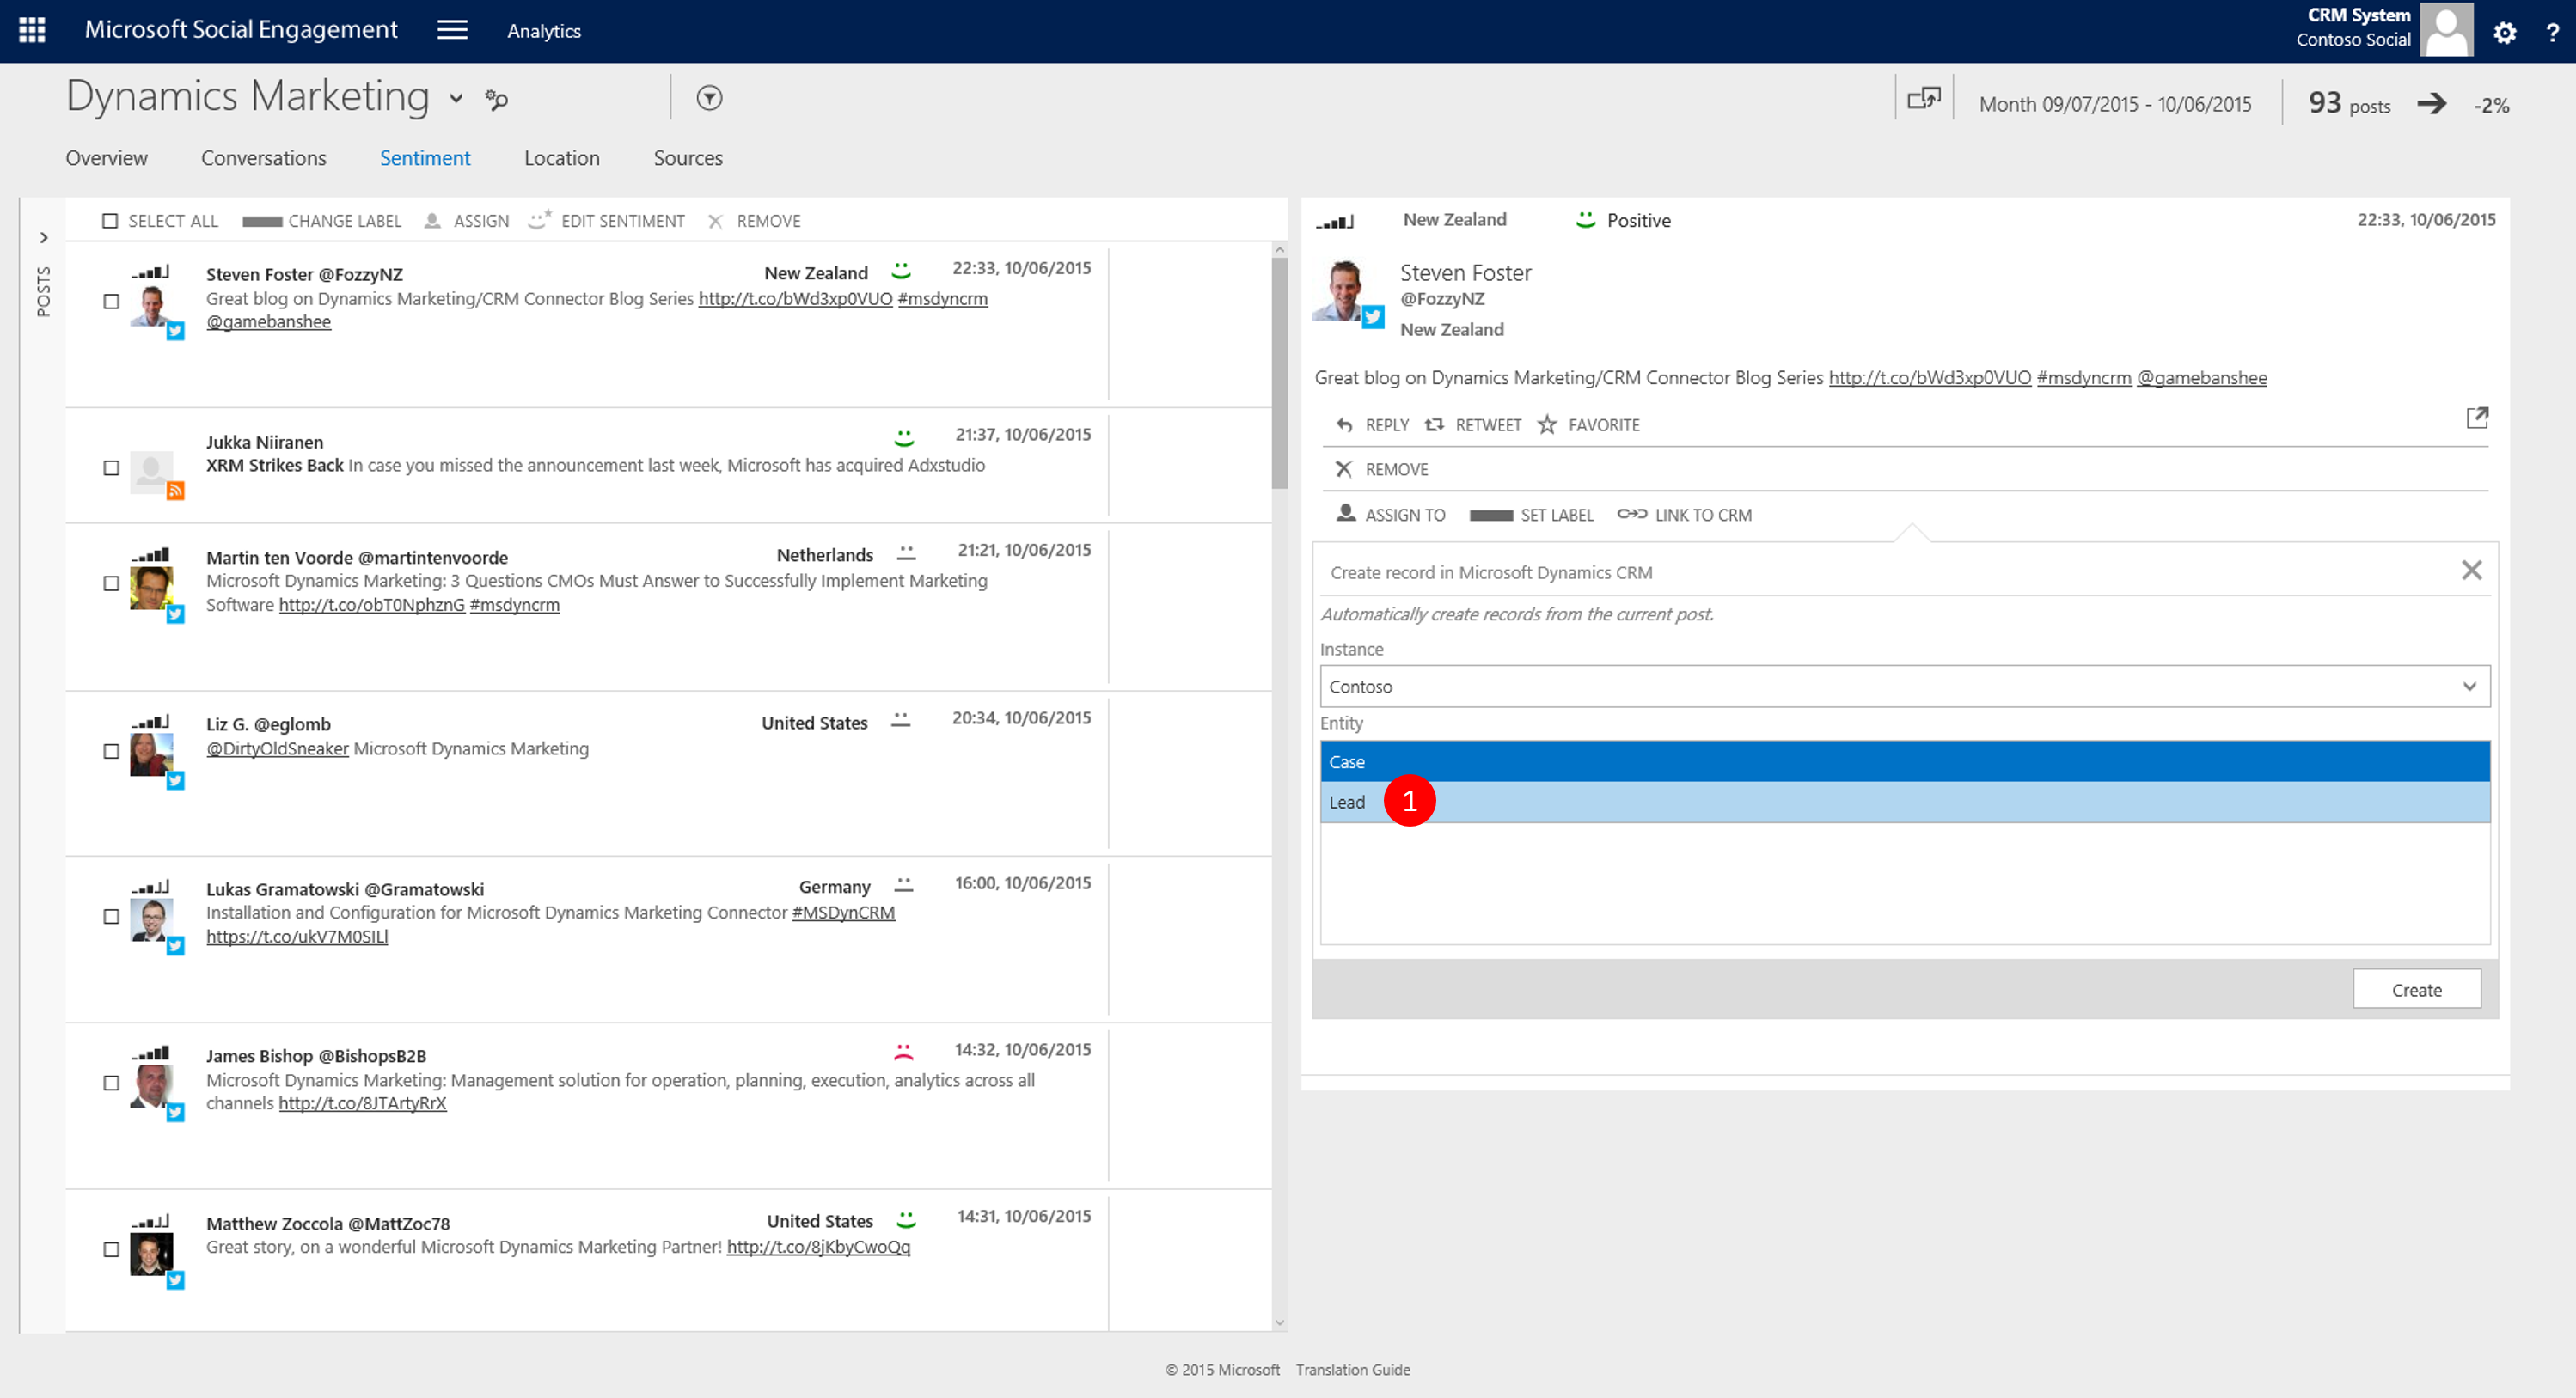
Picture 33: Pick create Lead 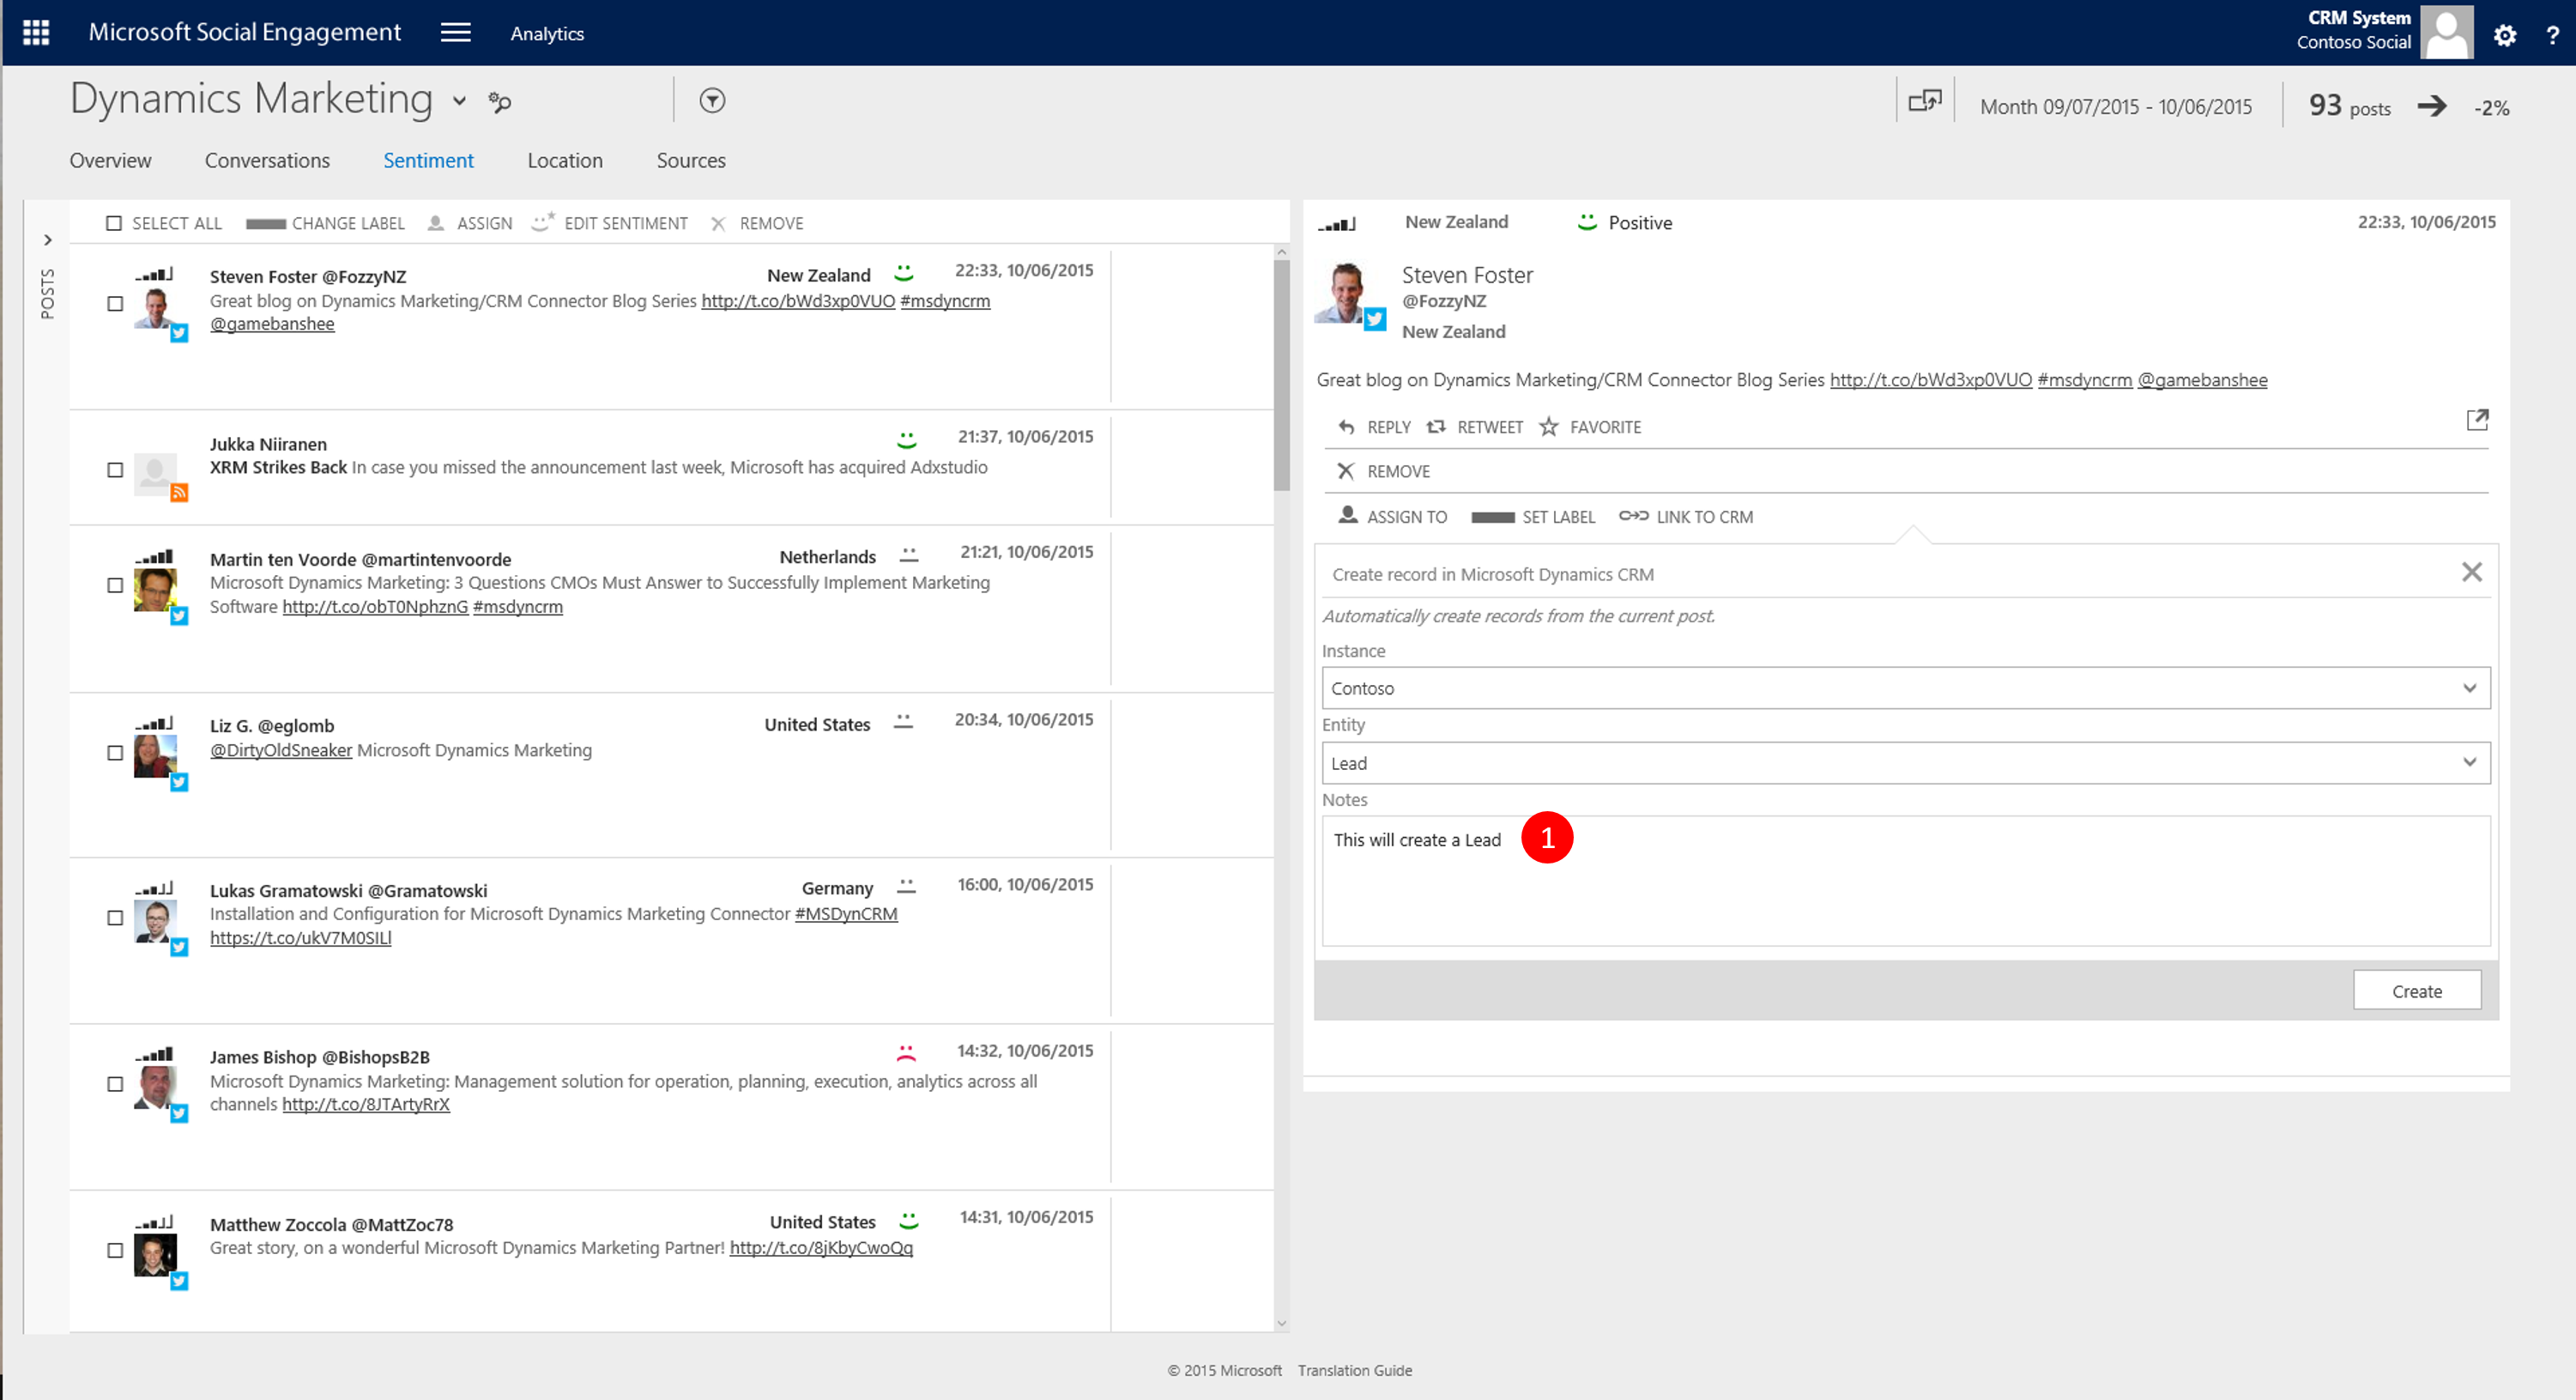
Picture 34: Type a Note and click Create 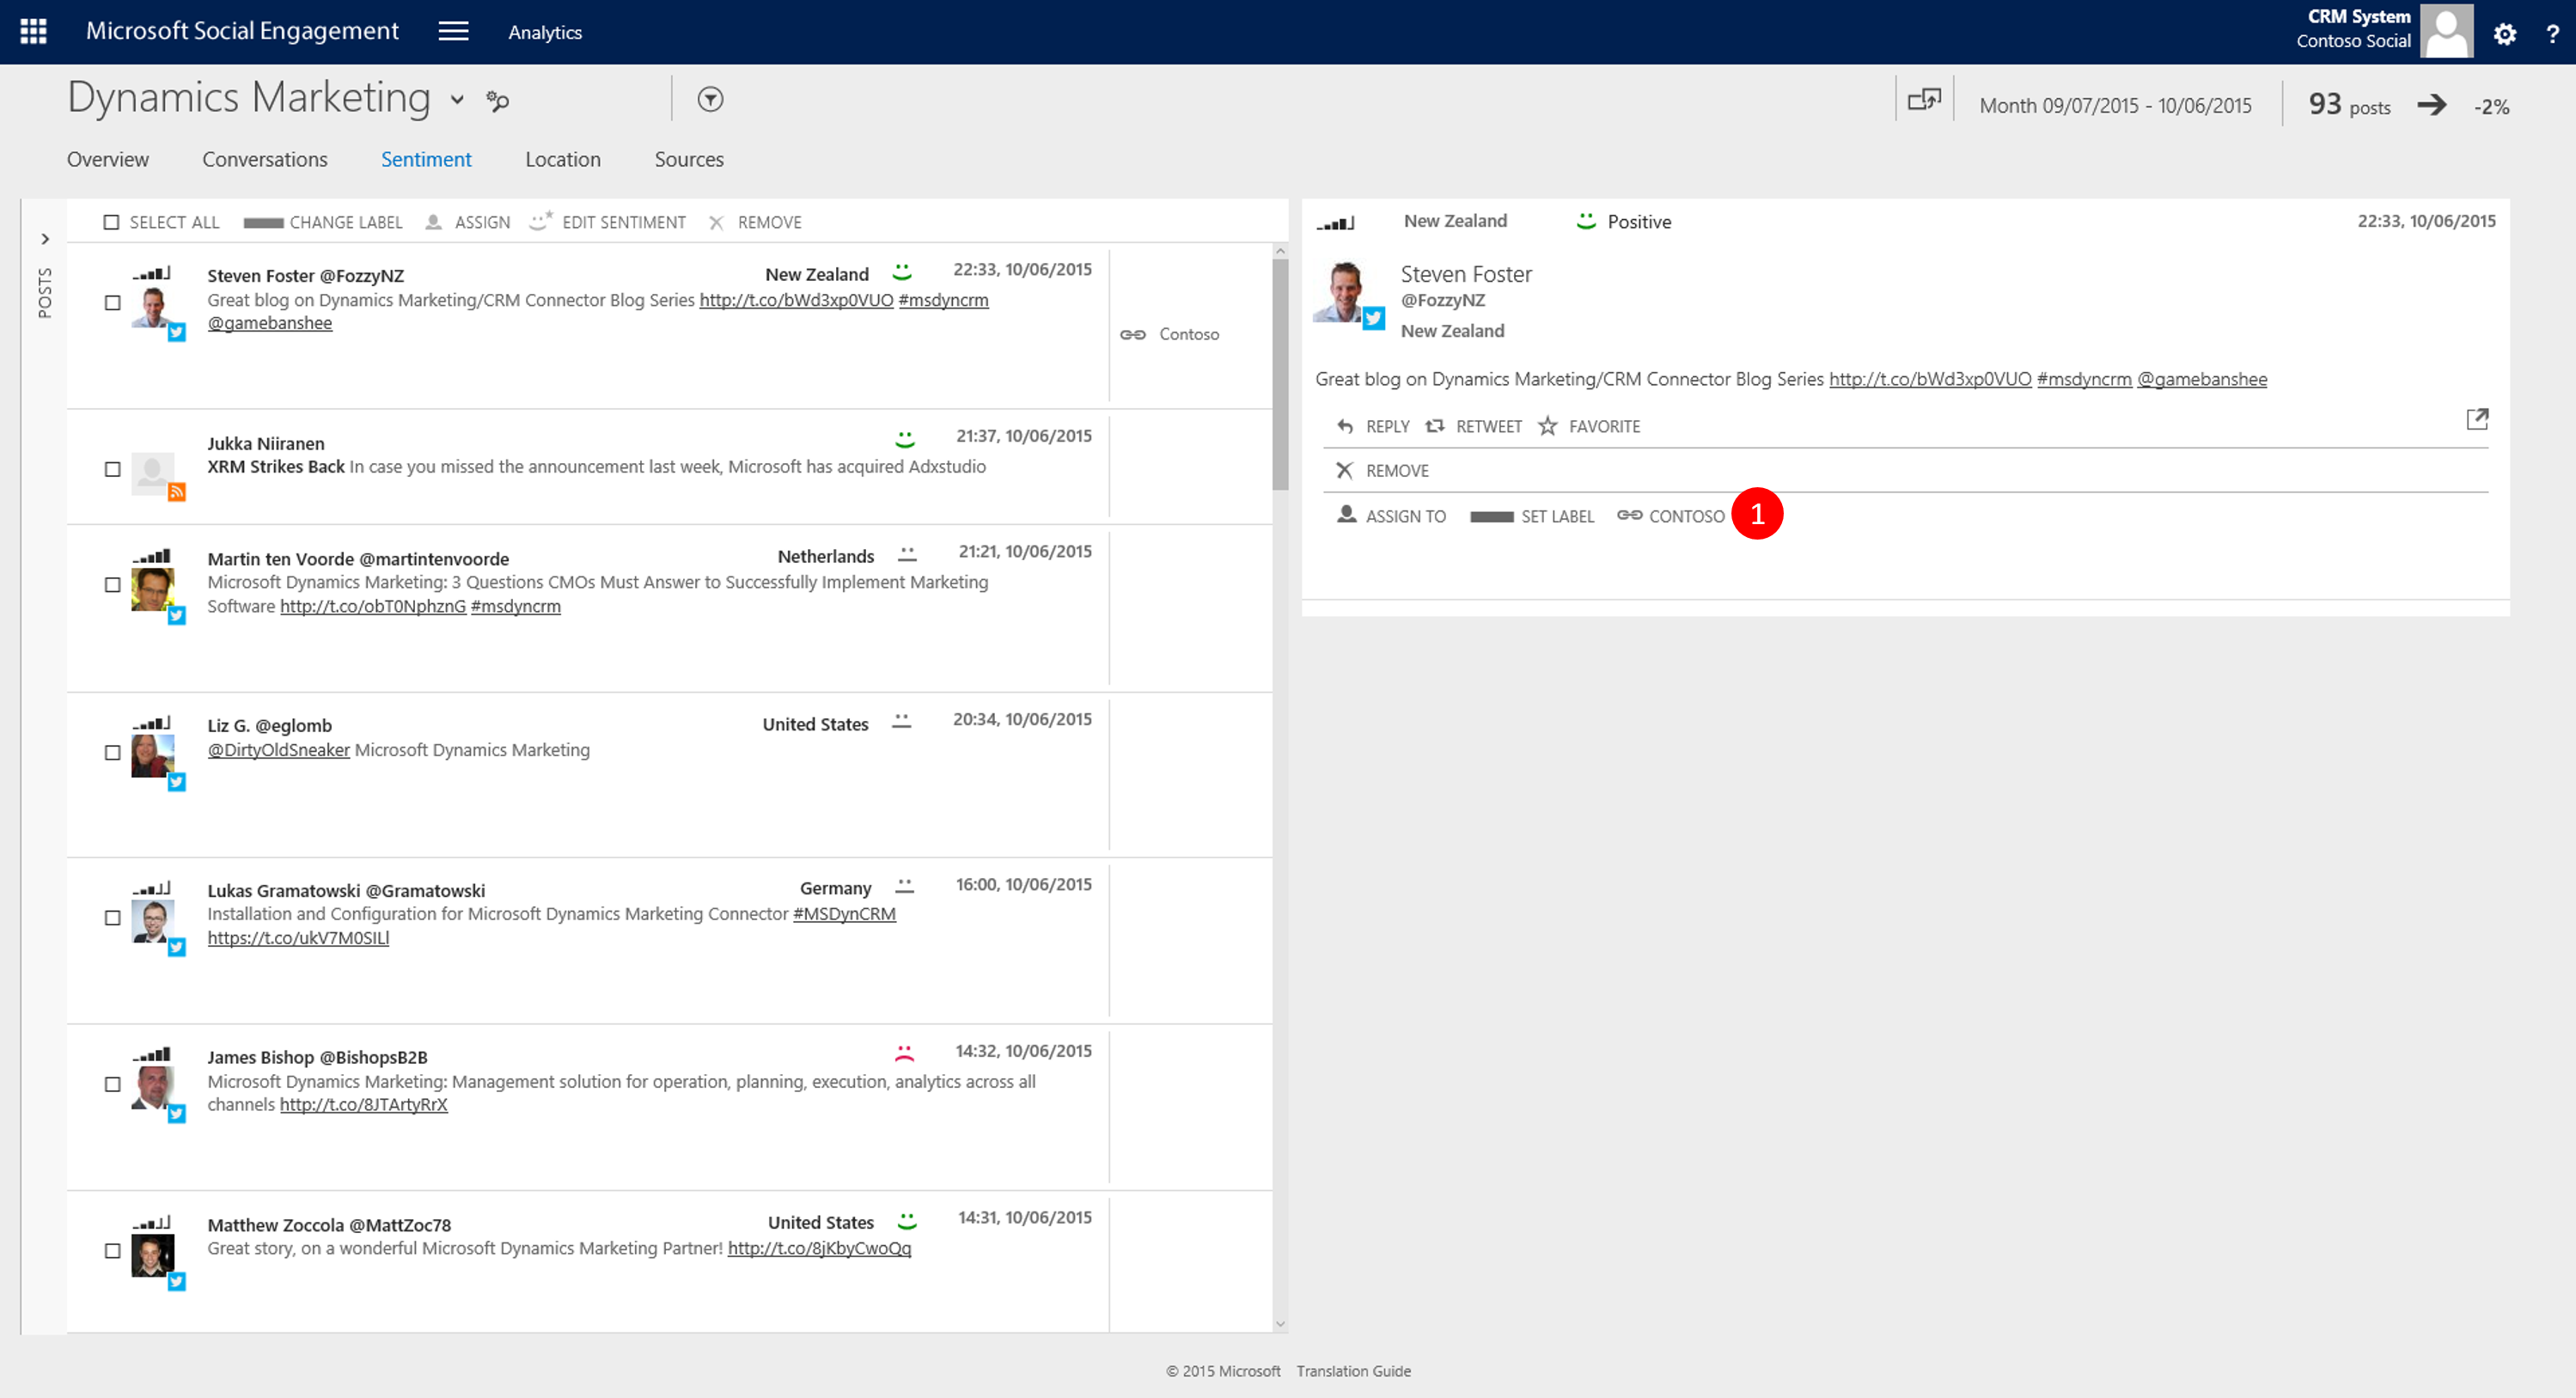
Picture 35: Post now displays Linked icon 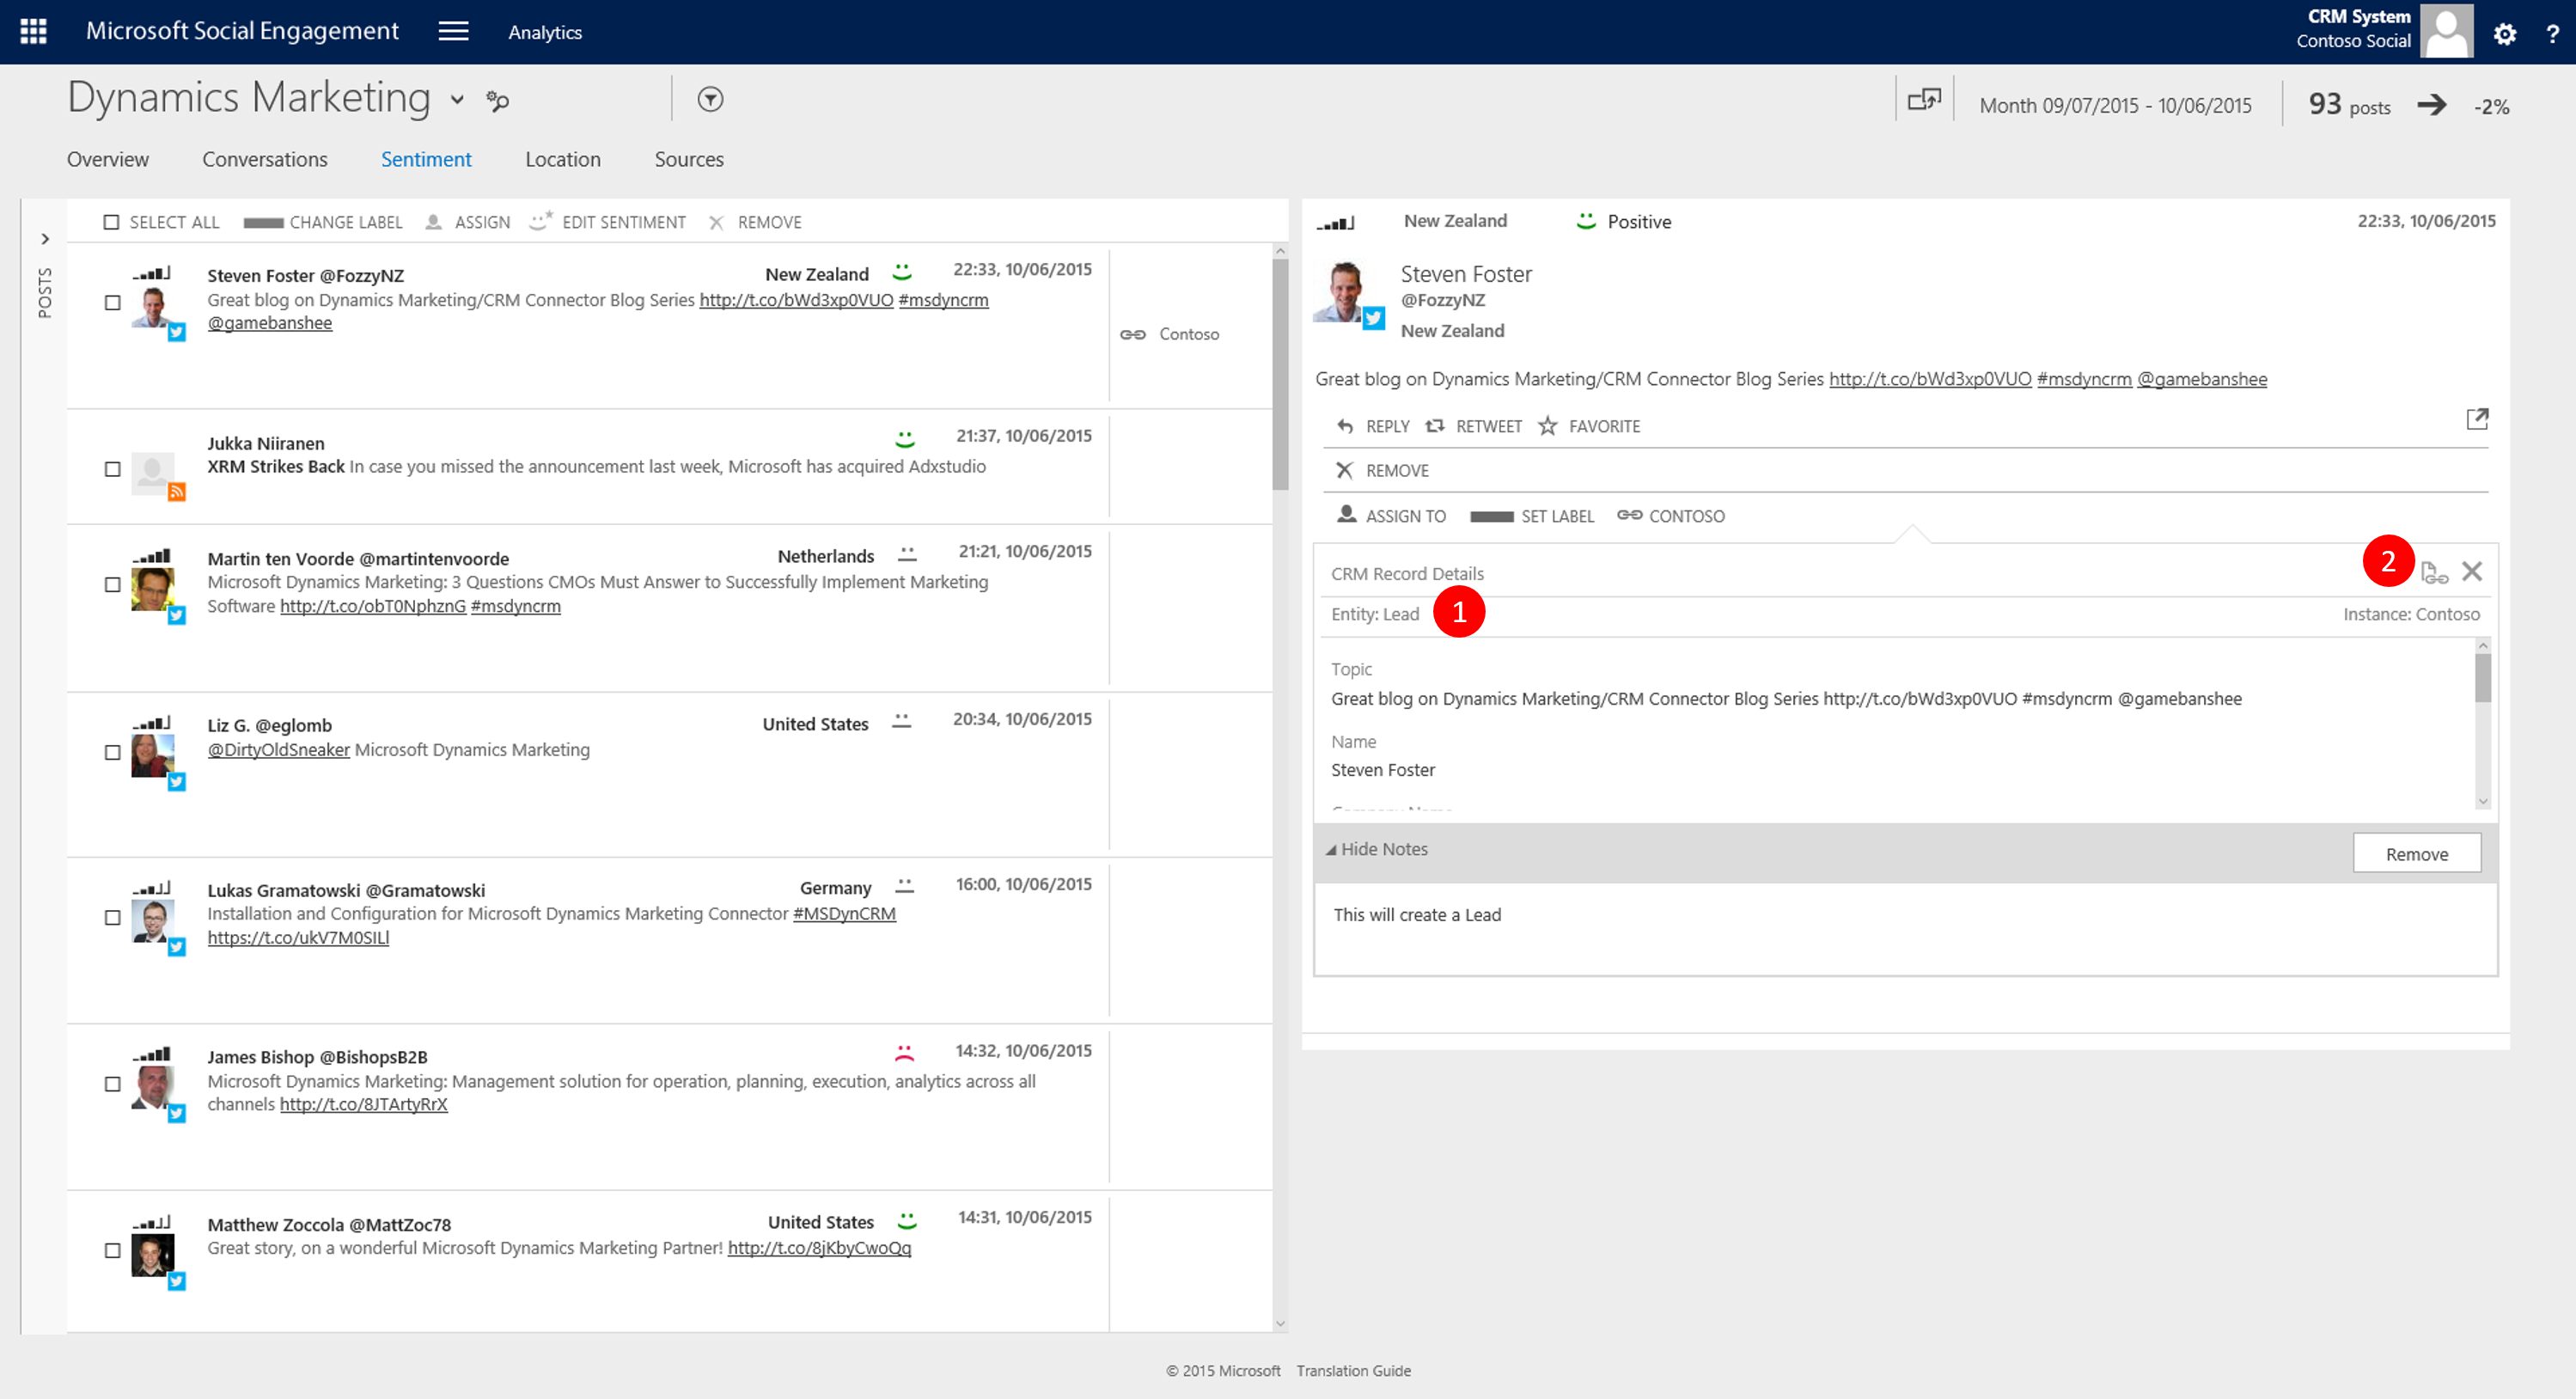
Picture 36: Verified Lead record created 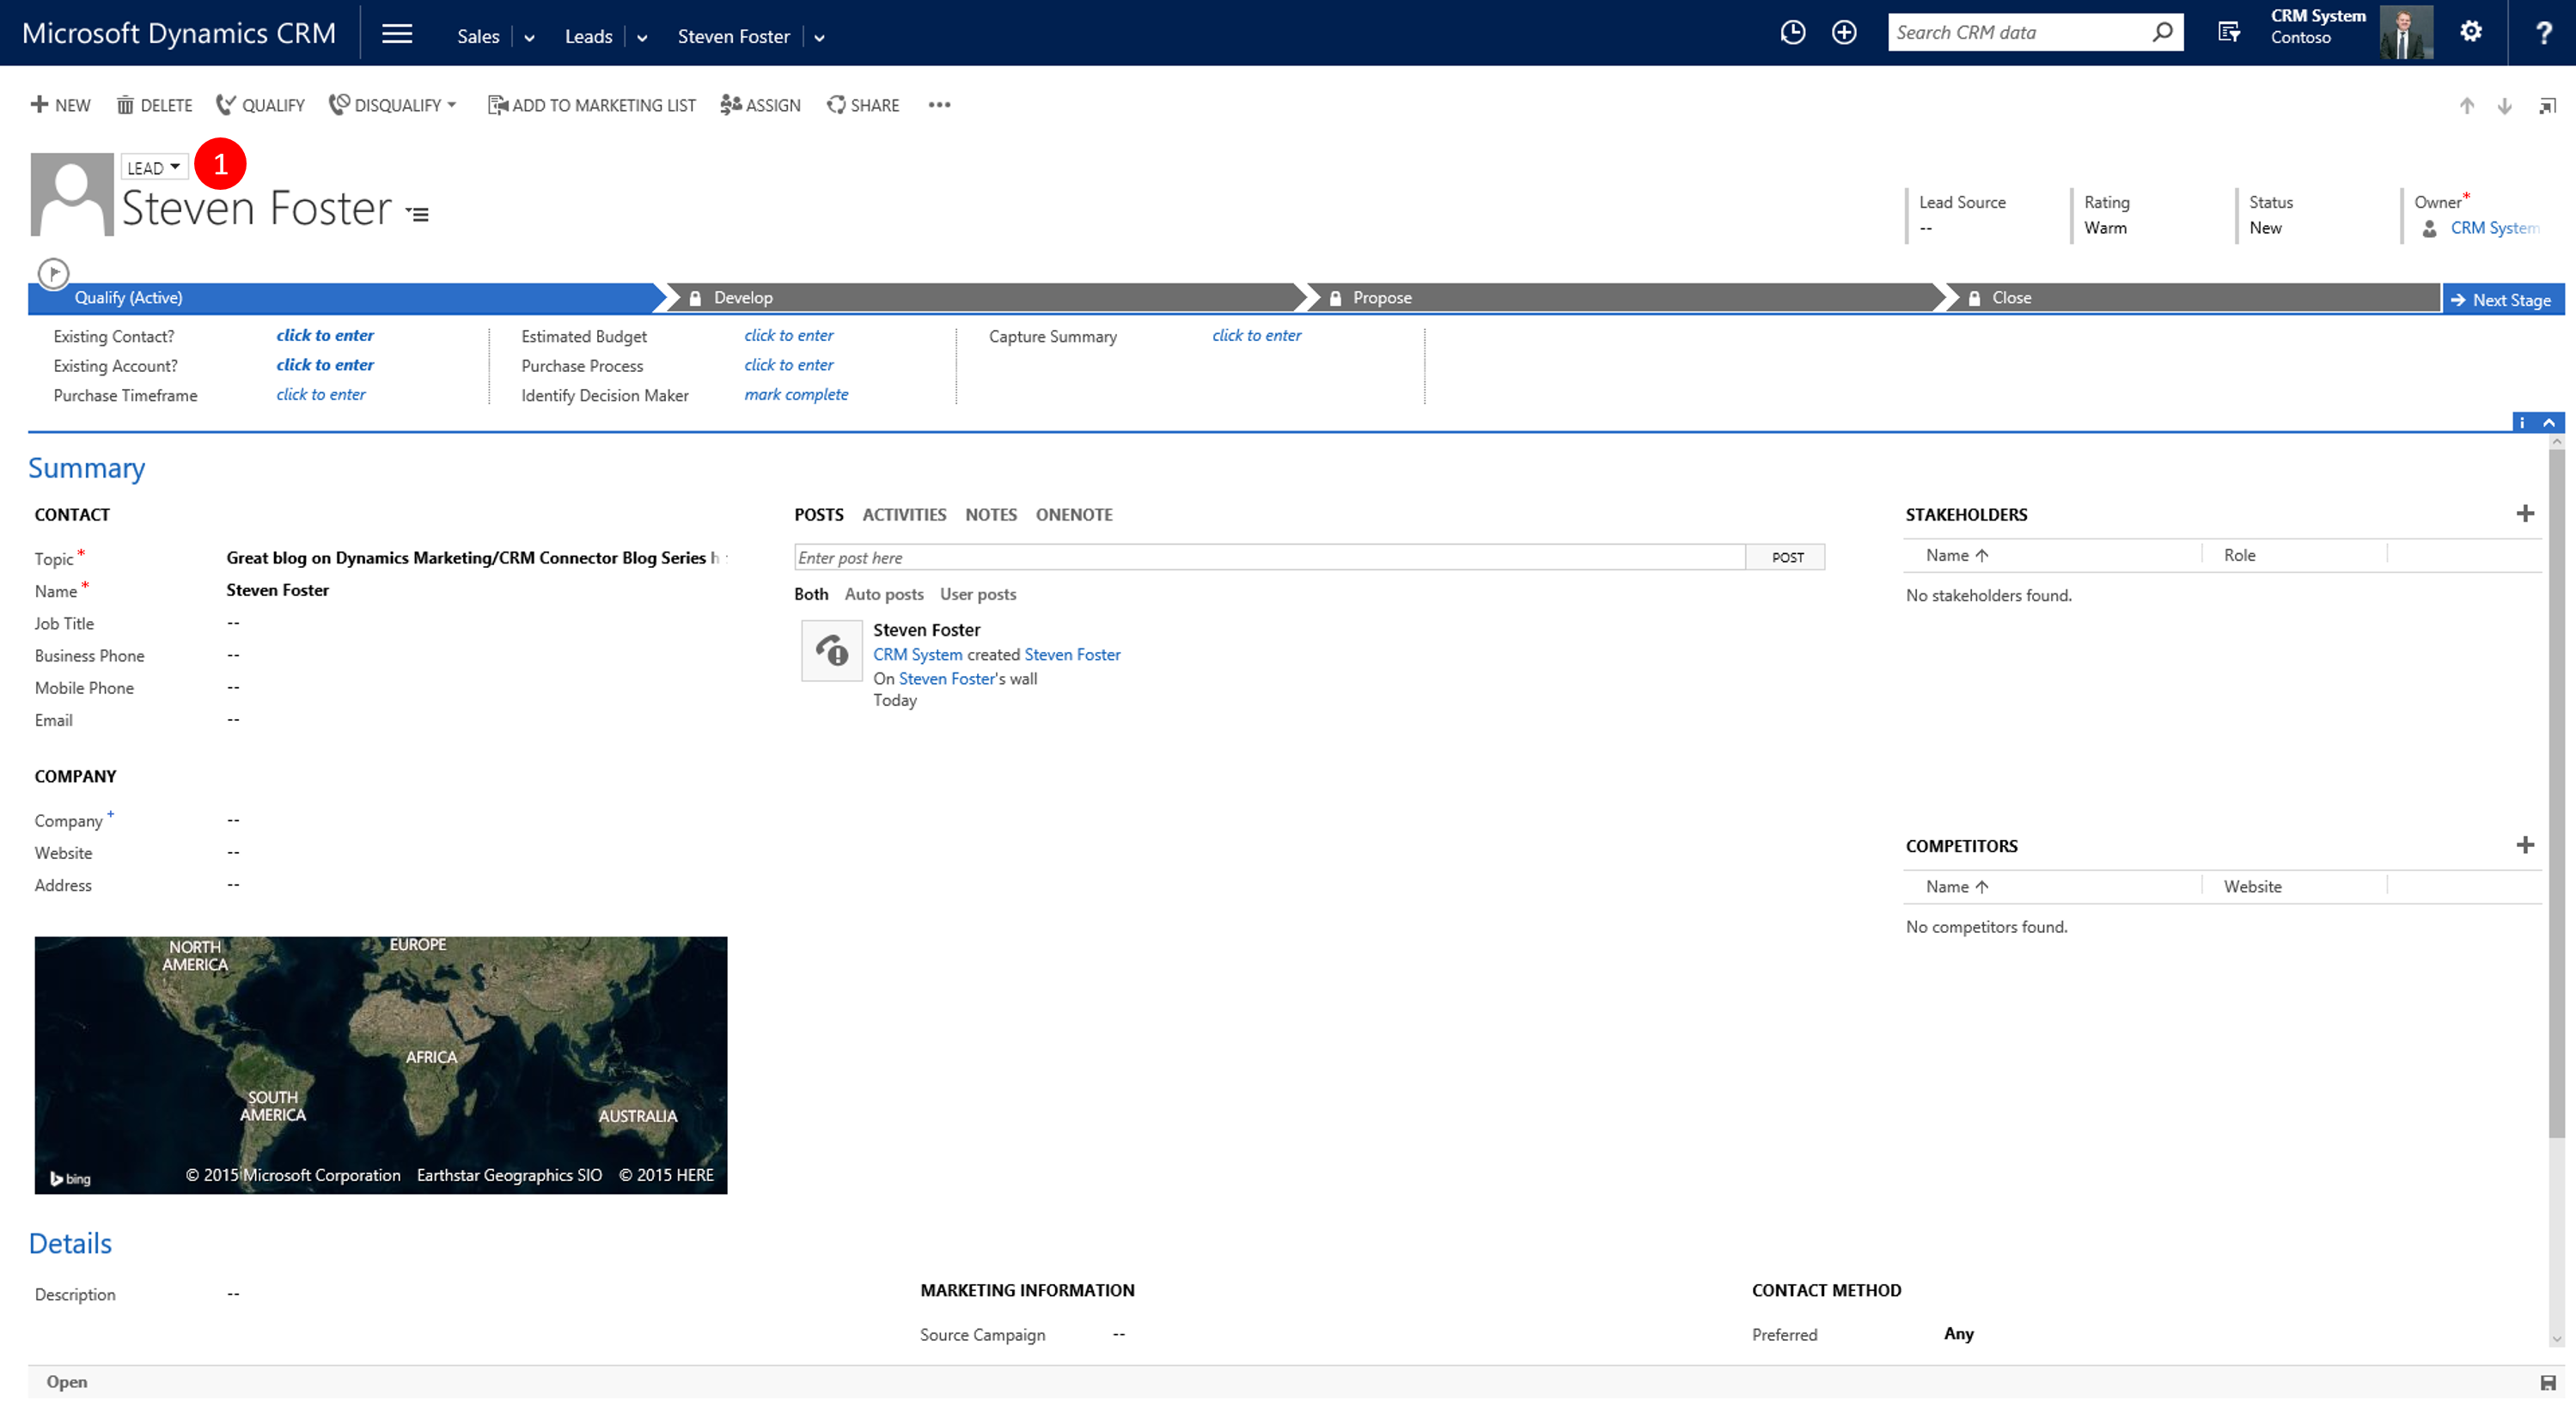
Picture 37: Lead in CRM 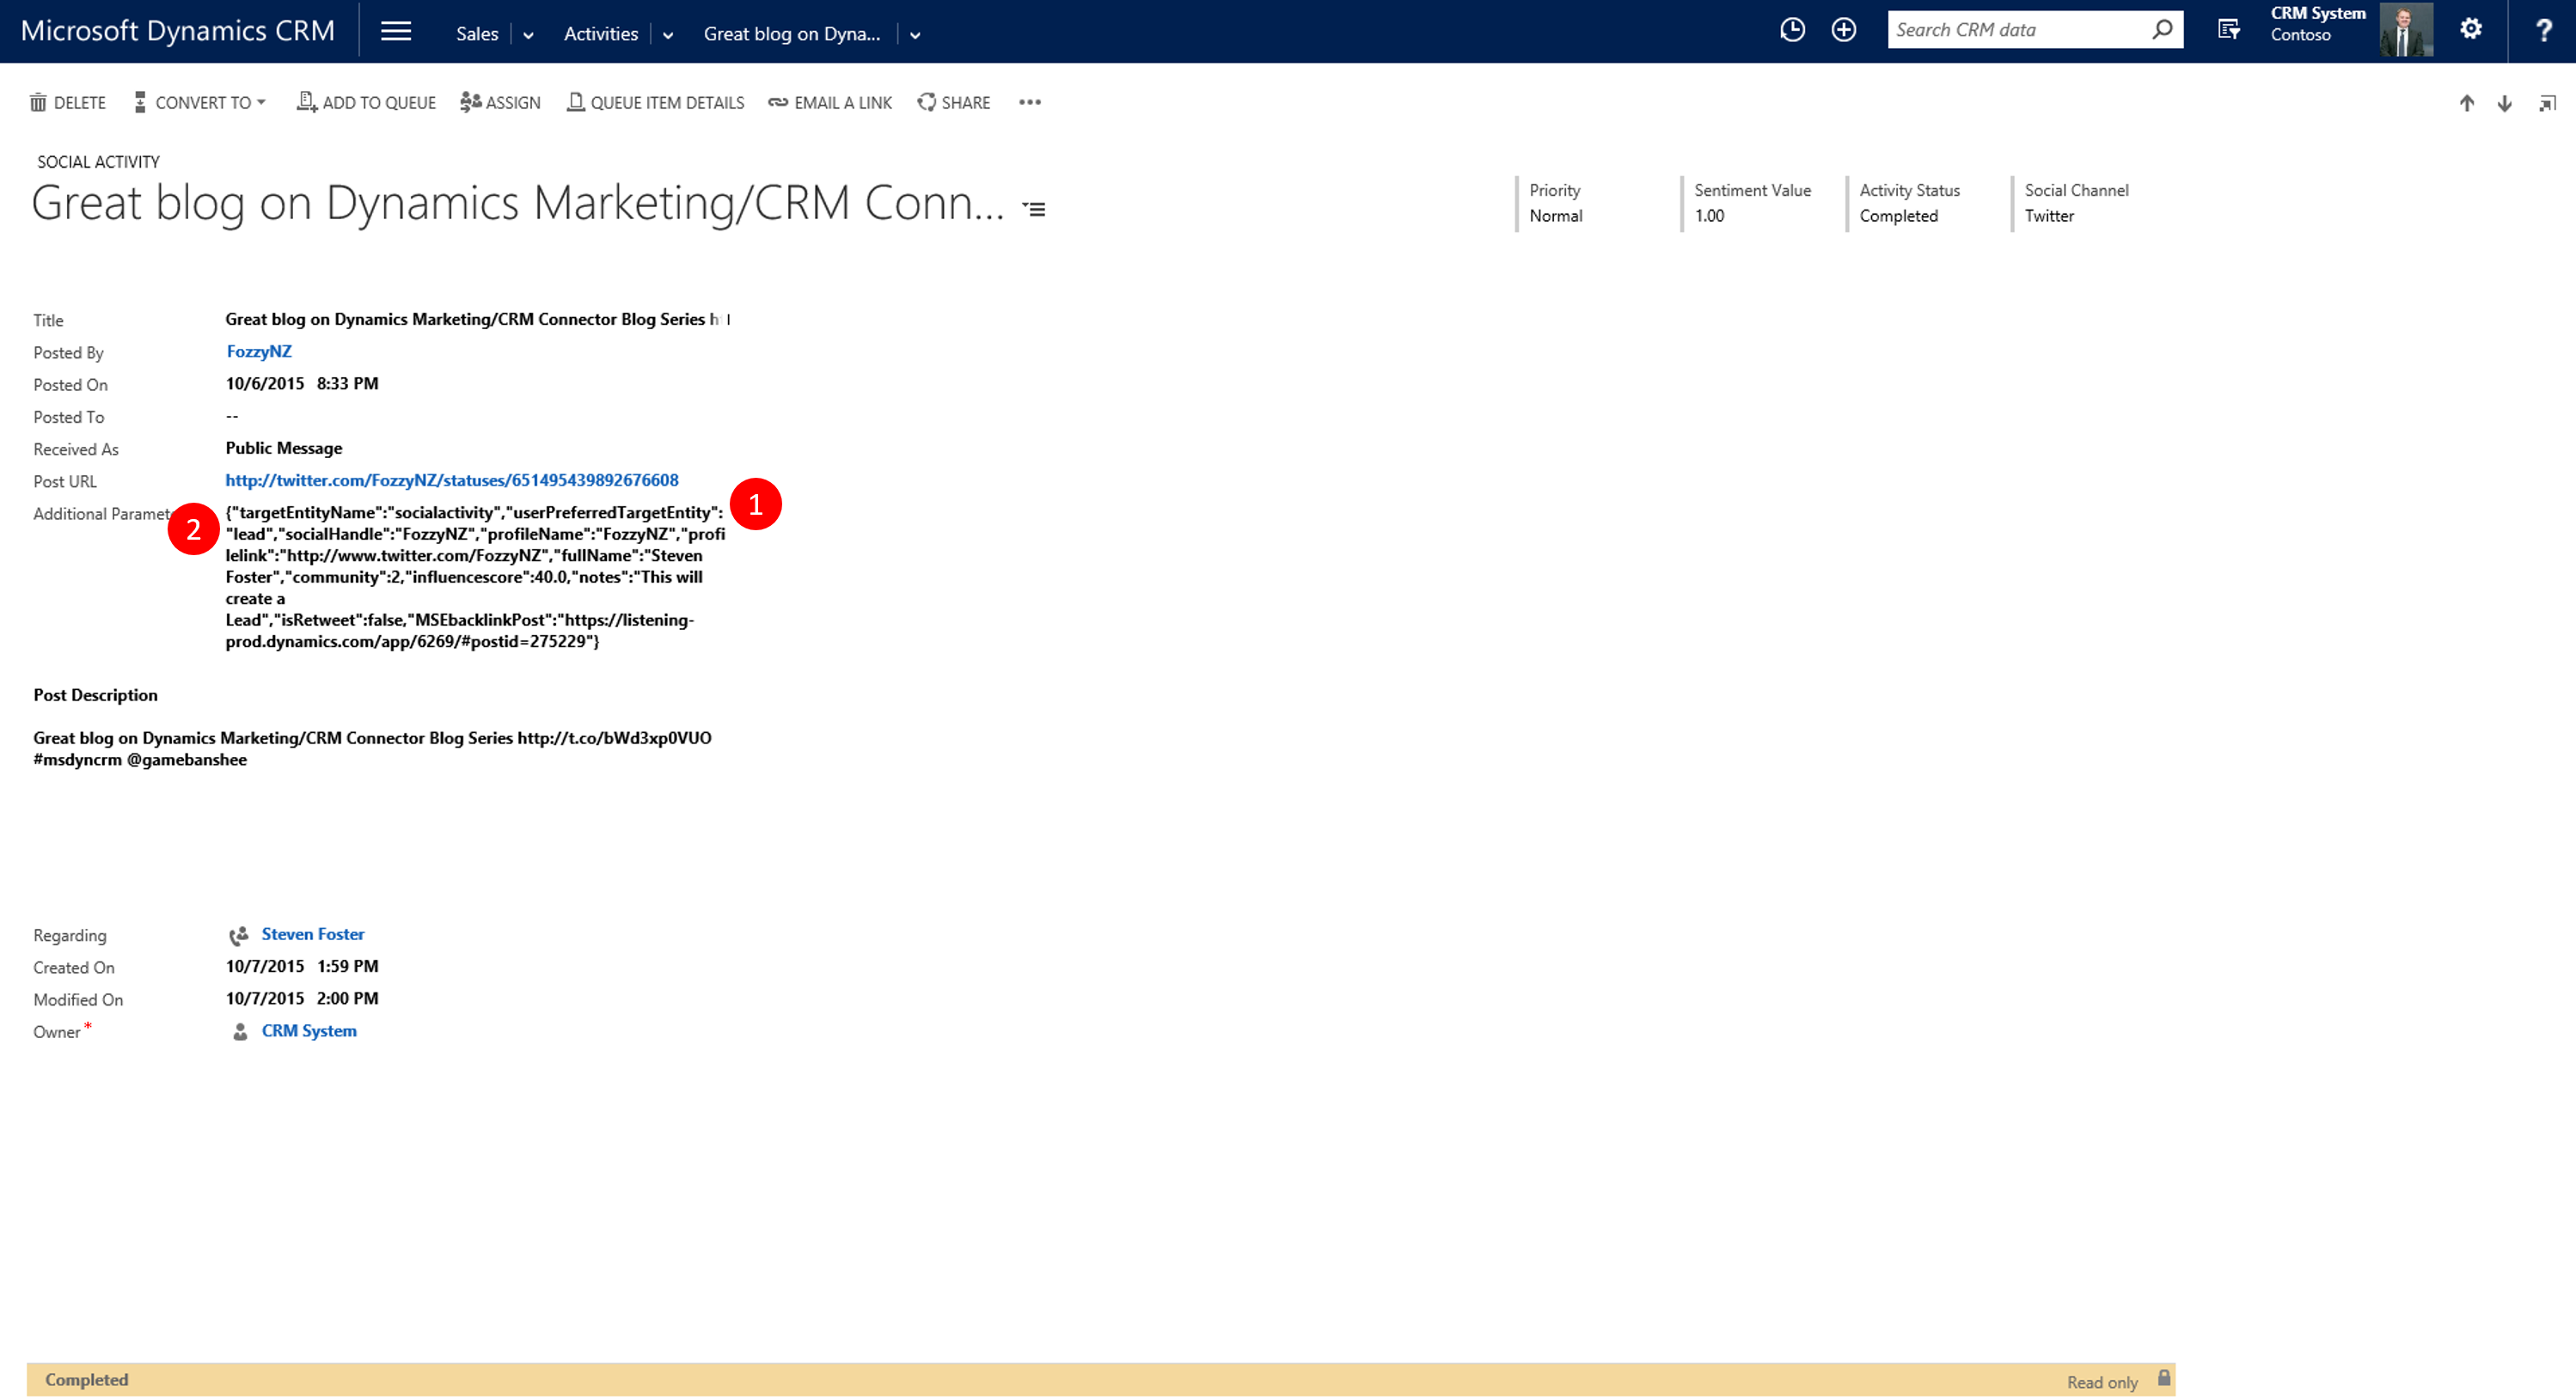
Picture 38: Source Social Activity
Then Navigate to another post, click Link to CRM, chose Create Case and see verify that a Case record is created
Picture 39: Navigate to new post and test second part of rule (create case) 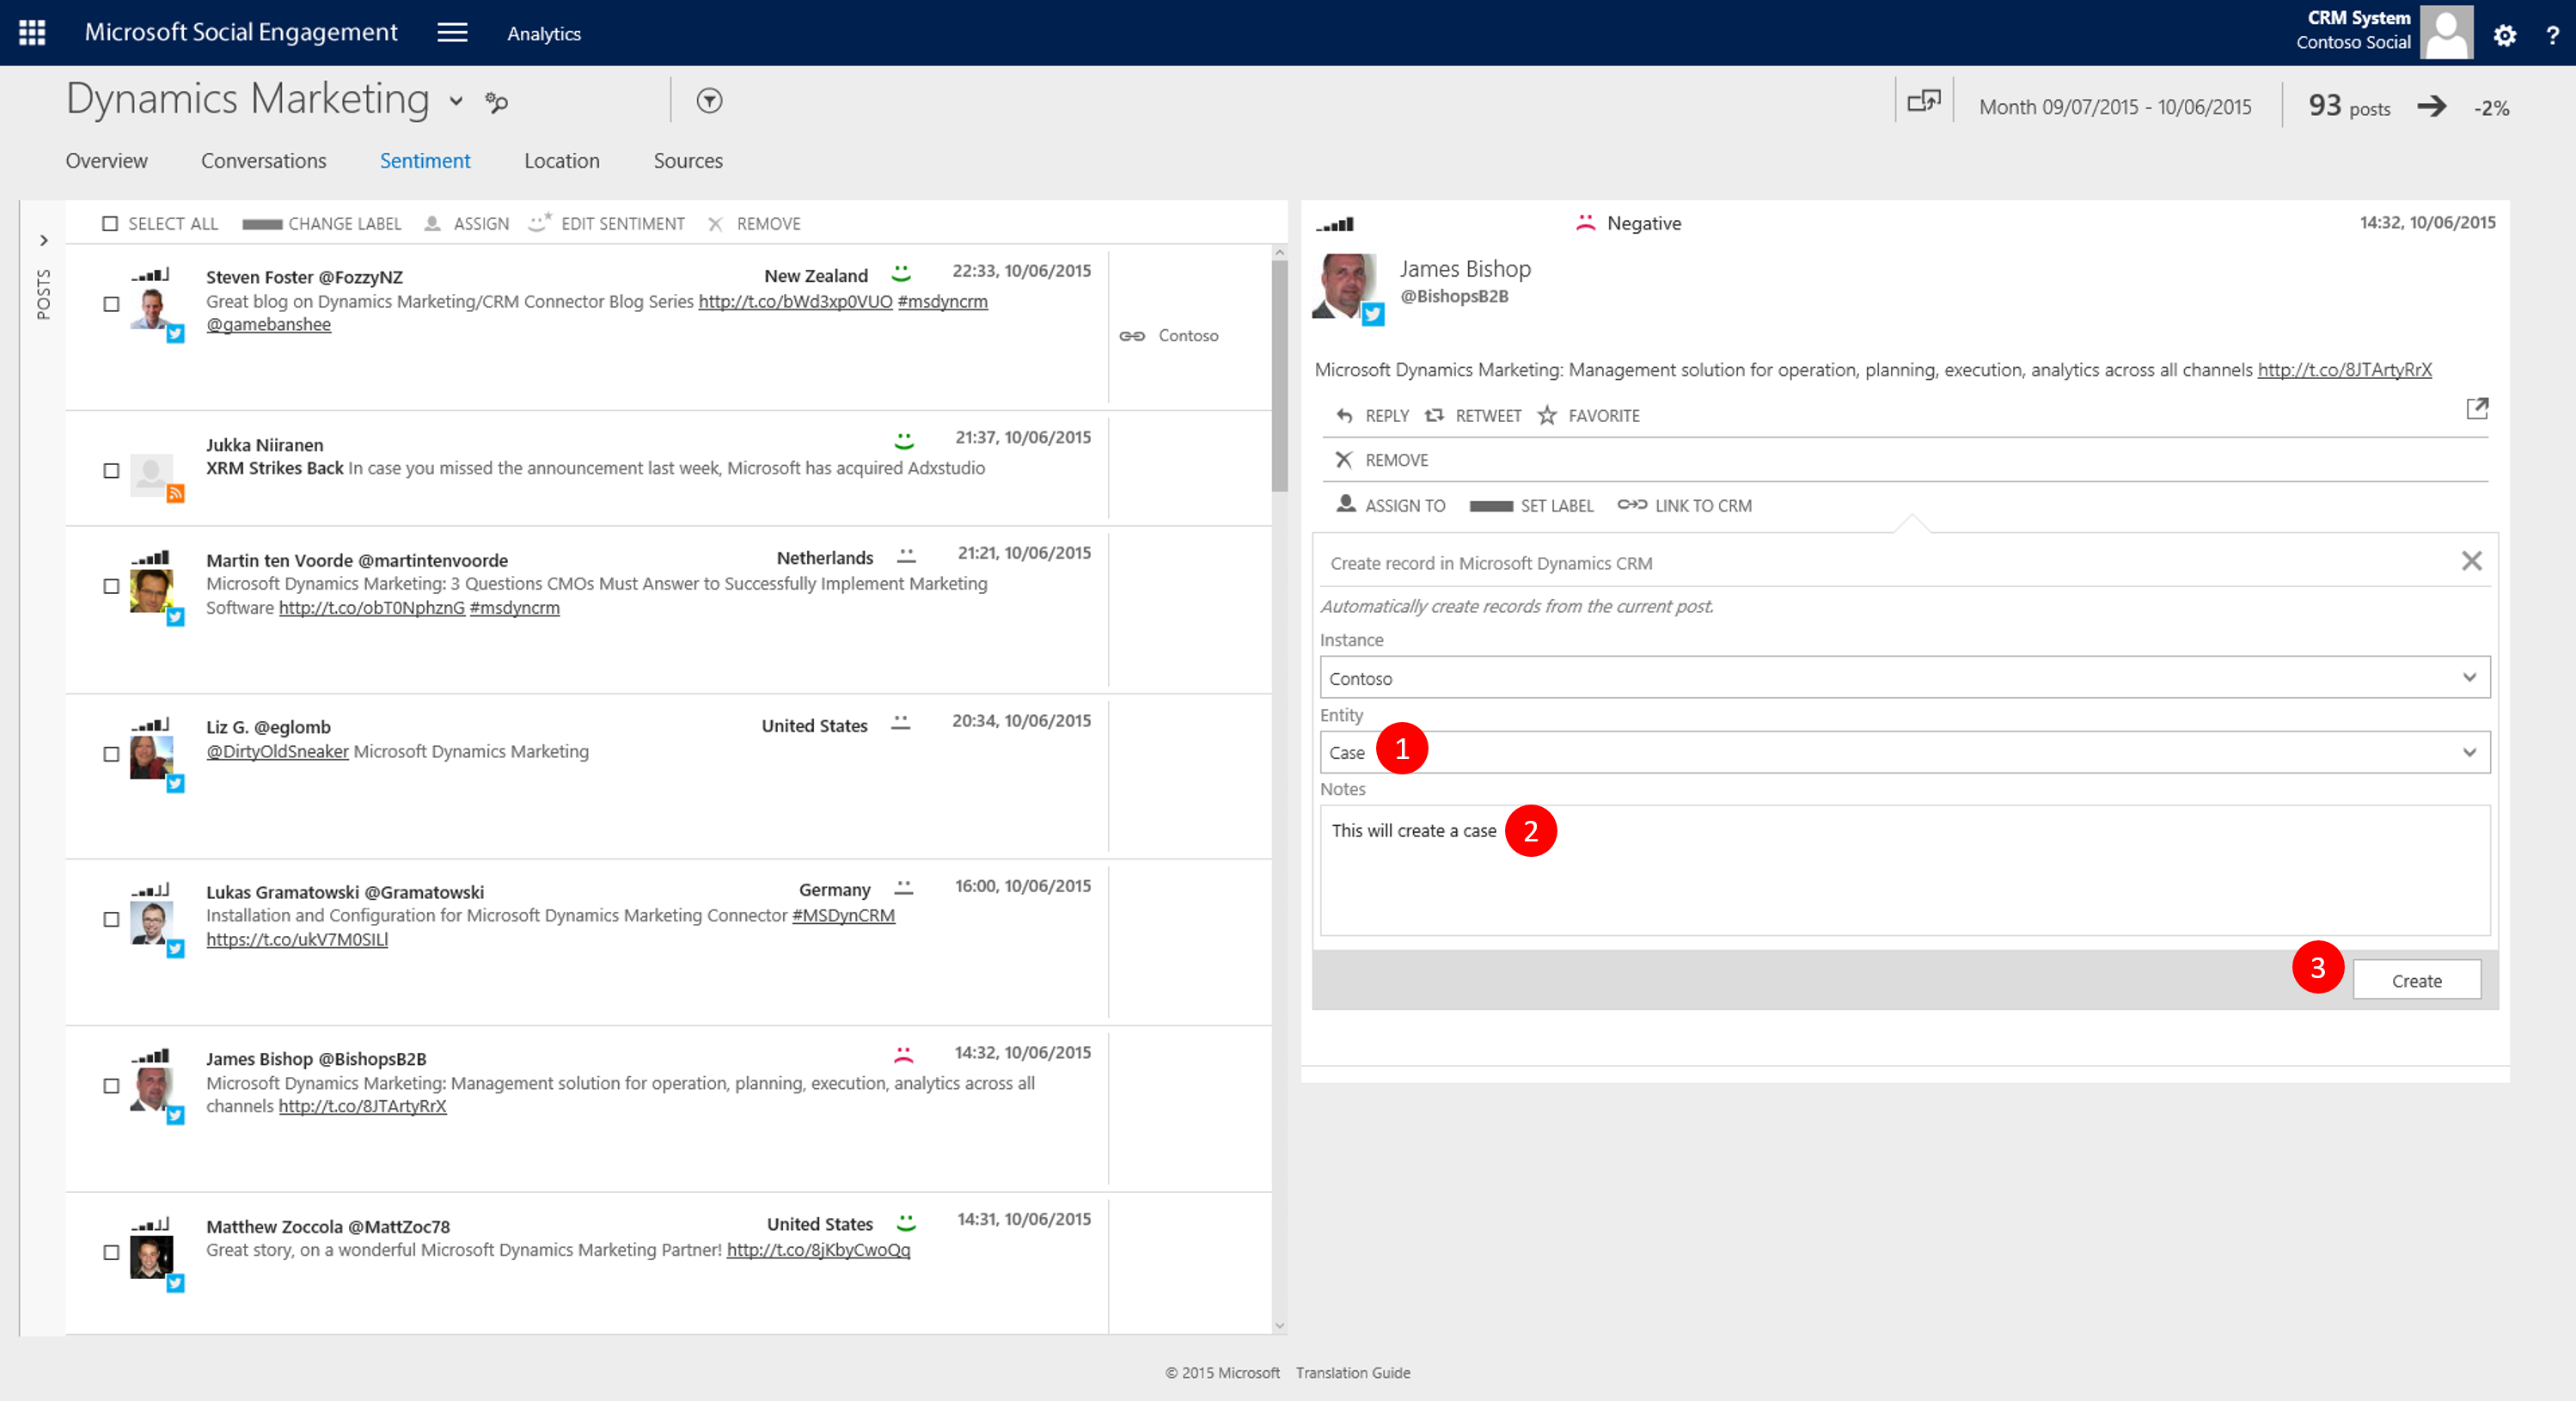
Picture 40: Pick create Case, type a note, and click Create 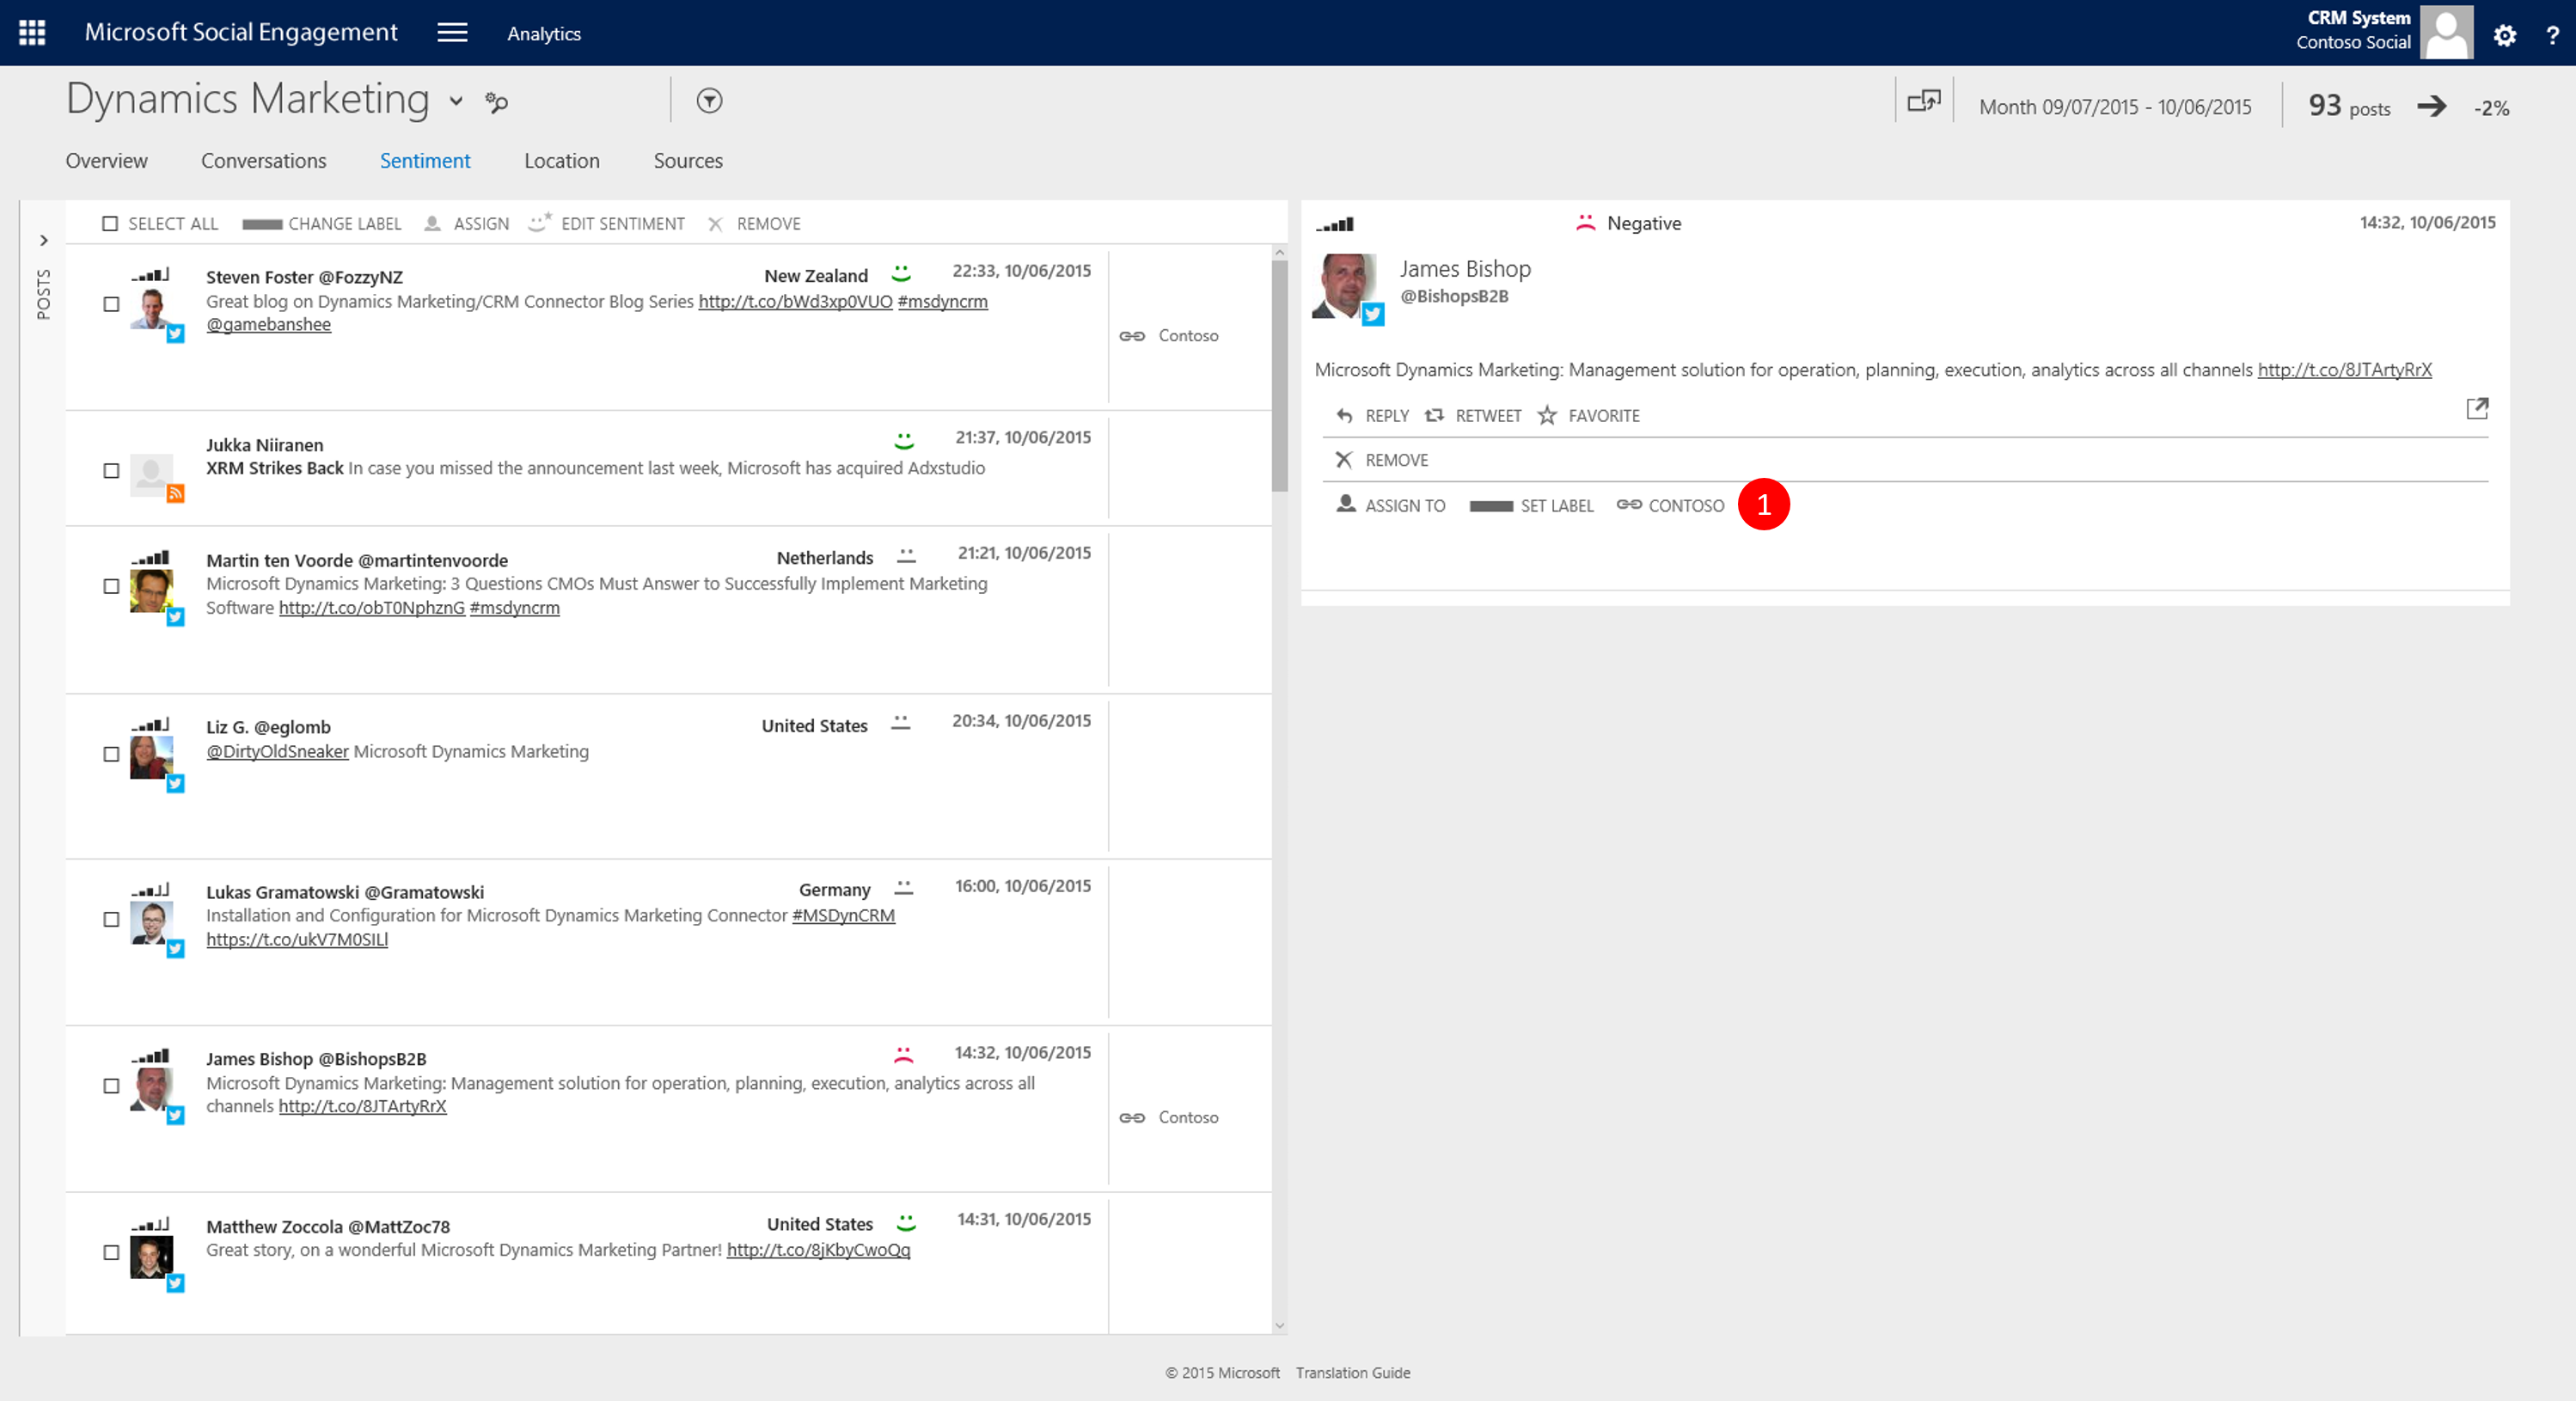
Picture 41: Post now displays Lnked icon 
Picture 42: Verified Case record created 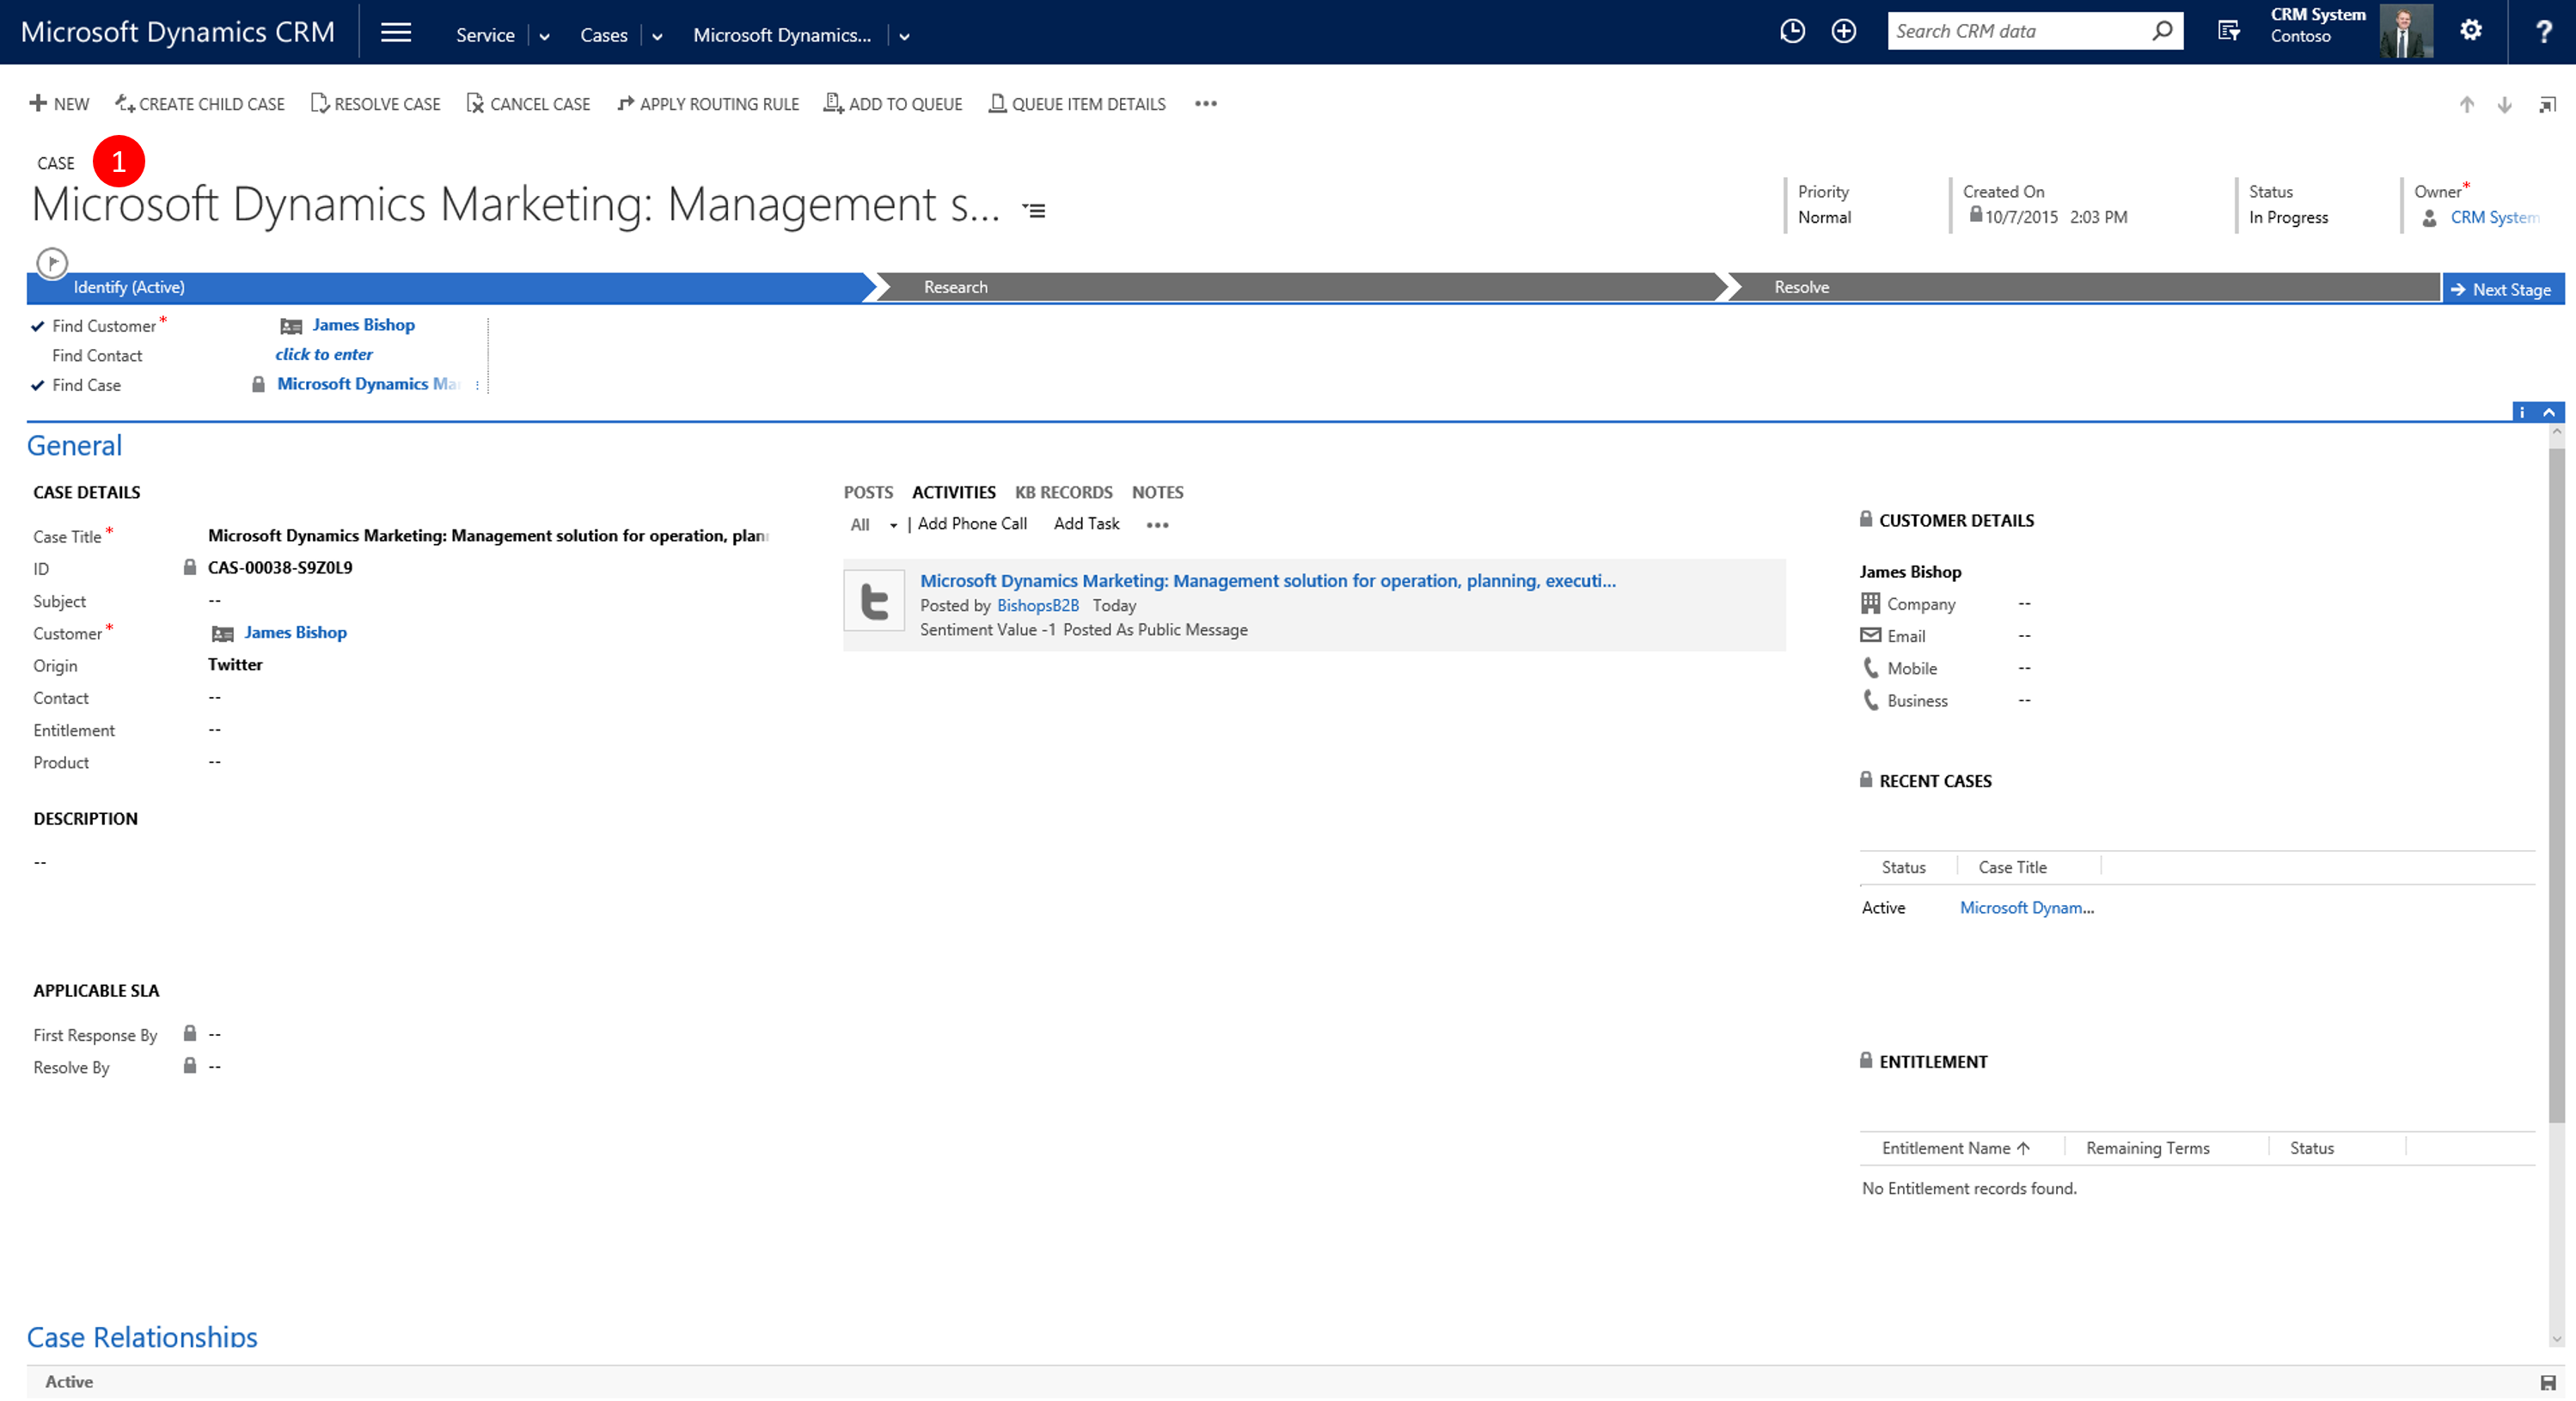
Picture 43: Case in CRM 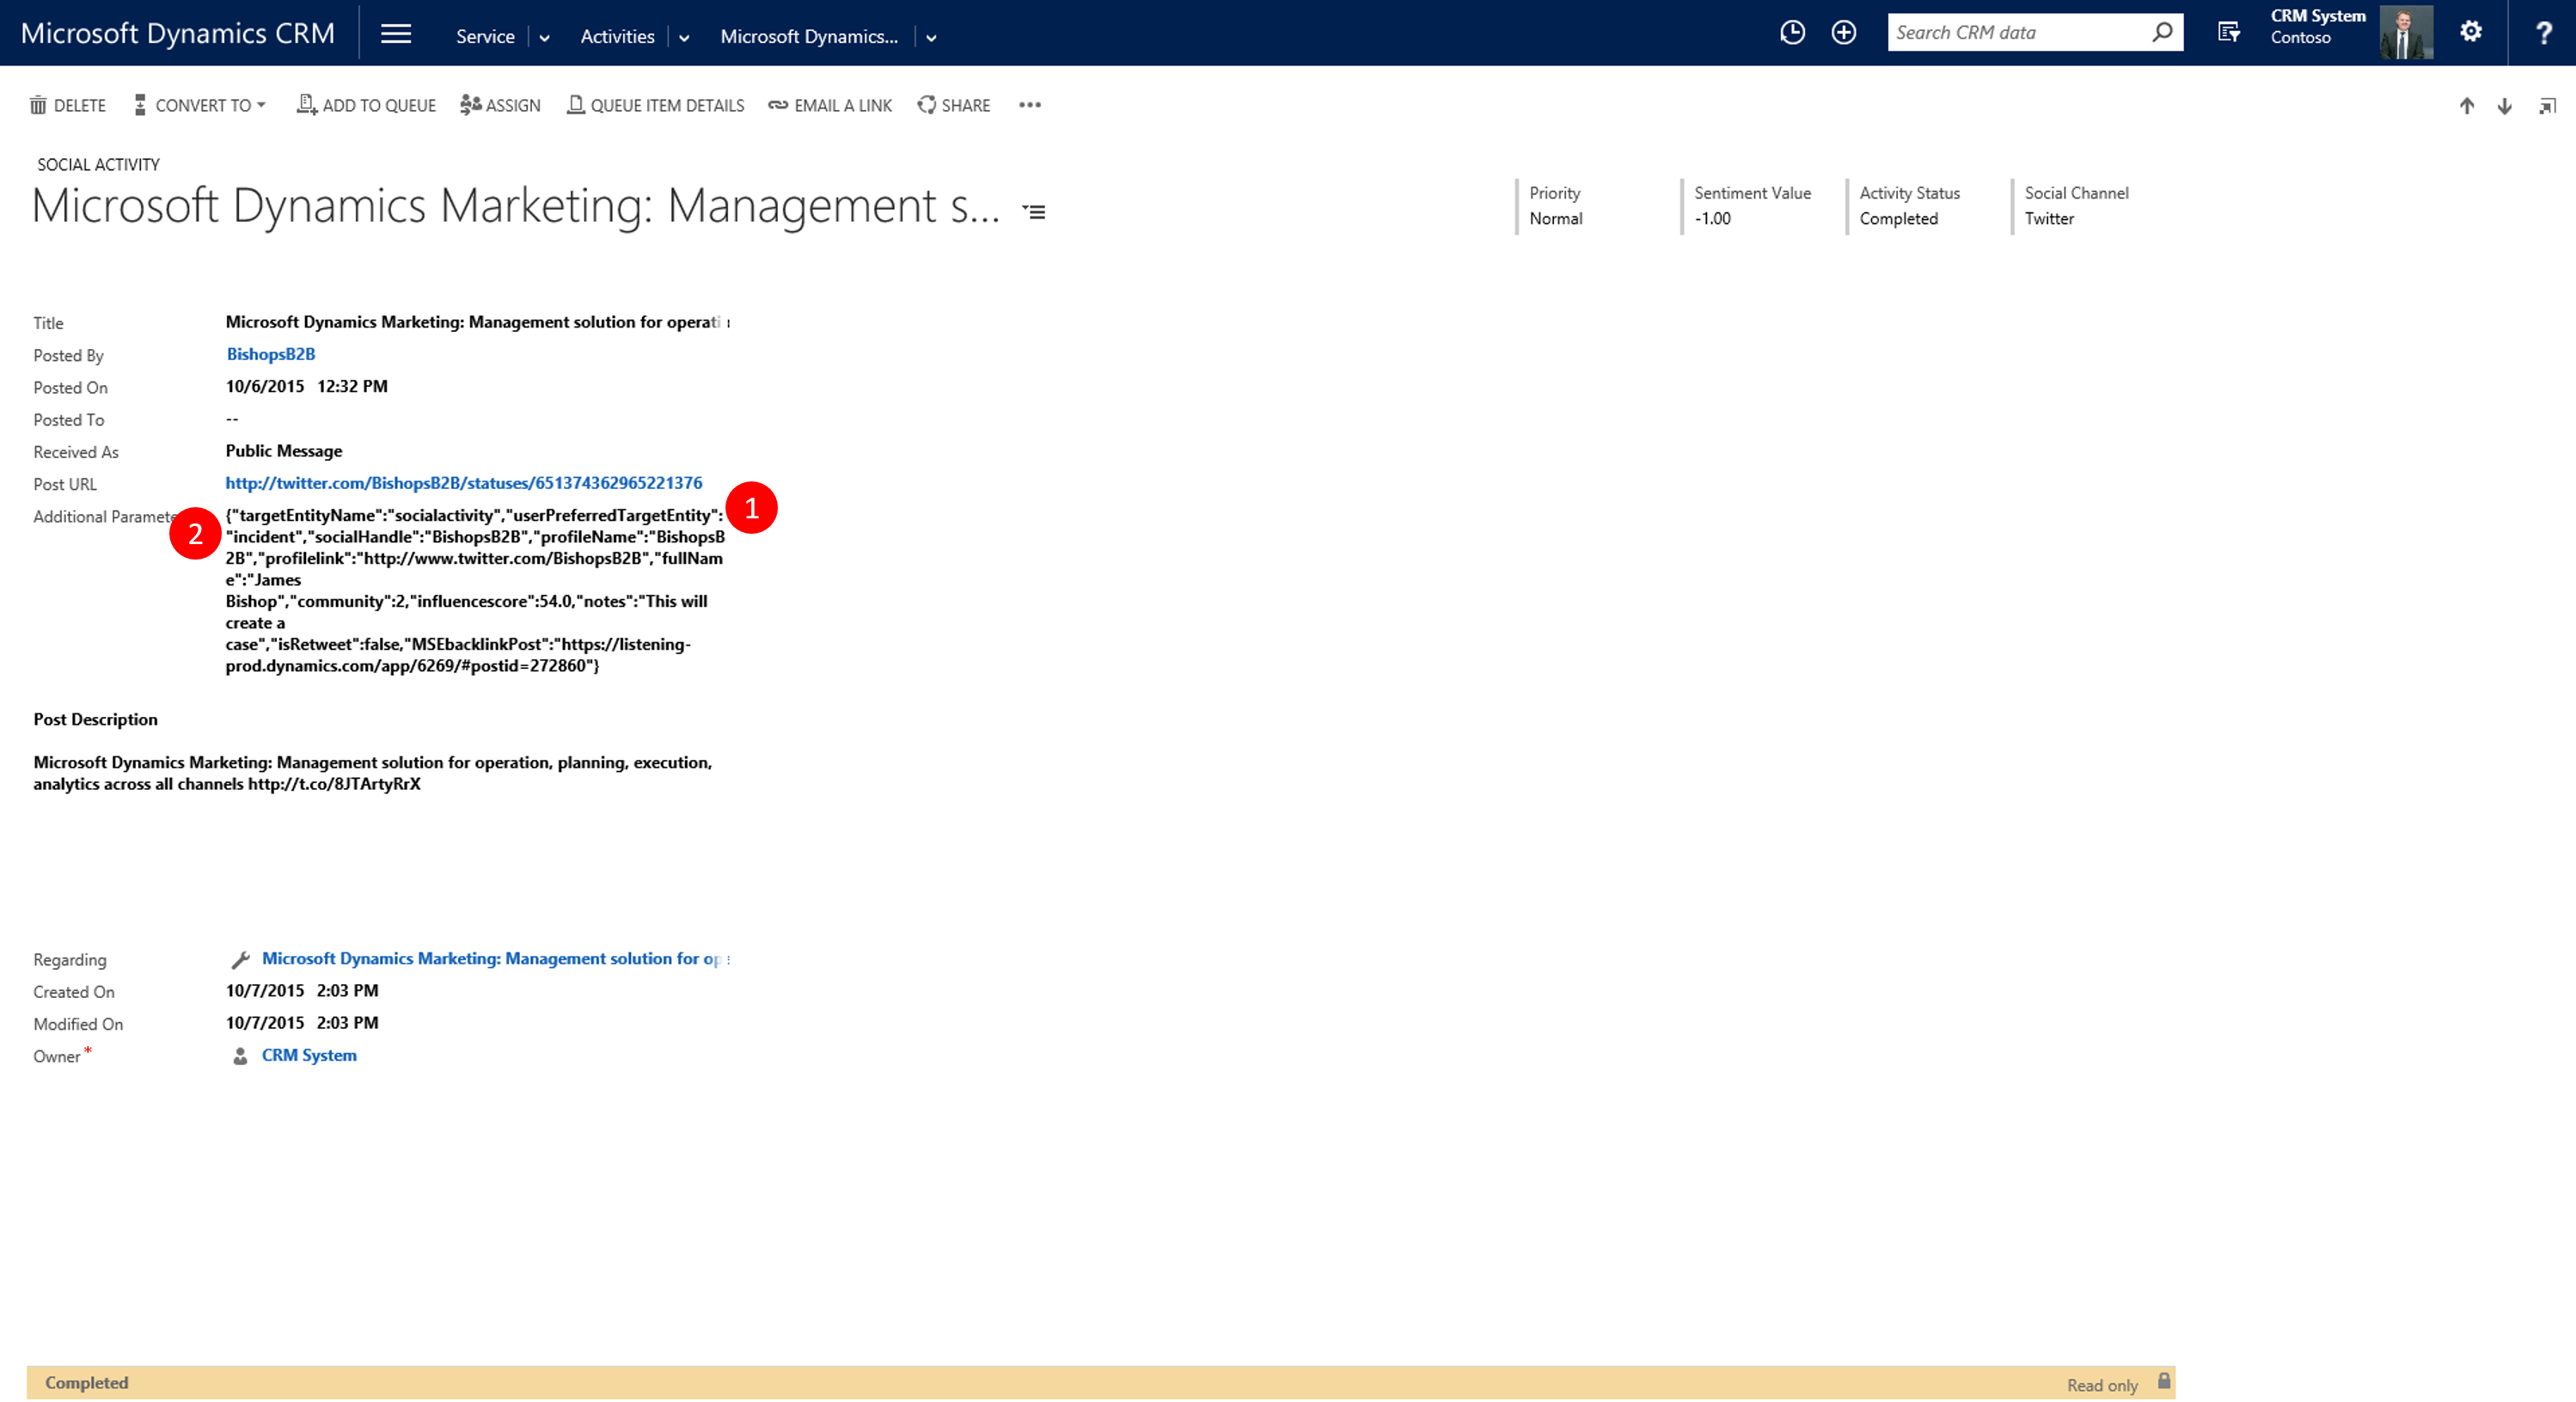
Picture 44: Source Social Activity
I hope you will benefit greatly from this fine new addition to the Microsoft Dynamics CRM and Social Engagement integration story. Start listening for potential leads or cases, and work them the way you know best in CRM.
Note:
- With pop-up blocker turned on in your browser you must create an exception for https://listening-prod.dynamics.com
See also